
Before creating your invoices on OOTI, review the invoicing history of your projects via Excel imports.
🔓 Permissions required
Super Admin
| Reading time | 2 minutes |
| Setting time | Long |
| Steps | 4 minutes |
After creating your project with their phases and fees, finalize the update by resuming what was previously invoiced.
💡 Click here to read the article on creating and setting up a project.
Summury
I/ Download the invoice import Excel file
II/ Complete an invoice in the file
III/ Choose the recovery method
1) Method 1: take over all the invoices for the project
2) Method 2: make a single invoice for the anteriority of the project and one for the current year
3) Method 3: make a state invoice per year, depending on the project
IV/ Import the Excel file into OOTI
I/ Download the invoice import Excel file
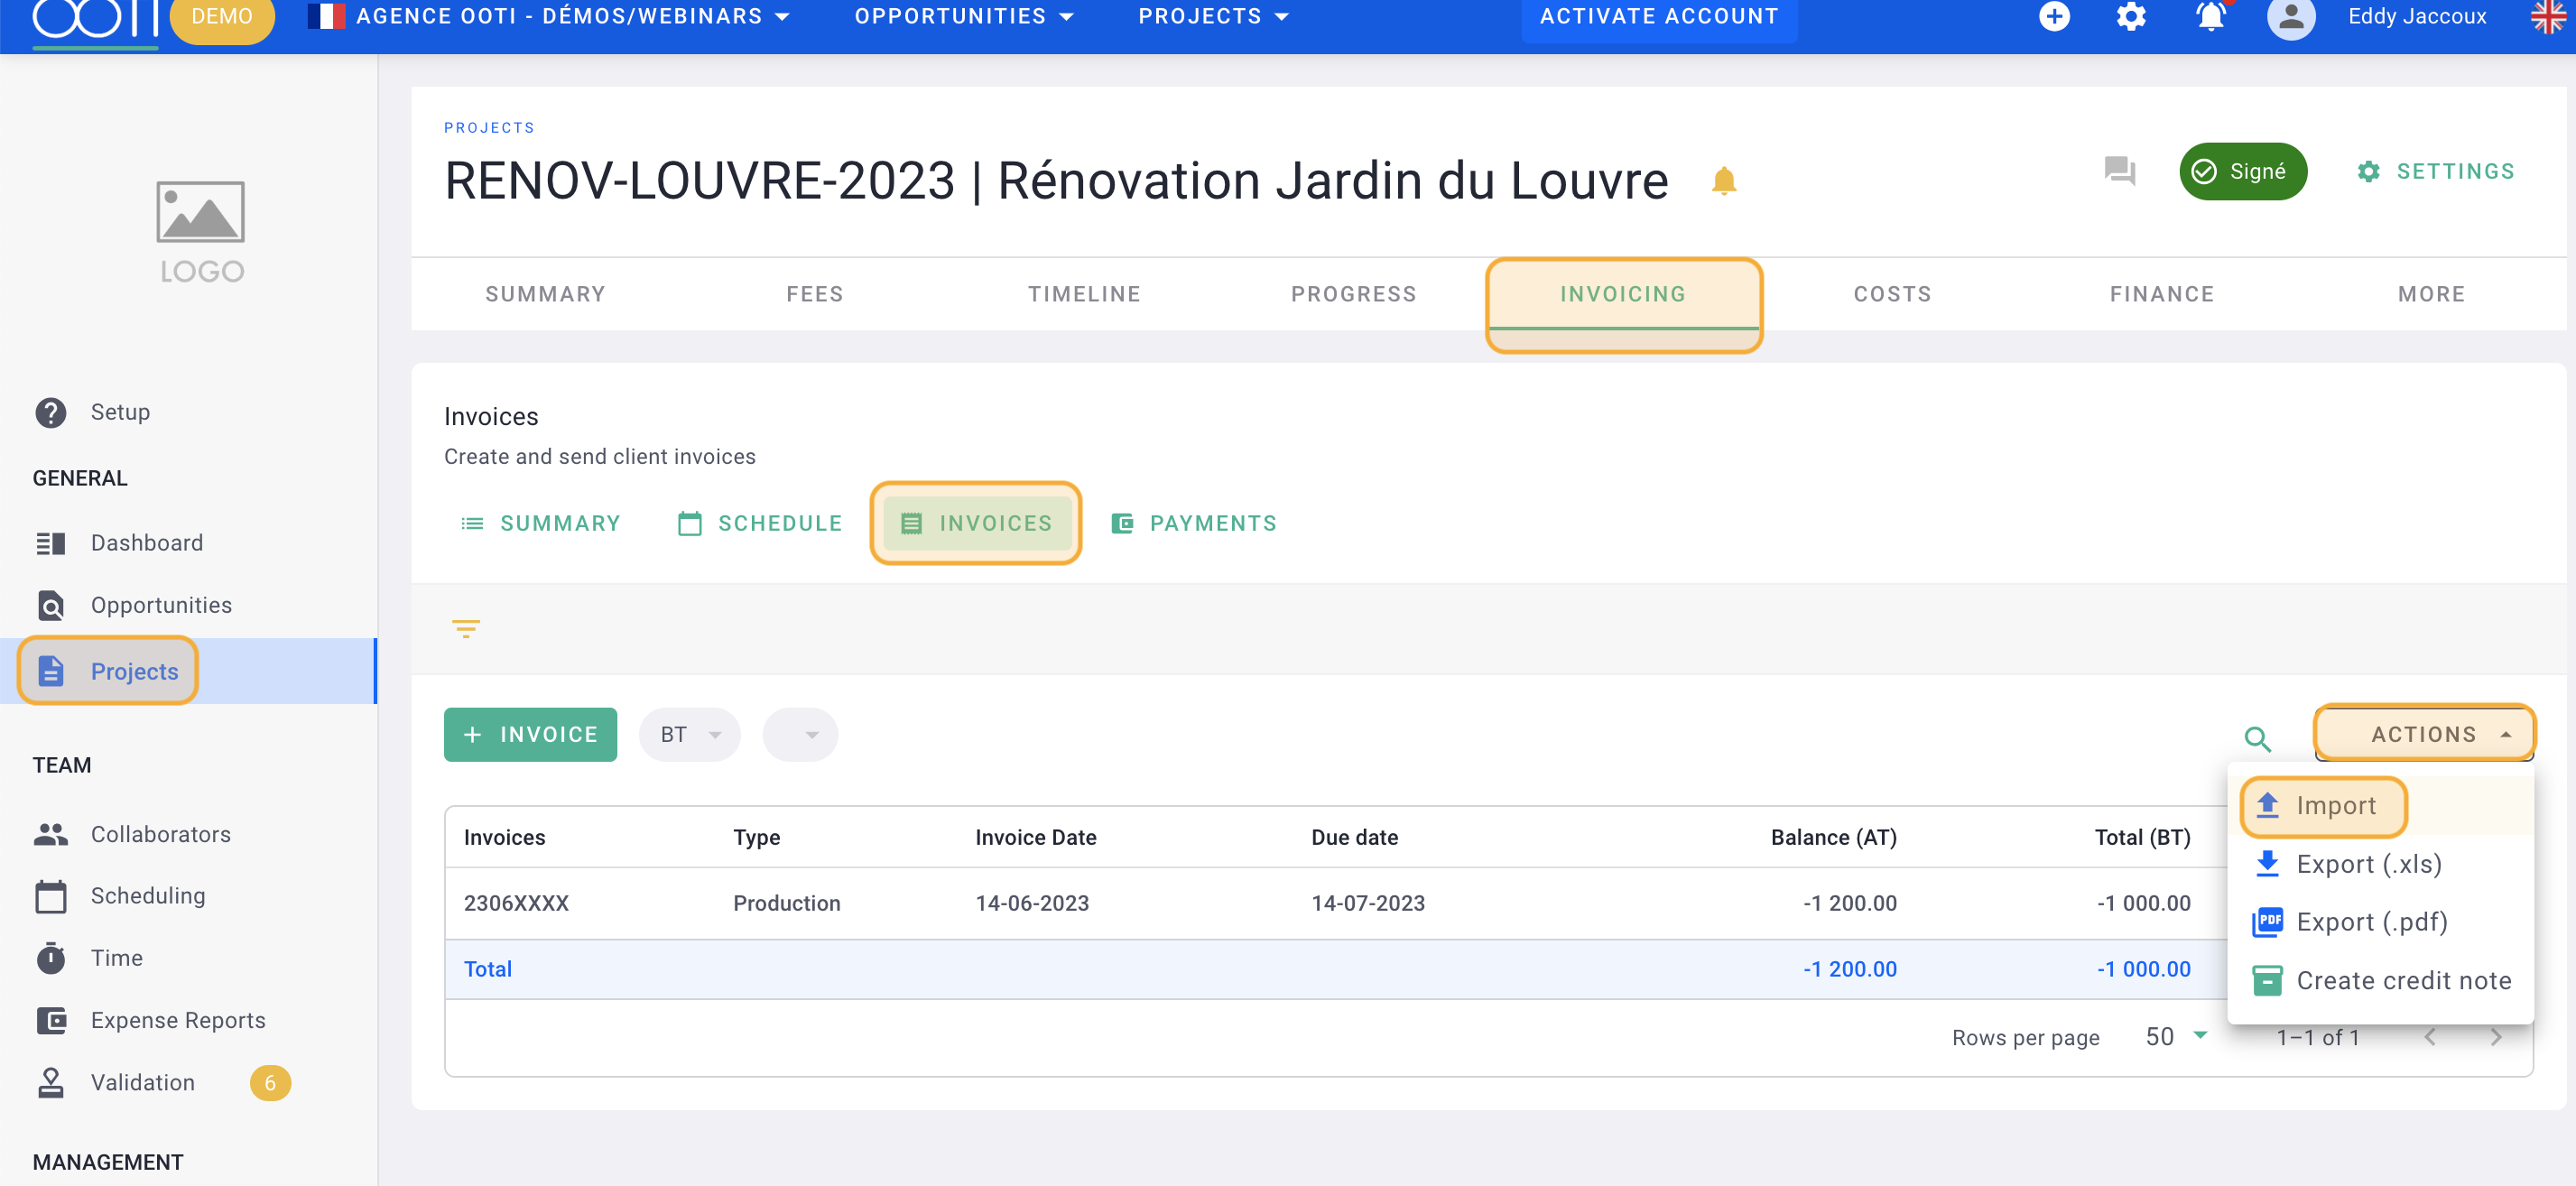
Go to your Project > click on the Invoicing tab > Invoices tab > click on Actions > then on Import.
Click Download sample file in the top right.
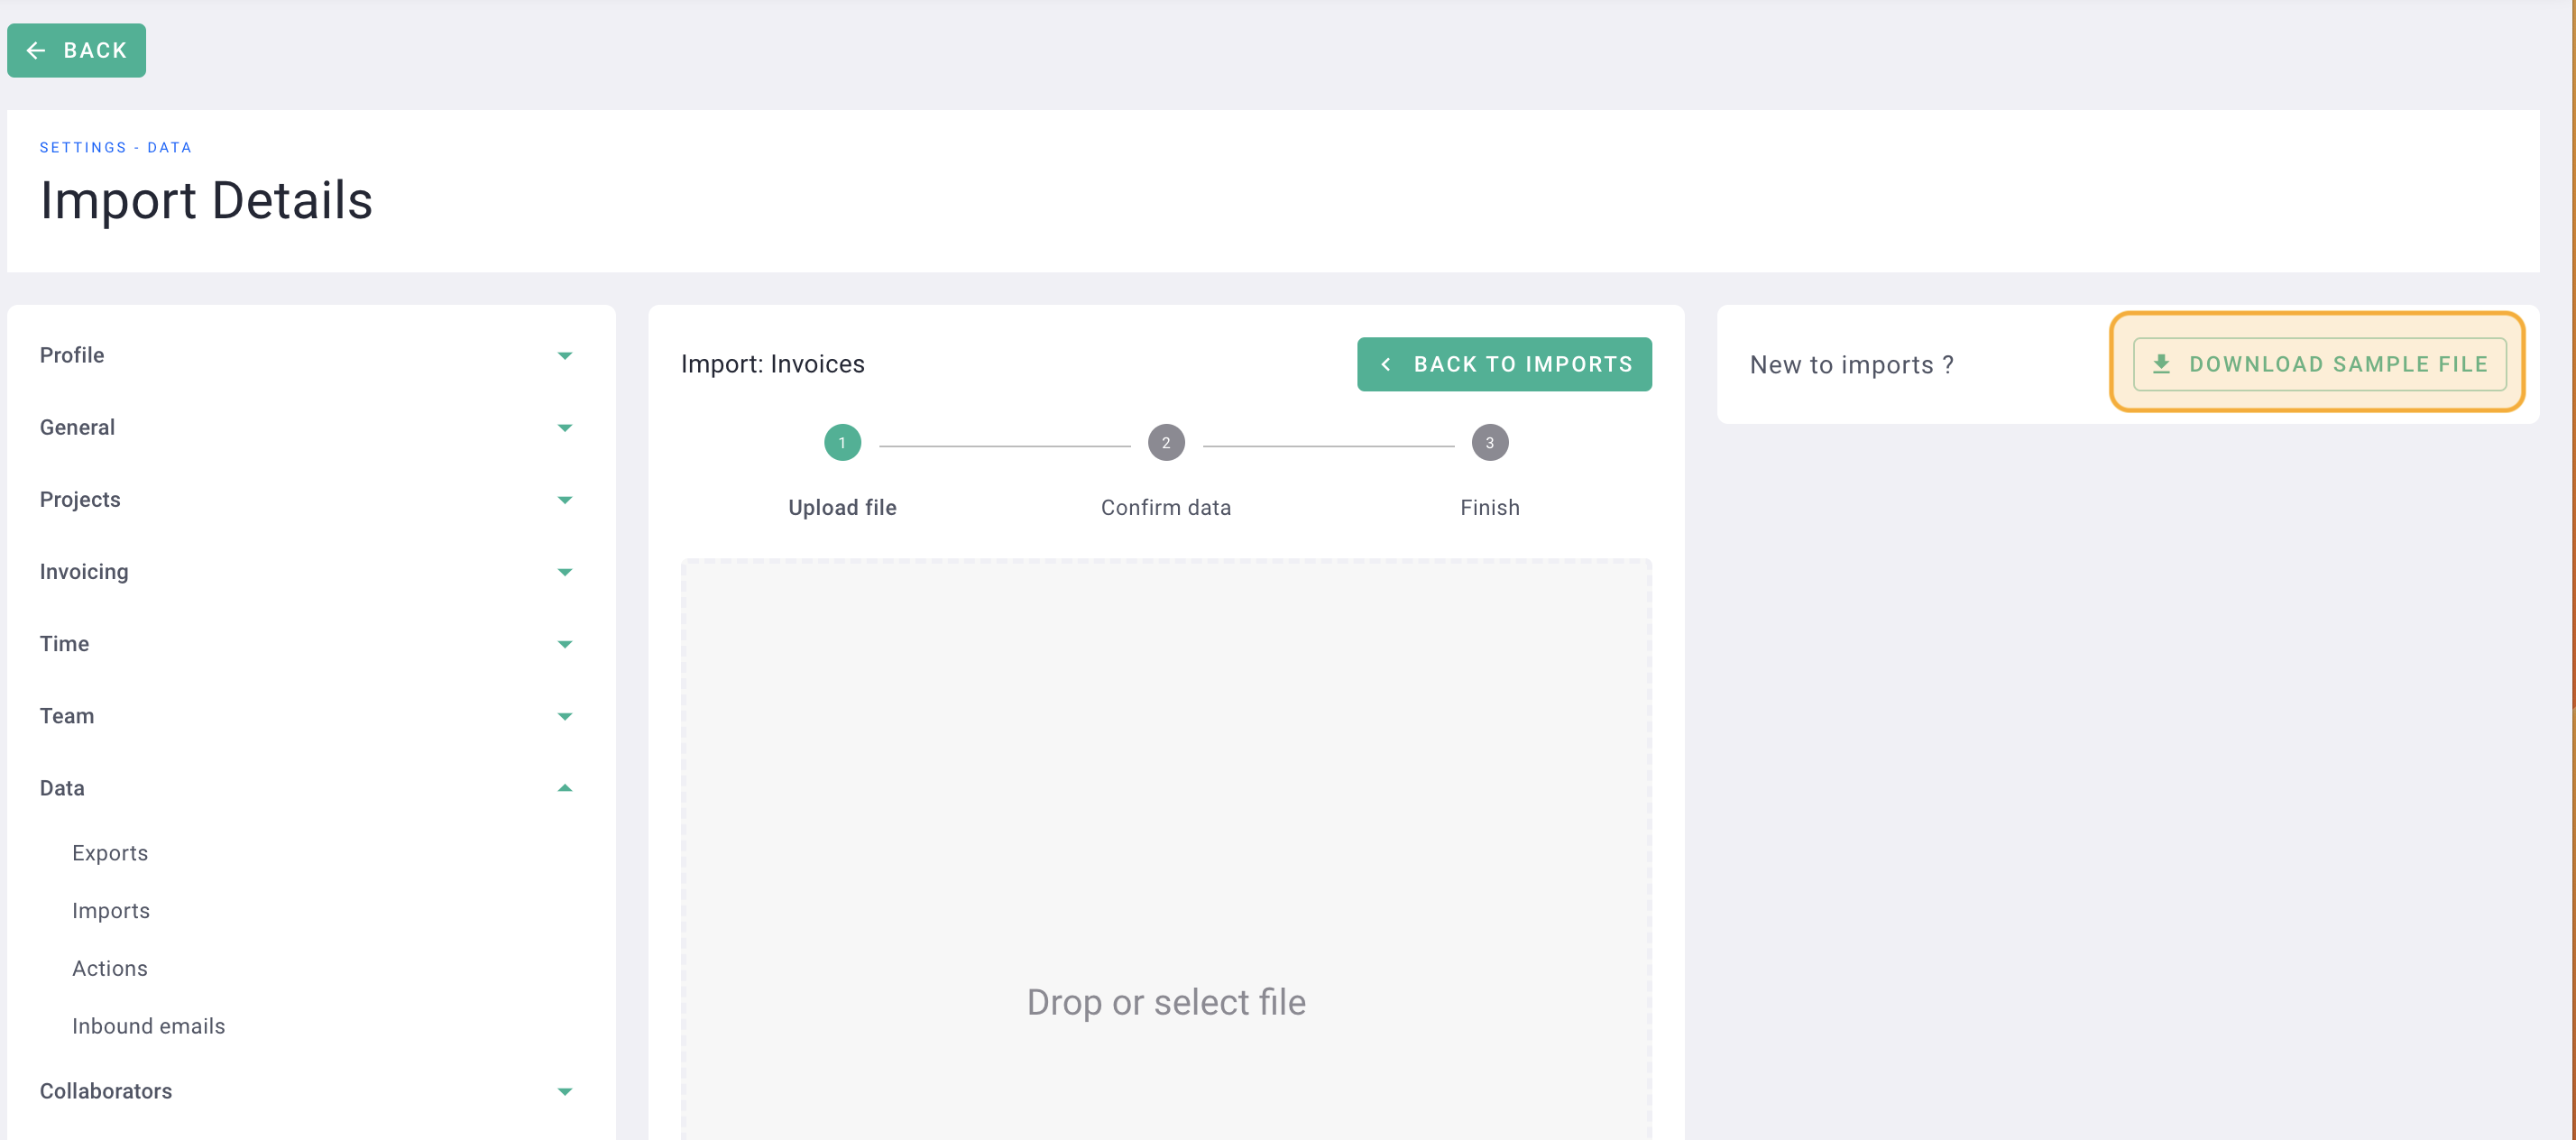
The Excel file is generated according to the phases and fees that you will have put in the project.
It's done ! 🎉 You have recovered the project's invoice import Excel file.
II/ Complete an invoice in the file
Open the Excel file.
You will see the frame with 5 sample invoices, generated by OOTI.
- FR-01-01-0003 with its Date of issue, is a Production type invoice in which two phases and annex are invoiced.s.
- FR-01-01-0004 with its Date of issue, is an Other type invoice in which an item is invoiced,
- FR-01-01-0005 with its Date of issue, is a Time type invoice in which one hour is invoiced,
- FR-01-01-0001 with its Date of issue and payments, is a Production type invoice in which all phases of the project are invoiced at 25% of the fees,
- FR-01-01-0002 with its Date of issue, is a Production type invoice in which all phases of the project are invoiced at 75% of the fees.
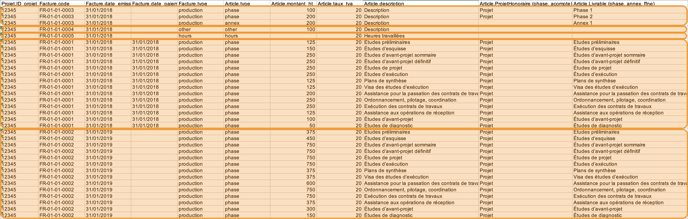
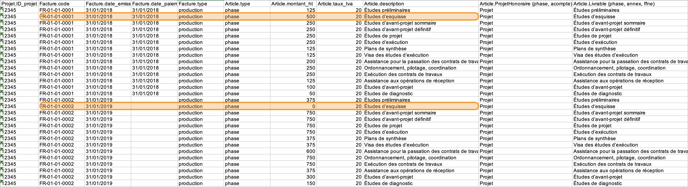
Here is how each production invoice is composed with in orange what can be modified:
- the invoice code; you can use the actual code of an invoice,
- the Date of issue of the invoice in DD/MM/YYYY format; the invoice enters the CA of the project according to this date,
- the Payment Date in DD/MM/YYYY format; if you do not put a date, the imported invoice will have the status “Not paid” or “Overdue”.
- Put the invoiced amounts of the phases according to the invoice. If a phase is not billed, put 0 or delete it.
⚠️ Do not delete or modify other elements.
Do not put a line between each invoice.
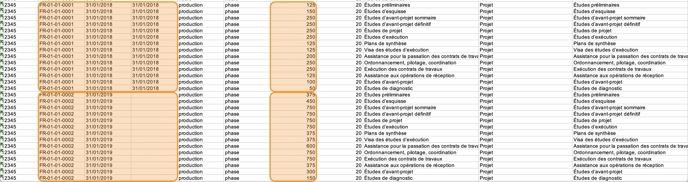
This is how two project invoices might look.
III/ Choose recovery method
There are 3 recovery methods:
1) Method 1: take over all the invoices for the project
If you have two invoices on the project, this is how the file looks:
- 2 invoices placed one after the other, each with their own code. Do not put a line between each invoice,
- each phase with the invoiced amount.
If a phase, for example Sketch studies, has been invoiced at 100% on an invoice, put 0€ on the next invoices otherwise it will be an over-invoicing or delete the phase.
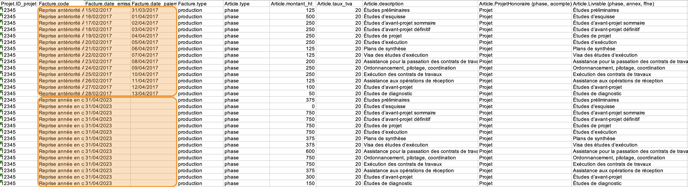
2) Method 2: make a single invoice for the anteriority of the project and one for the current year
If a project started in 2017 with 20 invoices, then make a single invoice for all previously invoiced and another that includes what was invoiced for the current accounting year.
The first invoice will have a fictitious code for example "Recovery of anteriority name of the project" and for the second for example "Recovery of current year name of the project".
Put a fictitious Issue Date. This invoice will enter the CA of the agency according to the month and the year but keep the format DD/MM/YYYY.
Put a fictitious Payment Date so that the invoice is in Paid status.
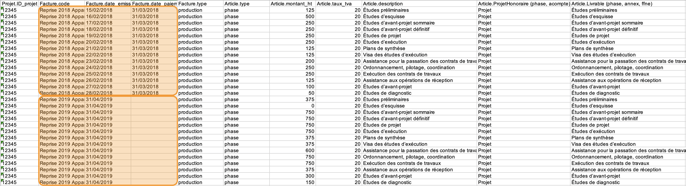
3) Method 3: make a state invoice per year, depending on the project
If a project started in 2018 and ends in 2019, then issue one invoice for 2018 and one for 2019.
Each invoice will have a fictitious code for example “Reprise-2018-project name” and “Reprise-2019-project name”.
Put a fictitious Issue Date. This invoice will enter the CA of the agency according to the month and the year but keep the format DD/MM/YYYY.
IV/ Import the Excel file into OOTI
Depending on your chosen method, which may vary between projects, save your Excel file.
Here, I used method 2 with an invoice that takes up all the anteriority and a second for the current exercise.
Import the Excel file into OOTI by clicking in the square or by dragging the file directly.
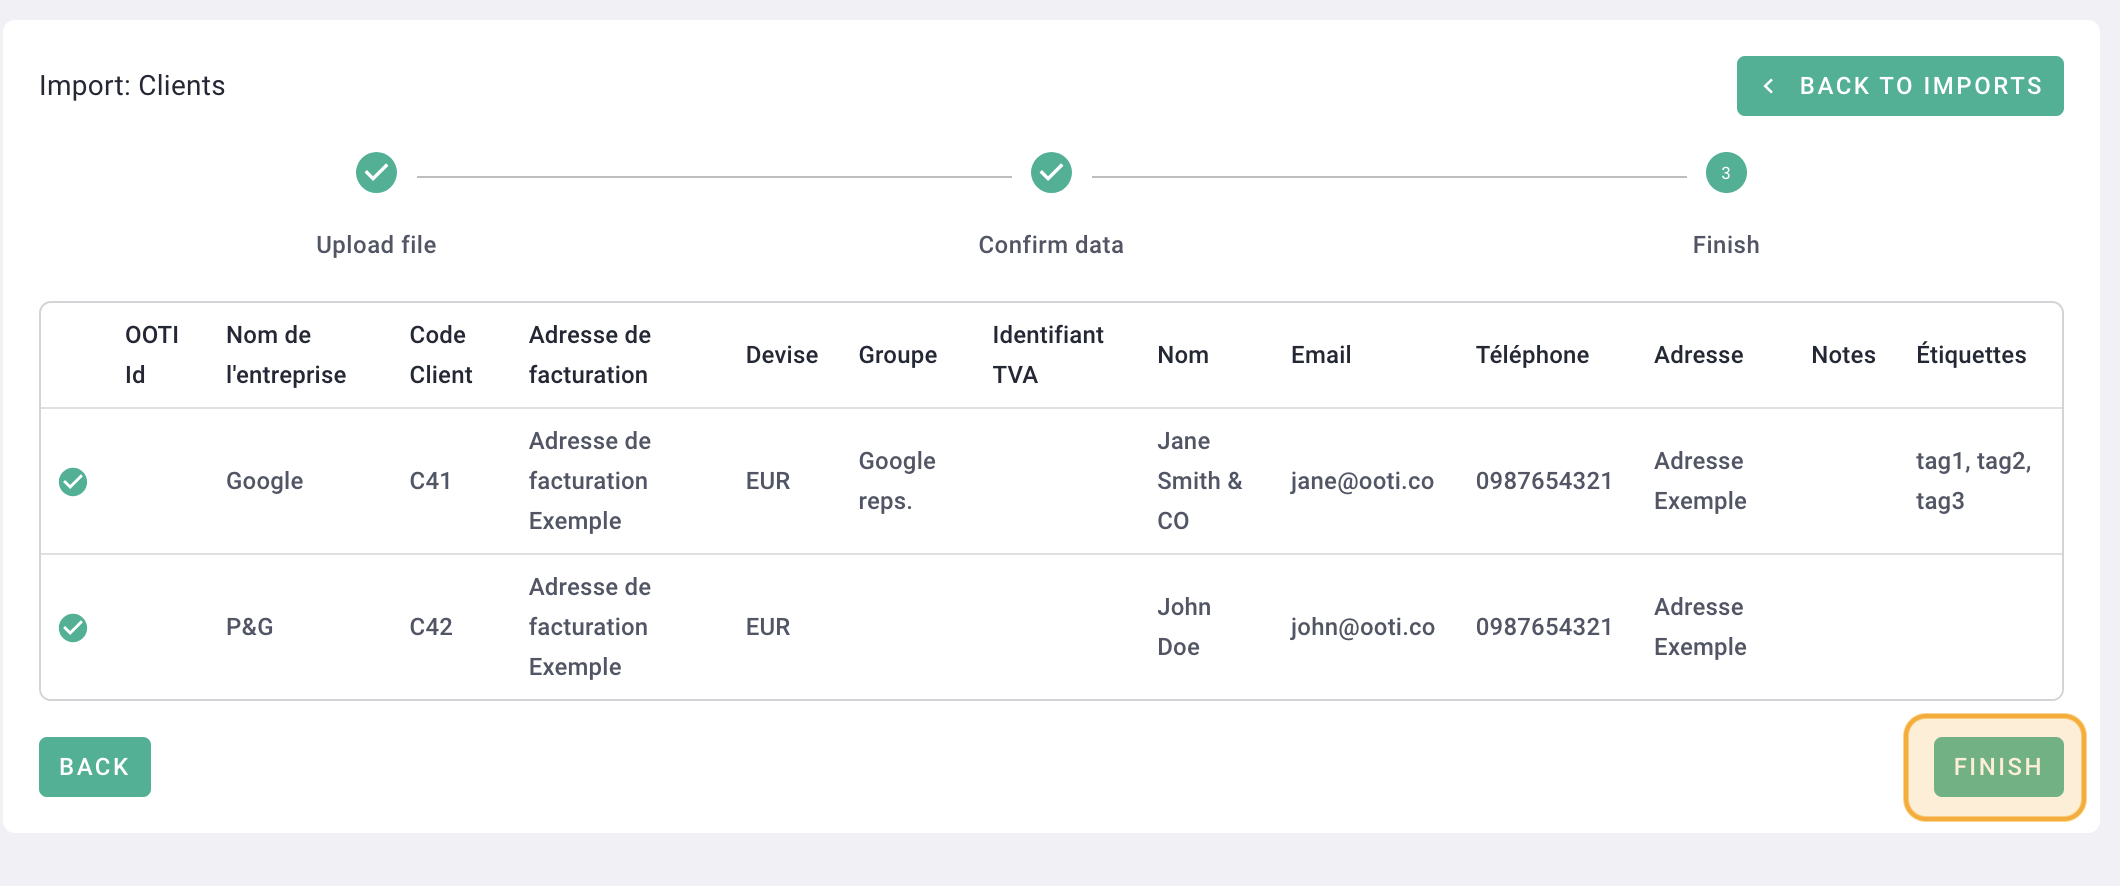
Once your data has been read, click Next at the bottom right.
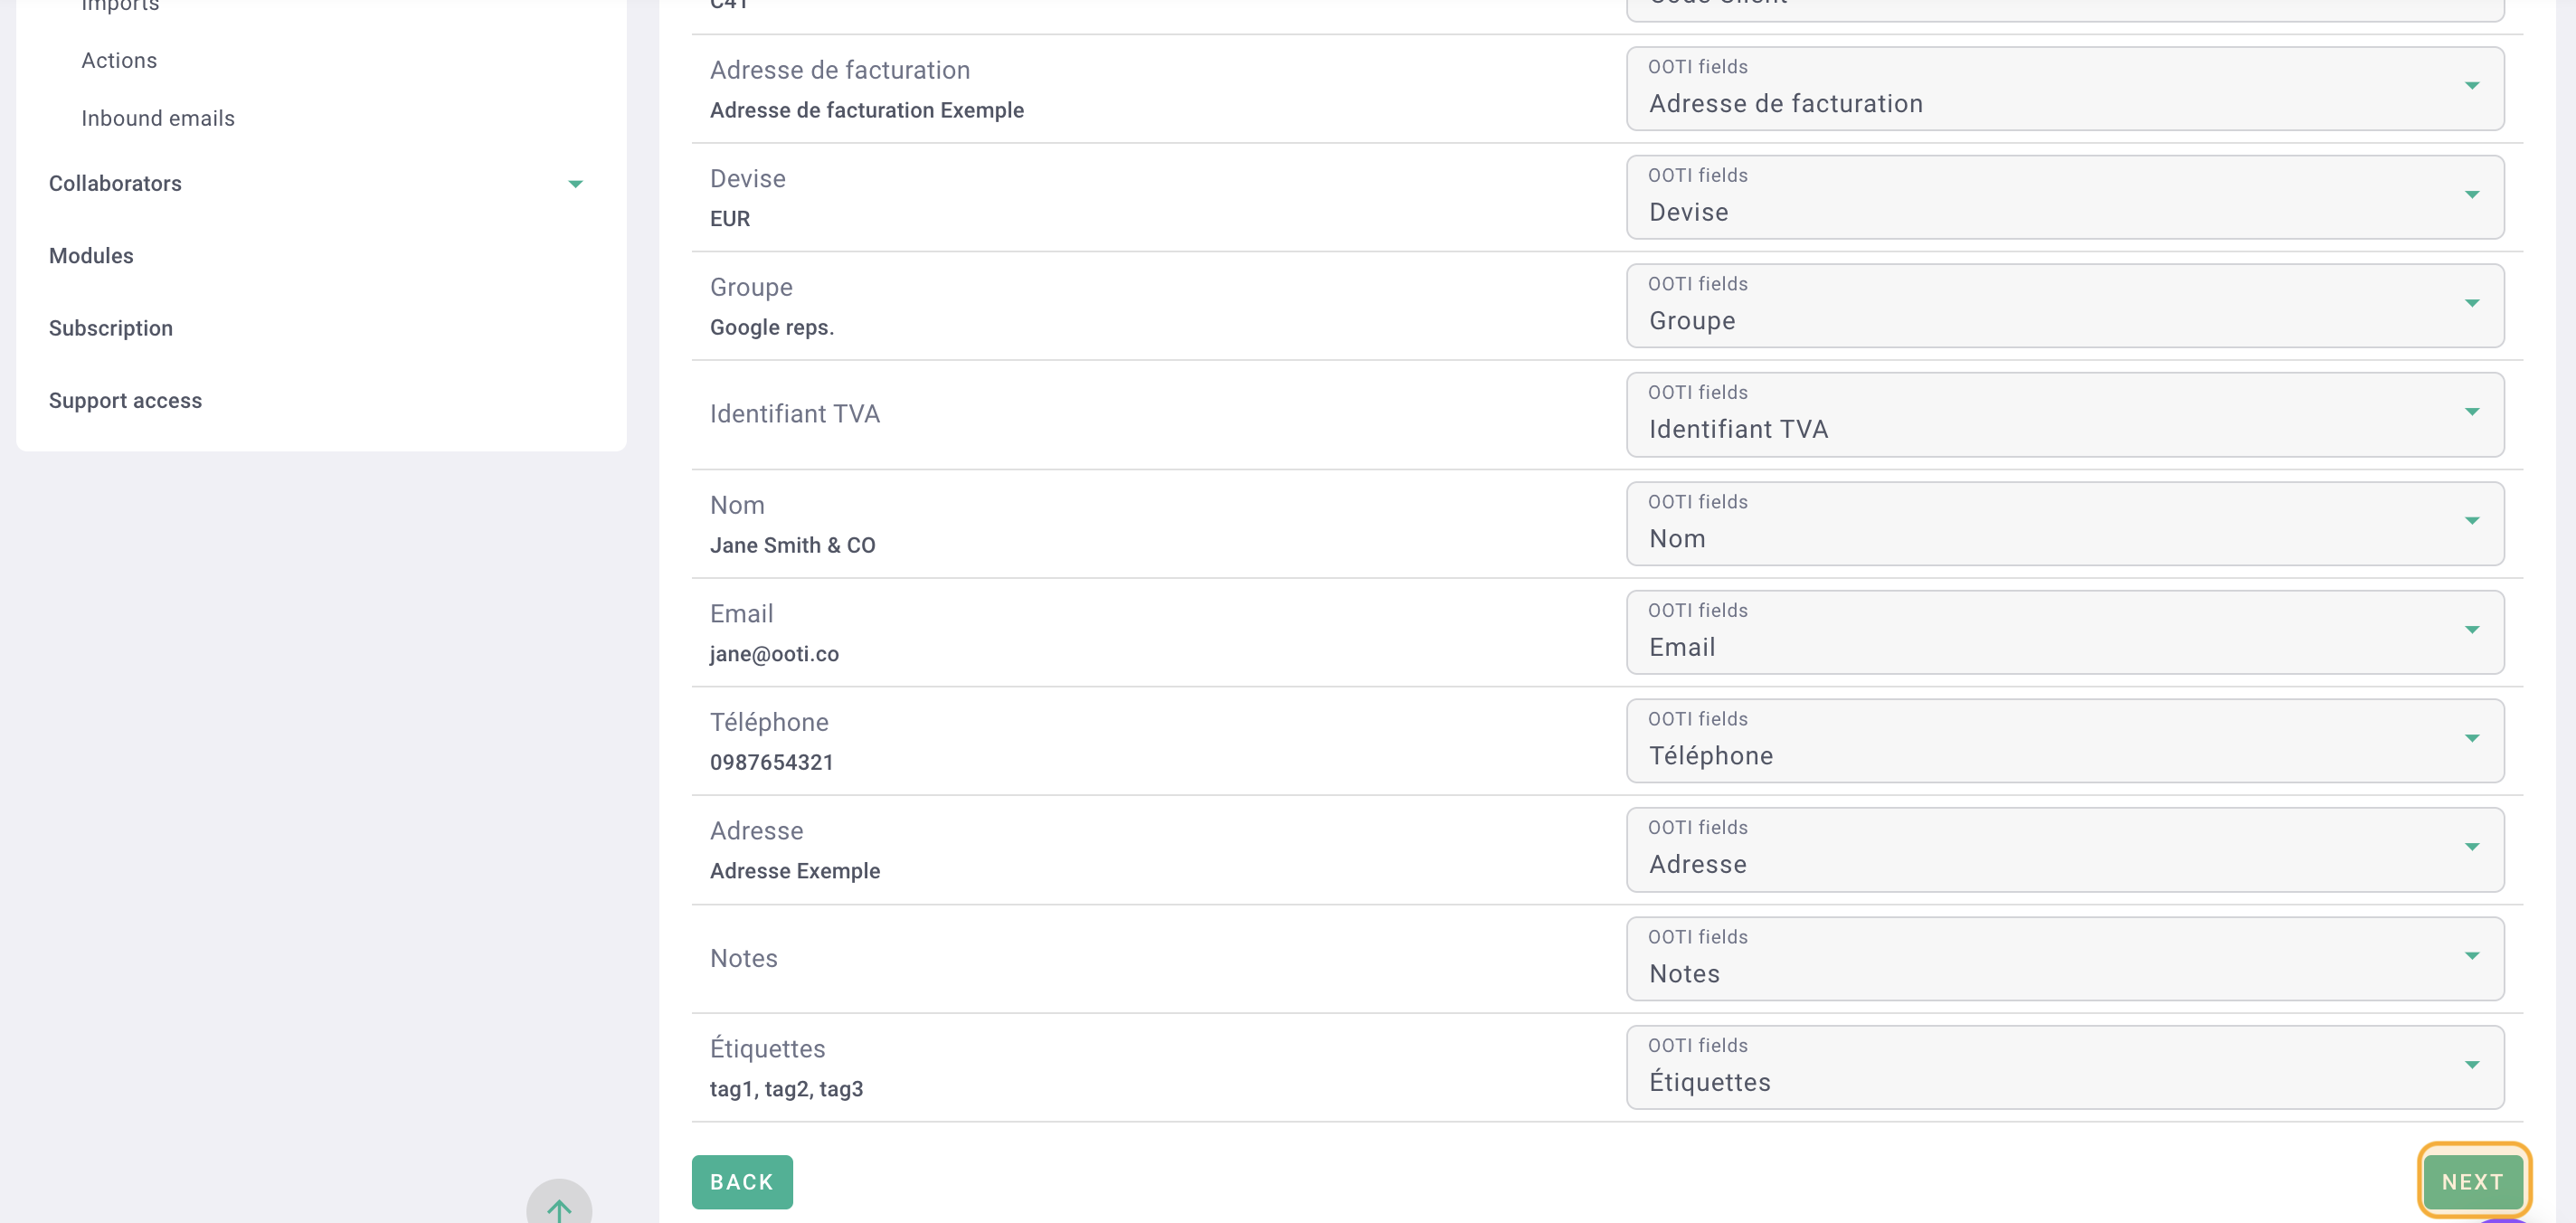
Finally, click on Finish at the bottom right.
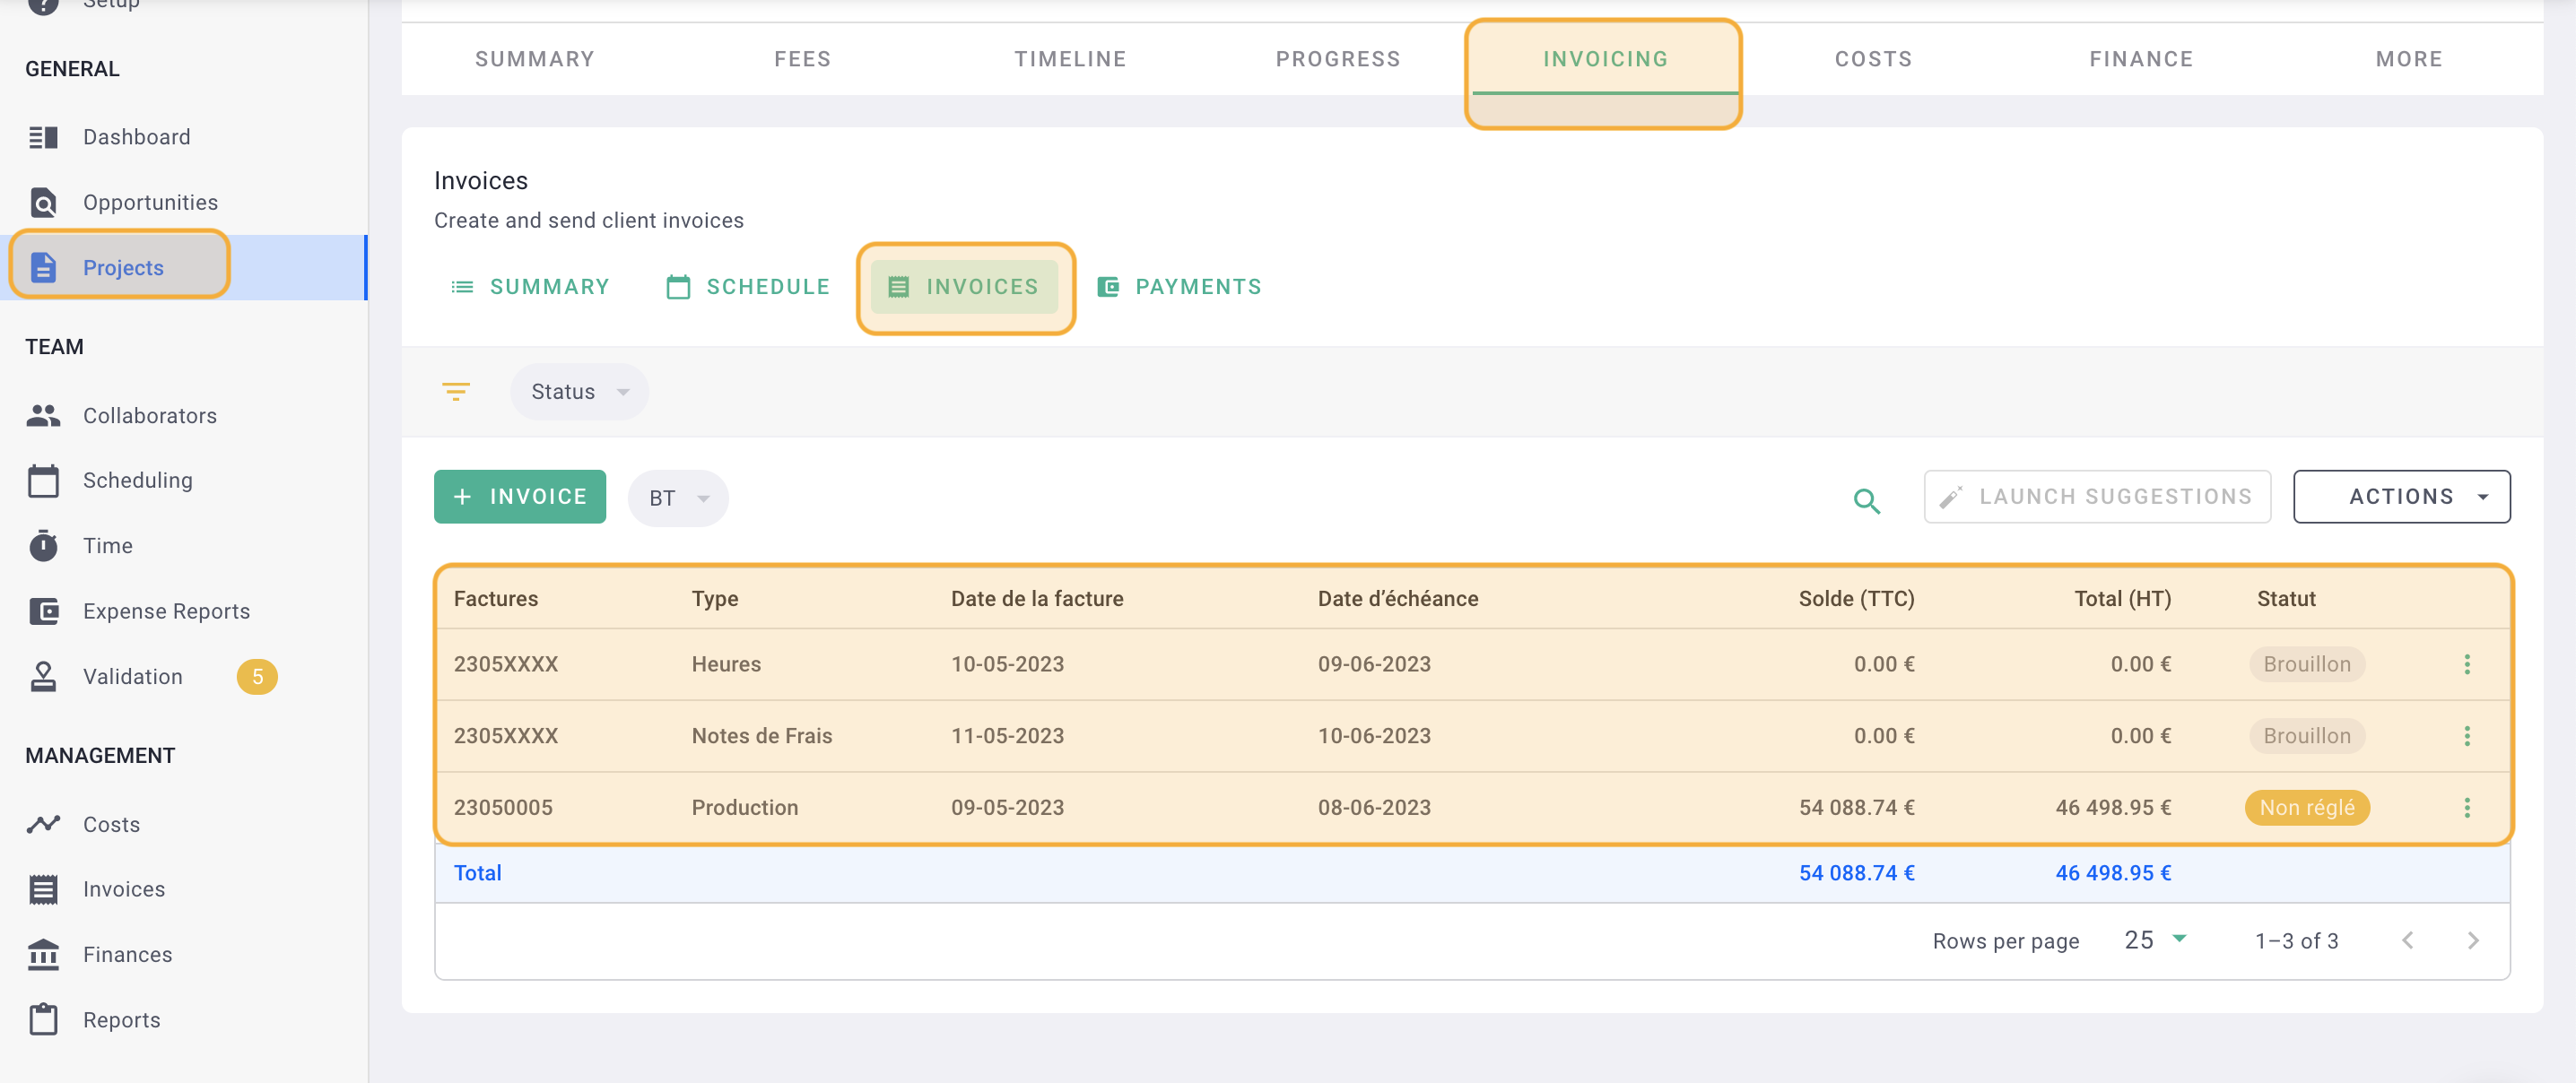
Once your invoices have been imported, go to the Project > Invoicing tab > Invoices tab.
Check your bills to make sure everything is correct.
It's done ! 🎉 You have resumed billing for your project.