Discover how to generate a credit note from an invoice created in OOTI.
✅ Notes/Remarks:
-Partial credit notes are not yet available.-The invoice must be marked as sent.
🔓 Required Permissions: View Invoices / Manage Invoices
| Reading time | 1 min |
| Setup time | 2 min |
| Steps | 2 |
SUMMARY
I- CREATE THE CREDIT NOTE FROM THE INVOICE
II- VALIDATE THE CREDIT NOTE
I- CREATE THE CREDIT NOTE FROM THE INVOICE
Go to the invoice in question and click on ACTIONS, then select CREATE CREDIT NOTE.
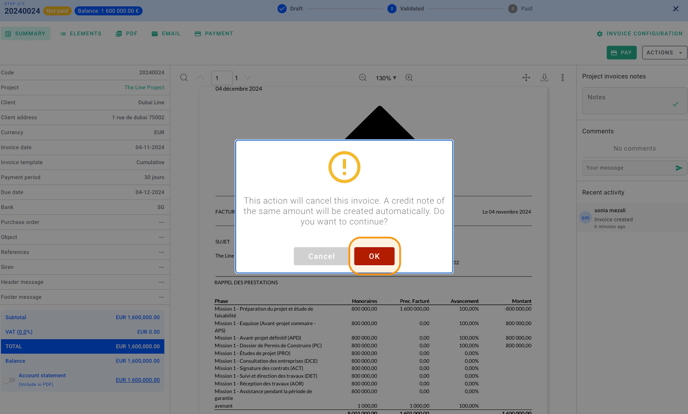
Then, click OK when the popup window opens.
This will automatically generate a credit note for the same amount as the invoice.

II- VALIDATE THE CREDIT NOTE
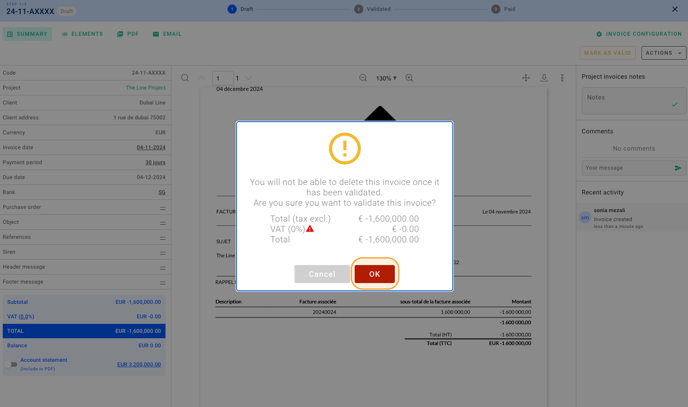
✅ Notes/Remarks: You are taken directly to the credit note for the invoice, which is currently in "Draft" status. The "A" present in the code (not finalized at this moment) clearly indicates that it is a credit note.

Click on MARK AS VALID.

Then, click OK when the popup appears.

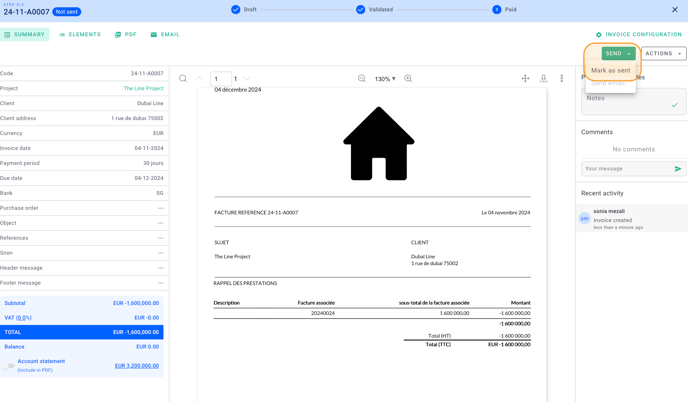
The credit note is now created and appears with a status of "Not Sent." You can click on SEND, then select MARK AS SENT so that it is accounted for in the revenue.

You can easily generate credit notes. 🎉
