
Allocate supplier invoice costs (subcontractors, freelancers) to your projects and/or their phases to track profitability.
🔓 Permissions required
Team: Manage providers
Project: Manage service providers
| Reading time | 5 min |
| Setup length | 5 min |
| Steps | 2 |
Summary
I/ Creating a supplier
II/ Creating a supplier invoice and allocating to project
I/ Create a provider
Navigate to the left-hand Costs menu > External Companies tab > List tab, then click the + Company button.
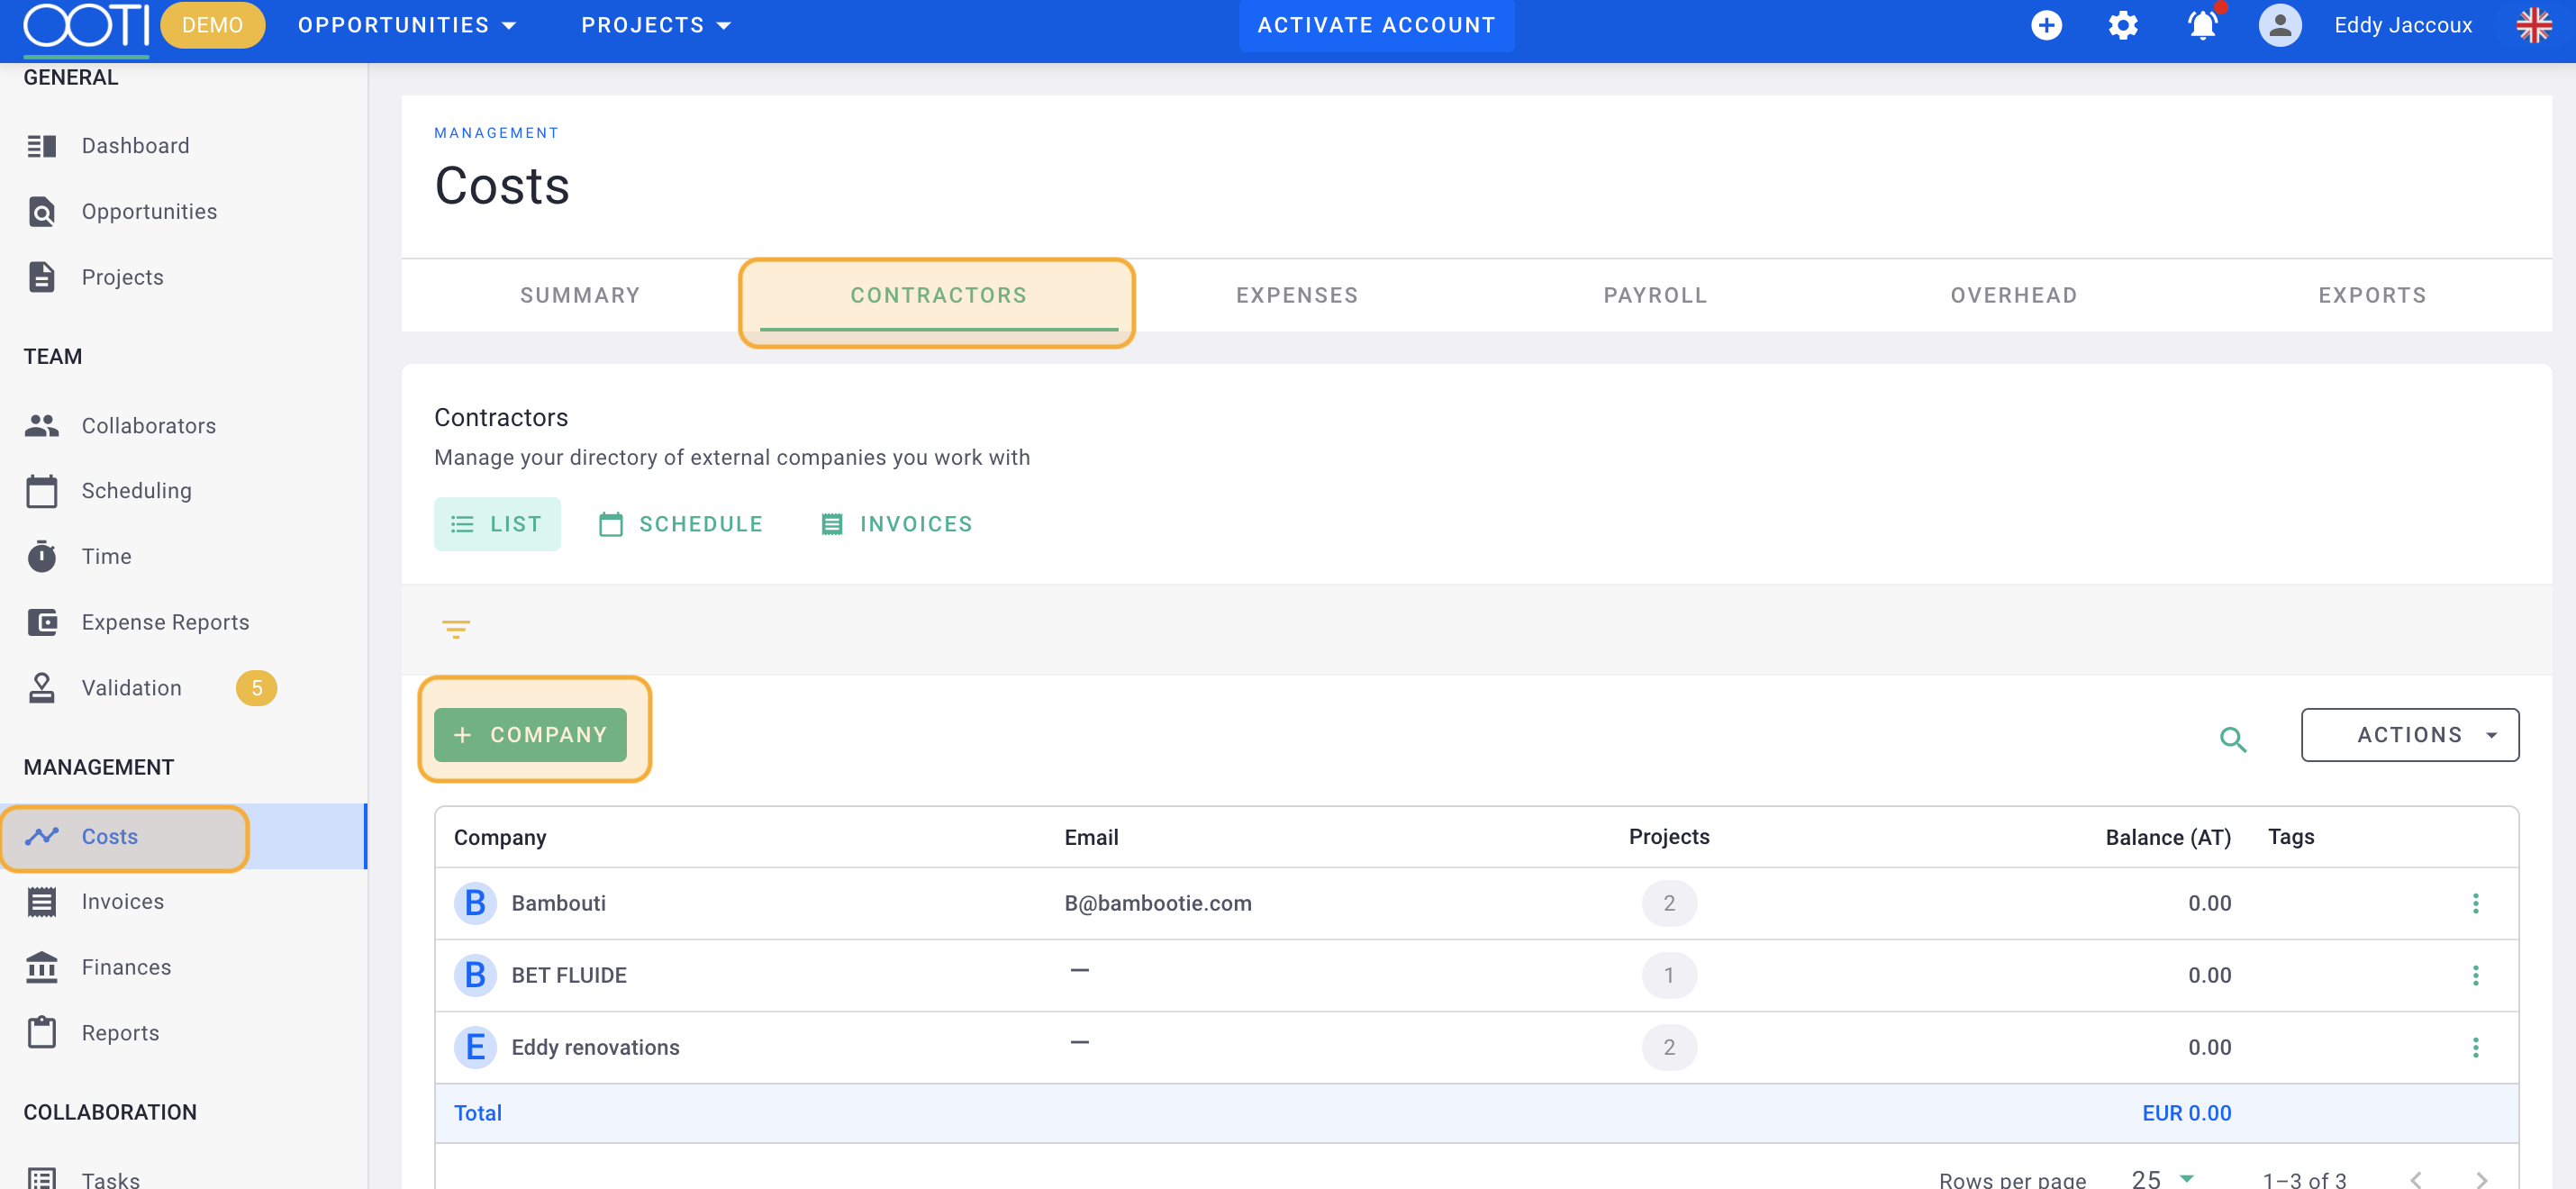
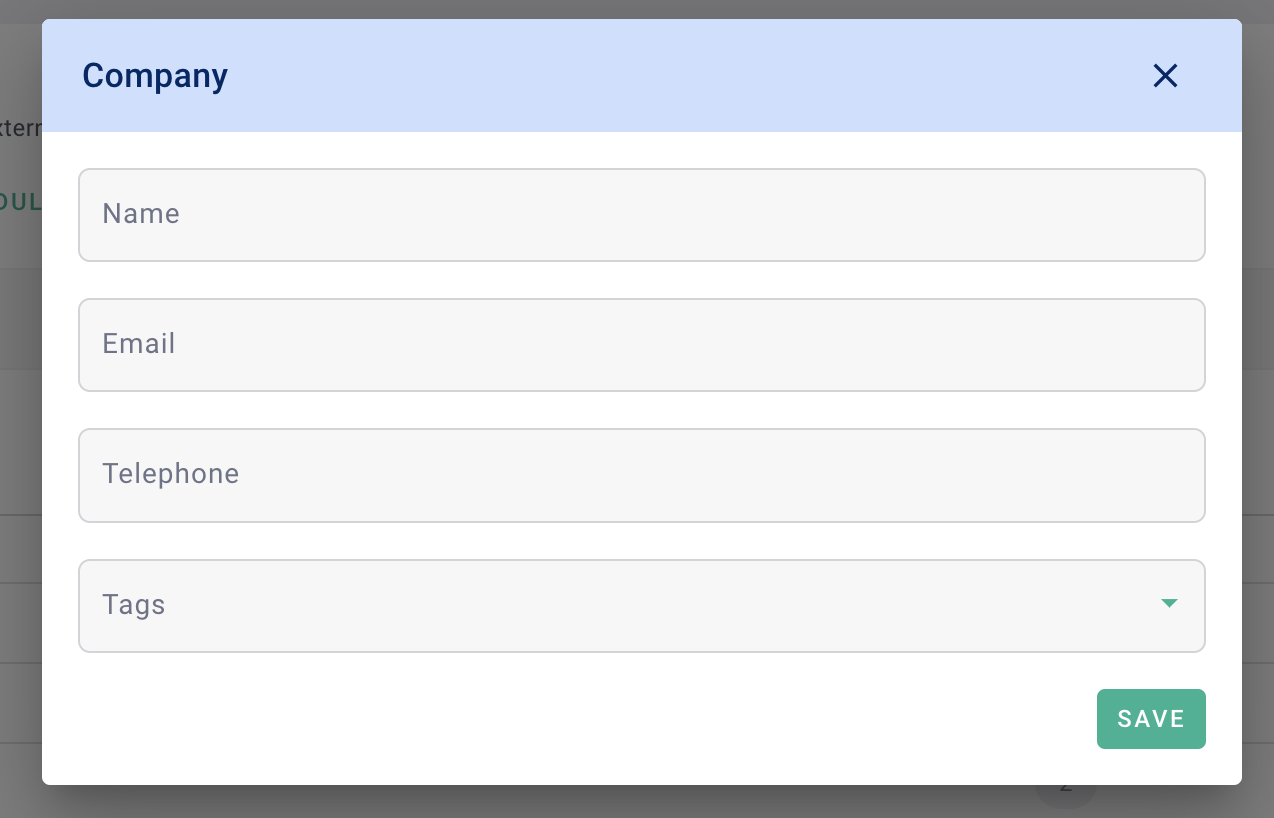
- Supplier Name,
- Email Address,
- Phone Number.
Select Labels to assist in analytics.
Click Save.
You have created a supplier! 🎉
II/ Creating a Supplier Invoice
1) Manually
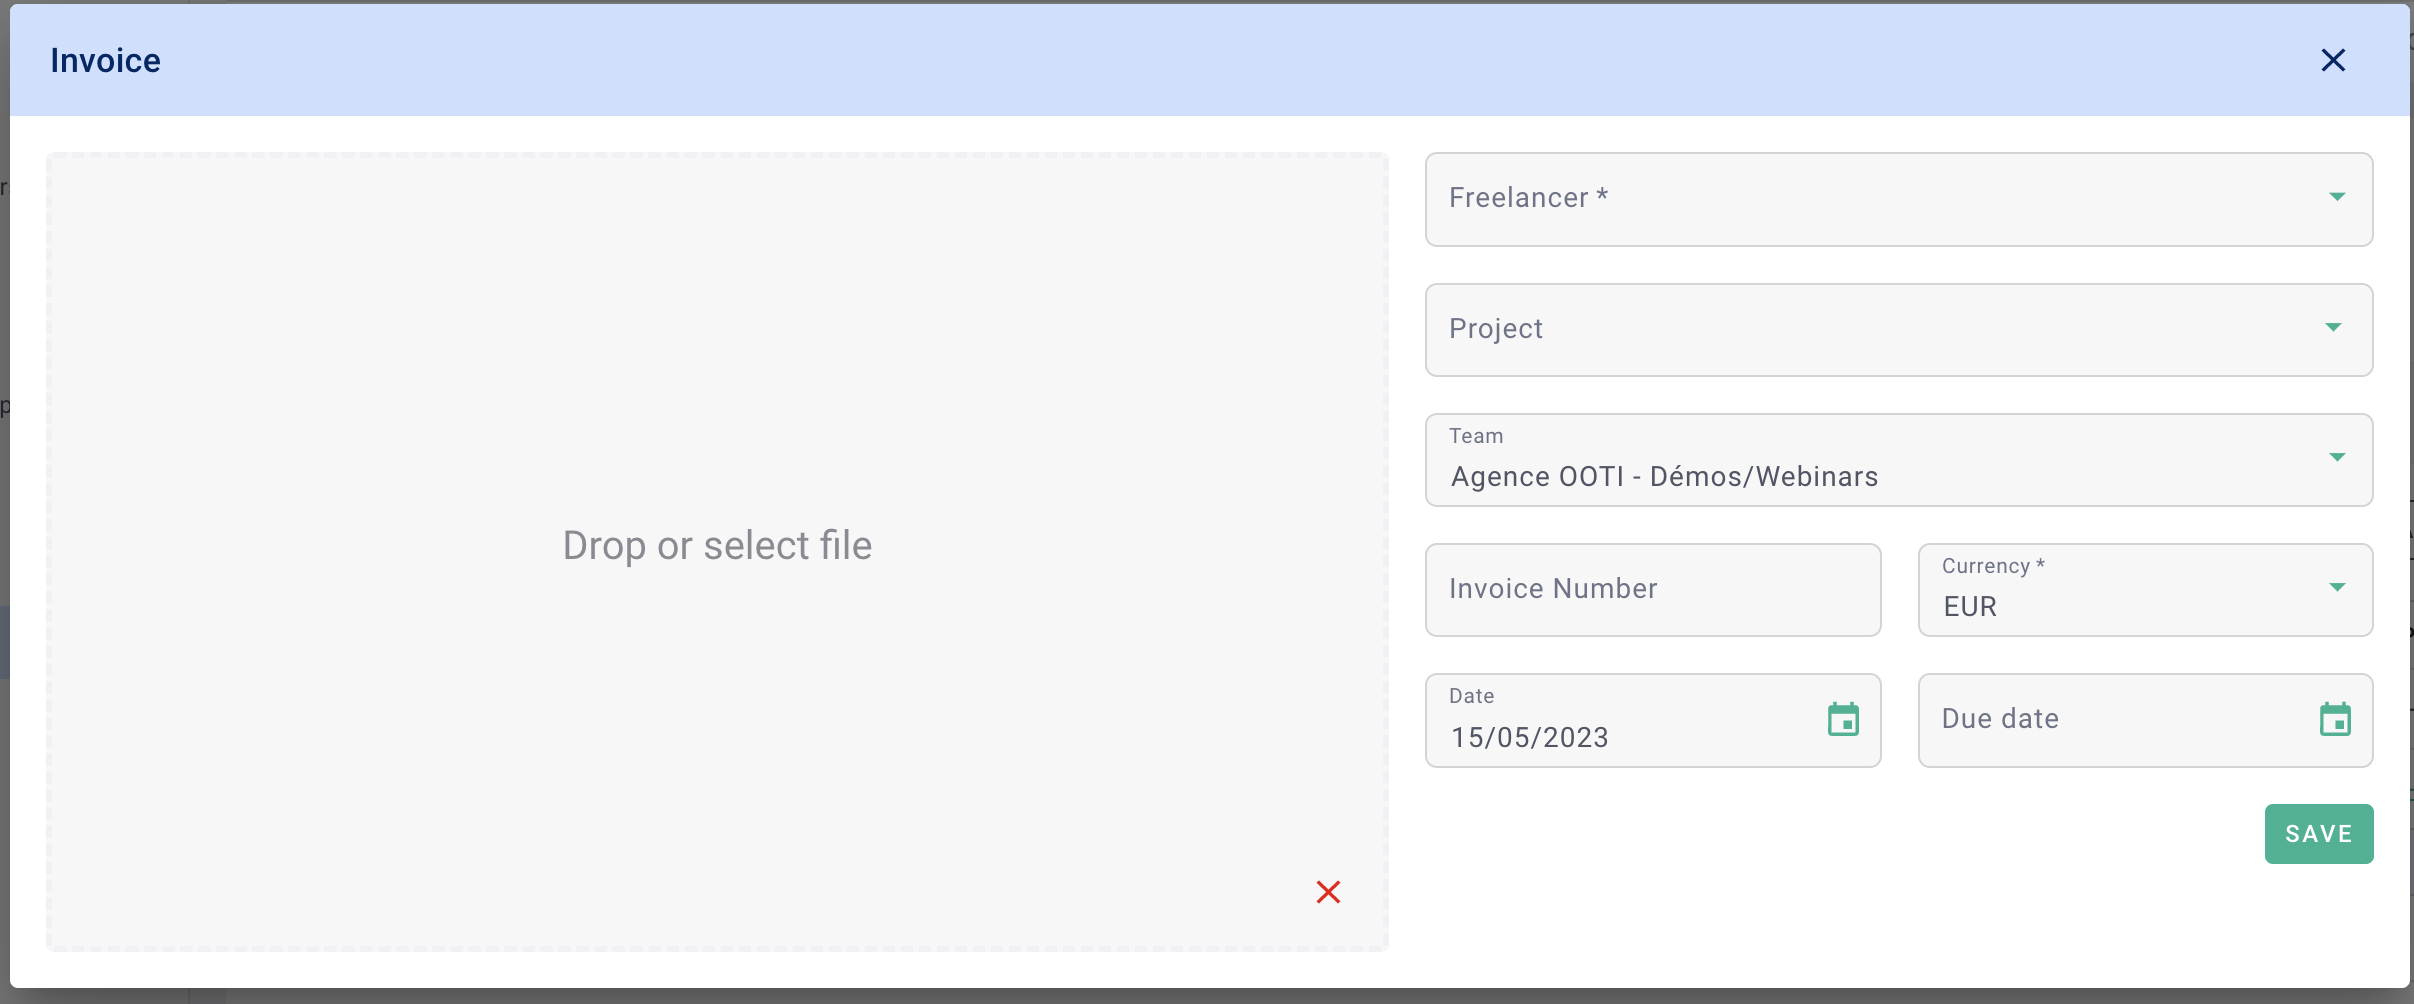
Go to the left-hand Costs menu > External Companies tab > Invoices tab, then click the + Invoice button.
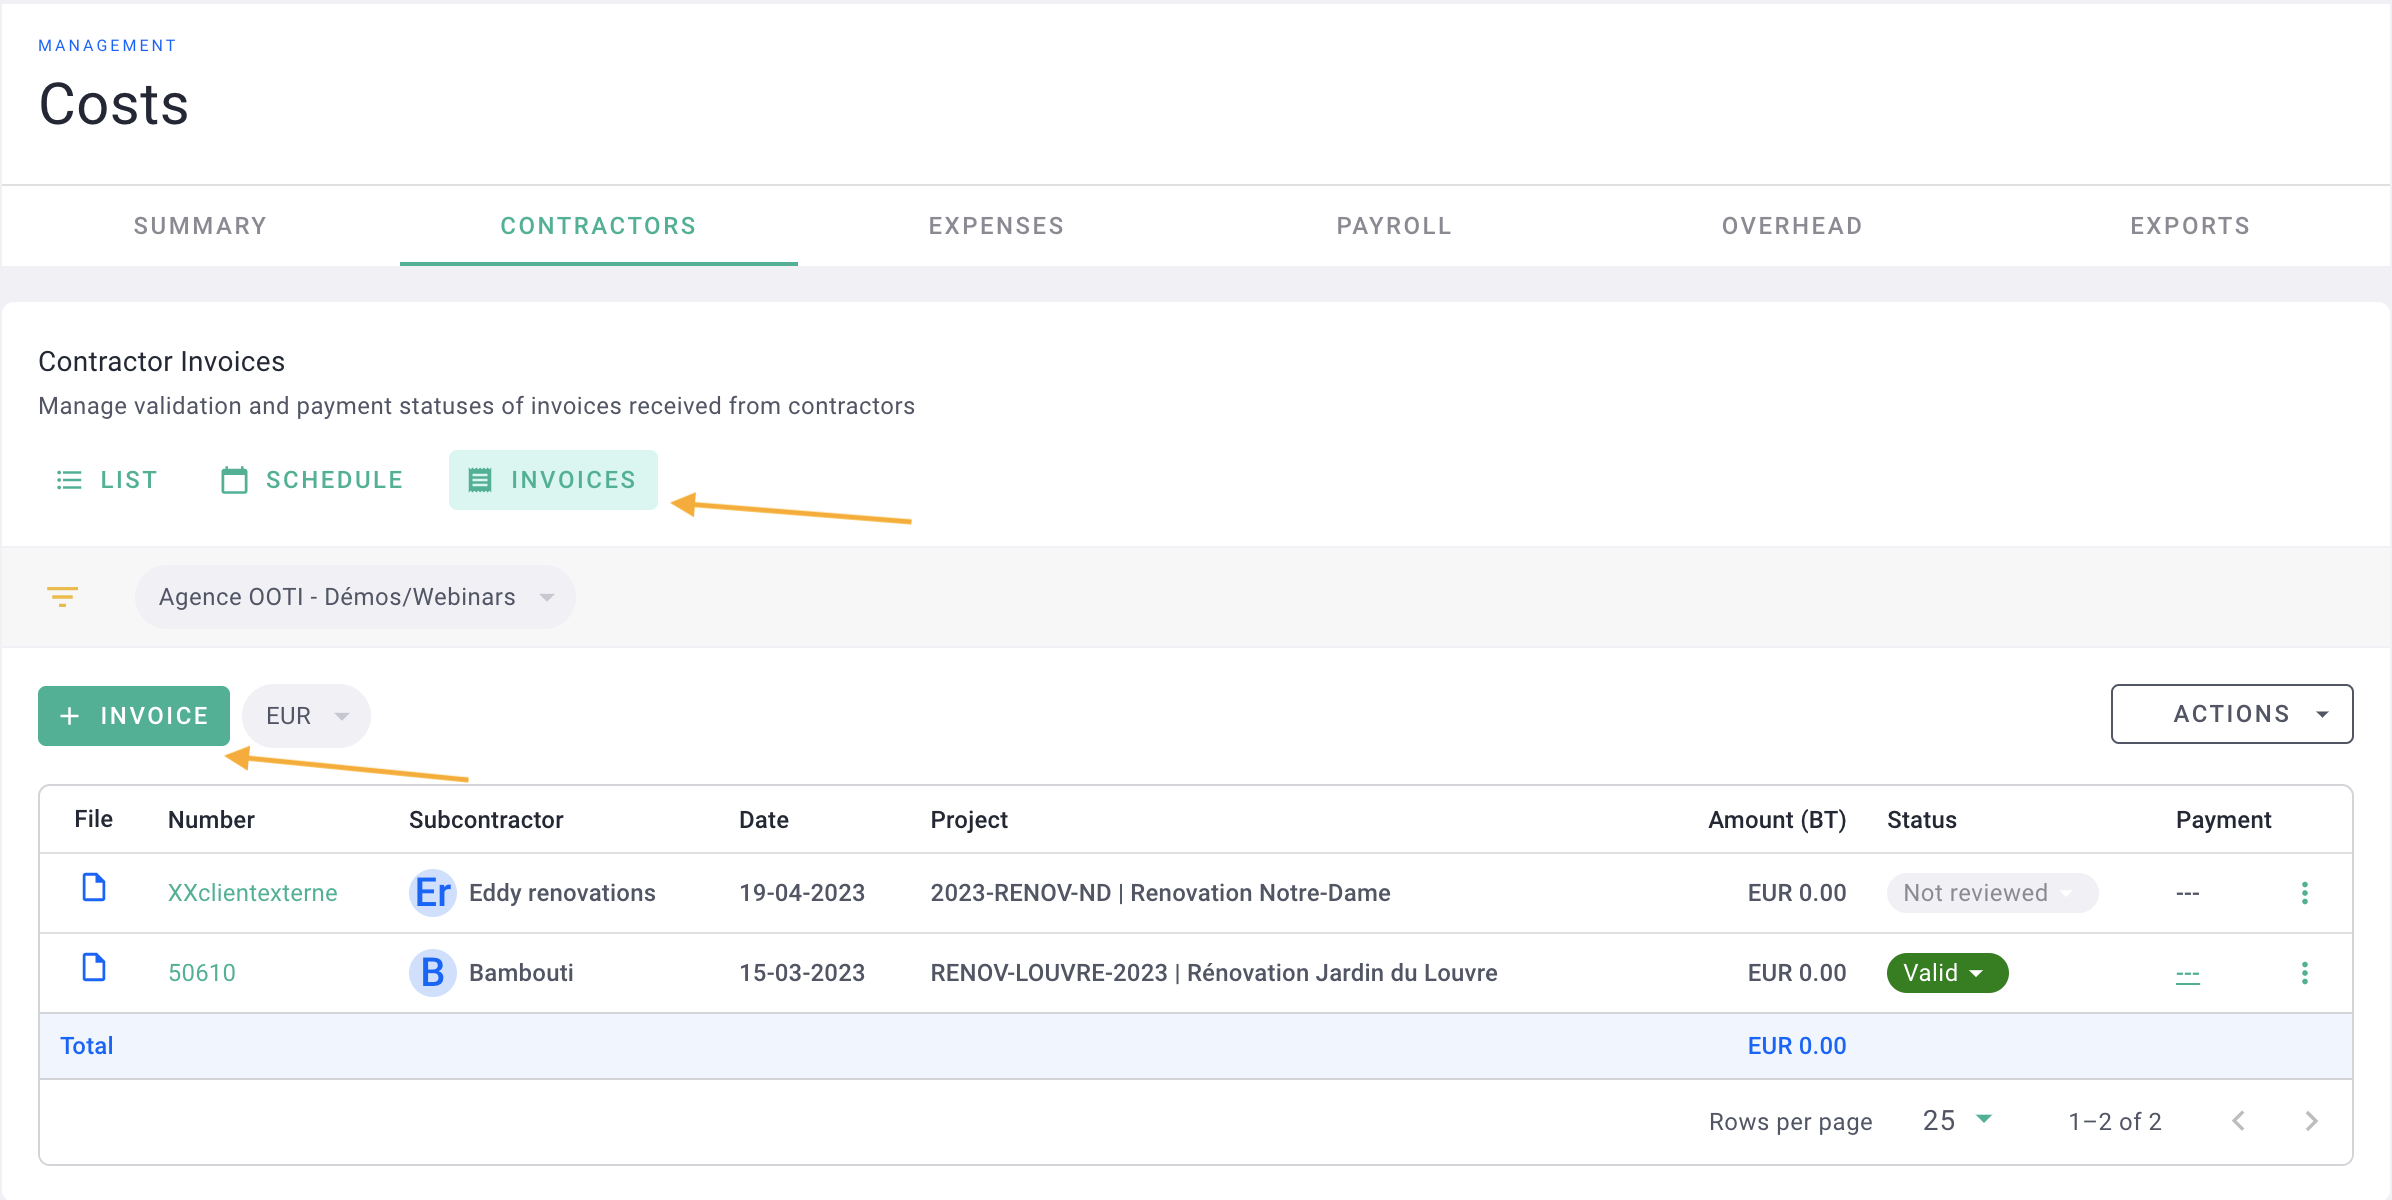
- External Company,
- Project (optional),
- Quote, if a quote was previously created, you can assign this invoice to the quote (see article),
- Currency.
In the form, enter:
- Invoice Number,
- Invoice Issuance Date,
- Due Date.
- Add the associated invoice in the square on the left.
Click Save.
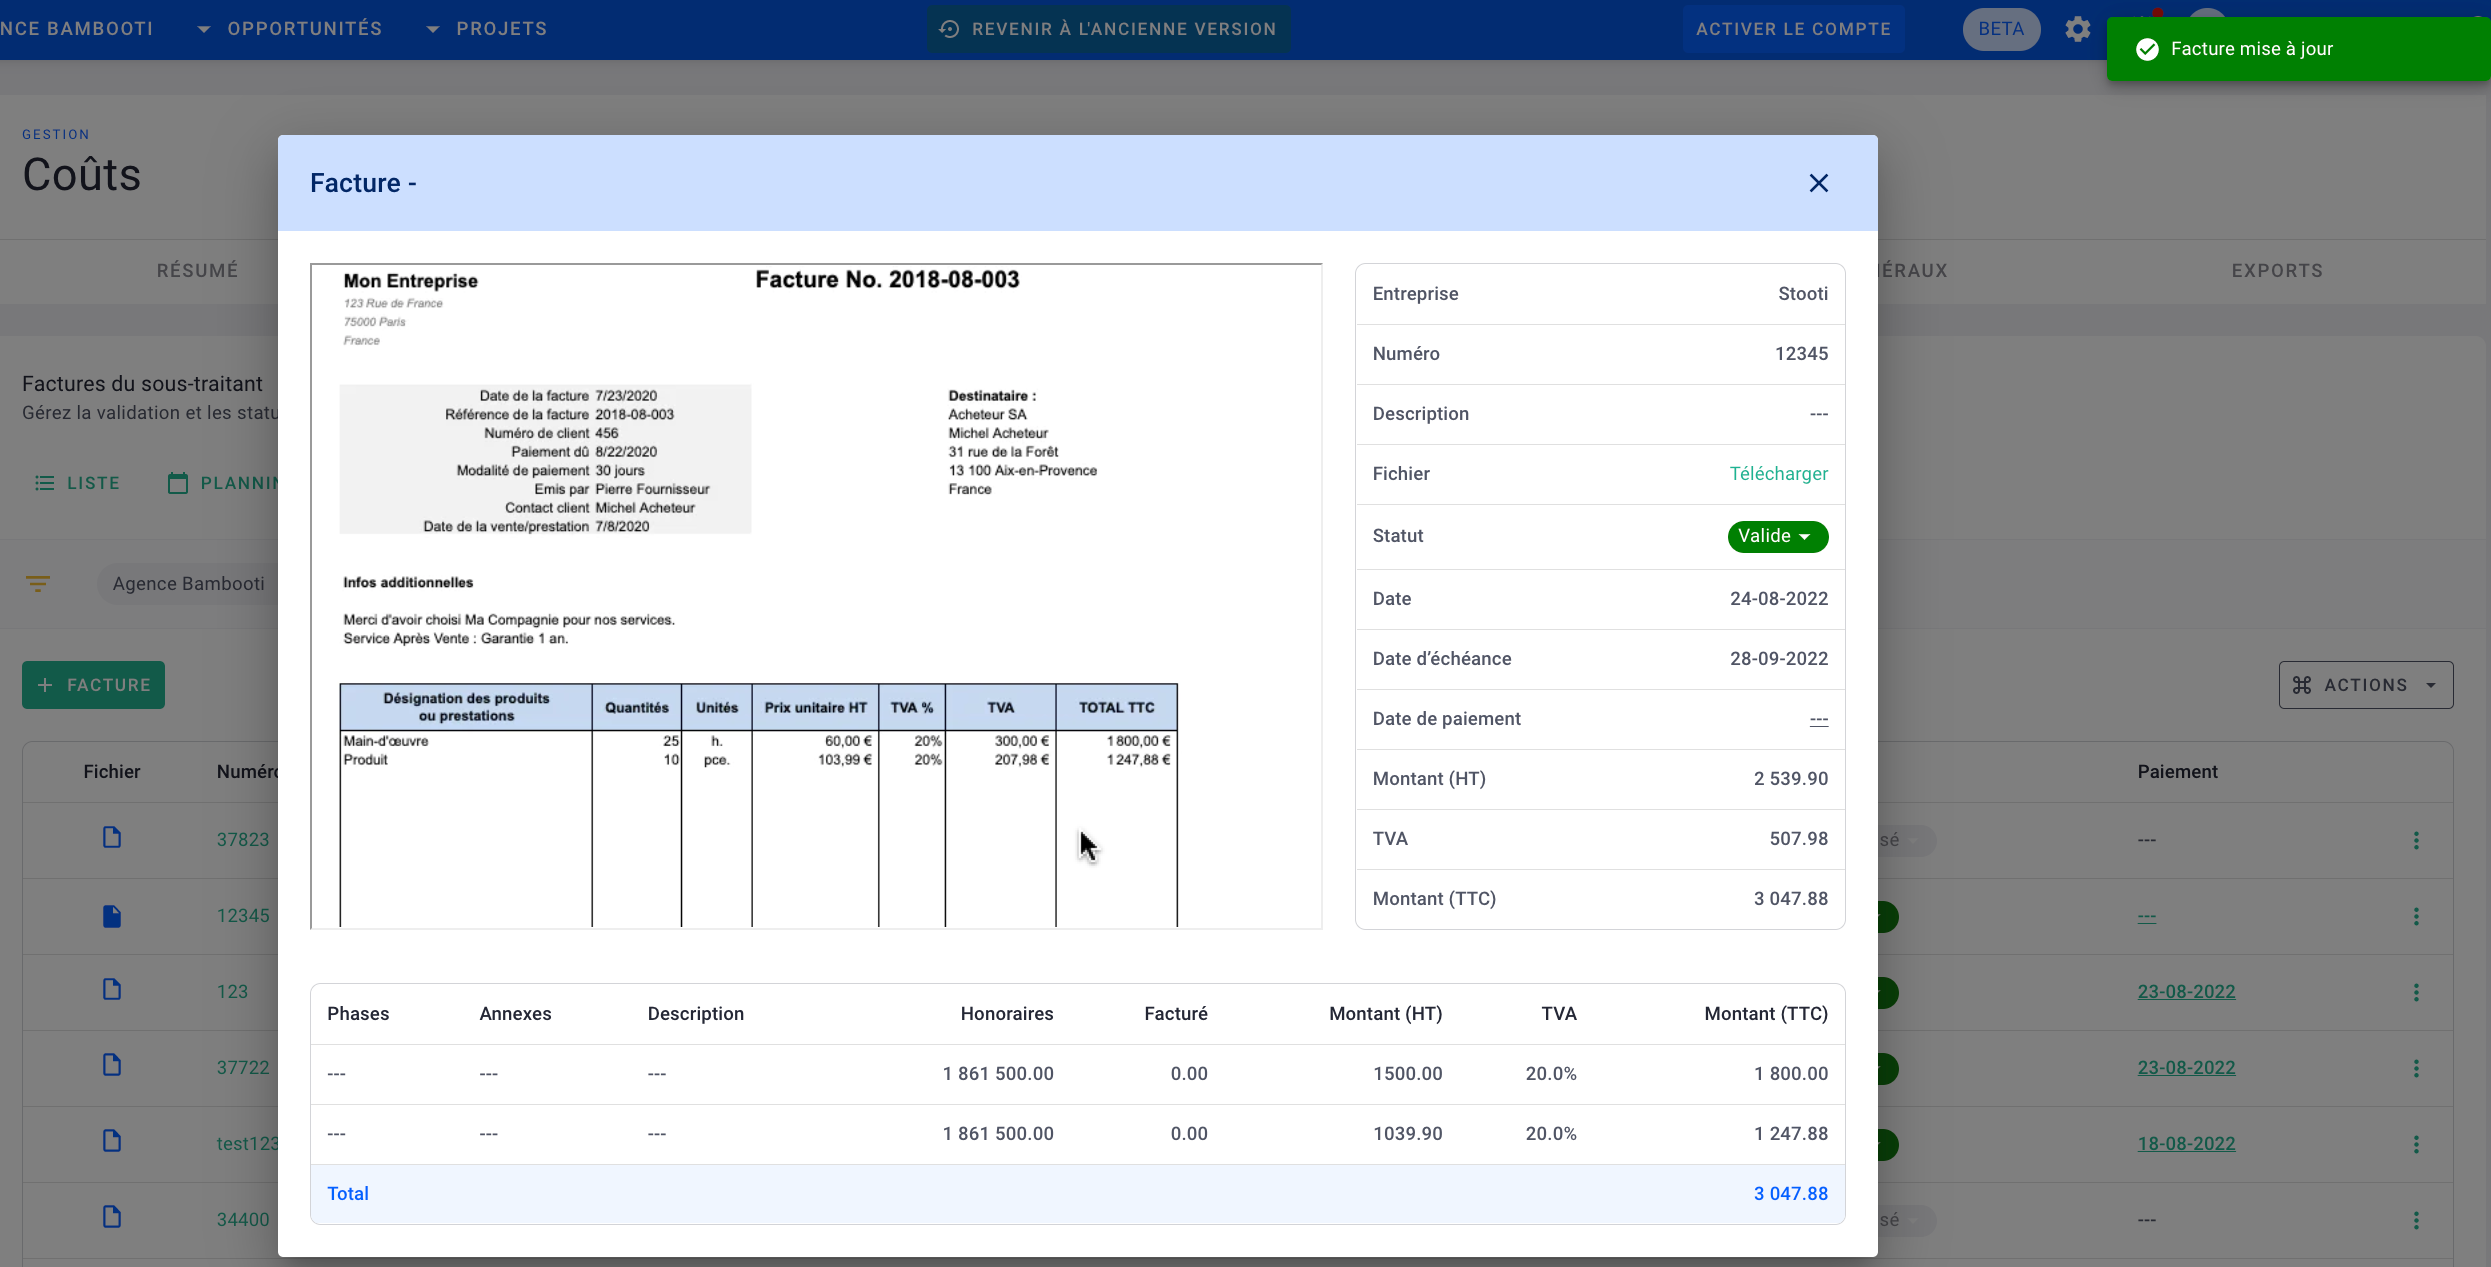
Here's the interface of a supplier invoice once the invoice is added.
You can modify the underlined data and add expenses to this invoice by clicking the + Item button.
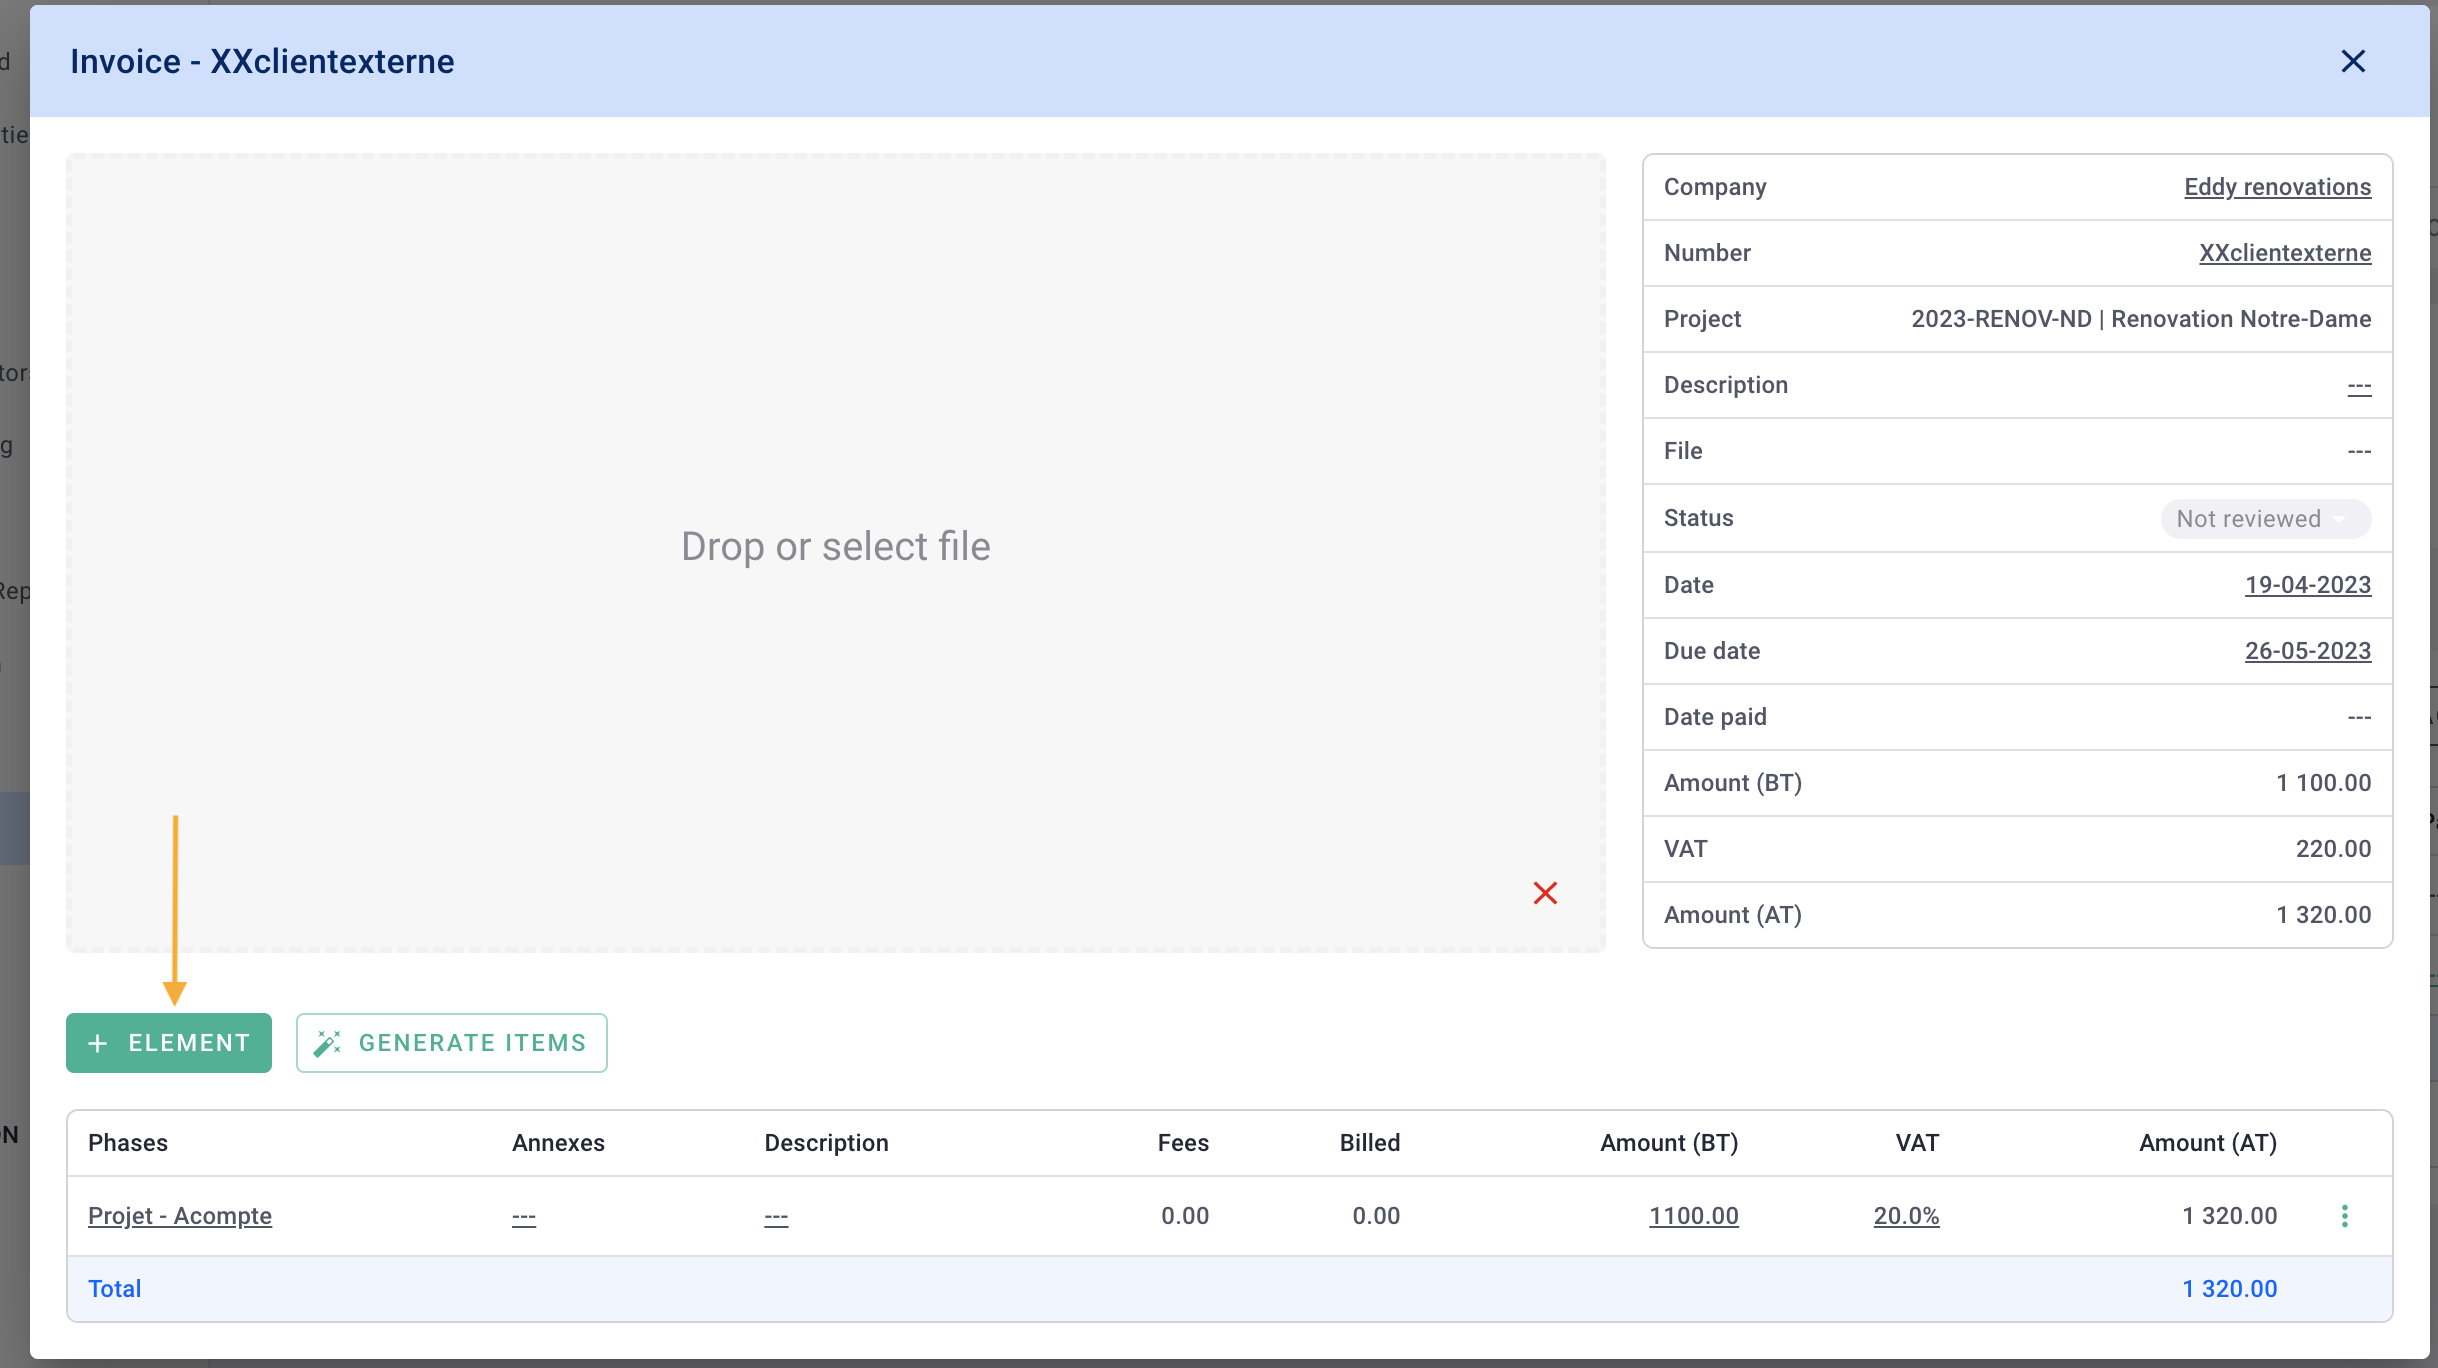
In the form, enter the Amount (excl. VAT) and the VAT Rate.
Select the phases in the Phases or Appendices field linked by this cost.
Click Save.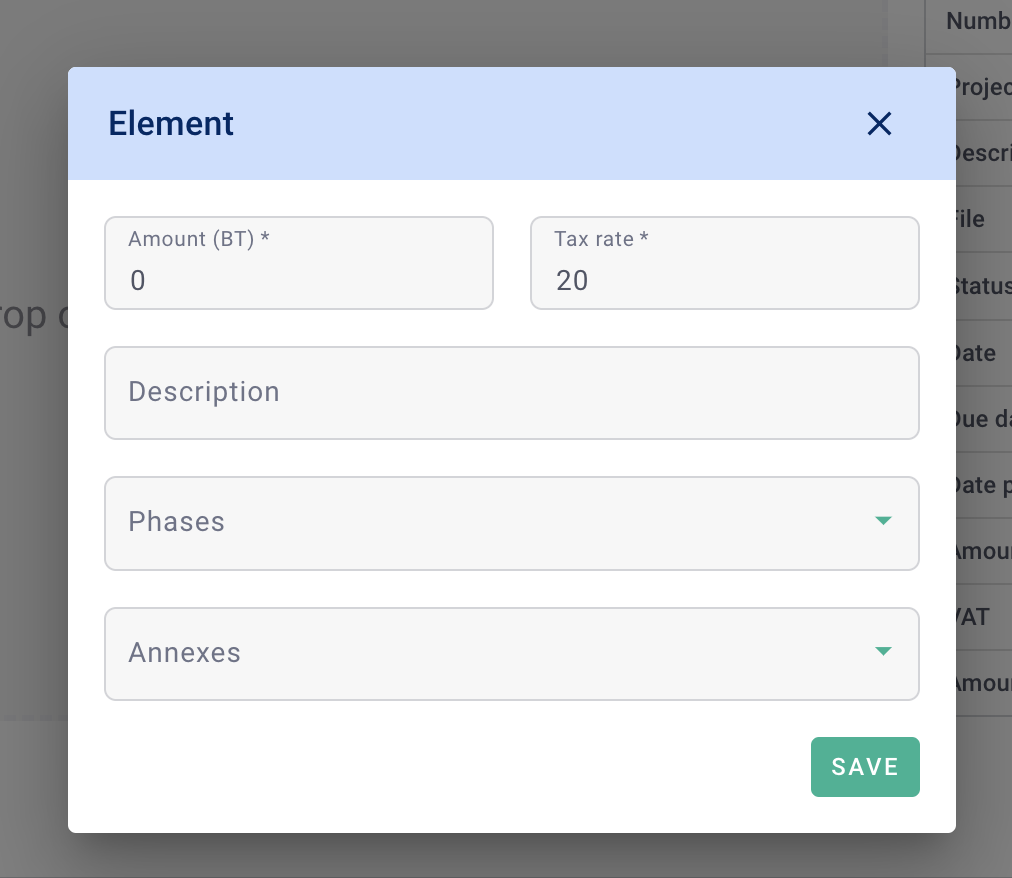
You have added your expense!
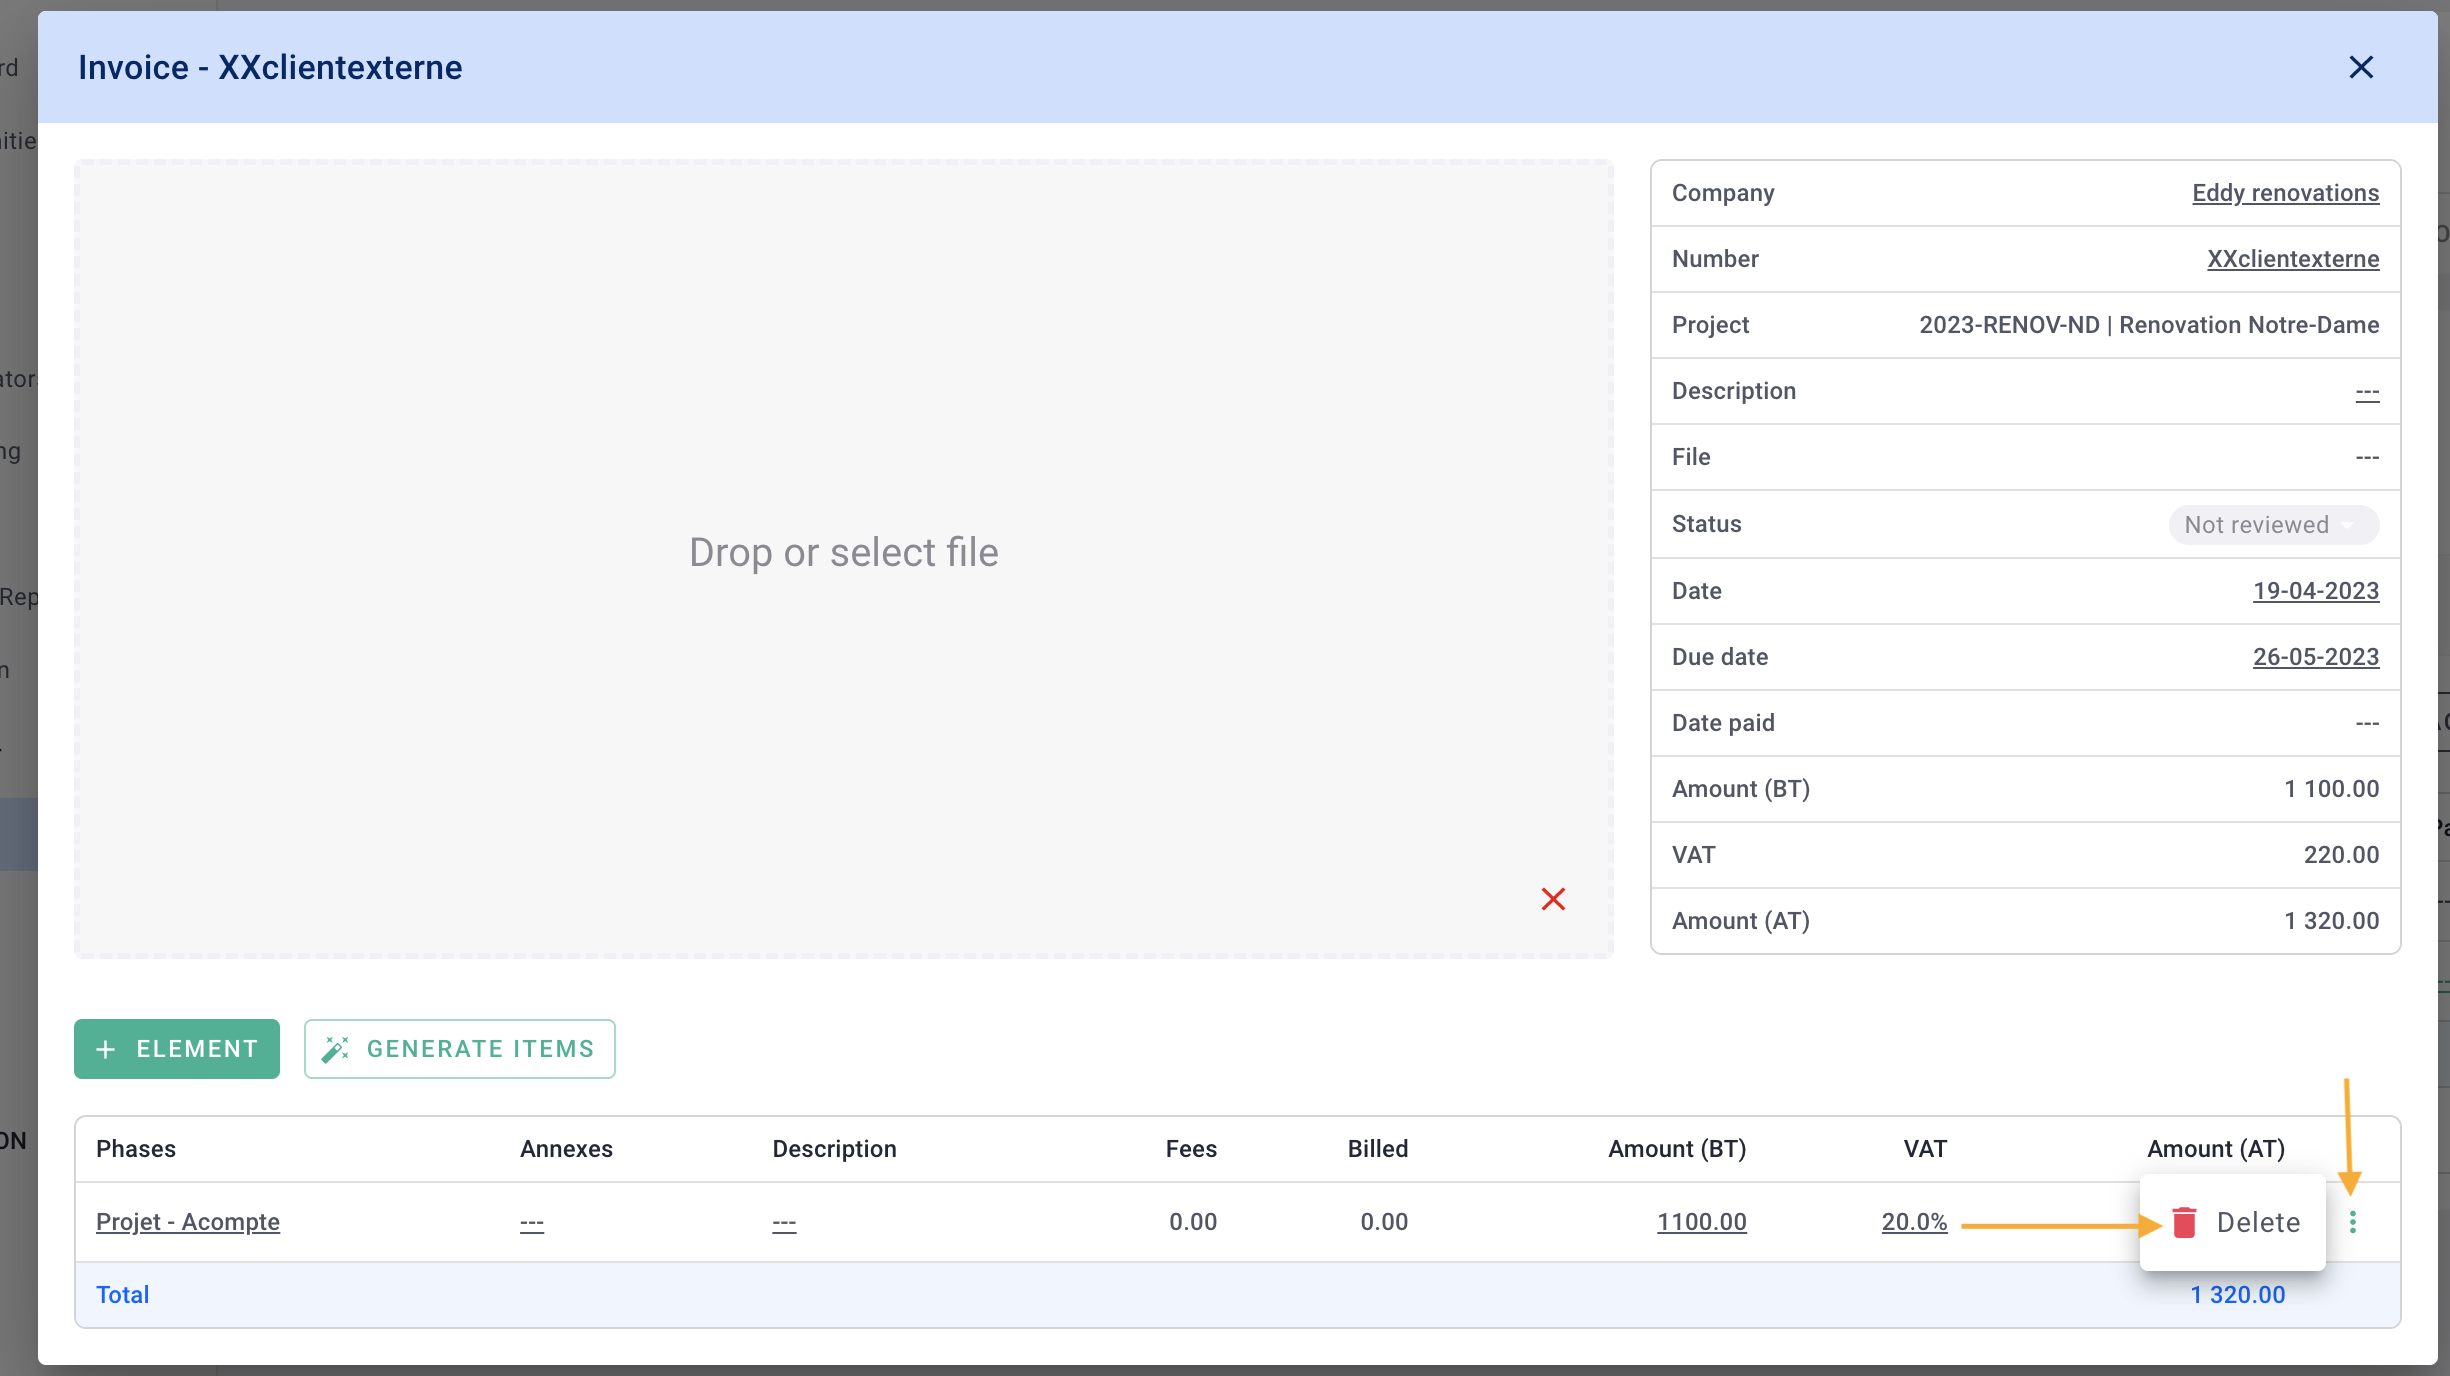
You can modify amounts by clicking on the underlined numbers or delete the expense by clicking the "..." options > Delete.
 Enter all supplier expenses into the invoice.
Once your invoice is complete, change the Status by clicking on Unrevised in gray, then select Approved.
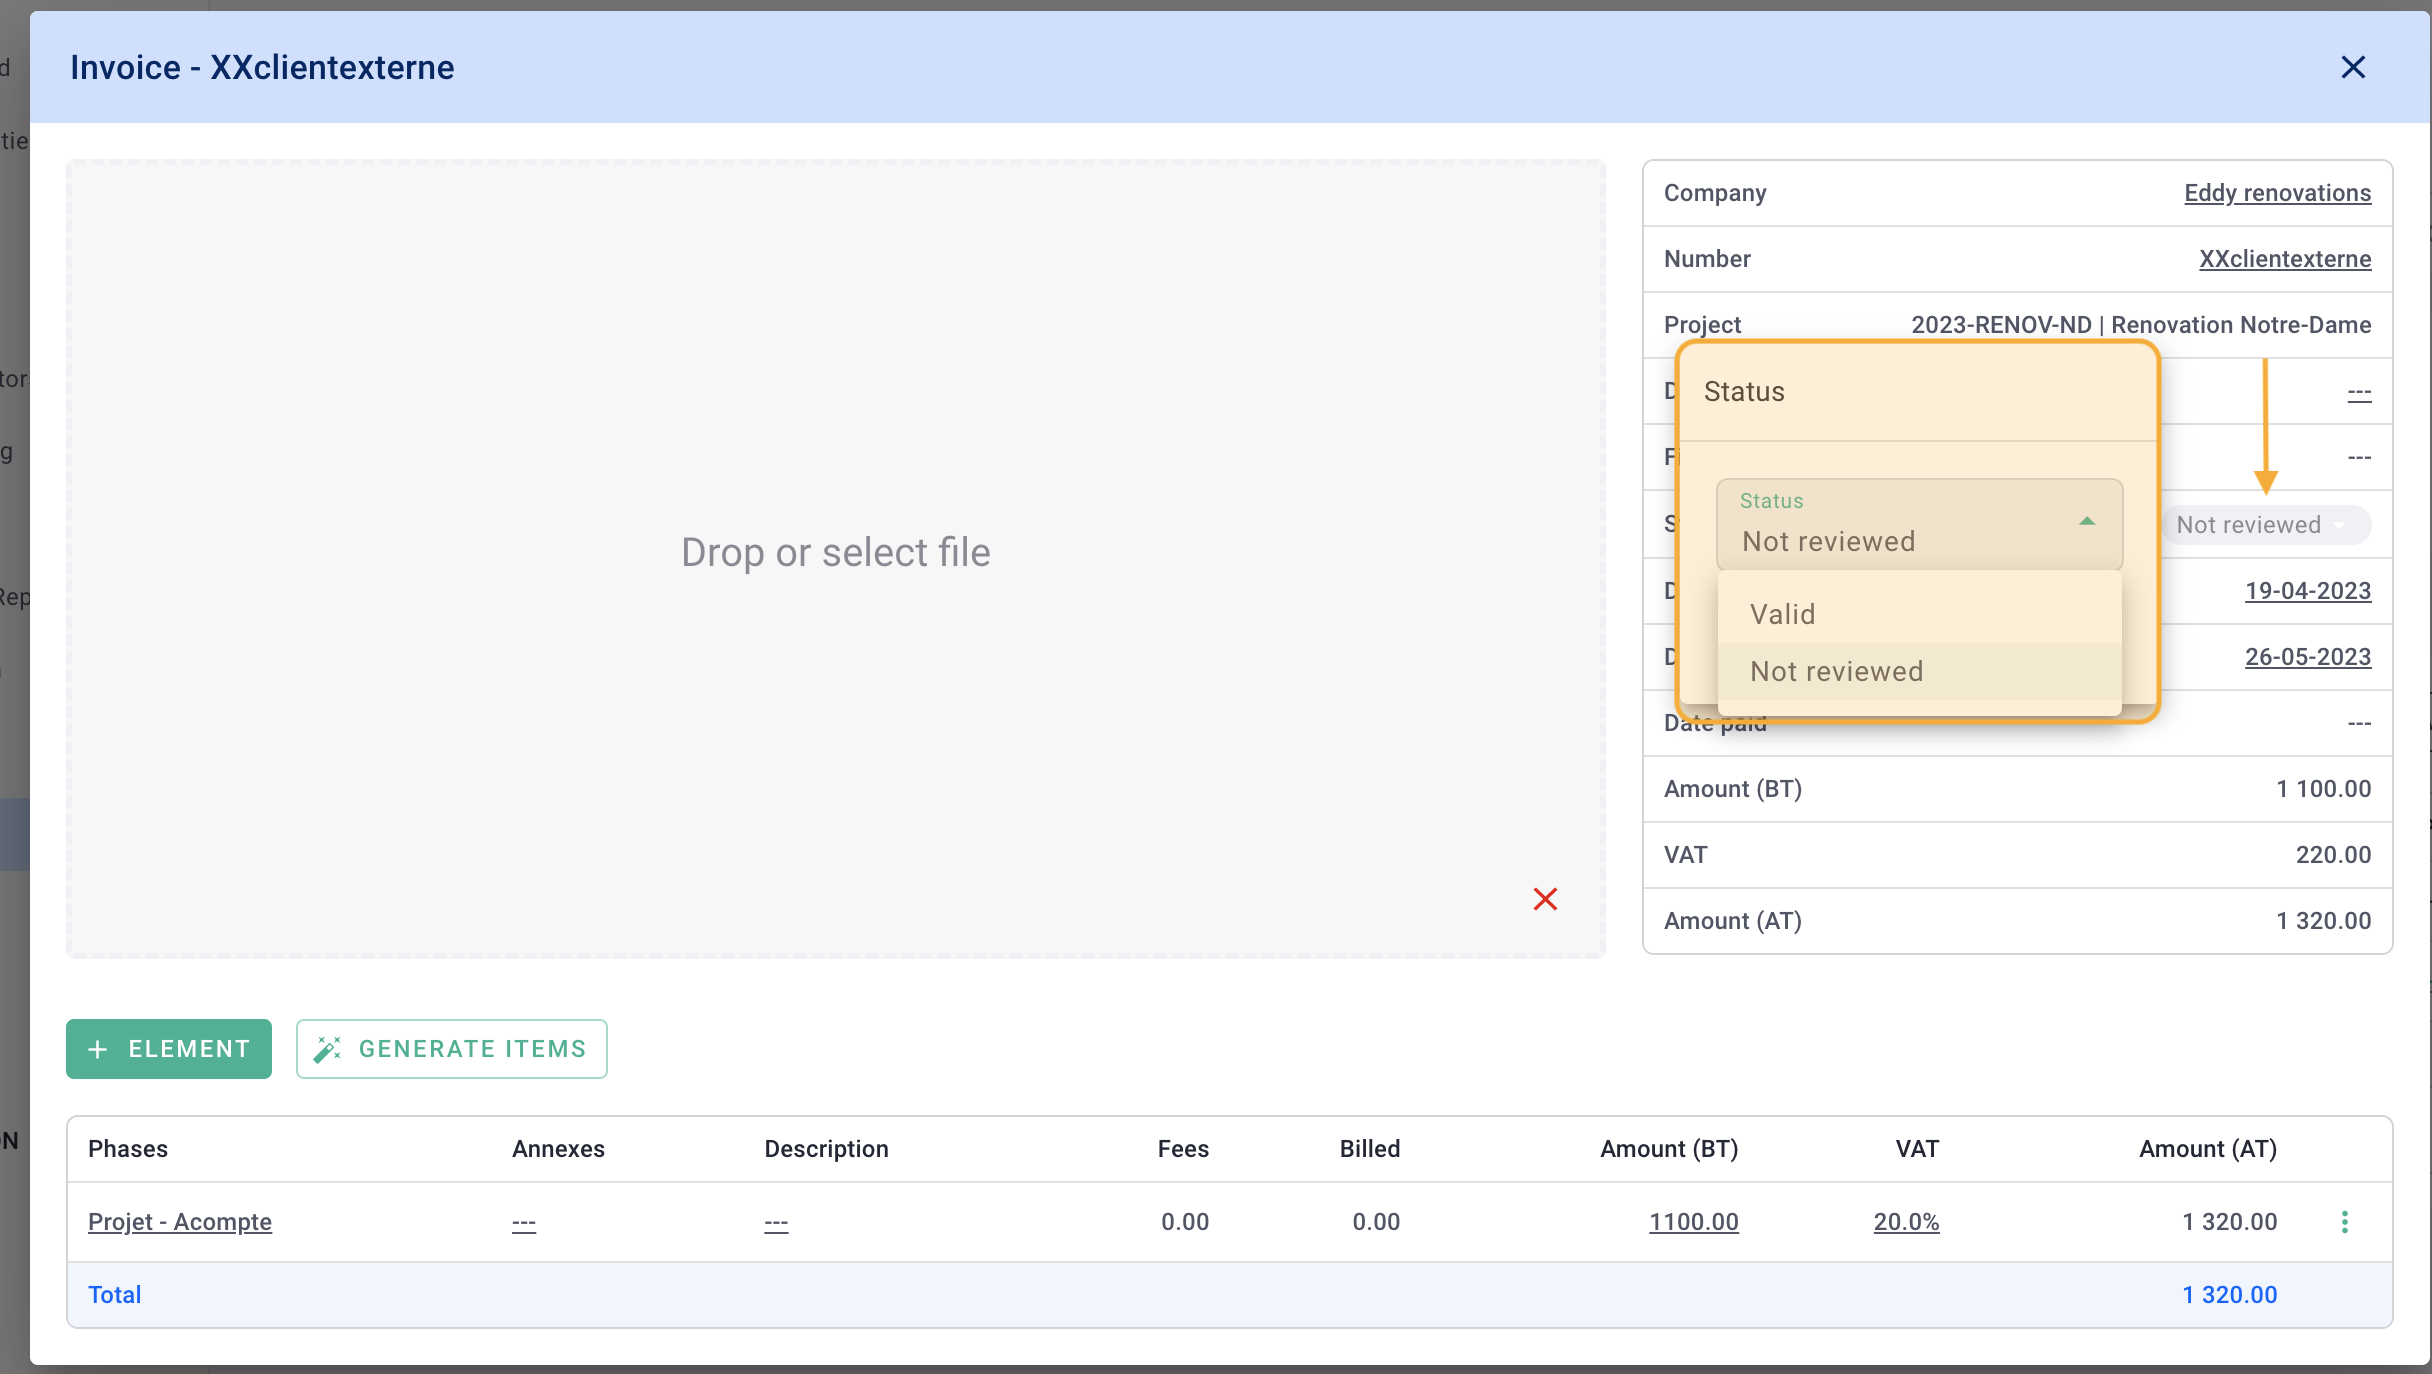
Your invoice is now updated and approved!
To modify your invoice, change the Status by clicking on Approved in green, then select Unrevised, make your modifications, and switch back to Approved.
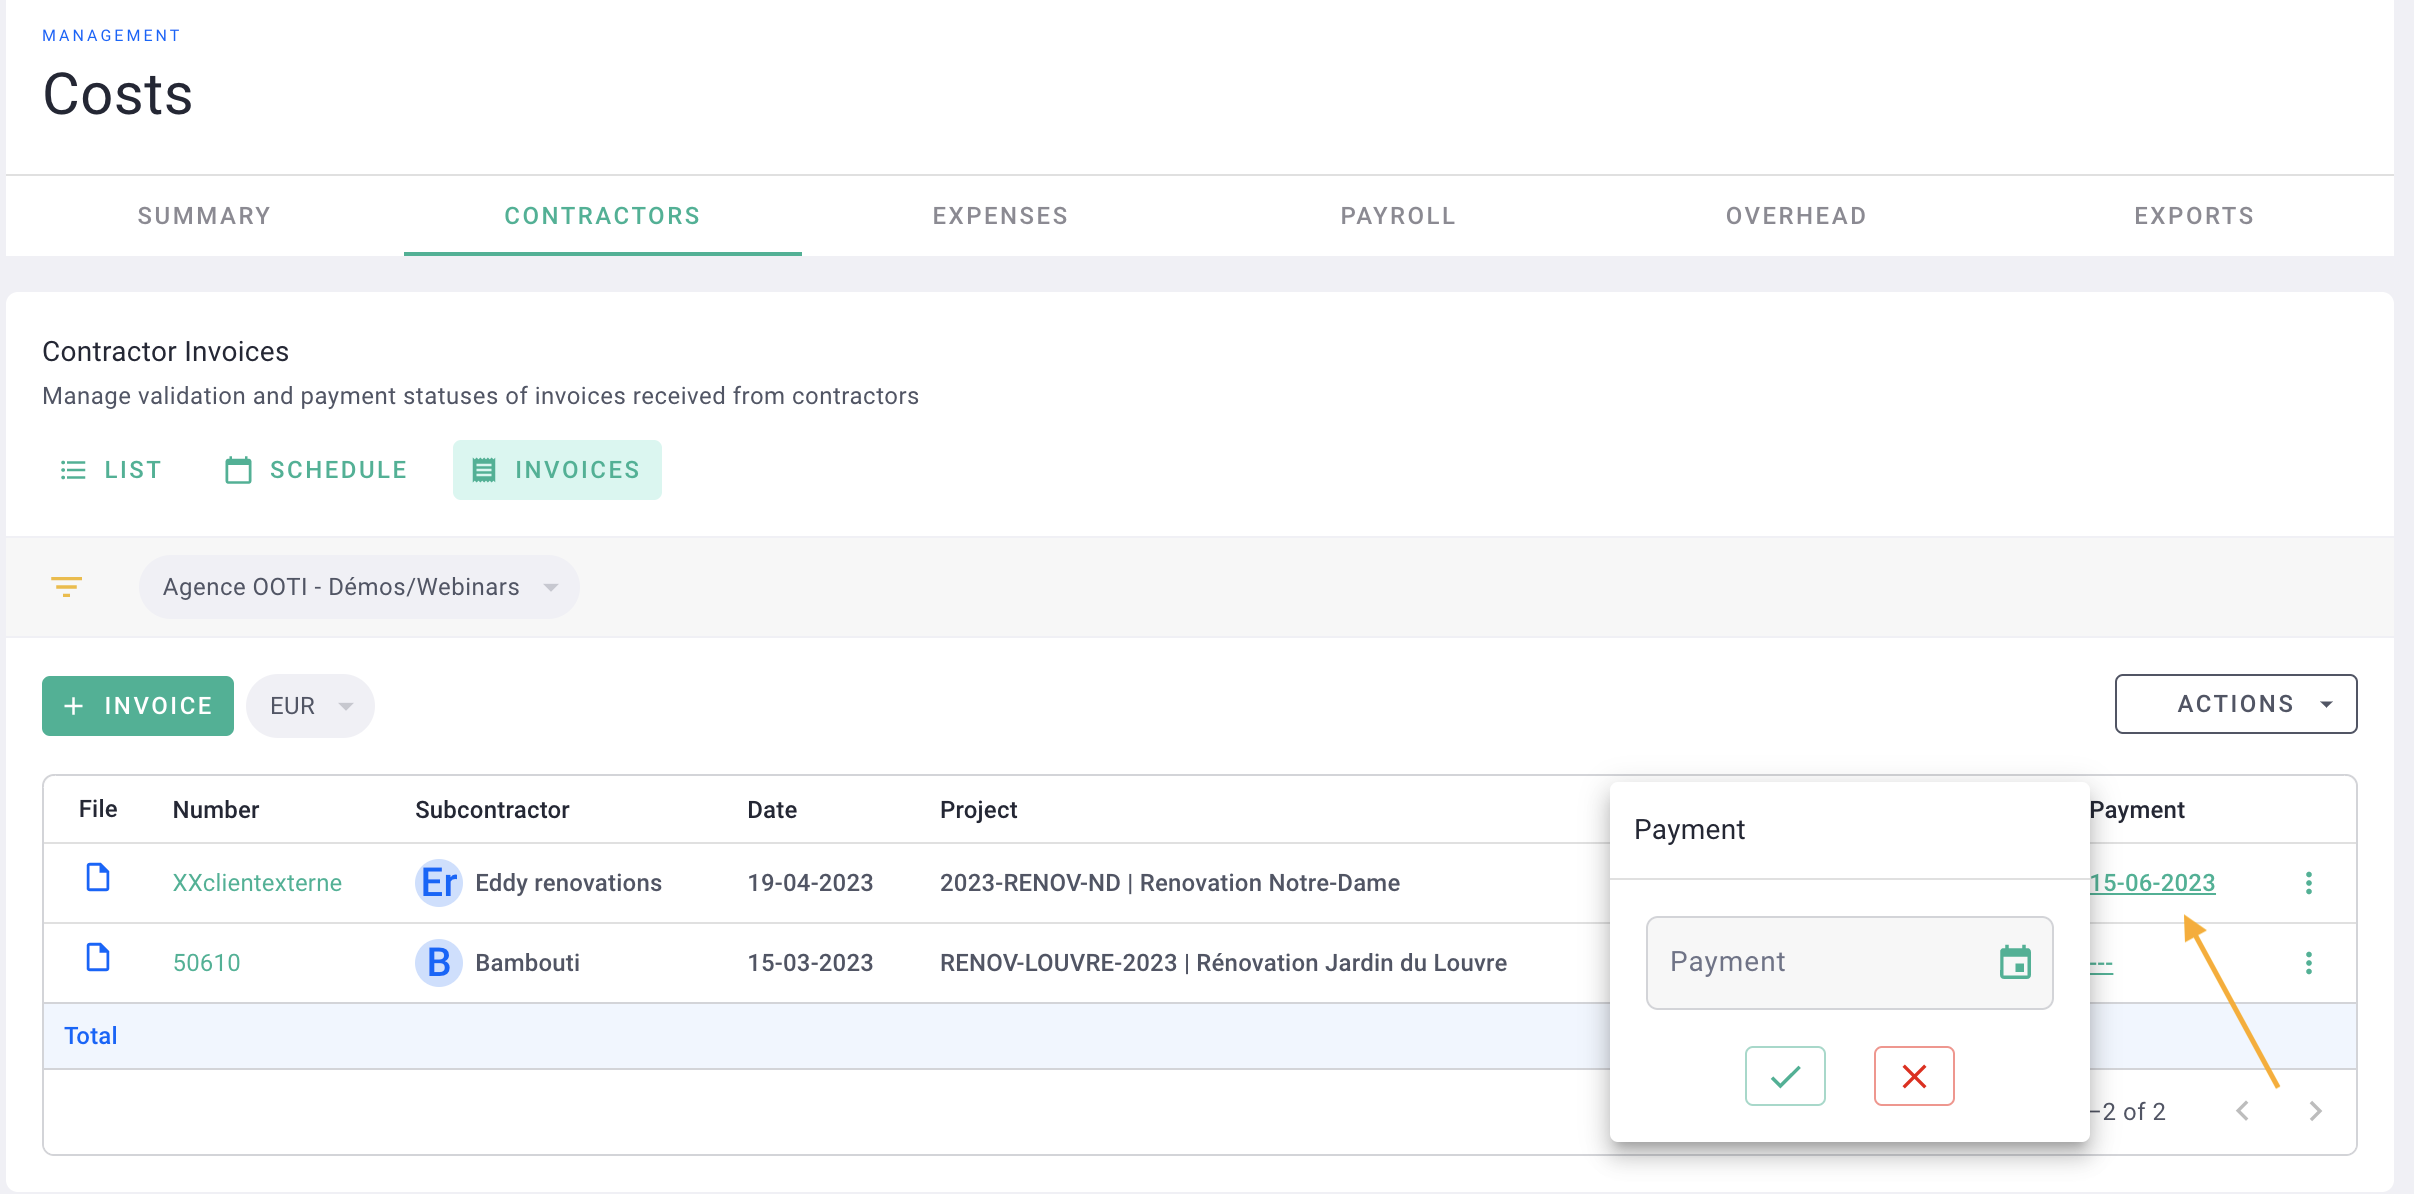
Once your invoice is correctly entered and approved, you can mark it as paid. In the invoice, enter the Payment Date or from the left-hand Costs menu > External Companies tab > Invoices tab, enter the Payment Date by clicking on the two green lines.
2) Automatically
✅ You can use the automatic generation of invoice items if subcontractors have been added to the project and their fee portion has been allocated in the Project Fees tab.
The process of creating a cost invoice in this case is exactly the same as explained in the chapter above.
The only difference is that instead of manually generating cost lines via the + Item button, we will click on the Generate Items button.
OOTI will retrieve the data entered in the Project Fees tab and automatically create cost lines. You only need to verify/modify the amounts, and you're done!
Done! 🎉
You know how to create a supplier invoice and allocate it to projects!