Send your invoices from OOTI using your own email address and domain by setting up SMTP for Gmail.
✅ Activating SMTP allows you to send emails from OOTI using your own email address instead of a generic OOTI address like noreply@ooti.co .
🔓 Required permissions
Super Admin
| Reading time | 5 mn |
| Setup length | 10 mn |
| Steps | 3 |
Summary
I/ Enable Two-Step Verification
II/ Generate the Password
1) Password Activation on Interface 1
2) Password Activation on Interface 2
I/ Enable Two-Step Verification
Go to your Gmail account and click on your profile picture or initial in the top right corner.
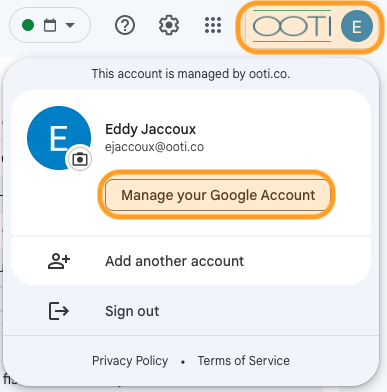
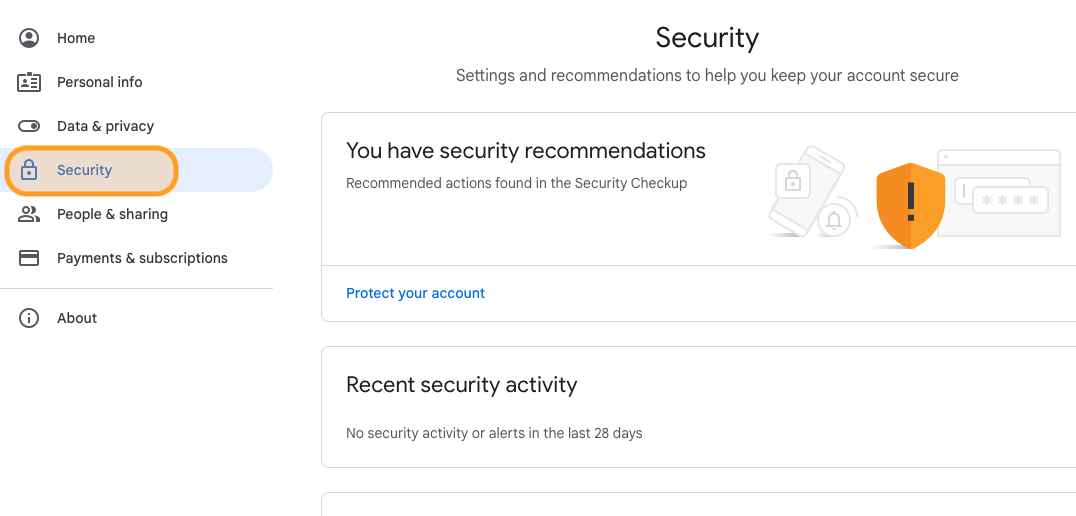
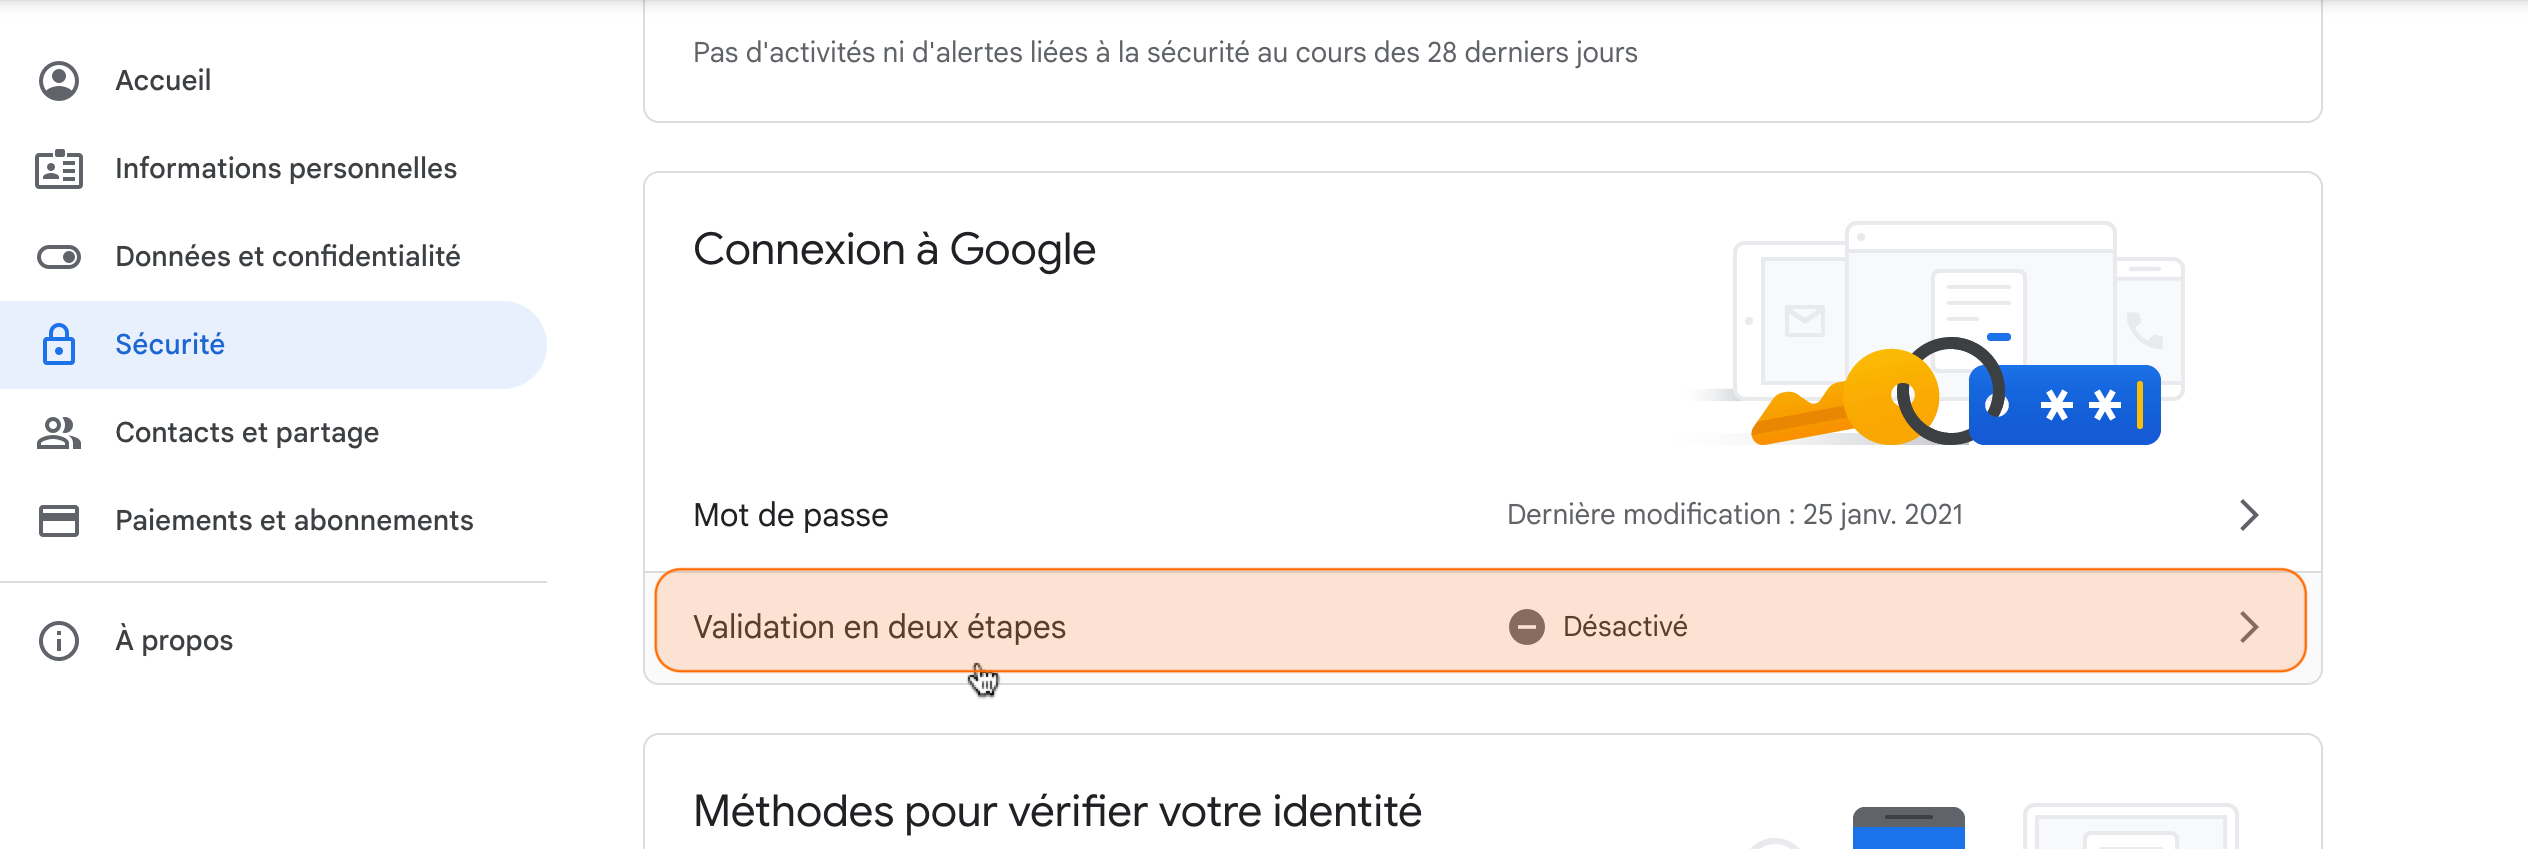
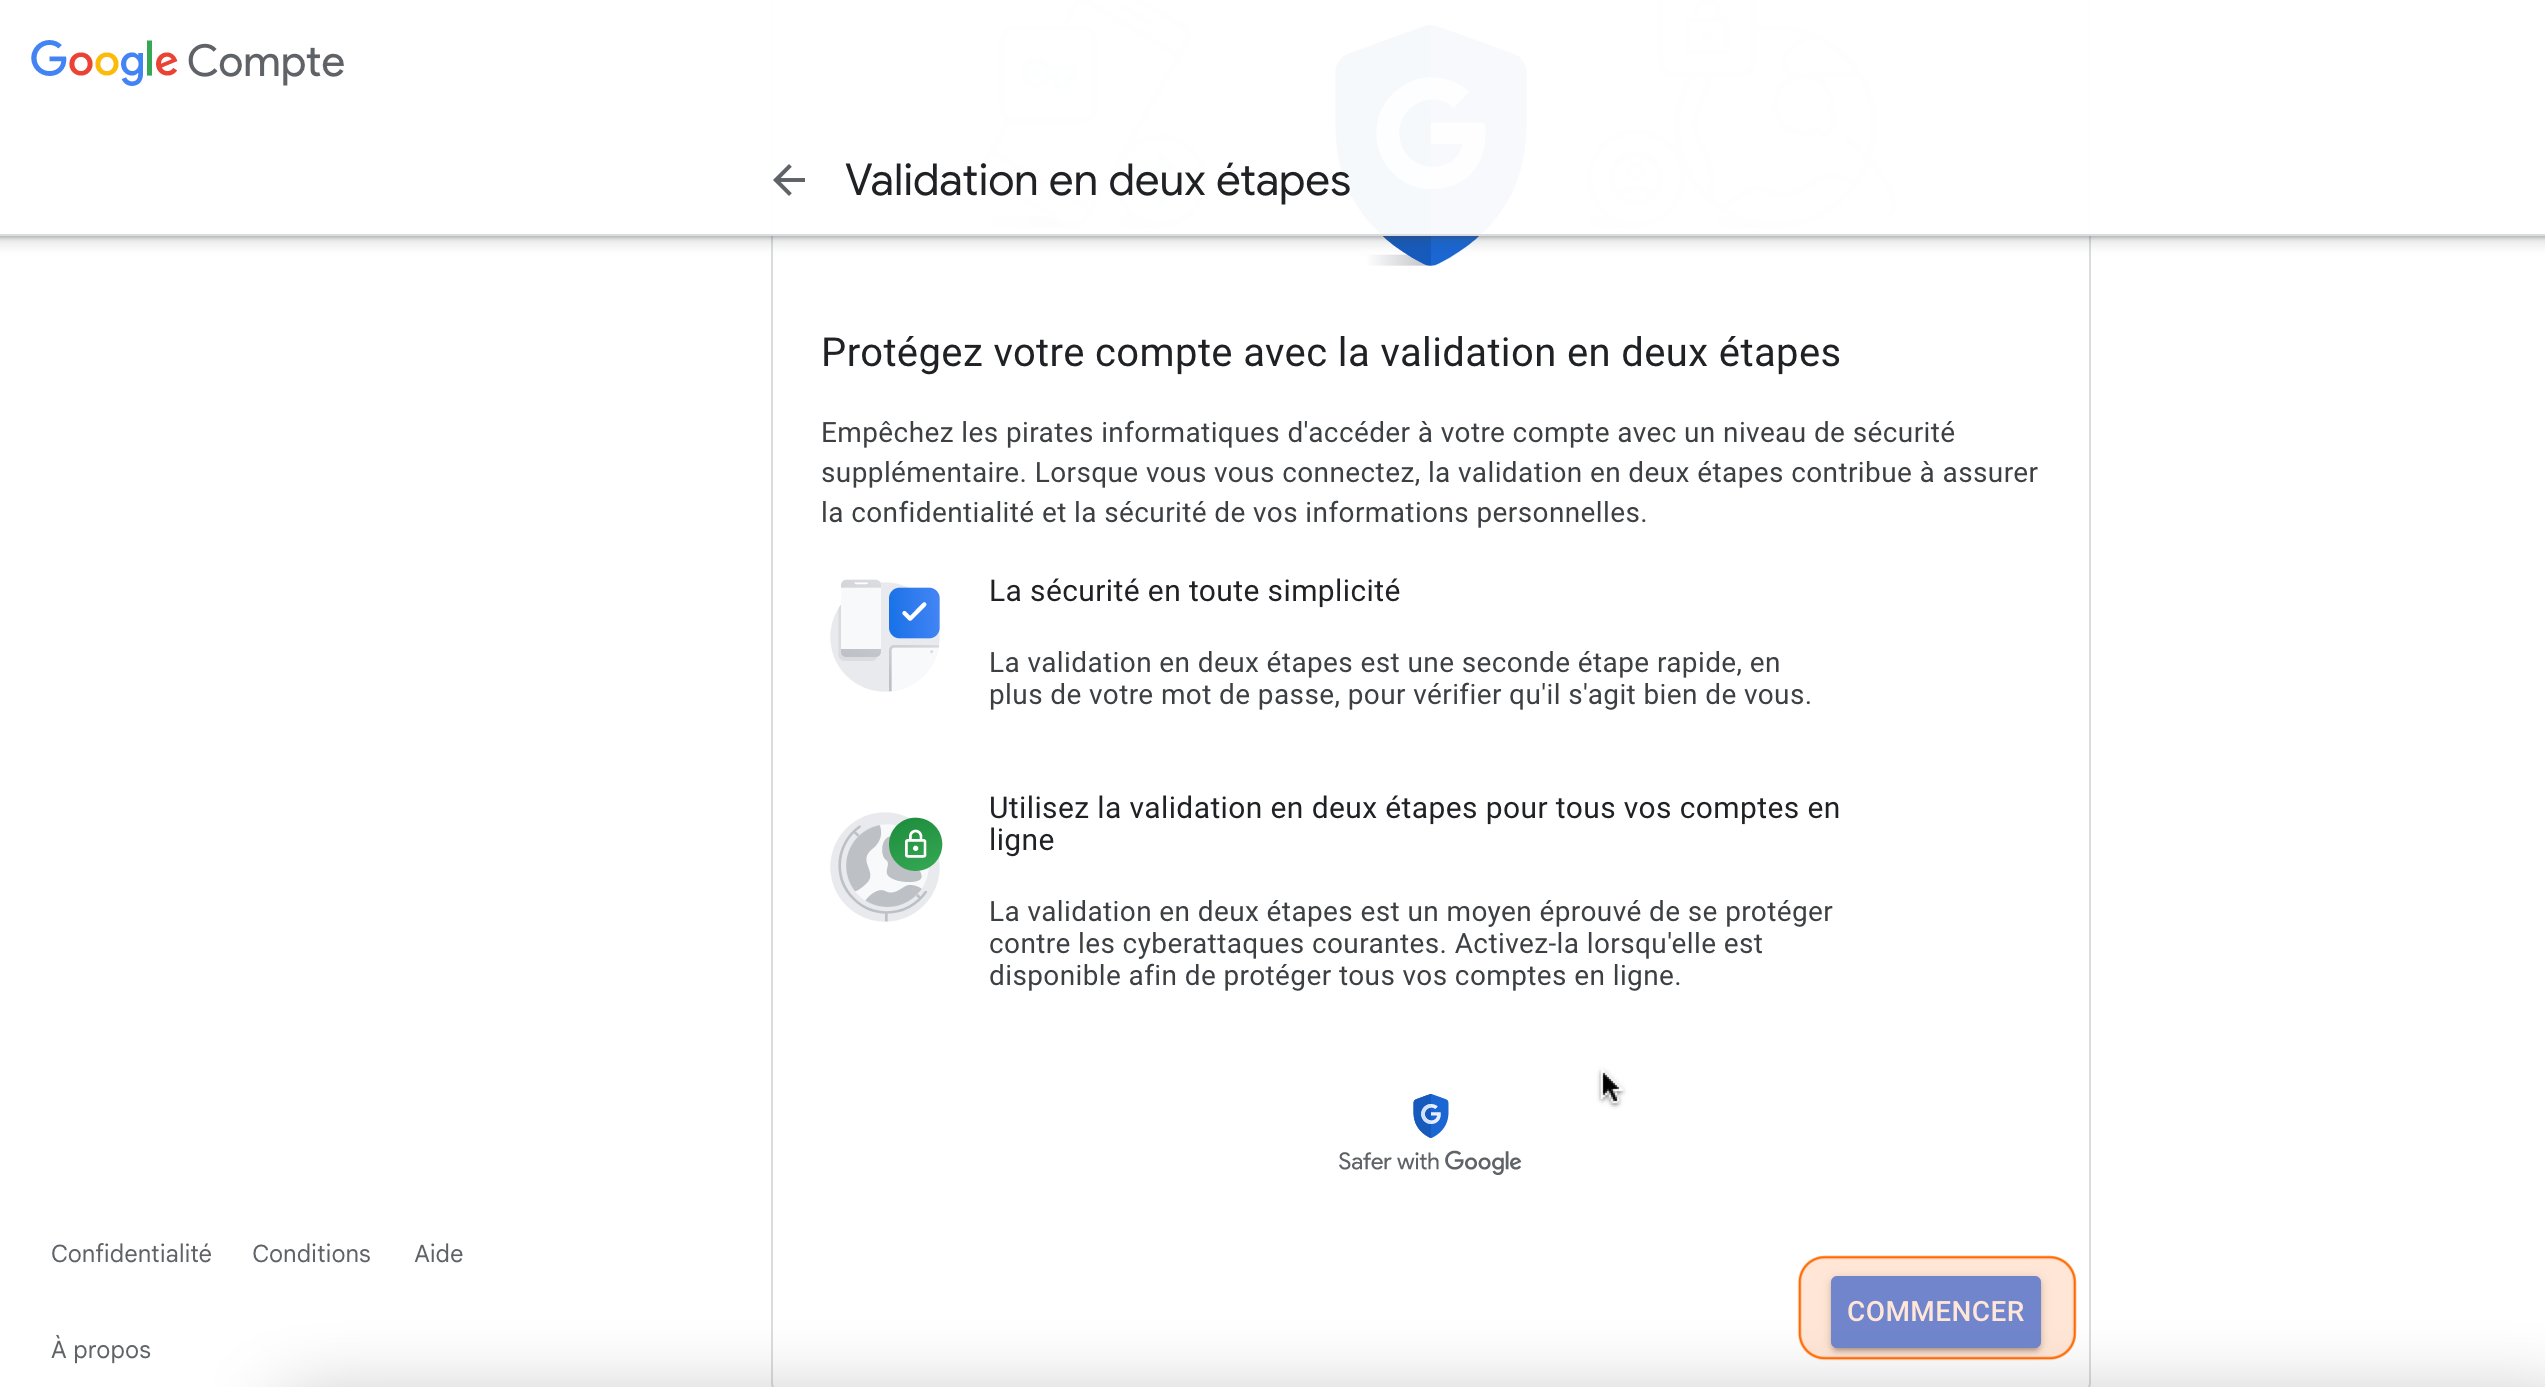
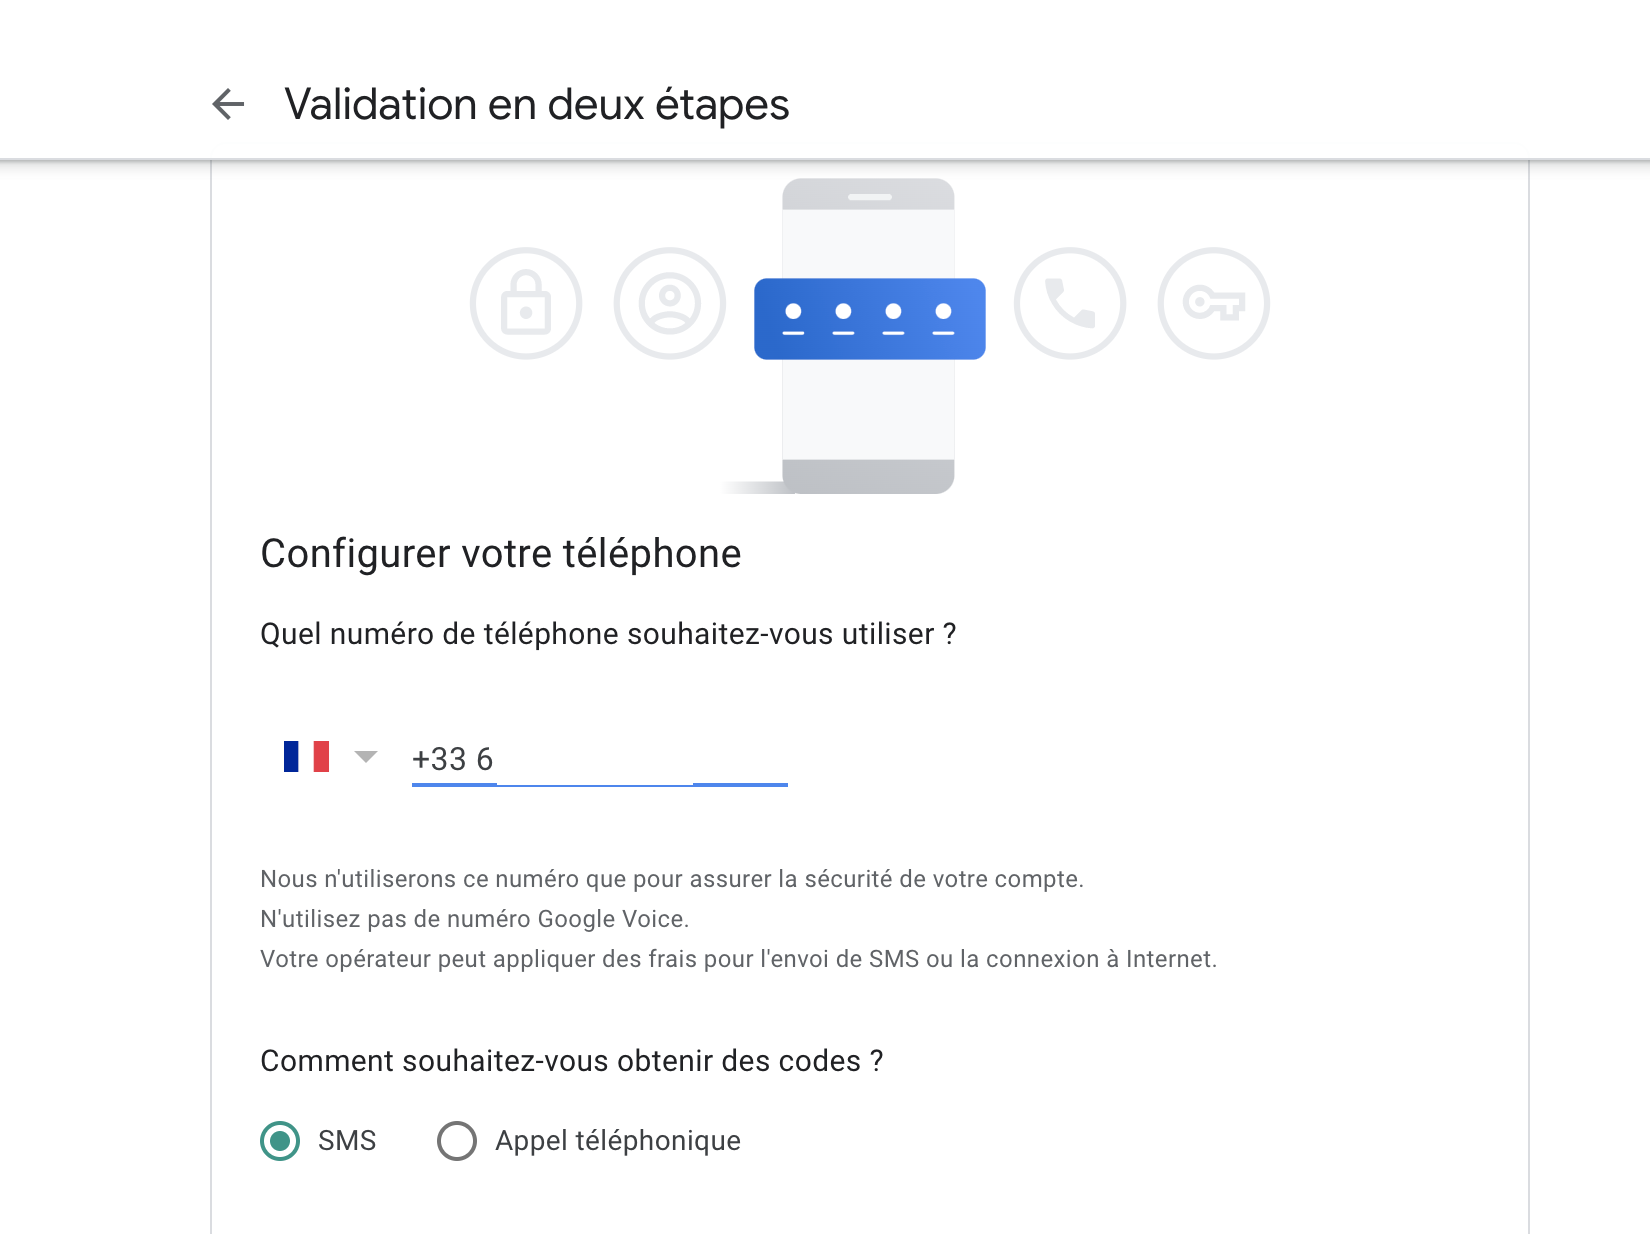
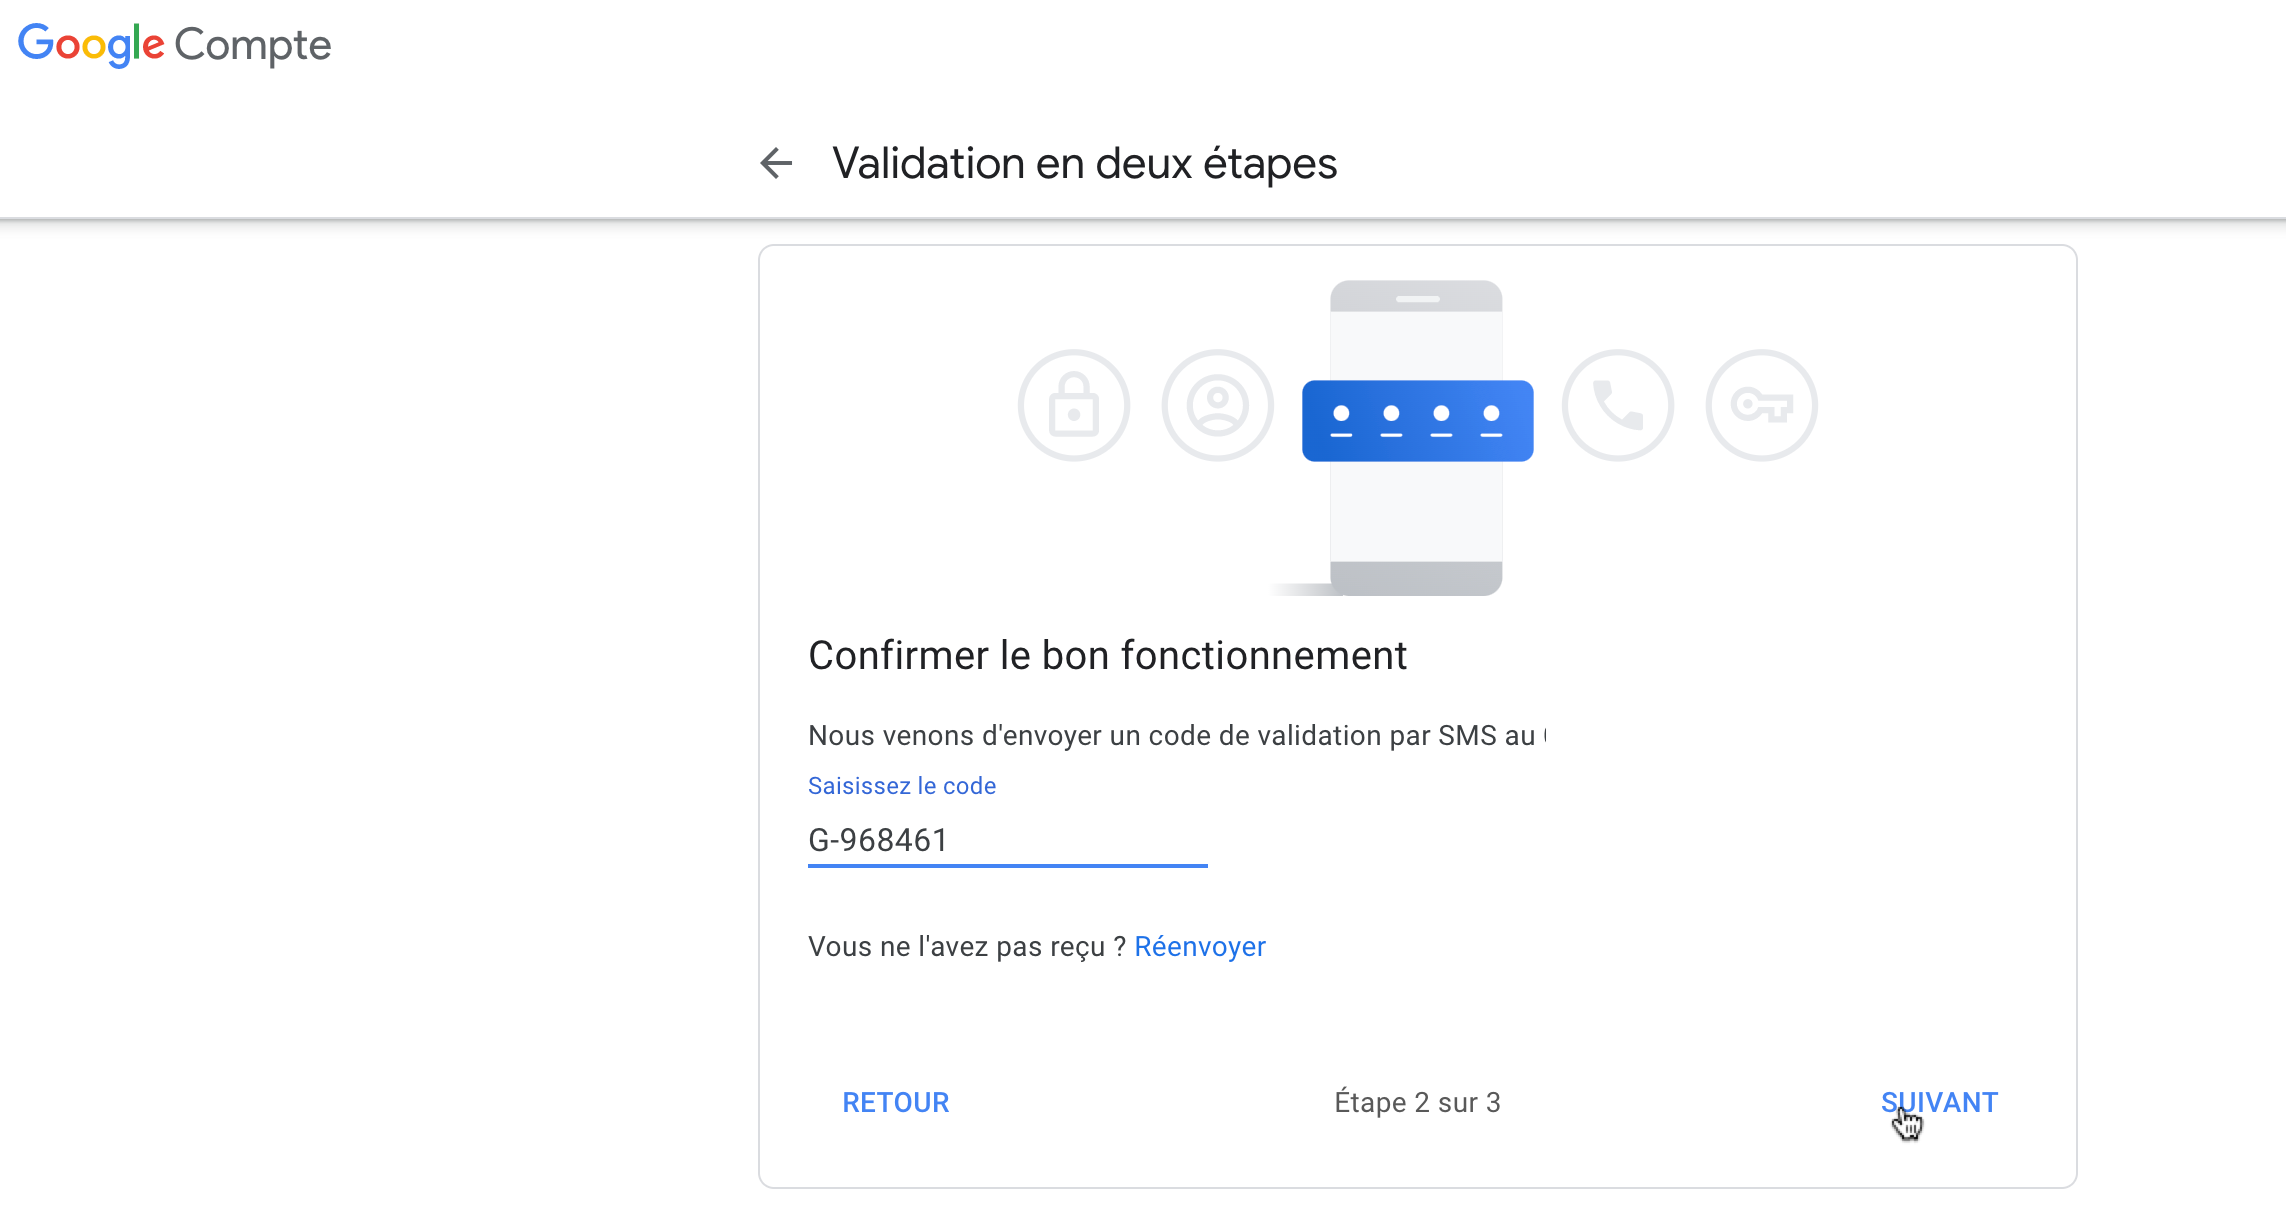
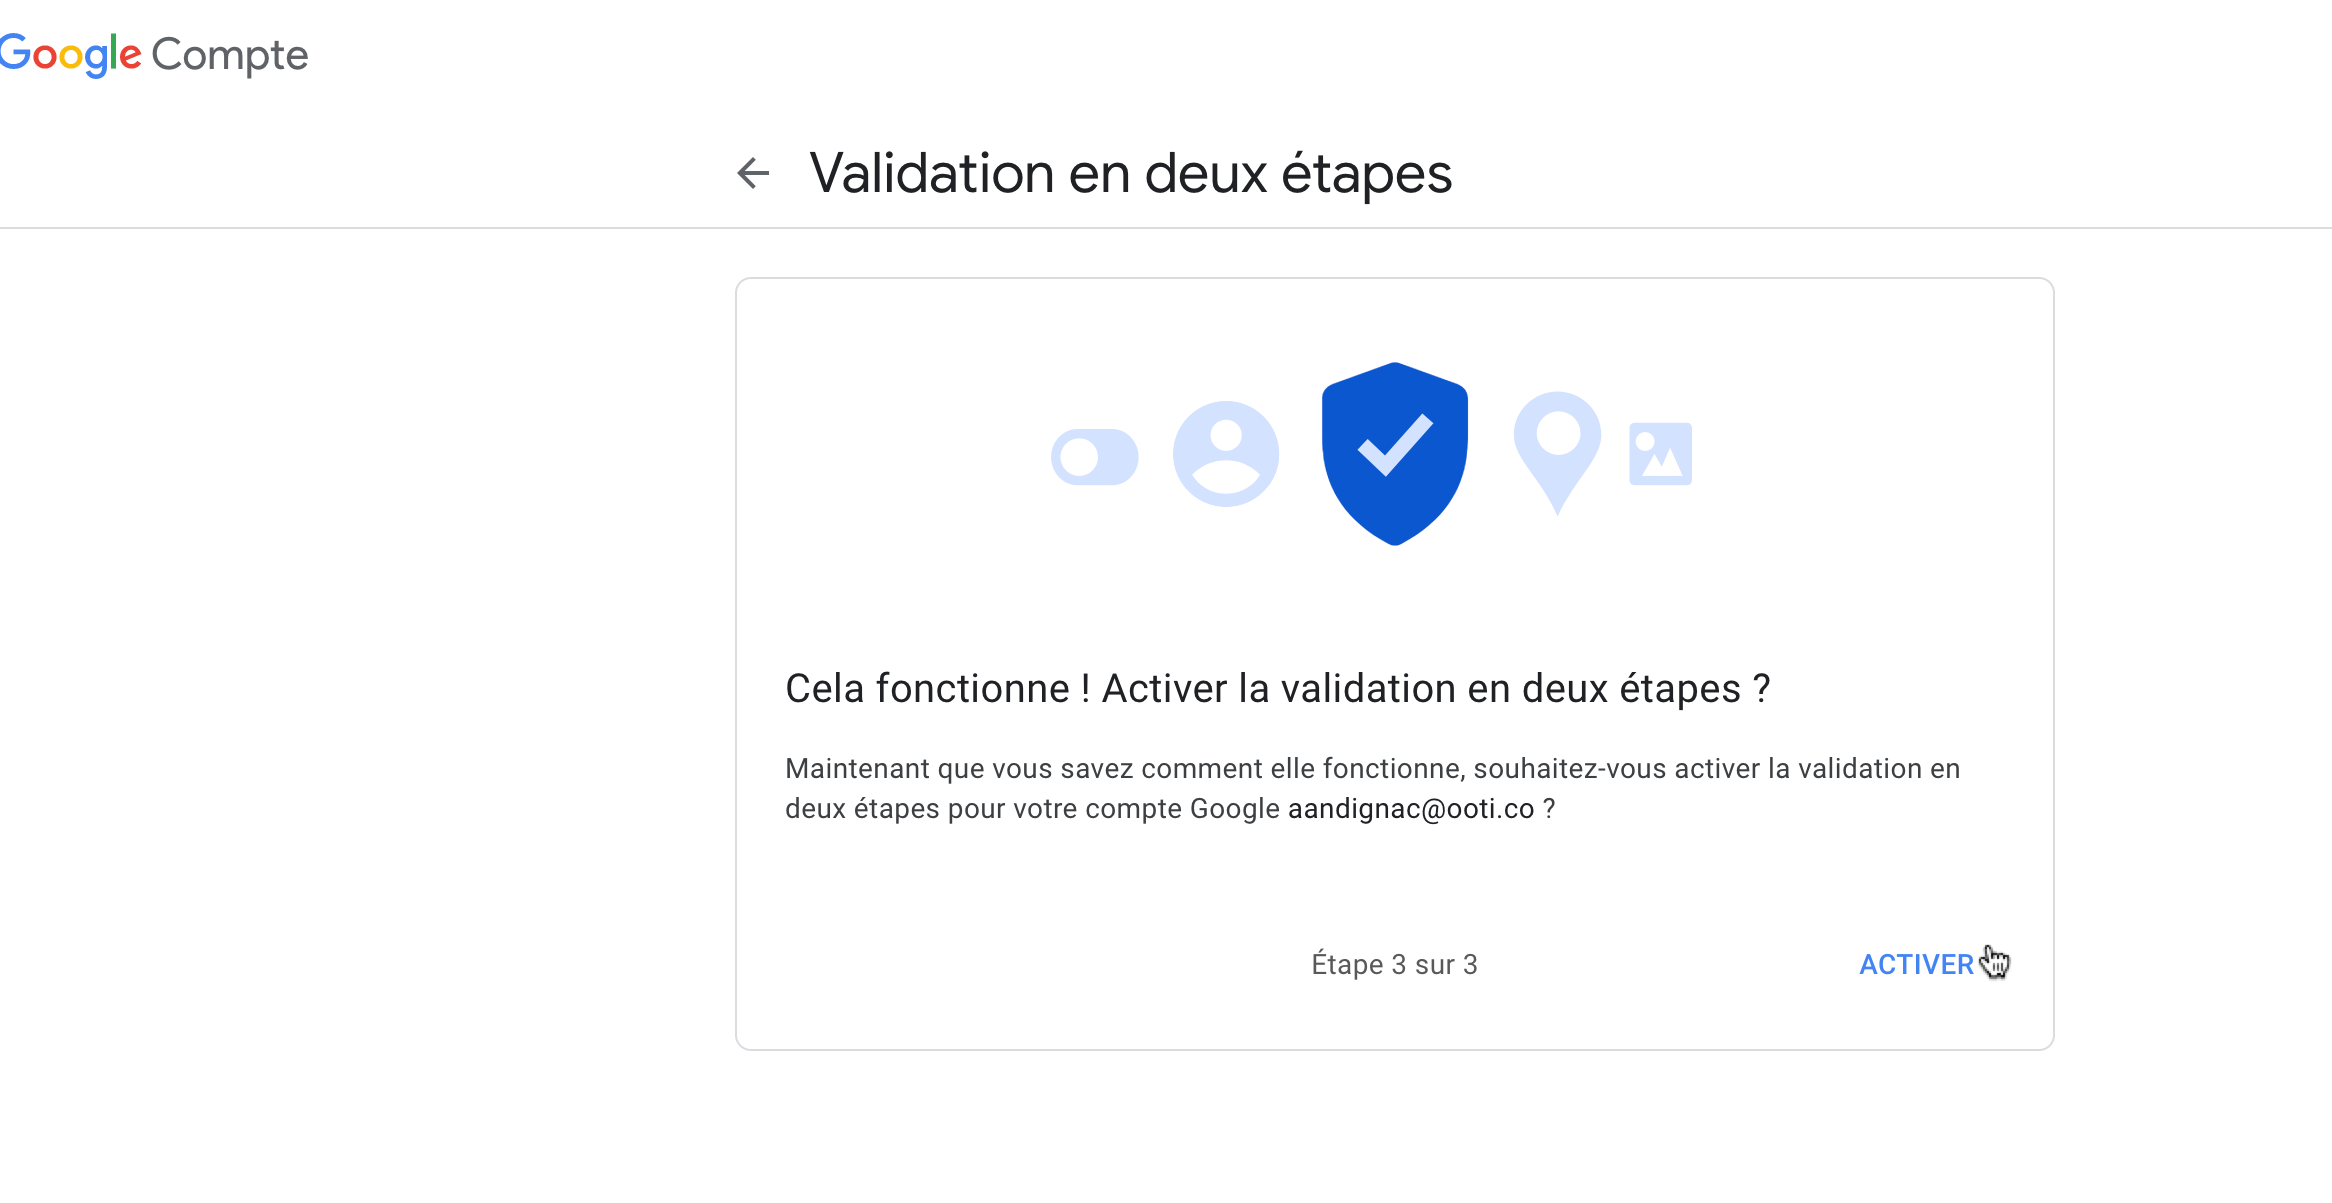
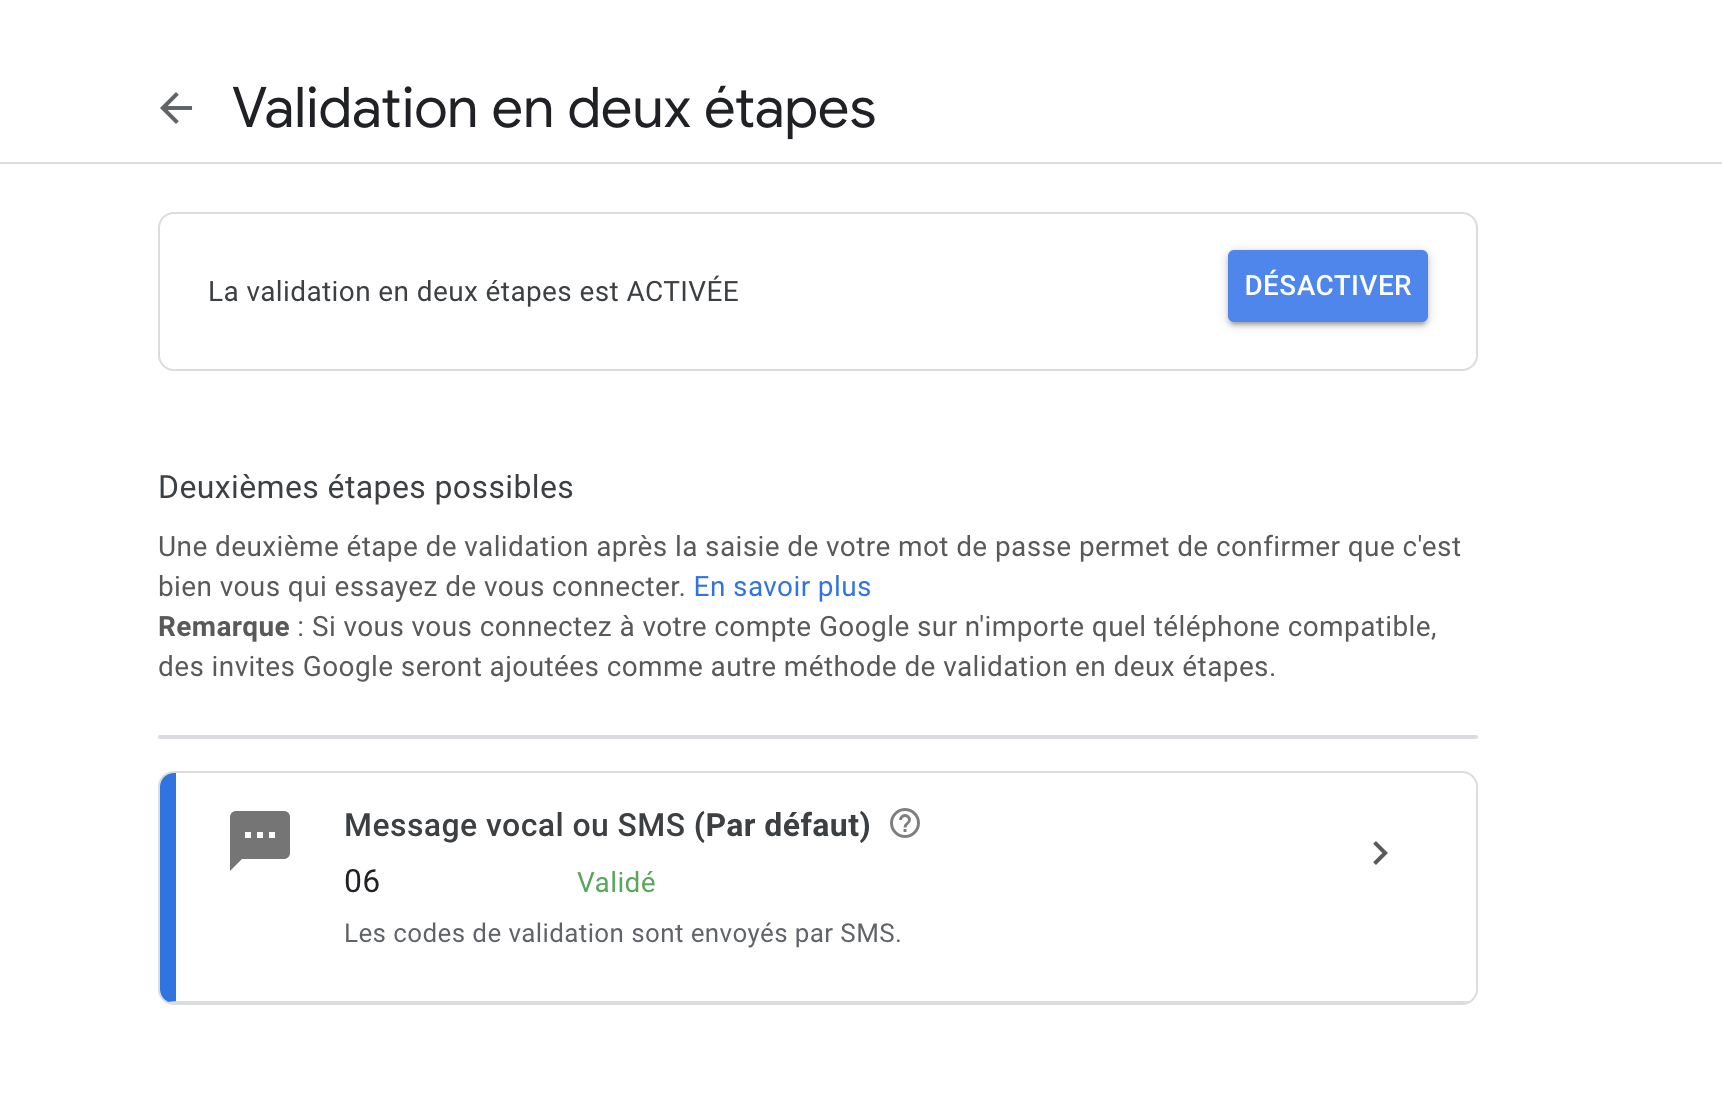
Now, you can click the back arrow in the top left corner next to "2-Step Verification."
II/ Generate the Password
1) Password Activation on Interface 1
⚠️ There are two different interfaces in Gmail depending on your email settings. Choose the section that corresponds to your interface.
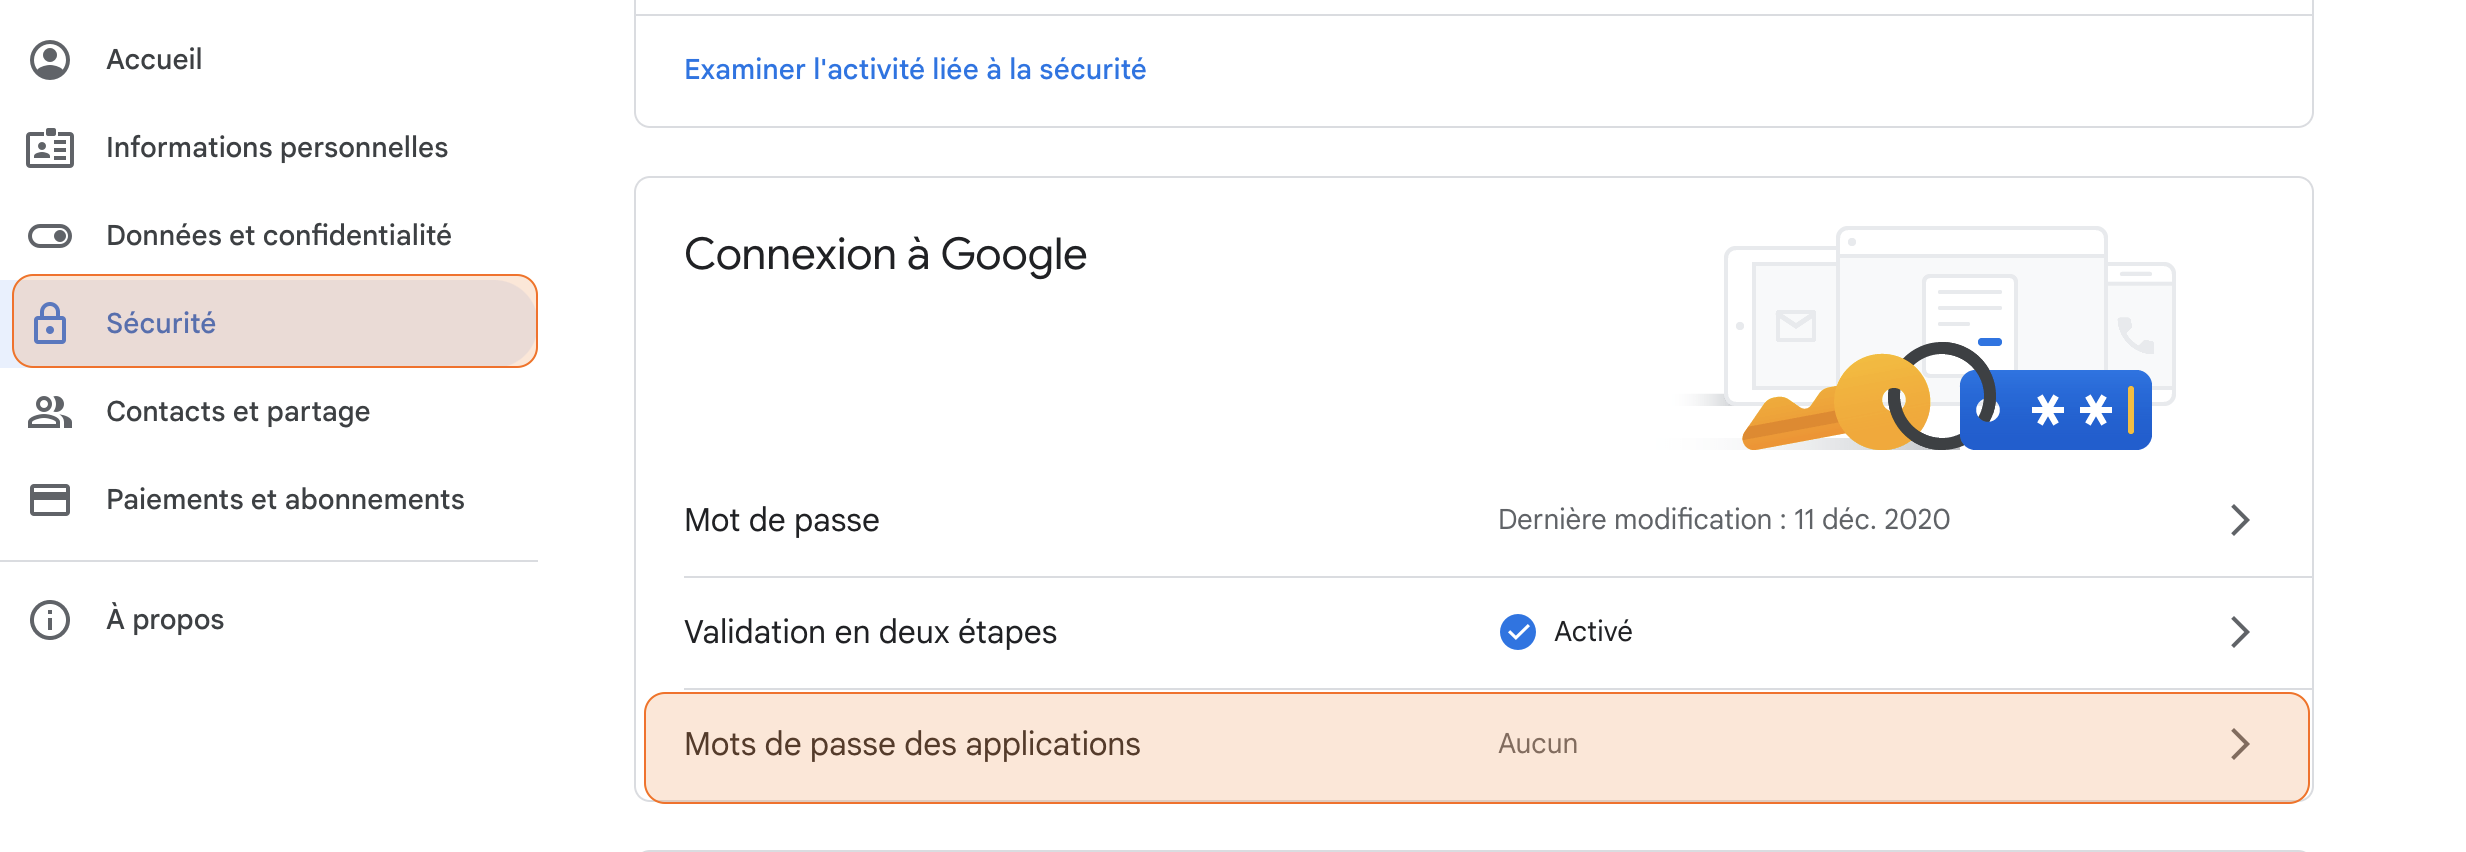
In the general menu, stay on "Security" and click on "App passwords."
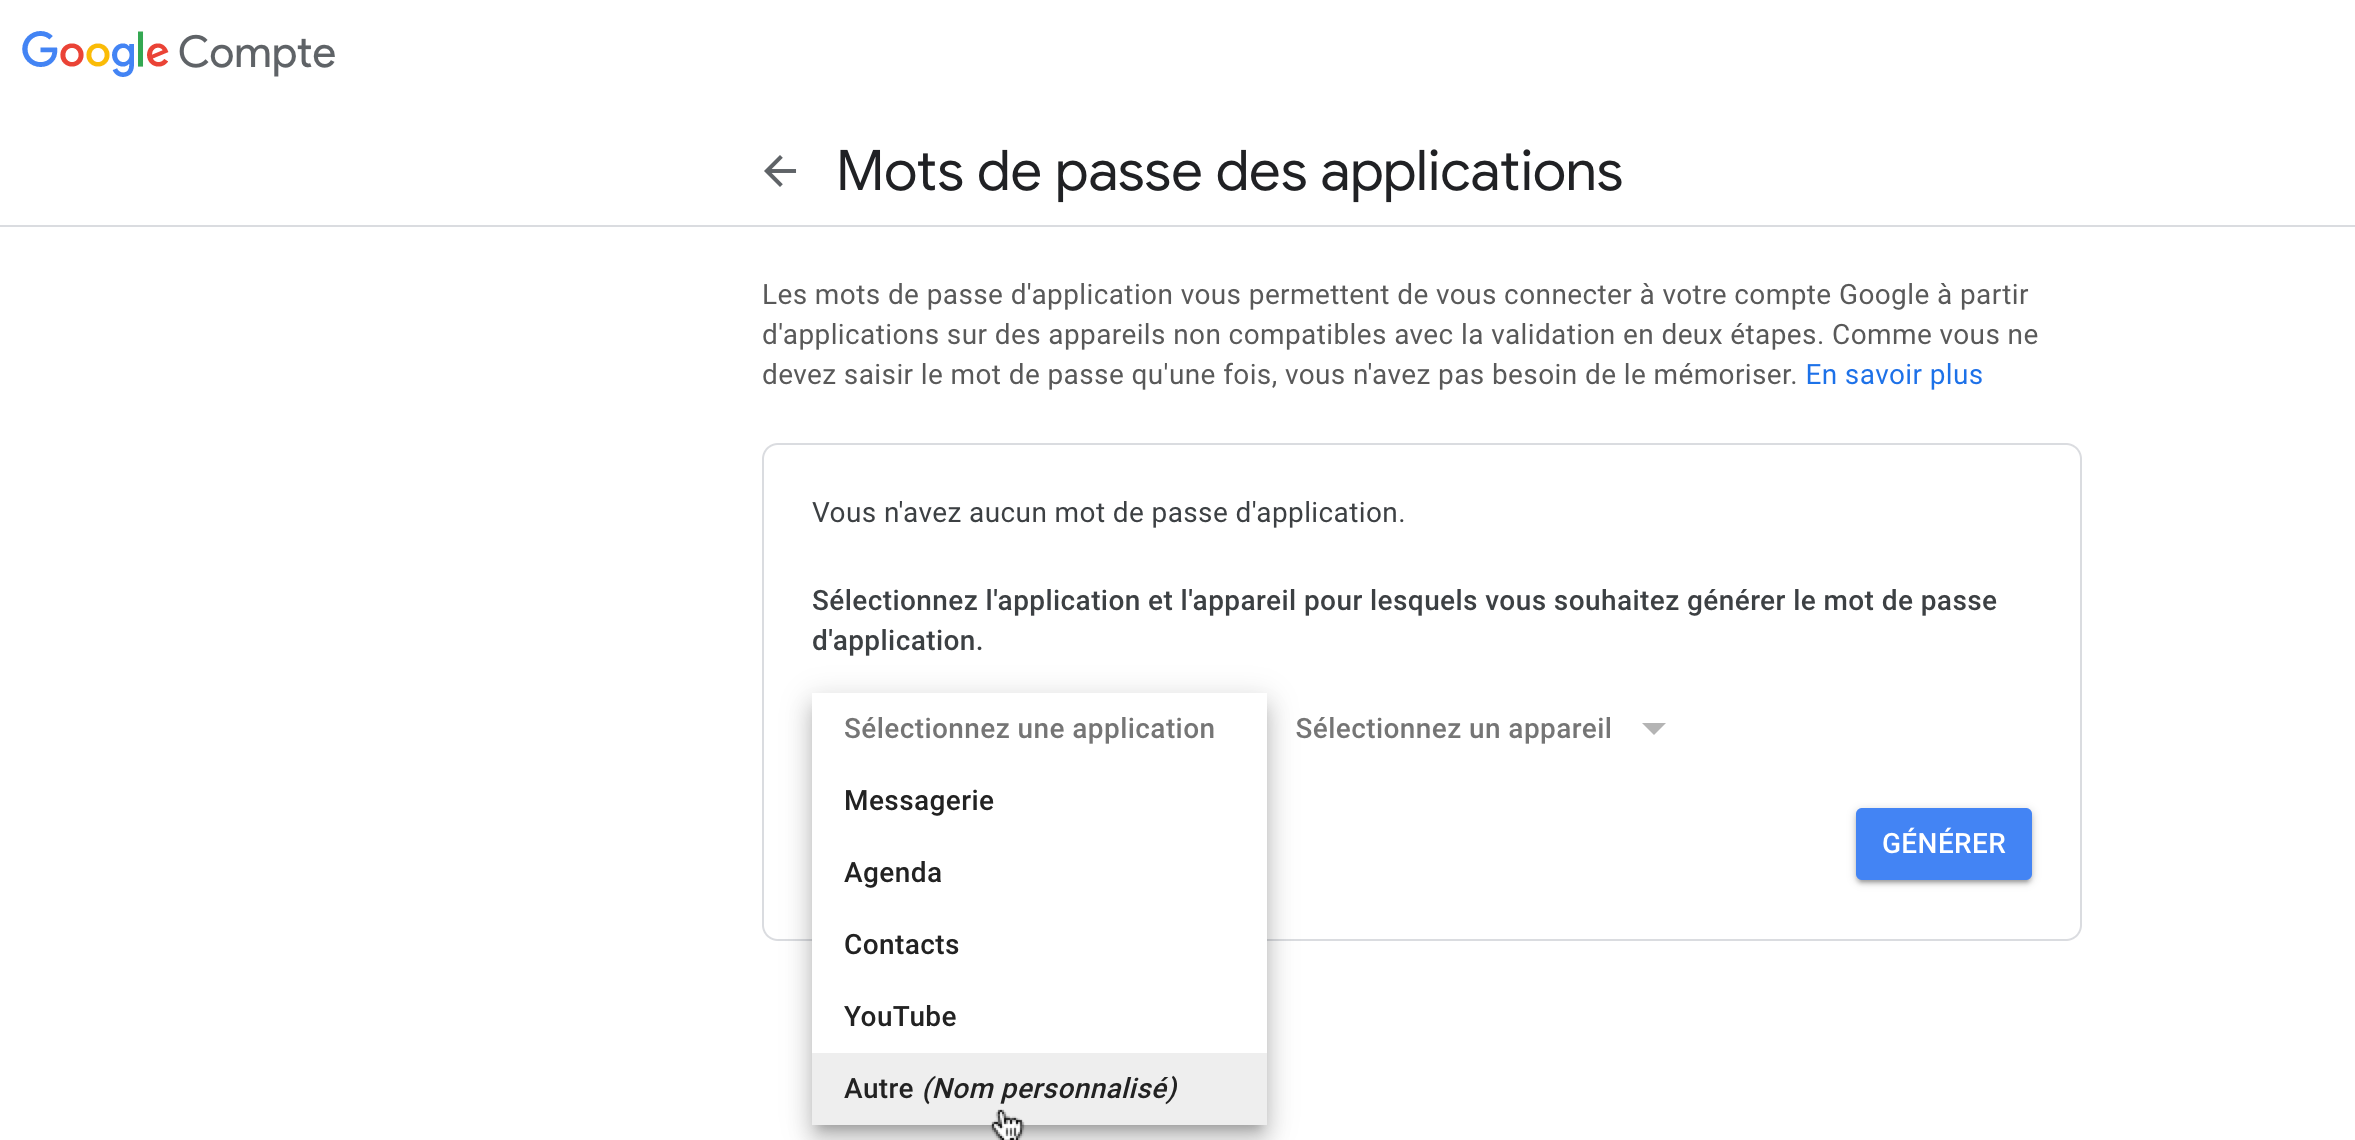
Select "Other" and enter "SMTP" for example, then choose your device (your computer) and click "Generate."
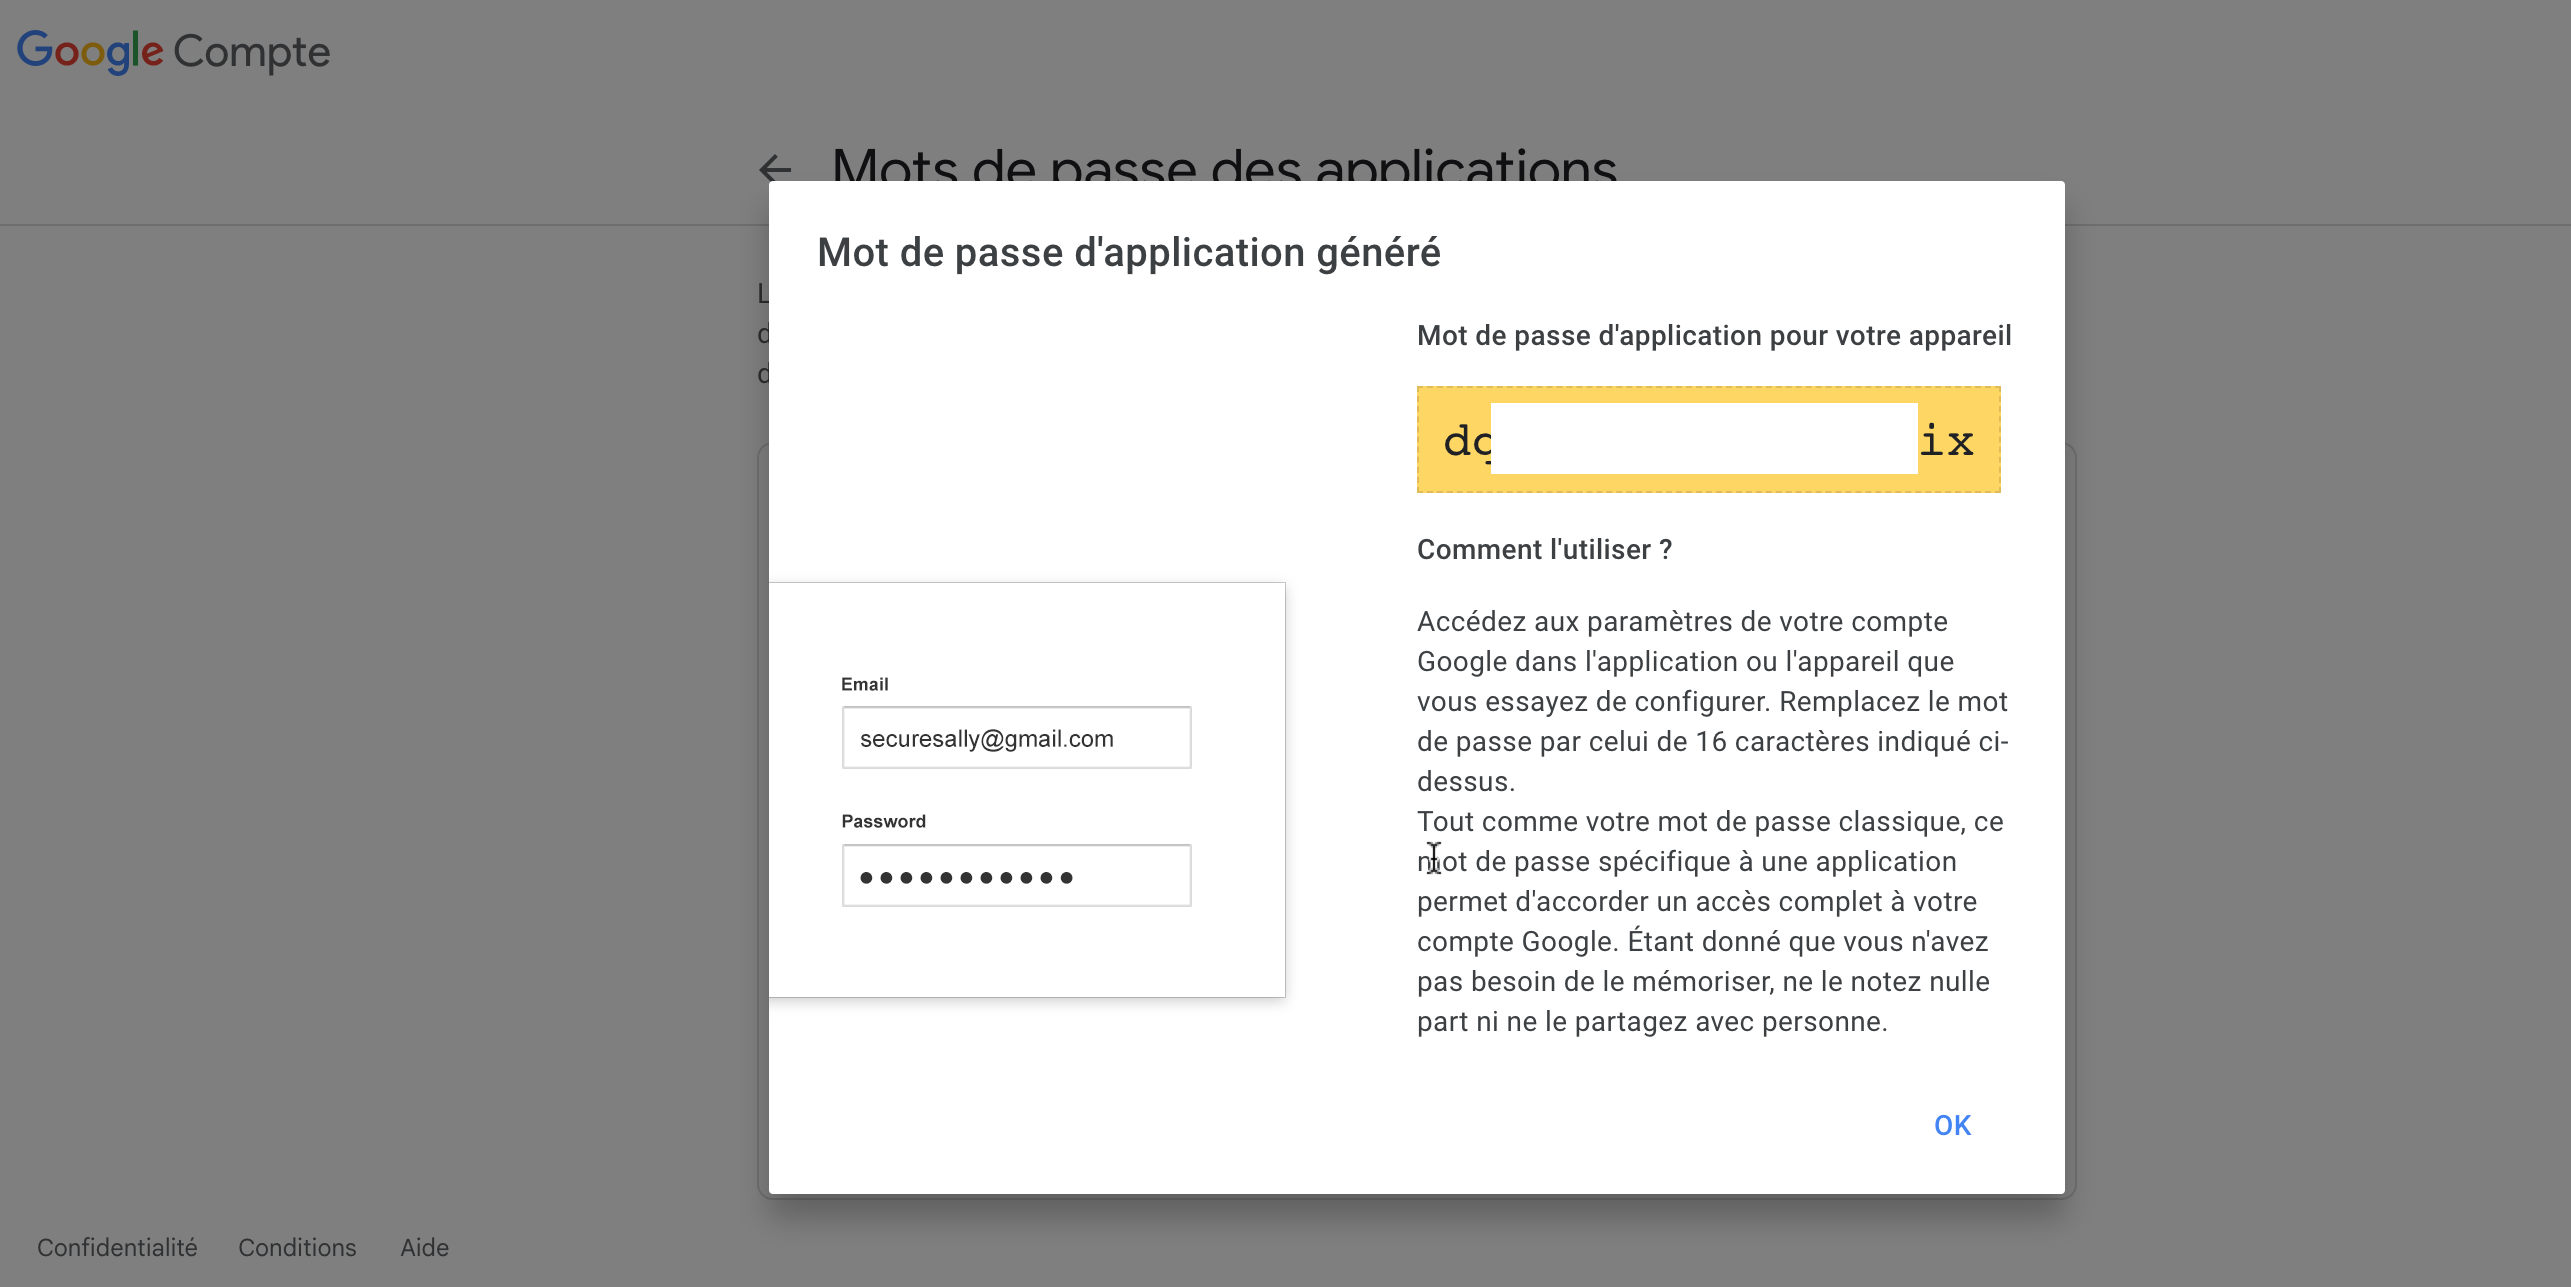
Gmail will generate a password to be saved in the yellow box. Please make sure to save this password. It will be used later on OOTI to connect your mailbox to OOTI.
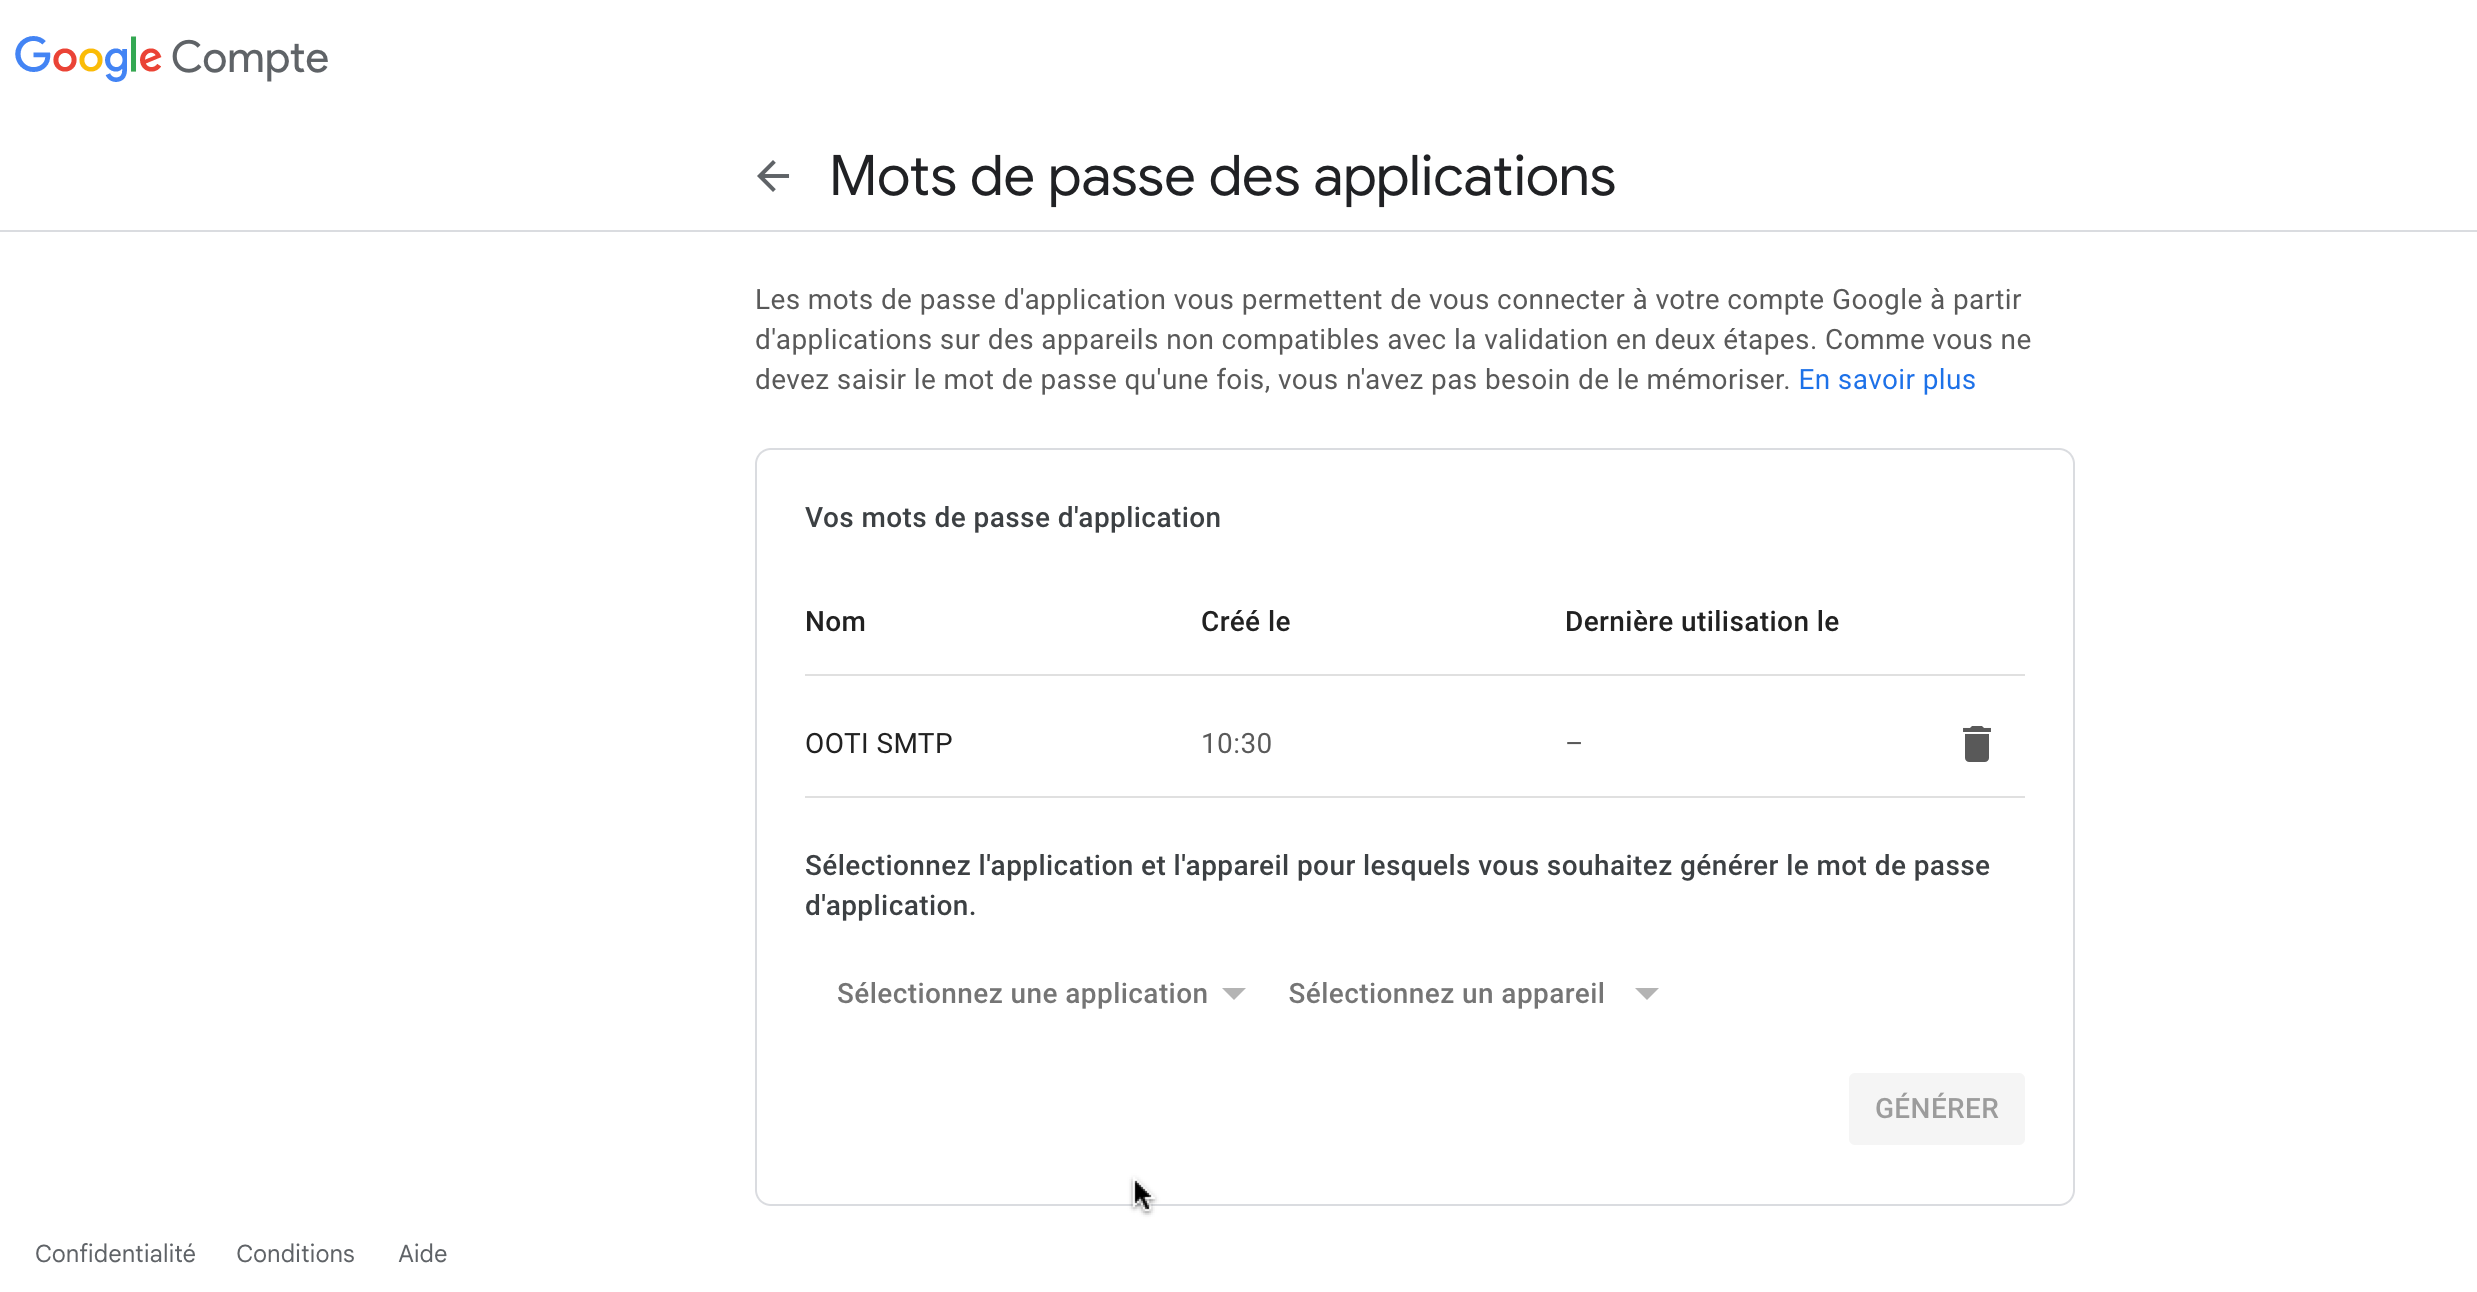
Your application-specific password for SMTP is generated.
2) Password Activation on Interface 2
In the general menu, stay on "Security" and click on "App passwords."

Then scroll down to the bottom of the page and click on "App passwords."
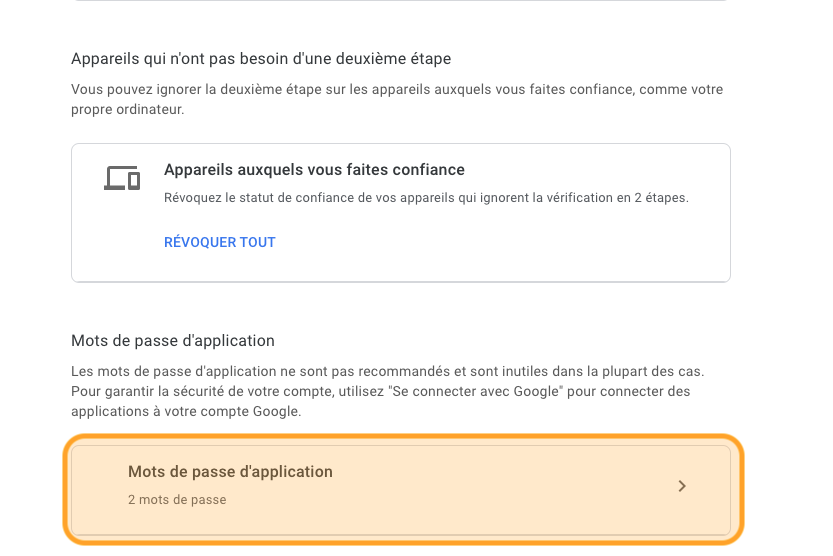
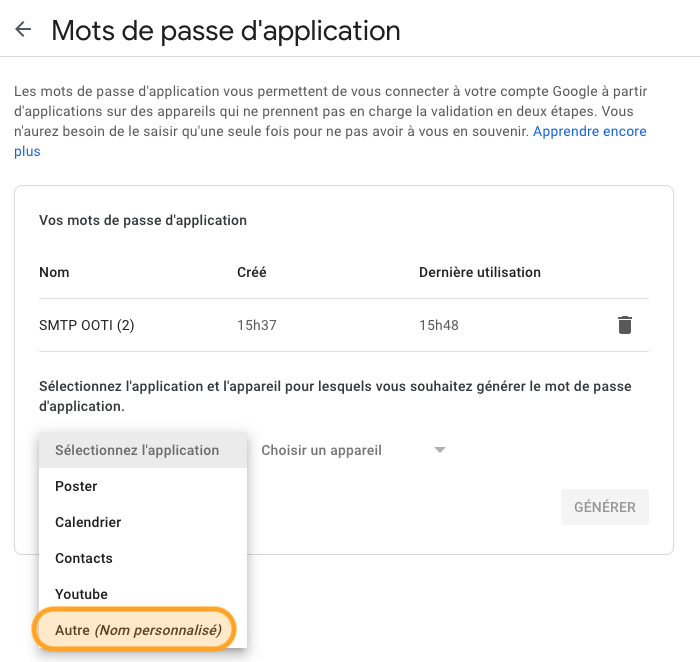
Next, select the field "Other (Custom name)."
Rename your field and click "Generate" to obtain the password.
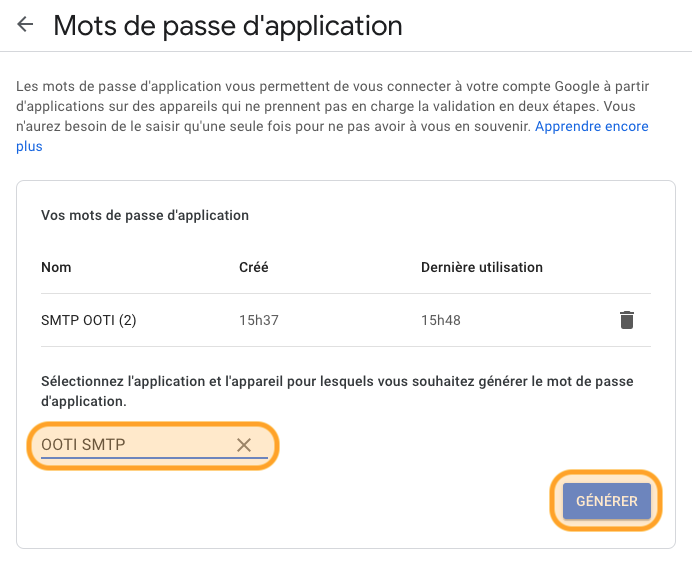
⚠️ The generated password is unique, so make sure to note it down carefully.
III/ Configure OOTI
Click on your First name at the top right corner.
Go to "Settings" > "Invoicing" on the left-hand side.
Click on "Emails" > "SMTP Settings" tab.
Enable SMTP by clicking on the toggle button.

Click on "+ Add SMTP Settings."

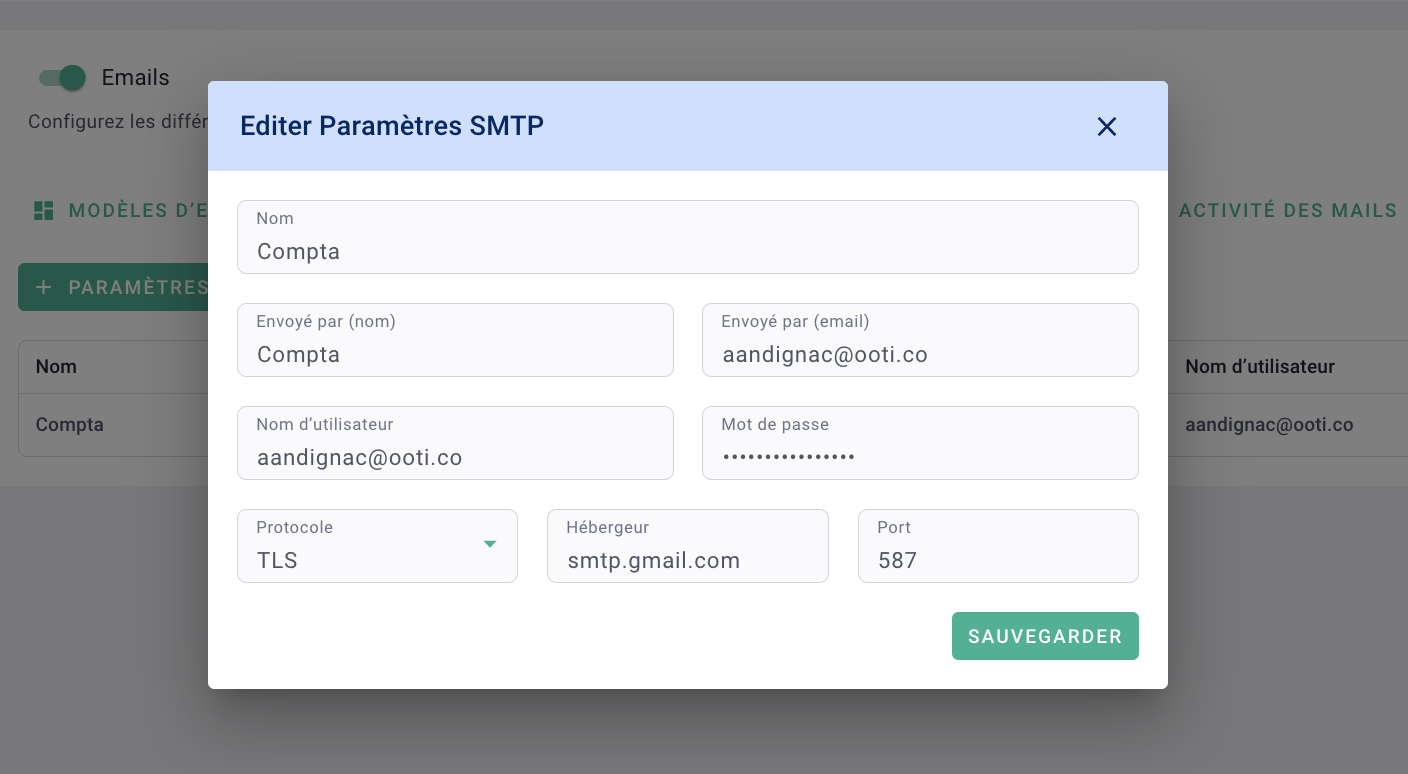
Fill out the form as follows (applicable for Gmail):
-
- Name: Title of the parameter for internal reference (not visible in the email).
- Sent by (name): Title/name of the sender (visible in the email).
- Sent by (email): Sender's email address (visible in the email).
- User name: Your email address (must be the e-mail address of an active license on your account).
- Password: Password generated by your email provider.
- Protocol: TLS.
- Host: smtp.gmail.com.
- Port: 587.
Click on Save.
Next, click on the options "..." and select "Verify settings."
After a few minutes, the status should change to "Verified."
Don't forget to assign the SMTP mail in the "Email Templates" tab. Click on a template, and in the "SMTP" field, select the one you just created.
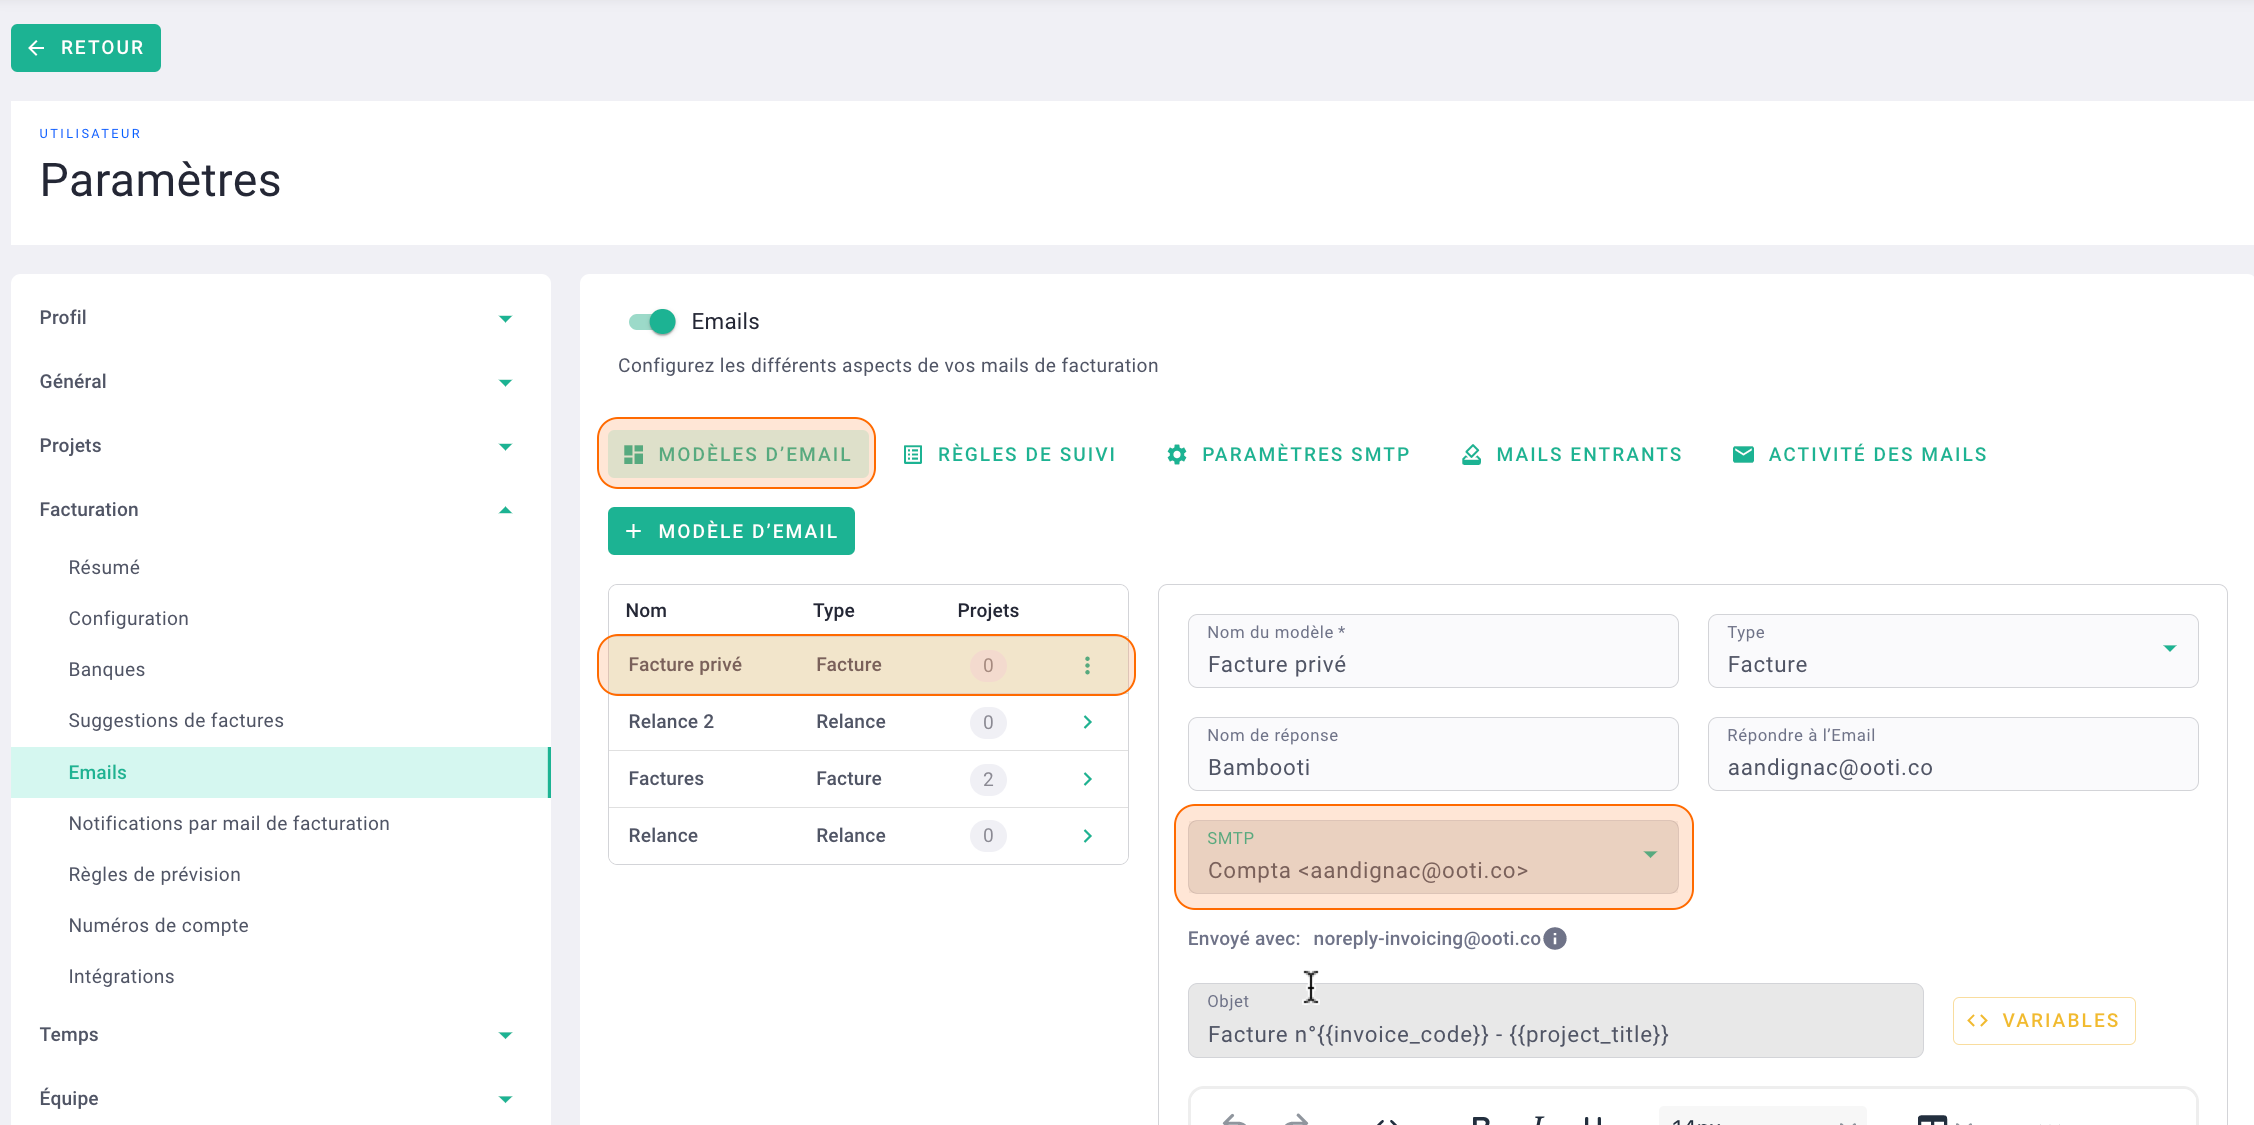
Now you can send your emails (invoices, subcontractors' certificates, and reminders) from OOTI using your email! 🎉
Configure multiple SMTPs if you want the sending mailbox to be different for different templates. For example, you can have one address for sending invoices and another for reminders.
