Create and write your fee proposals/quotes and upload them. Re-use your proposal for other opportunities.
🔓 Required permissions
Team: View Pipelines and Manage Pipelines
| Reading time | 5 min |
| Setup length | 10 min |
| Steps | 4 |
Summary
I/ Configure the style guide
II/ Create a proposal
III/ Write the proposal
IV/ Save a proposal as a template and reuse it
I/ Configure the style guide
You can create a style guide to your proposals.
💡 Click here to know everything about the graphic charter
II/ Create a proposal
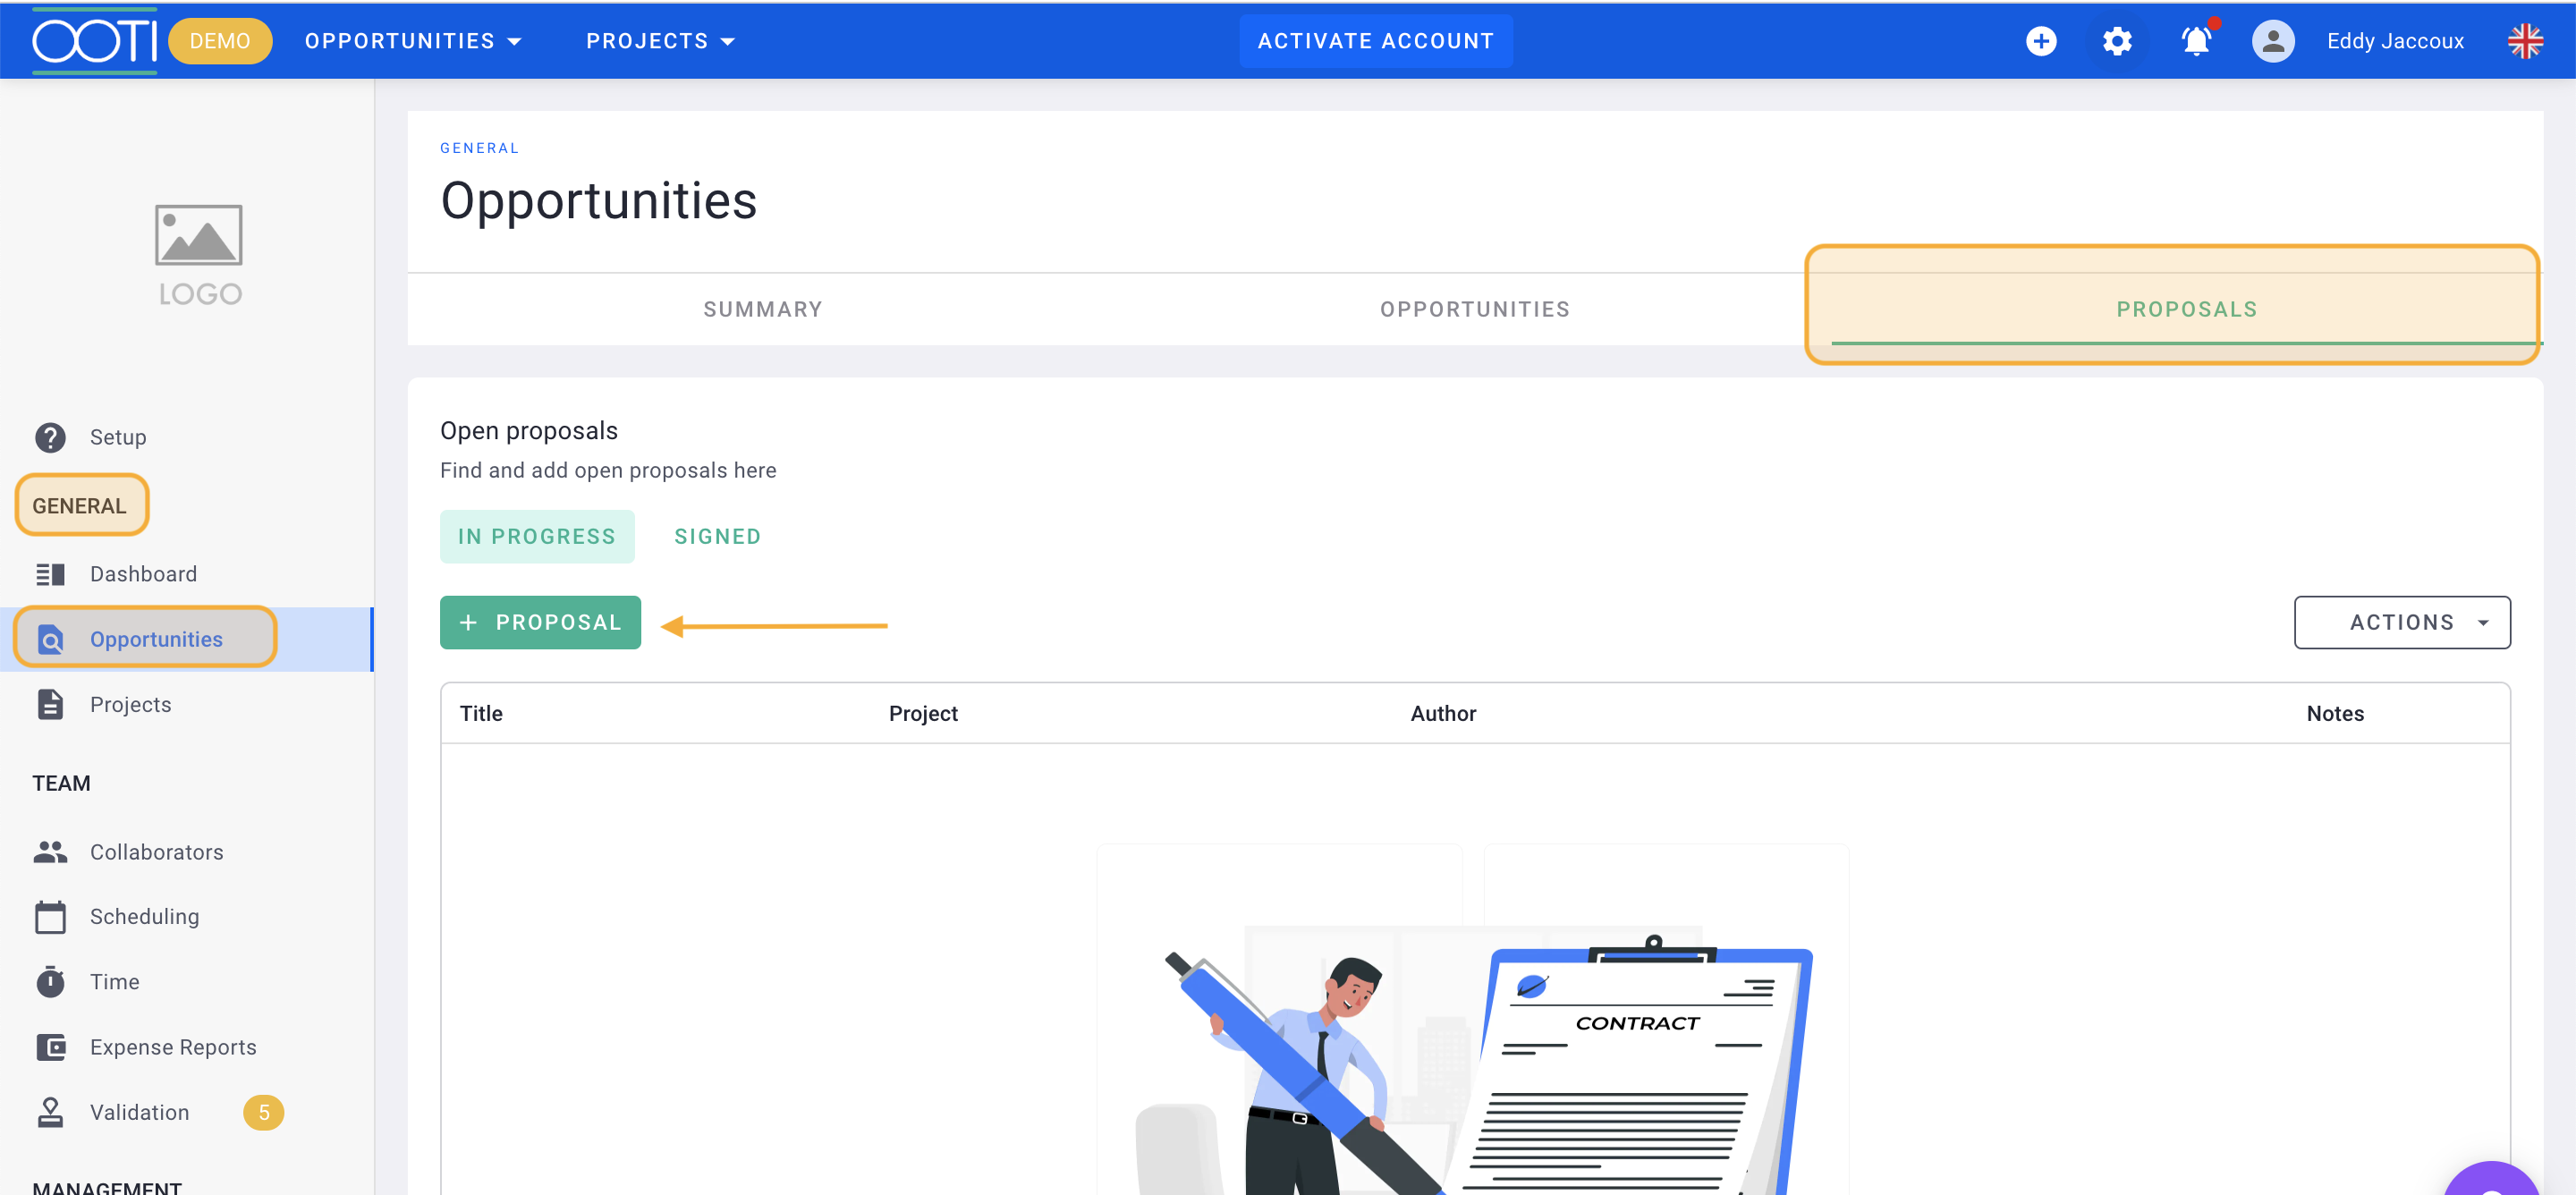
To create a proposal, go to General > Opportunities > Proposals.
Then click on proposal and choose your opportunity.
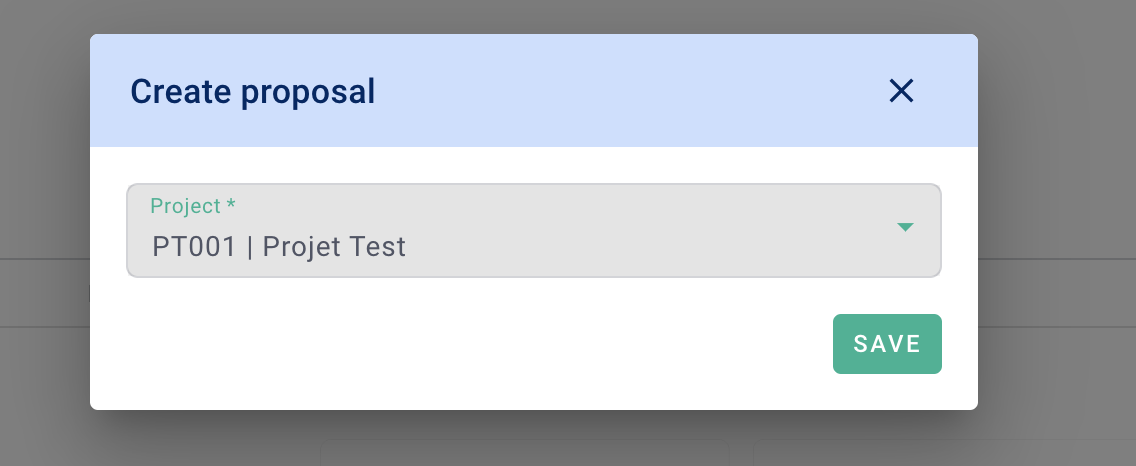
💡 You can also go to your deal (opportunity or project) then click on fees > proposals.
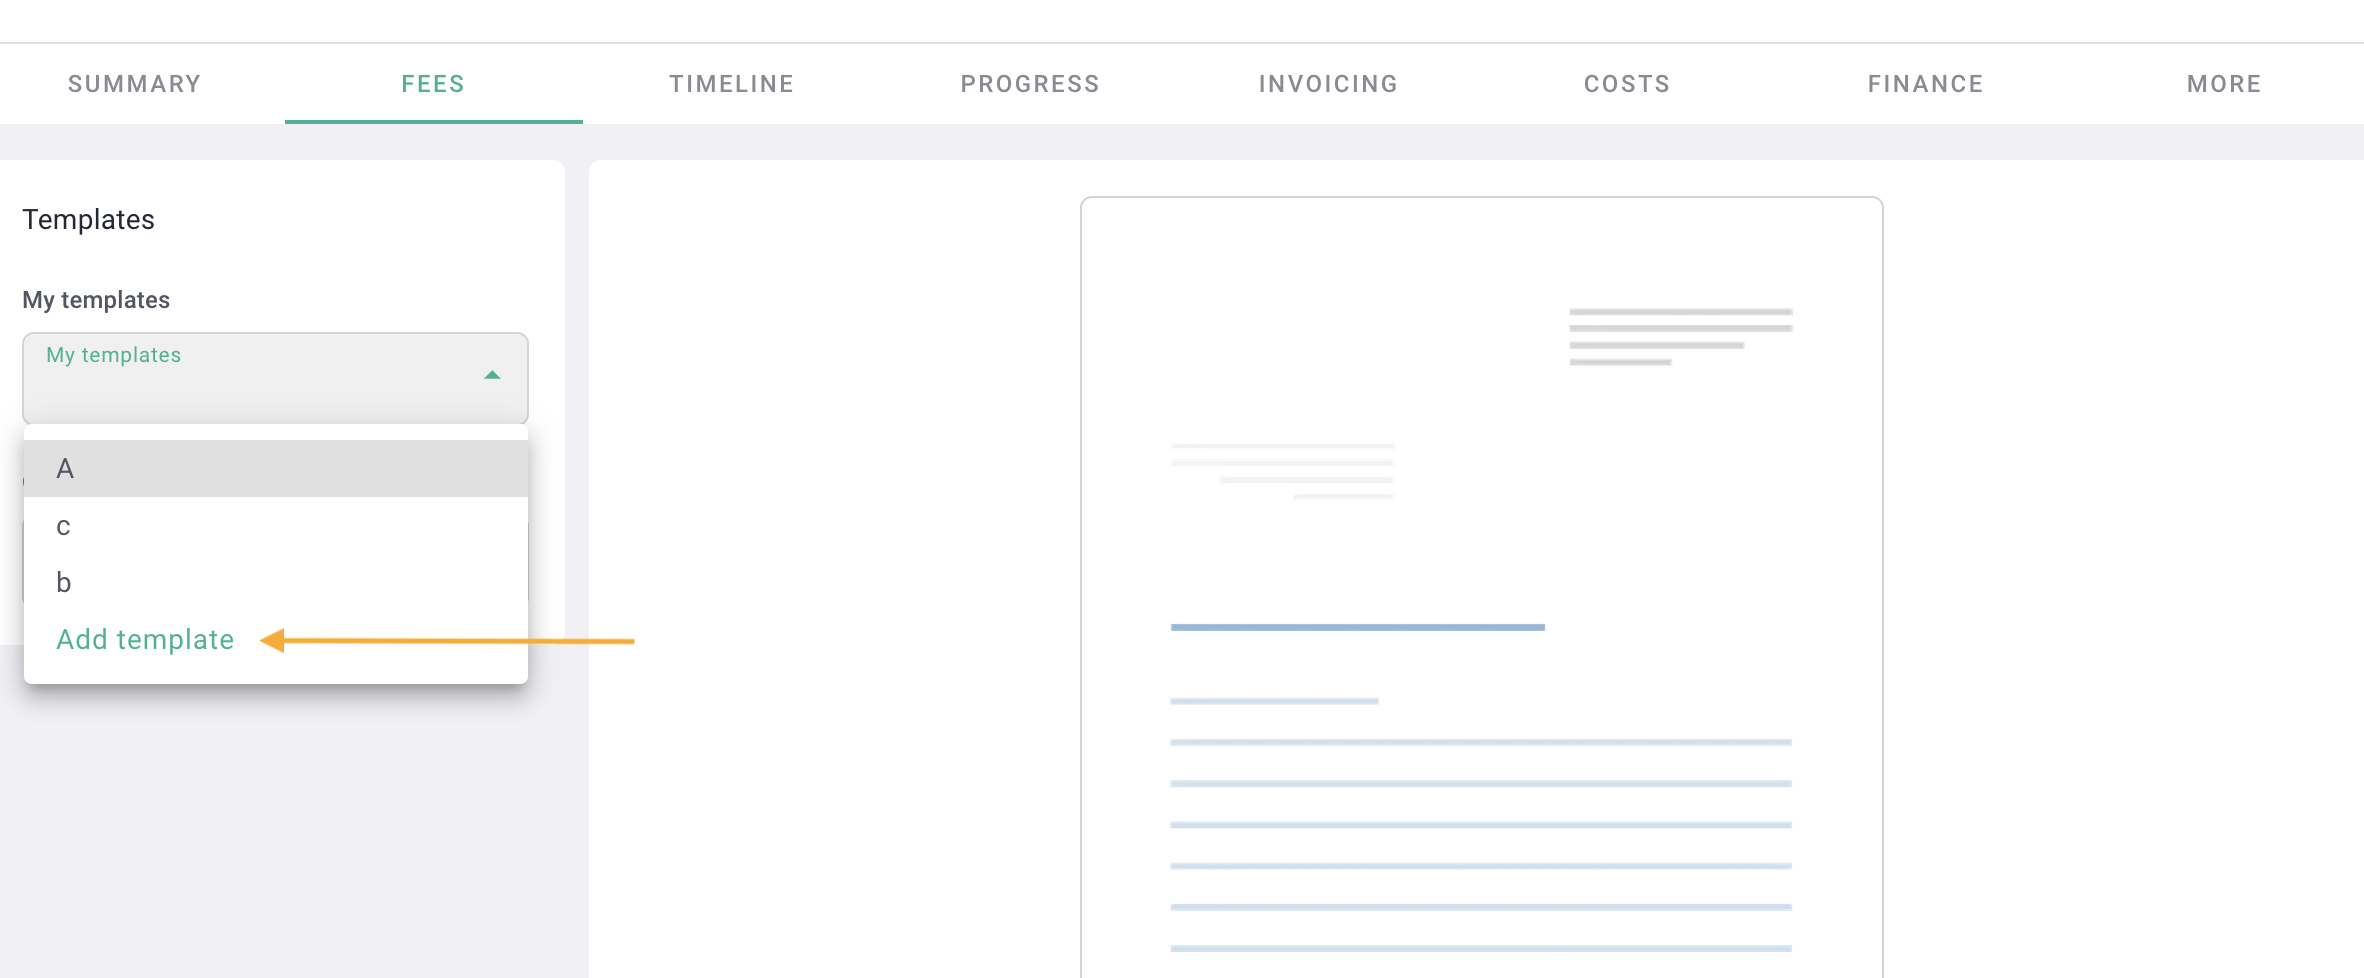
Click on the menu on the left "my models" then make blank page.
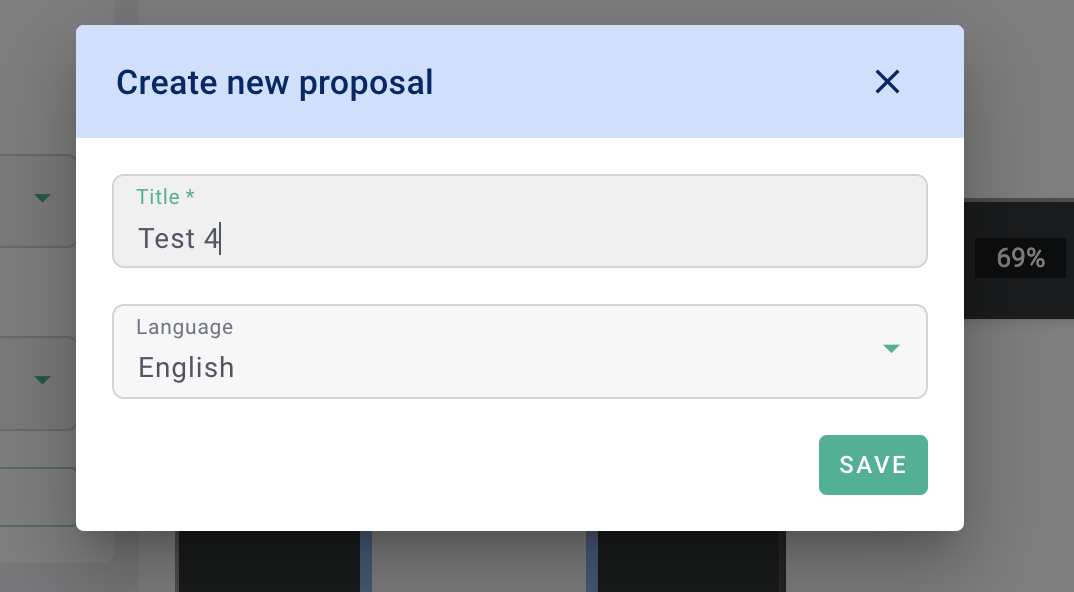
Name your proposal and select language. Save.
💡 You can reuse your proposal for other business (opportunities or project), it will serve as a model.
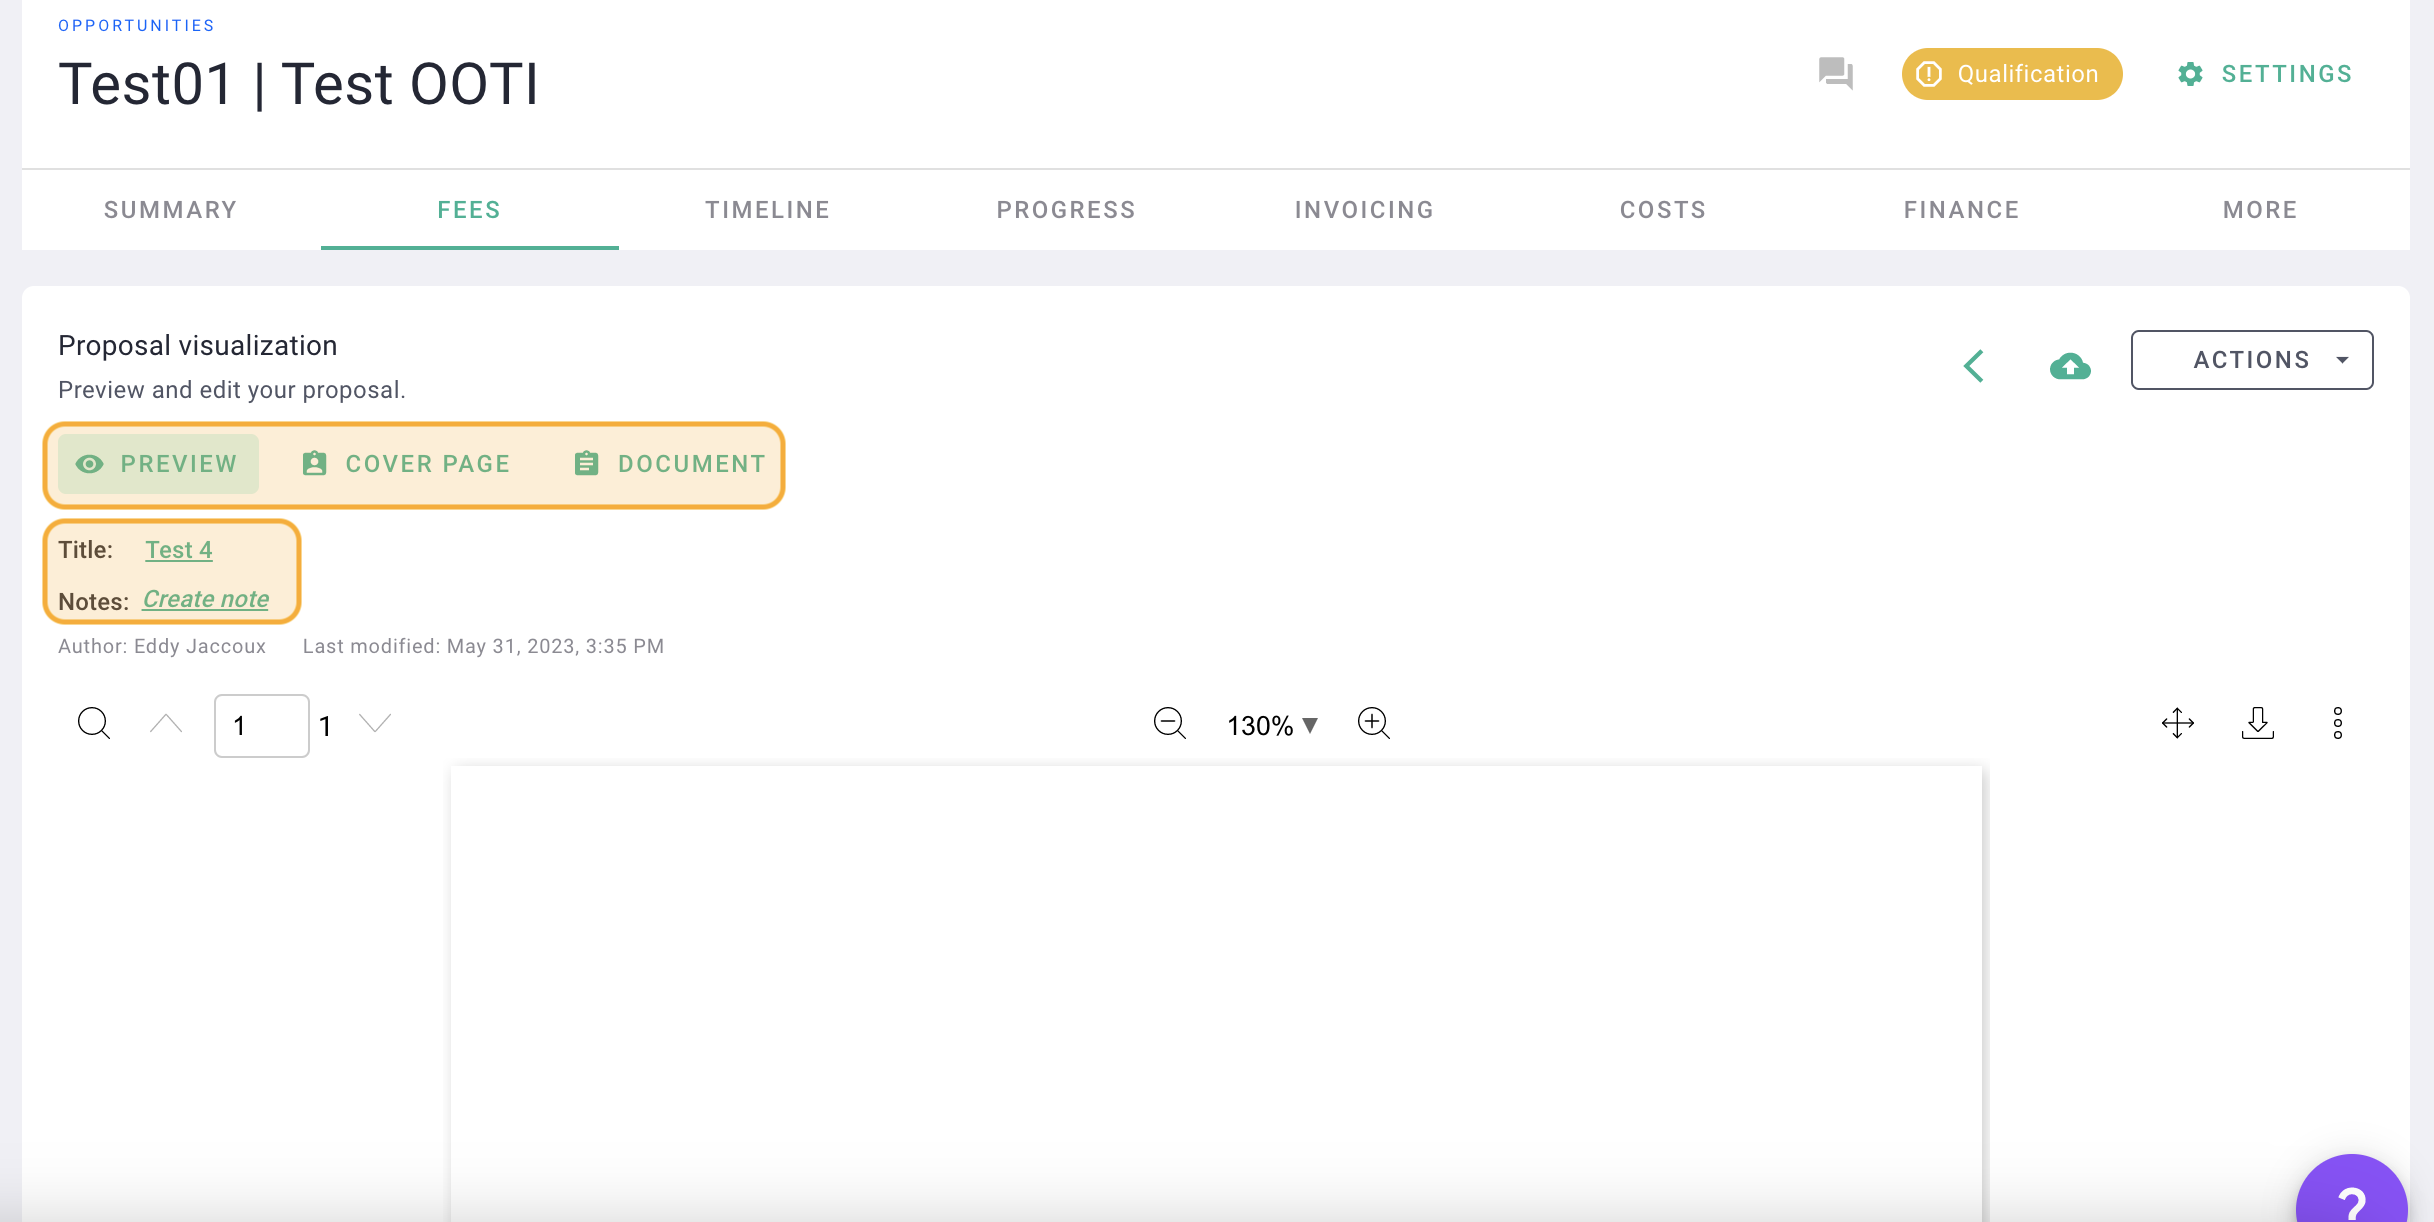
You will arrive in a proposal console. This is made up of three tabs:
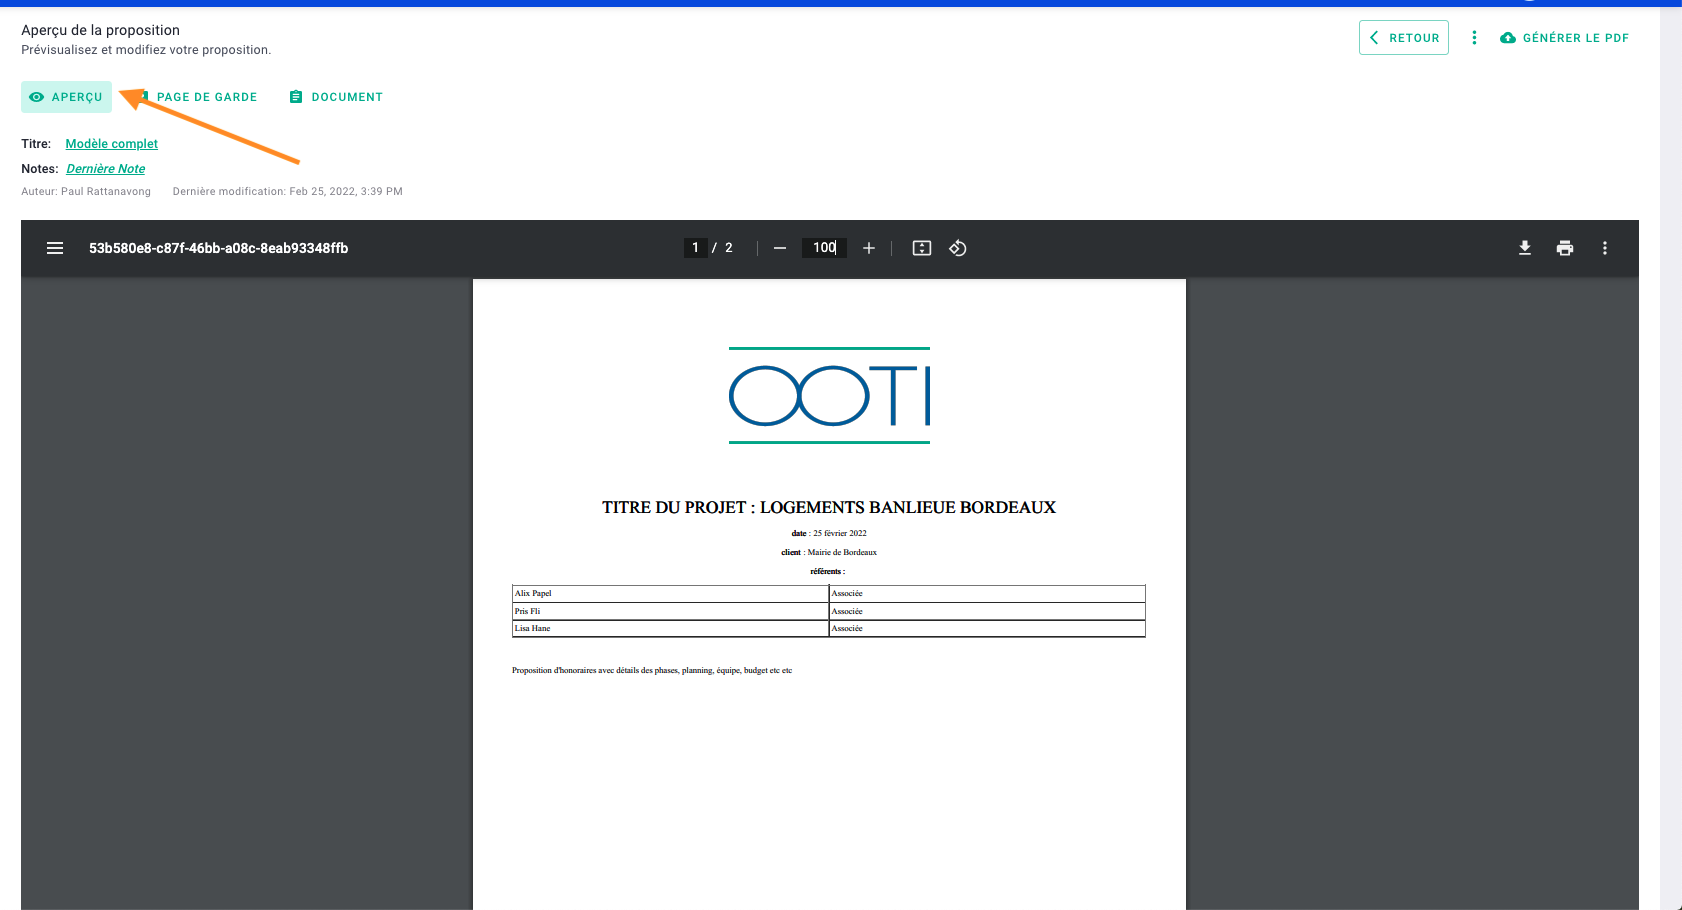
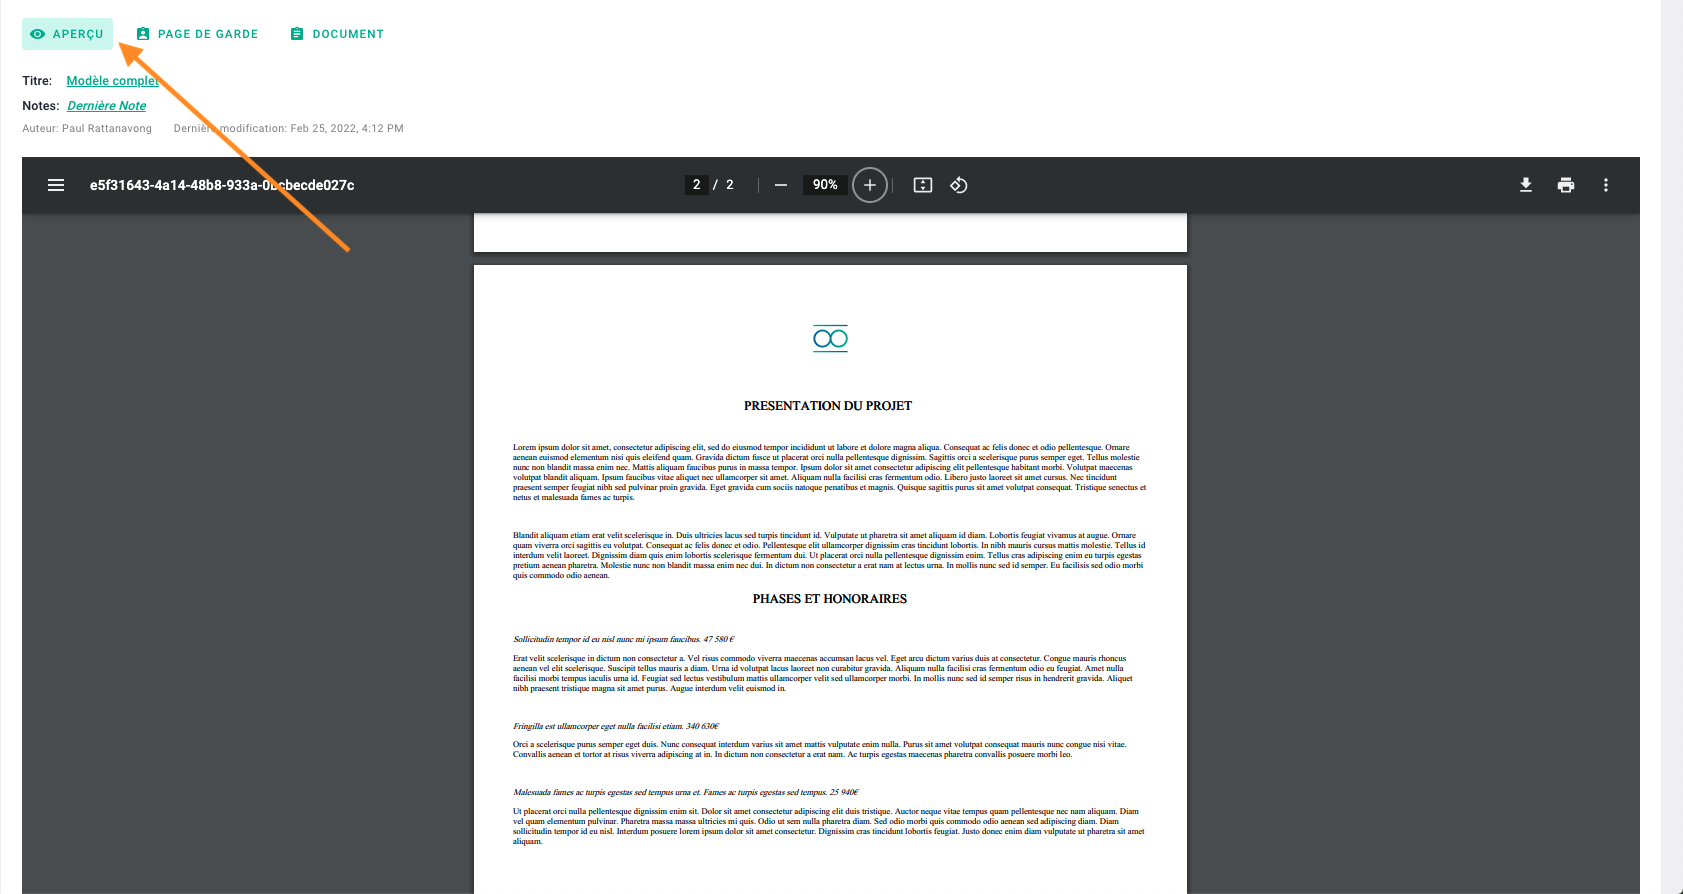
- Preview: this is the result, the rendering of your proposal that you will have to download in pdf,
- Cover page: the 1st presentation page of your proposal, you can complete it,
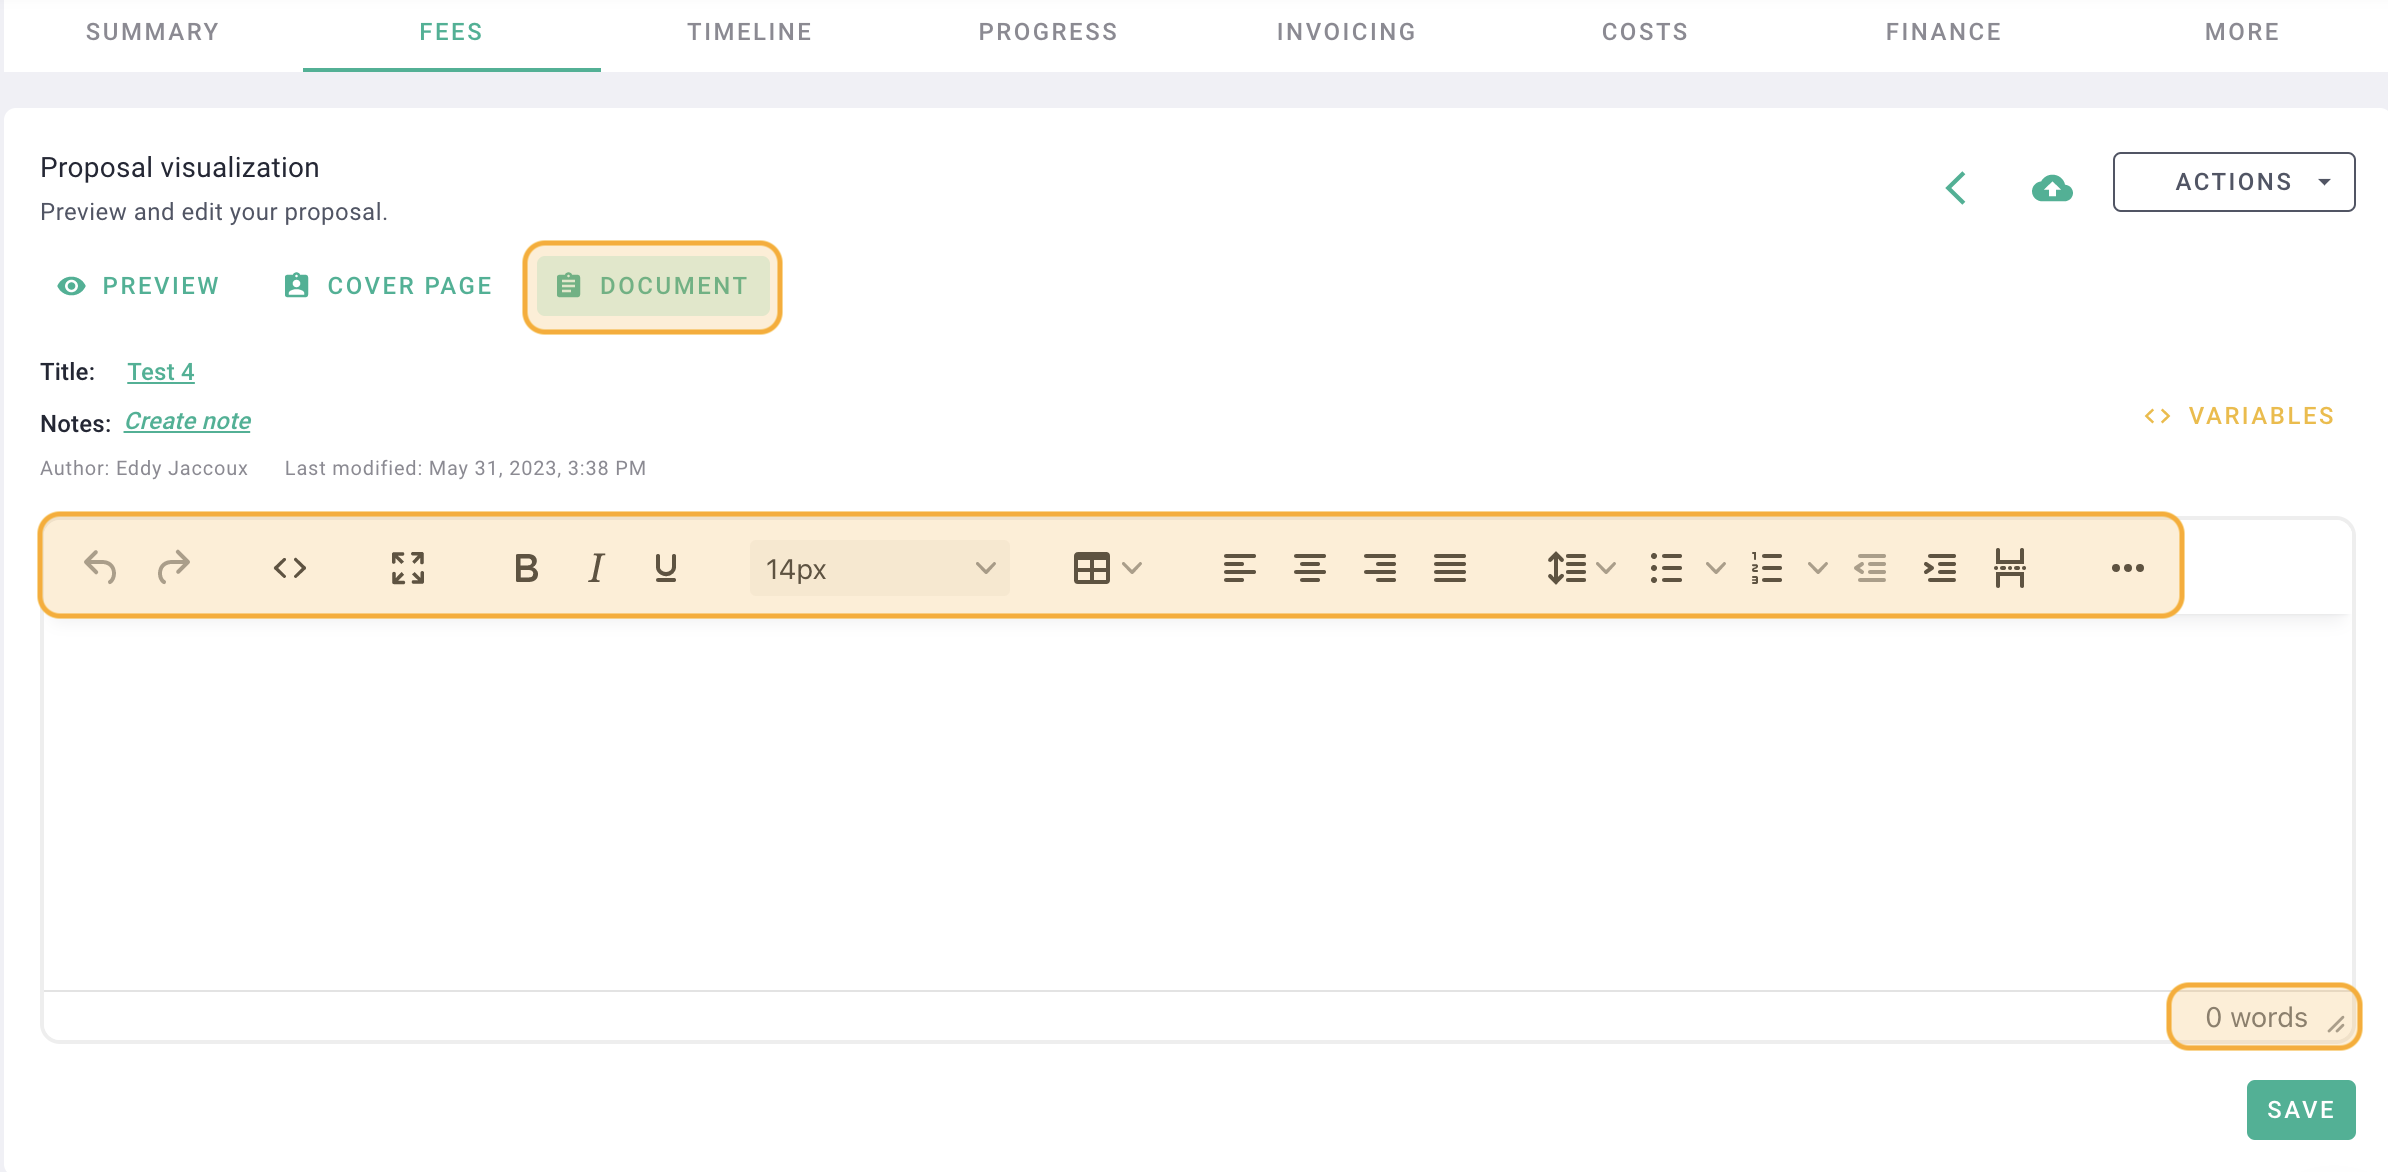
- Document: the body of your proposal with all the elements, texts, tables etc.
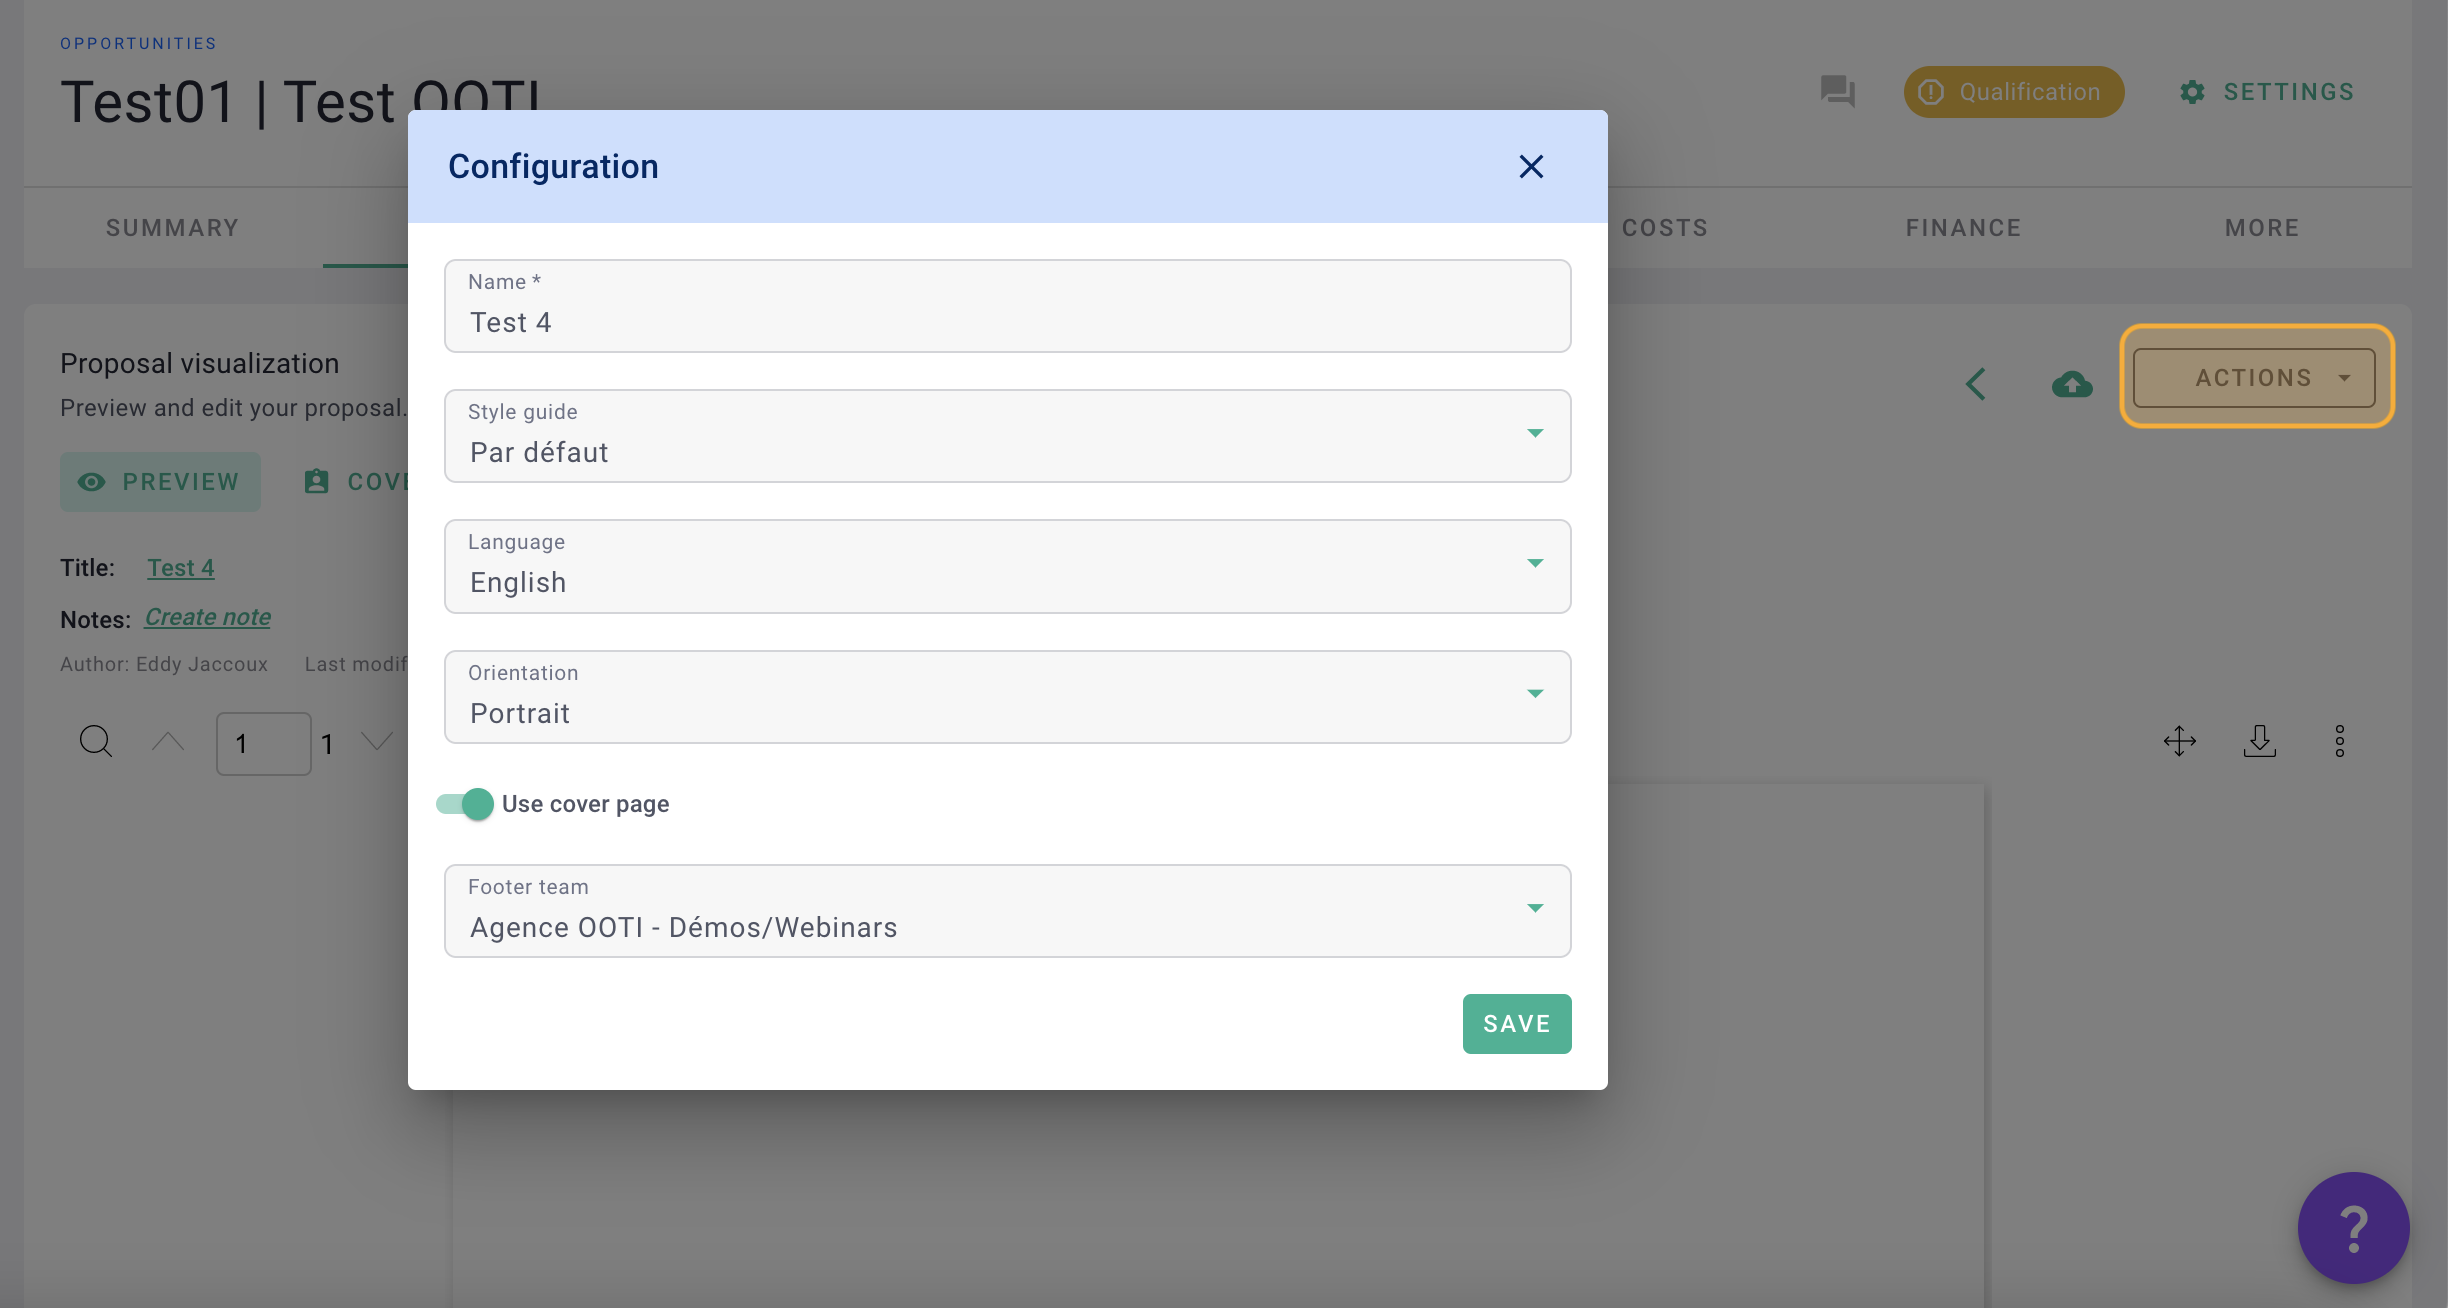
Click on options to tweak your proposal like orientation (portrait or landscape), use of cover page etc.
III/ Write the proposal
1) Cover page
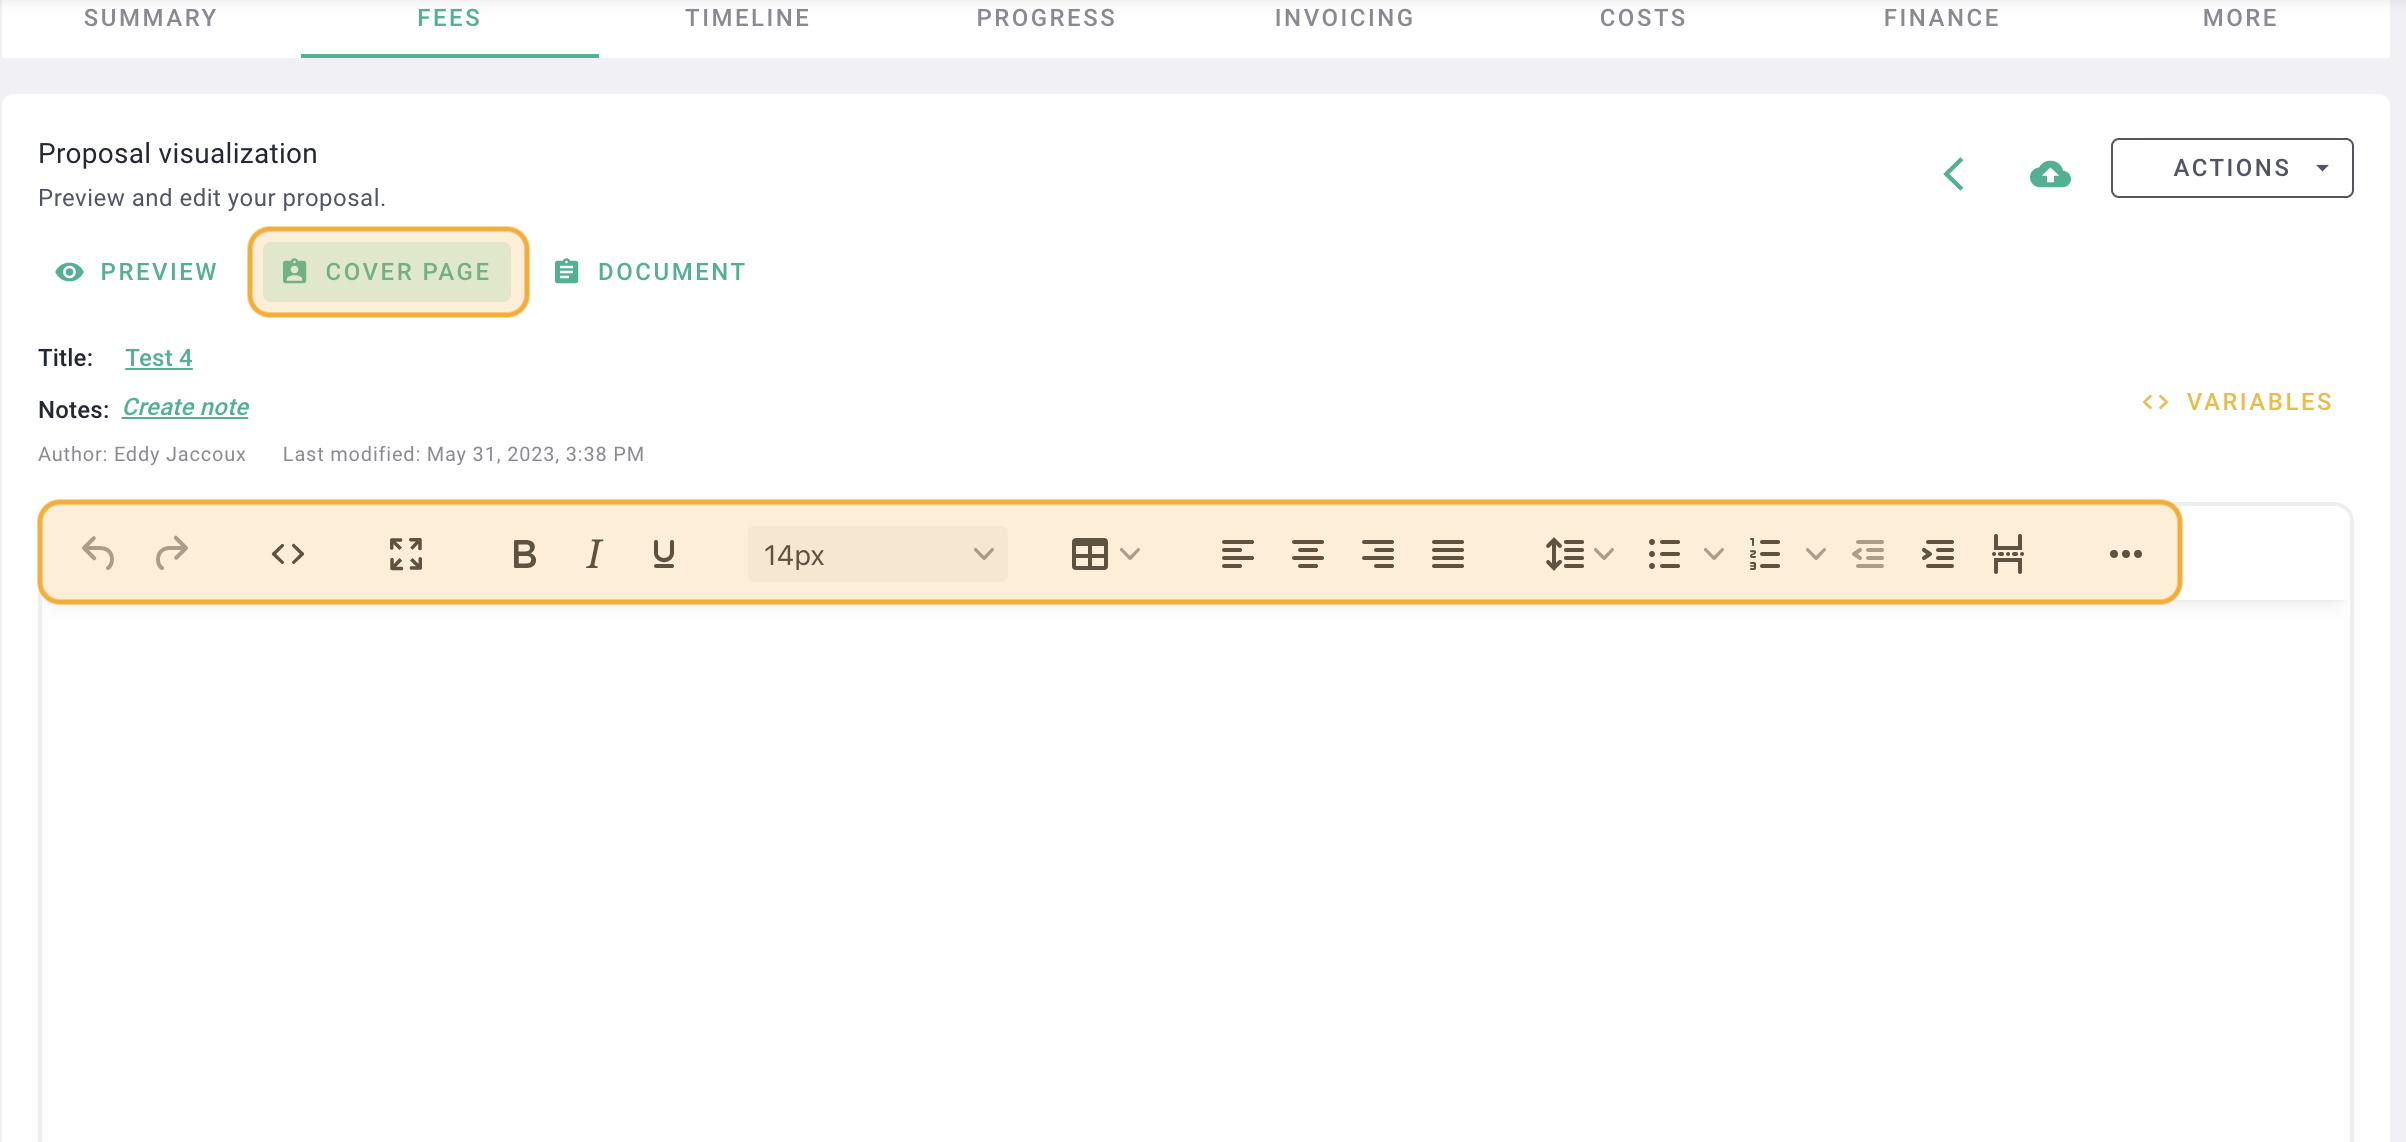
Go to the cover page tab to make a nice presentation of your proposal.
Write your text for the cover page in the white block. Click on the small button at the bottom right to expand the block and facilitate your writing.
Use the toolbar to optimize your text.
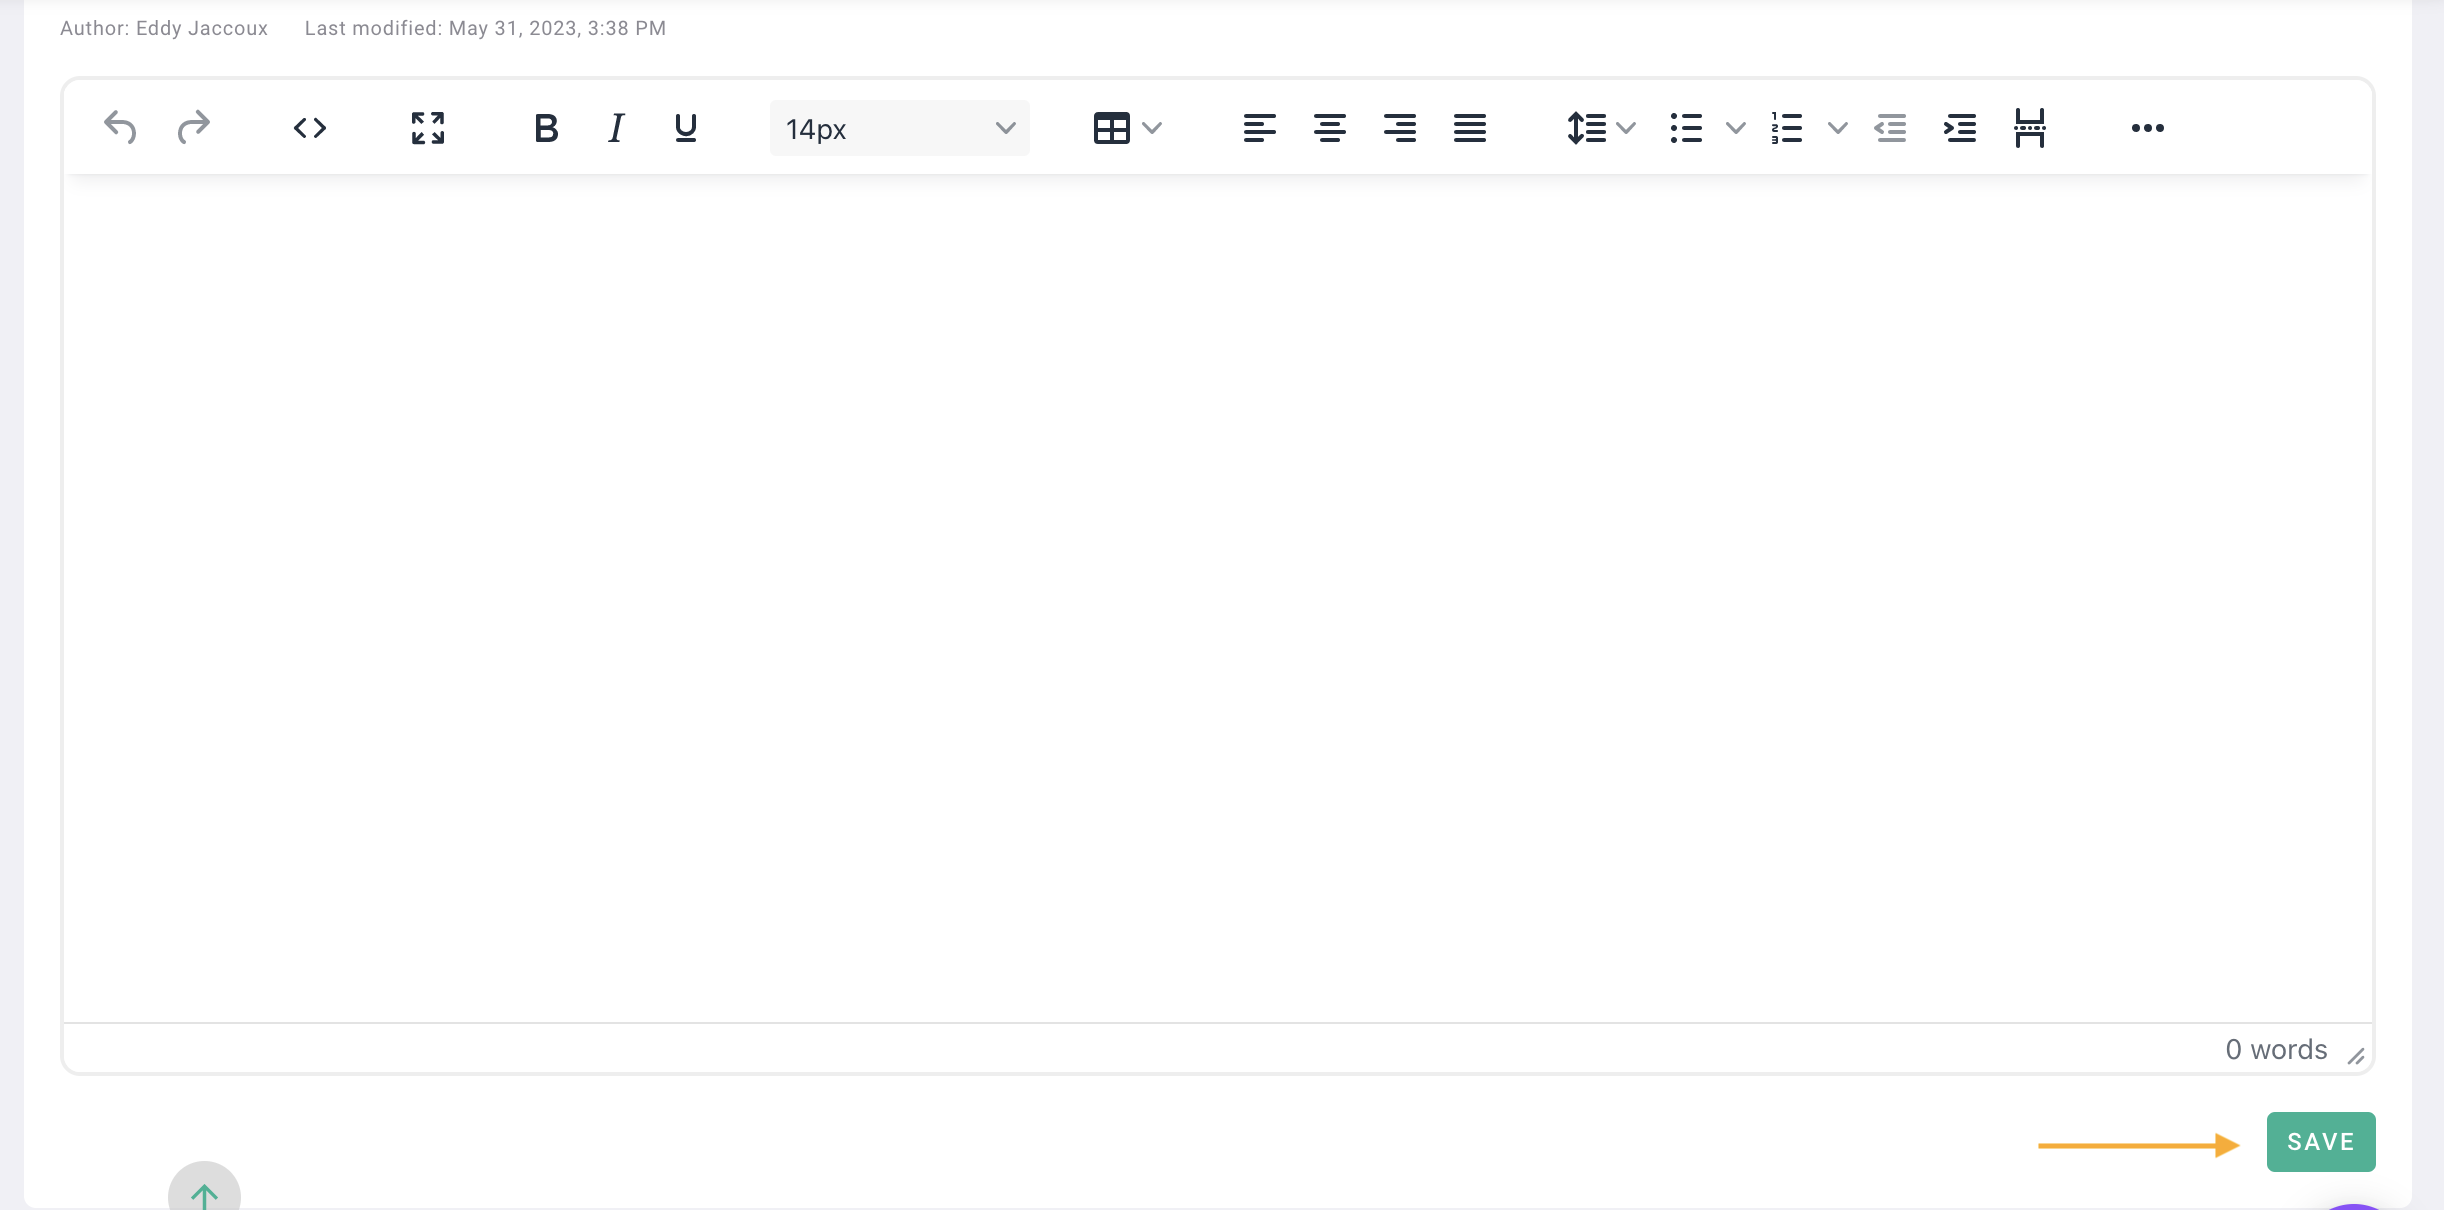
After writing your text, click save.
Once saved, go to preview to see the rendering.
2) Document
Go to the Document tab and write your text for the cover page in the white block. Click on the small button at the bottom right to expand the block and facilitate your writing.
Use the toolbar to optimize your text.
After writing your text, click save.
Once saved, go to preview to see the rendering.
3) Variables
Variables are fields, information that you fill in when you complete elements: project name, fees, client name, dates, first name, title etc etc ... These variables are specific to each element that you fill in OOTI.
You can then use these variables which are specific to forms (projects or customers for example) and include them in your proposal. This saves you from having to re-enter everything a second time in your proposal.
For example here, the project is "RENOV-LOUVRE-2023 | Rénovation Jardin du Louvre
" which we have manually rewritten in the proposal.
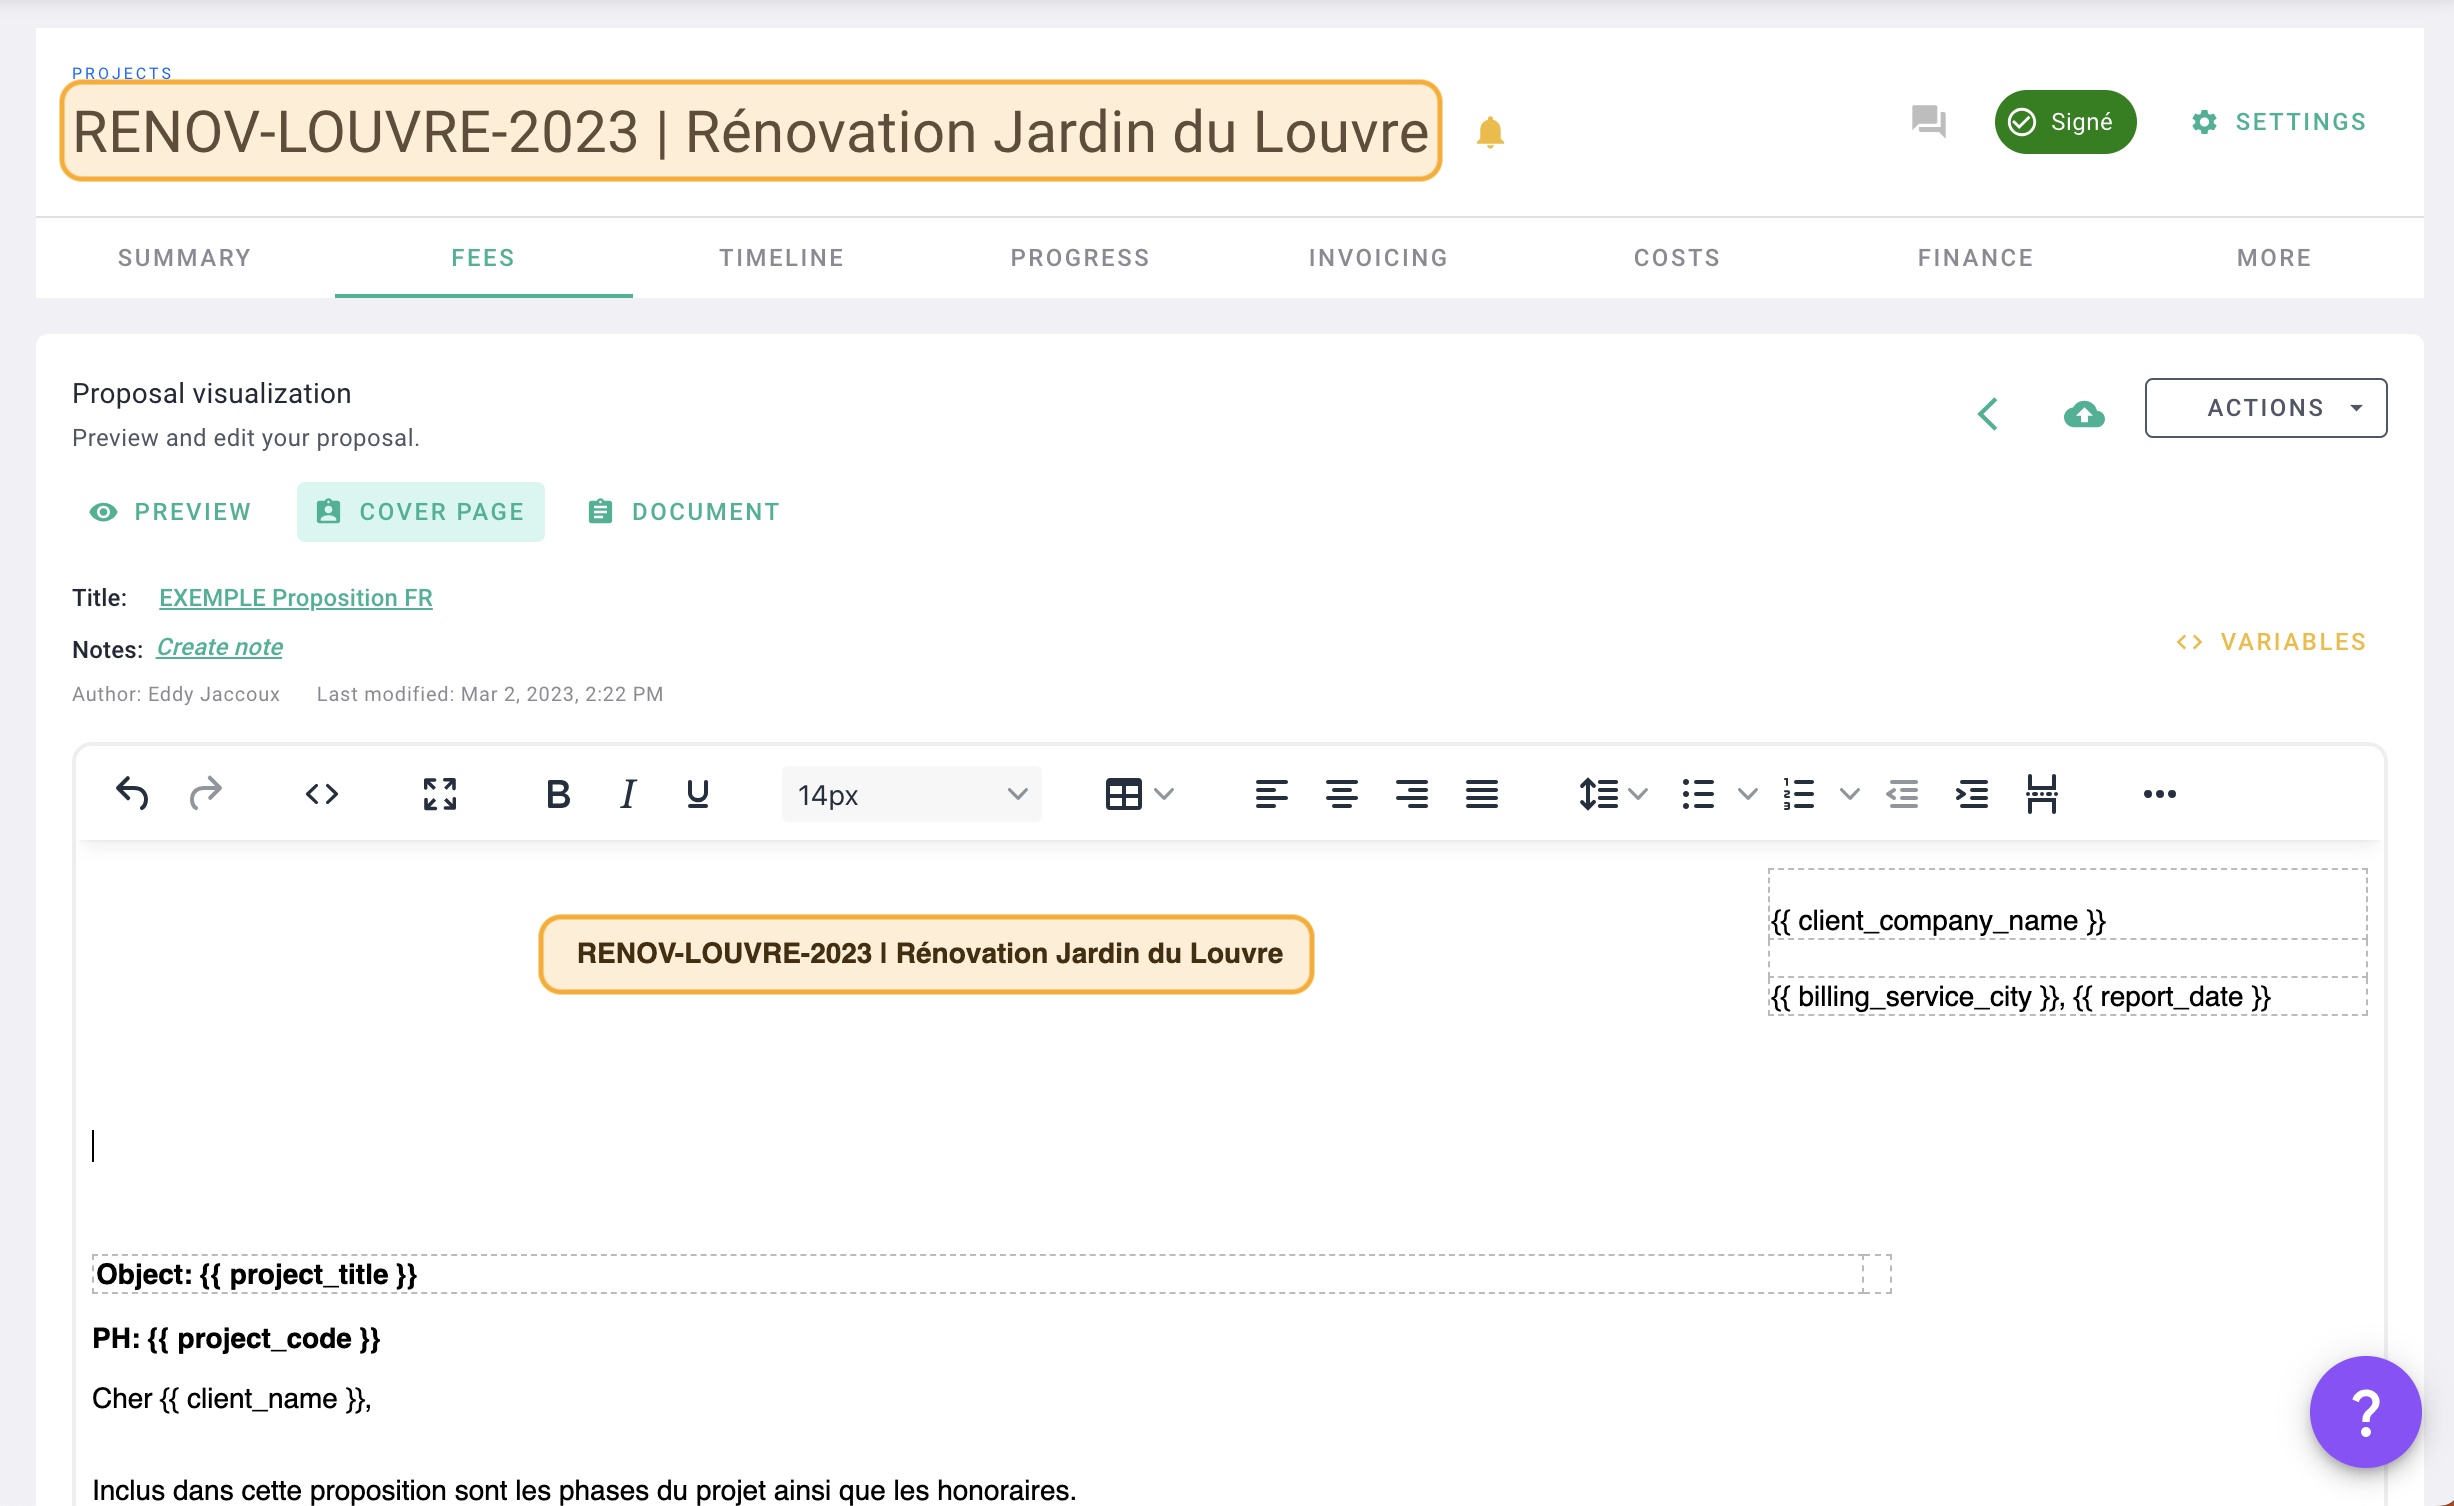
The same here, when you create a customer, you fill in the name, among other things. We re-wrote it manually in the proposal.
To avoid re-entering everything, then click on variables.
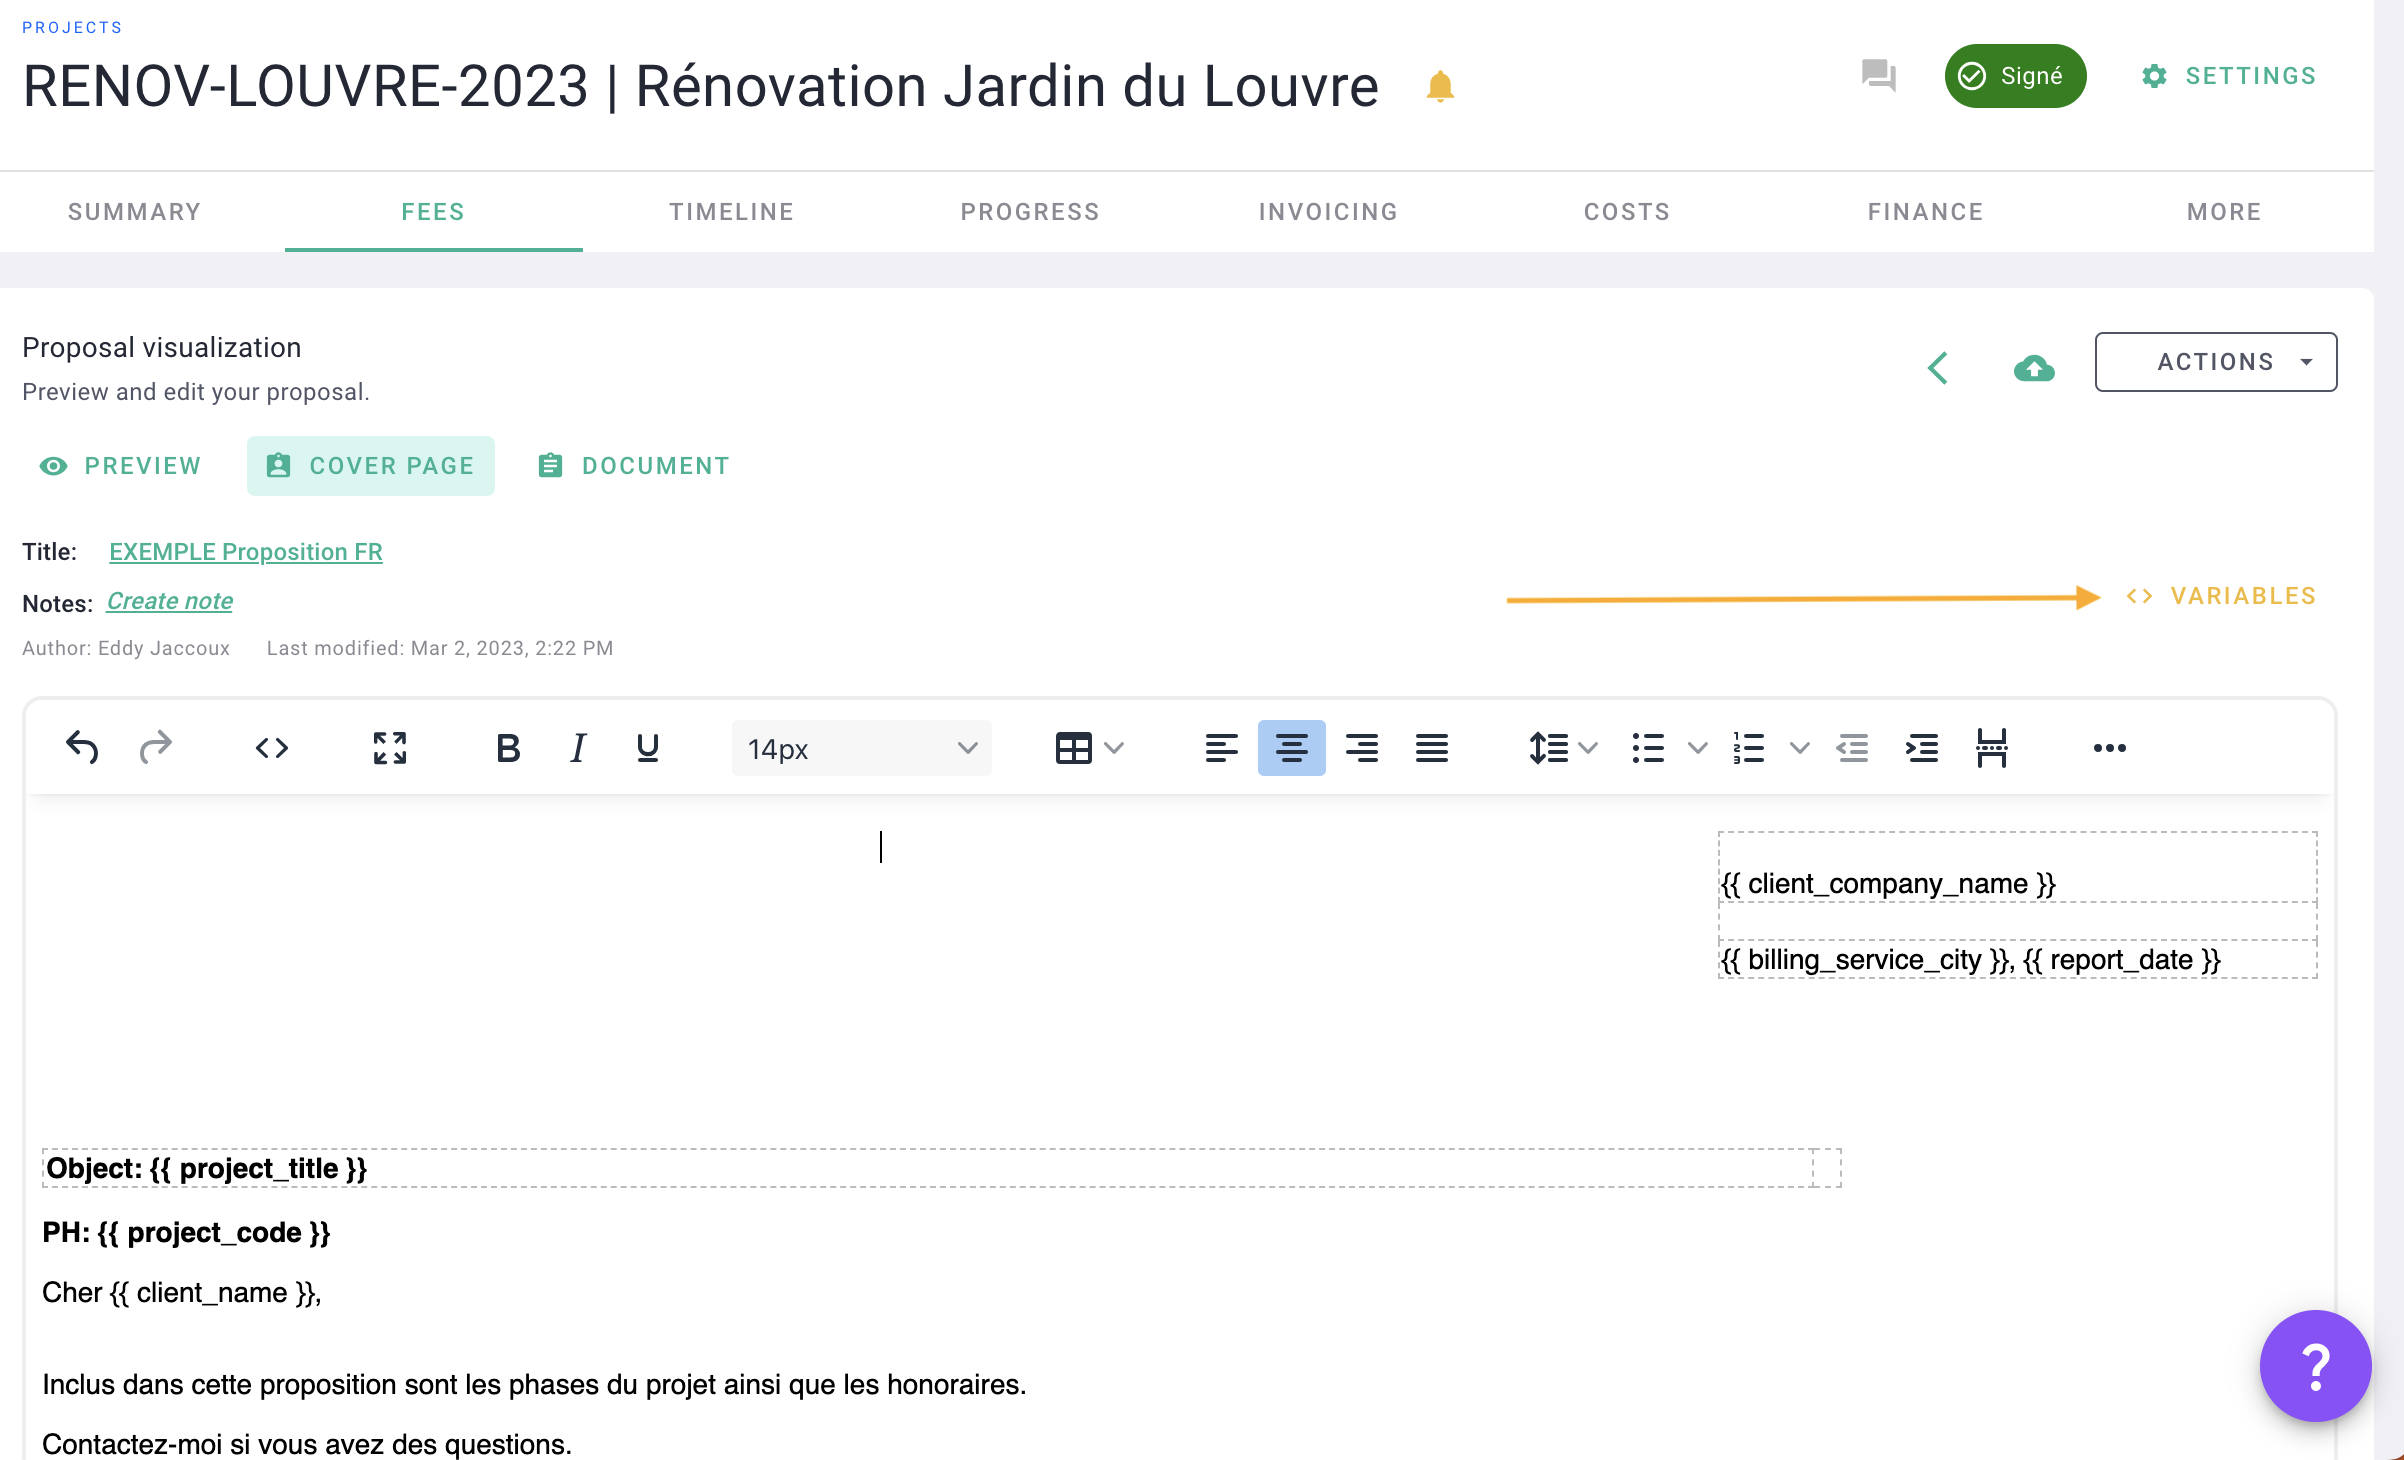
You will find all possible variables organized in sections.
💡 Variables are created by OOTI and are not currently customizable.
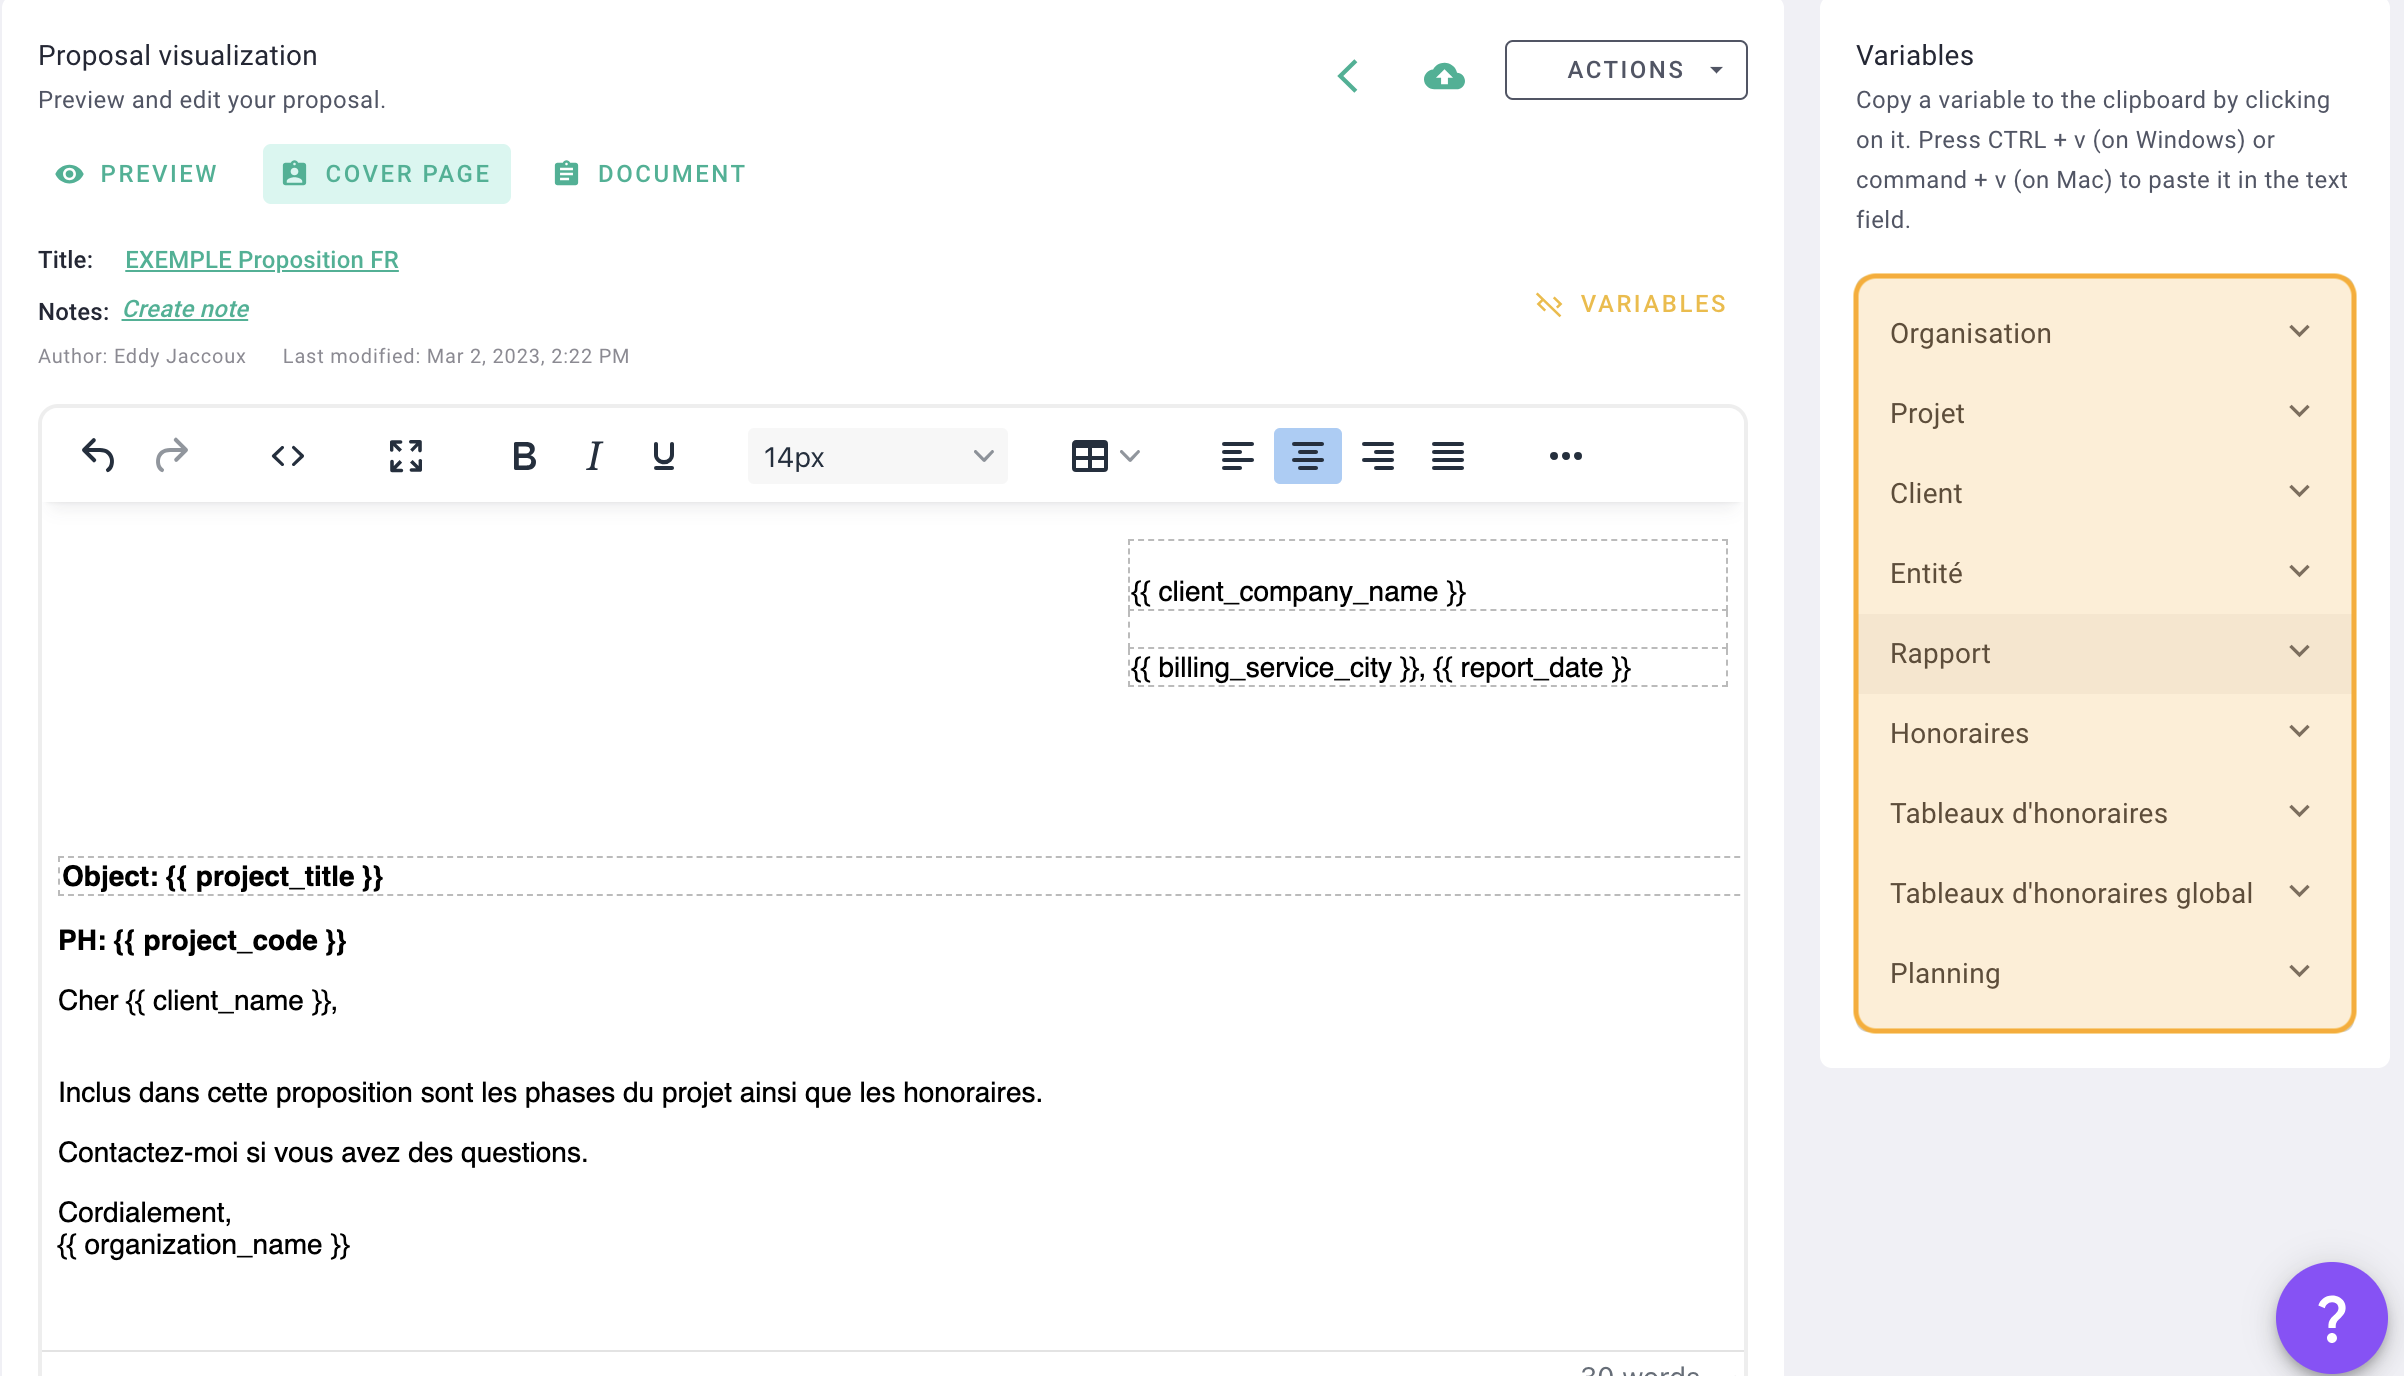
Select a section then choose a variable by simply clicking on it. You will see the preview in black.
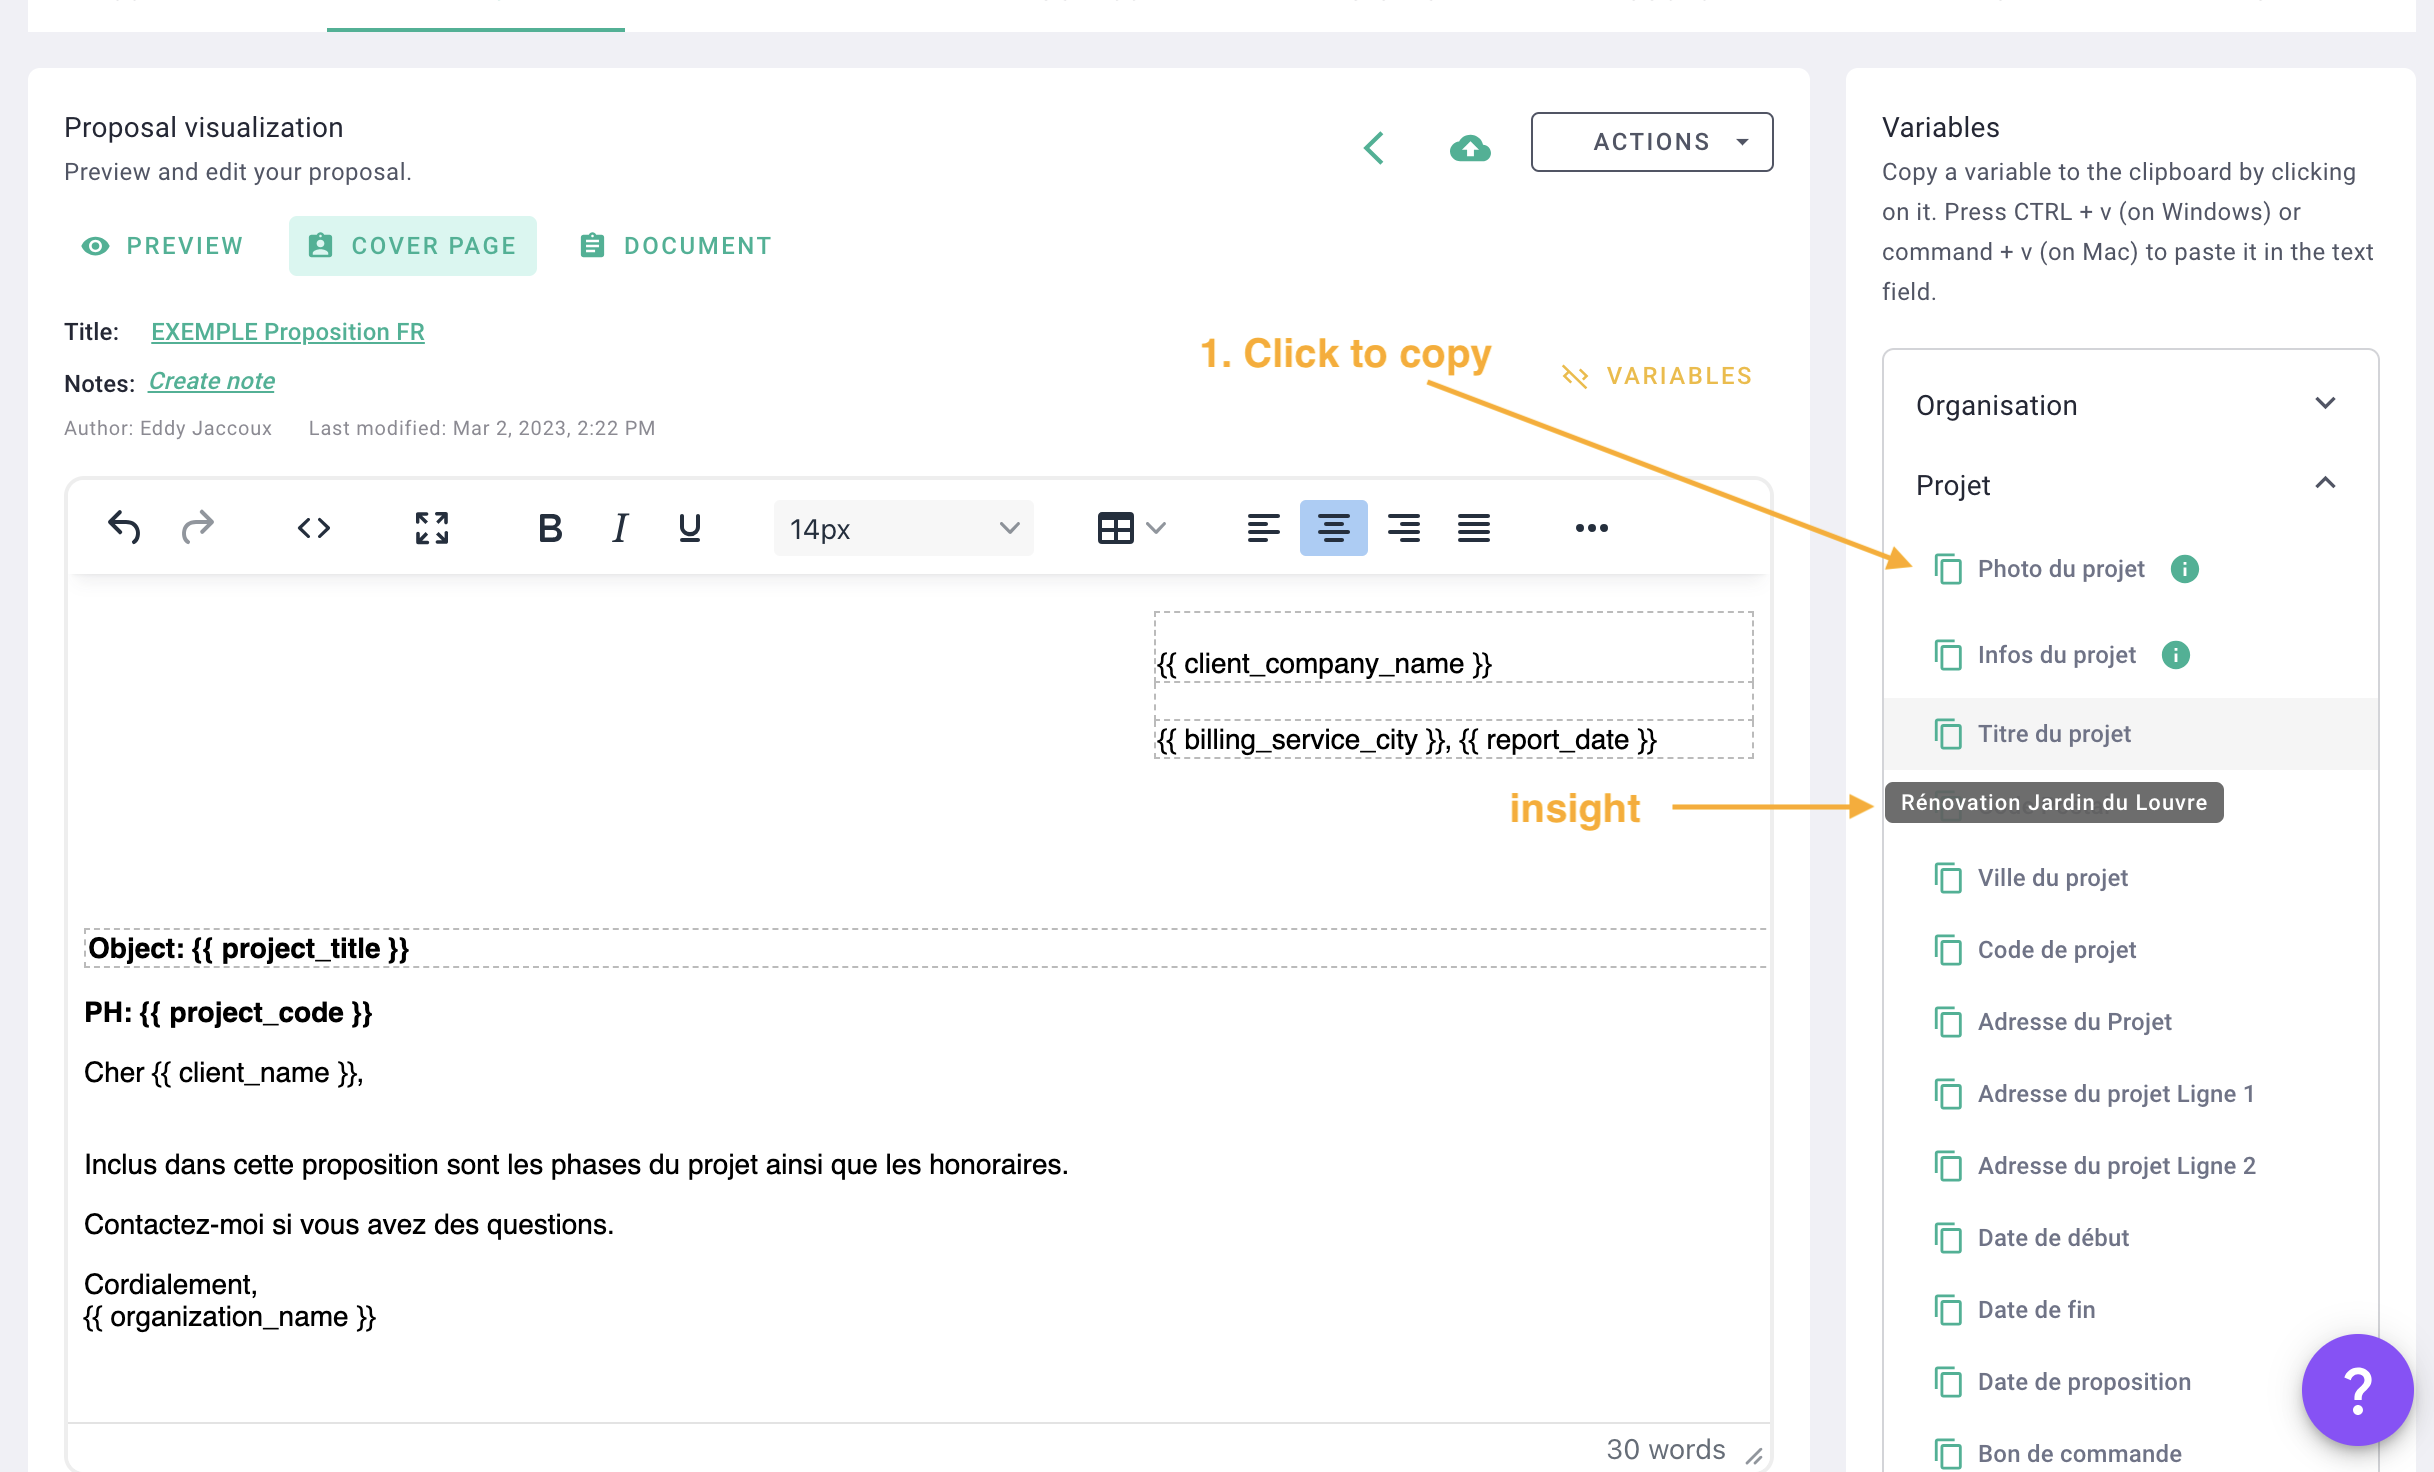
Then press CTRL+V (PC) or CMD+V (MAC) to add the variable to your text.
The variable has 1 format in quotes :
Leave the variable as is, it is fine as it is so no need to modify it.
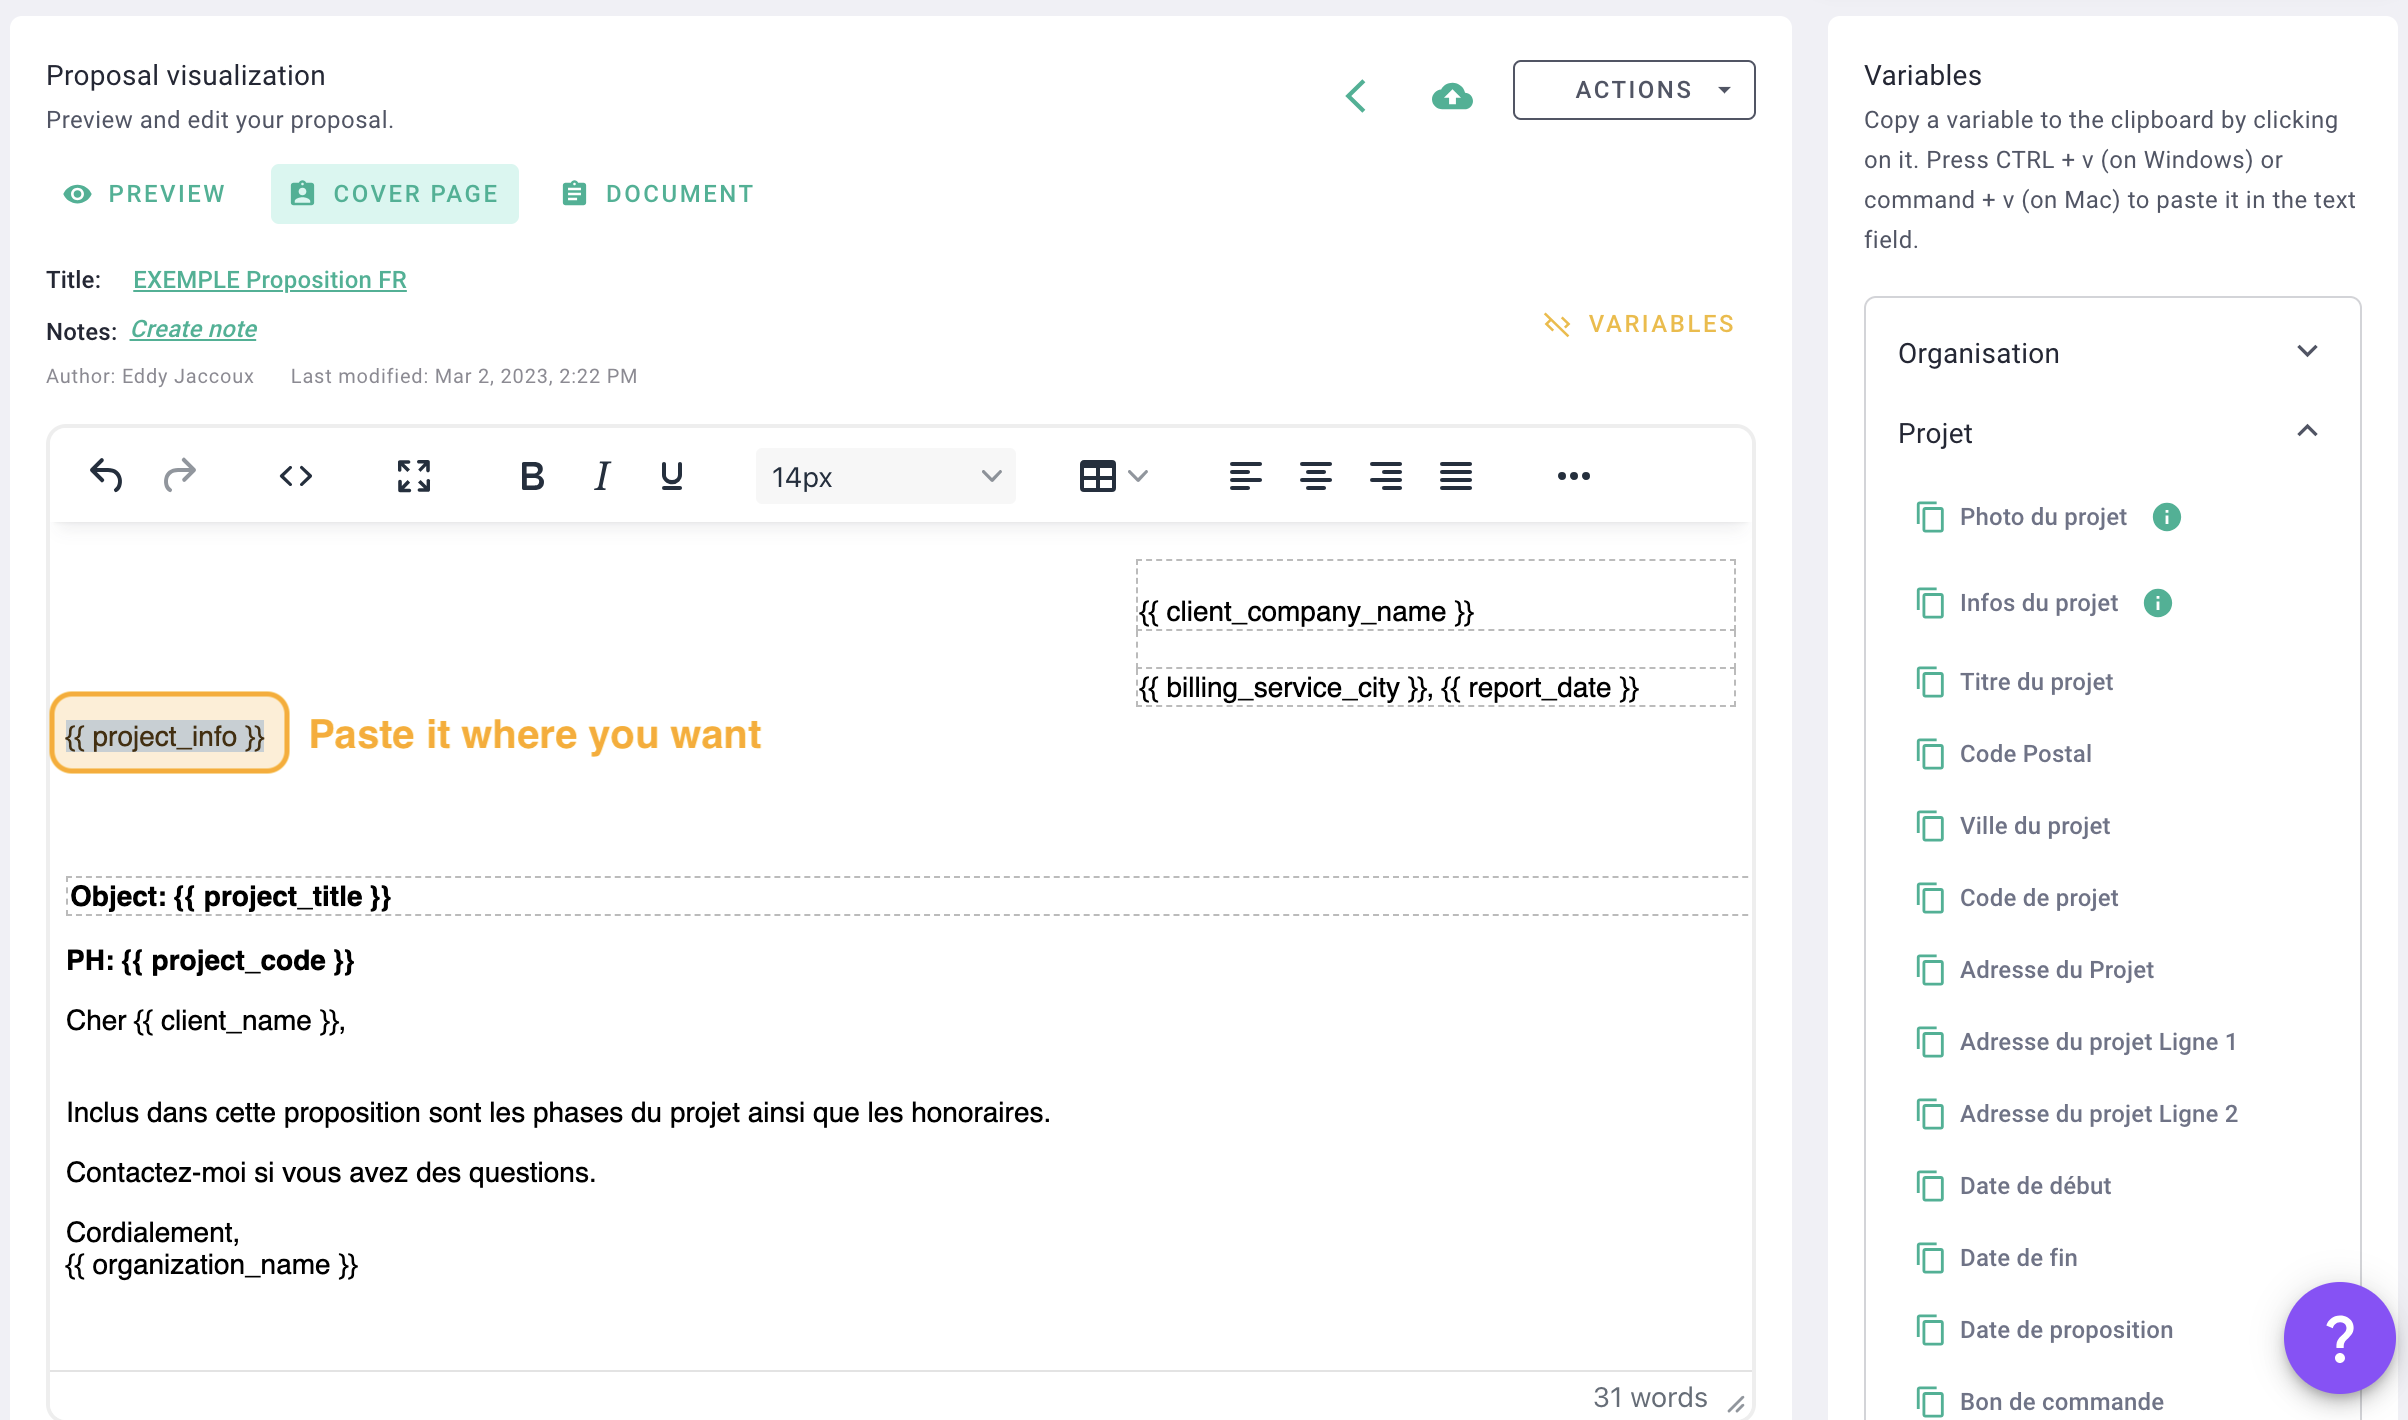
Add as many variables as you are interested in.
For example if you have added fees in your business with the phases and amounts, use the variable "fee tables > production fees by phase".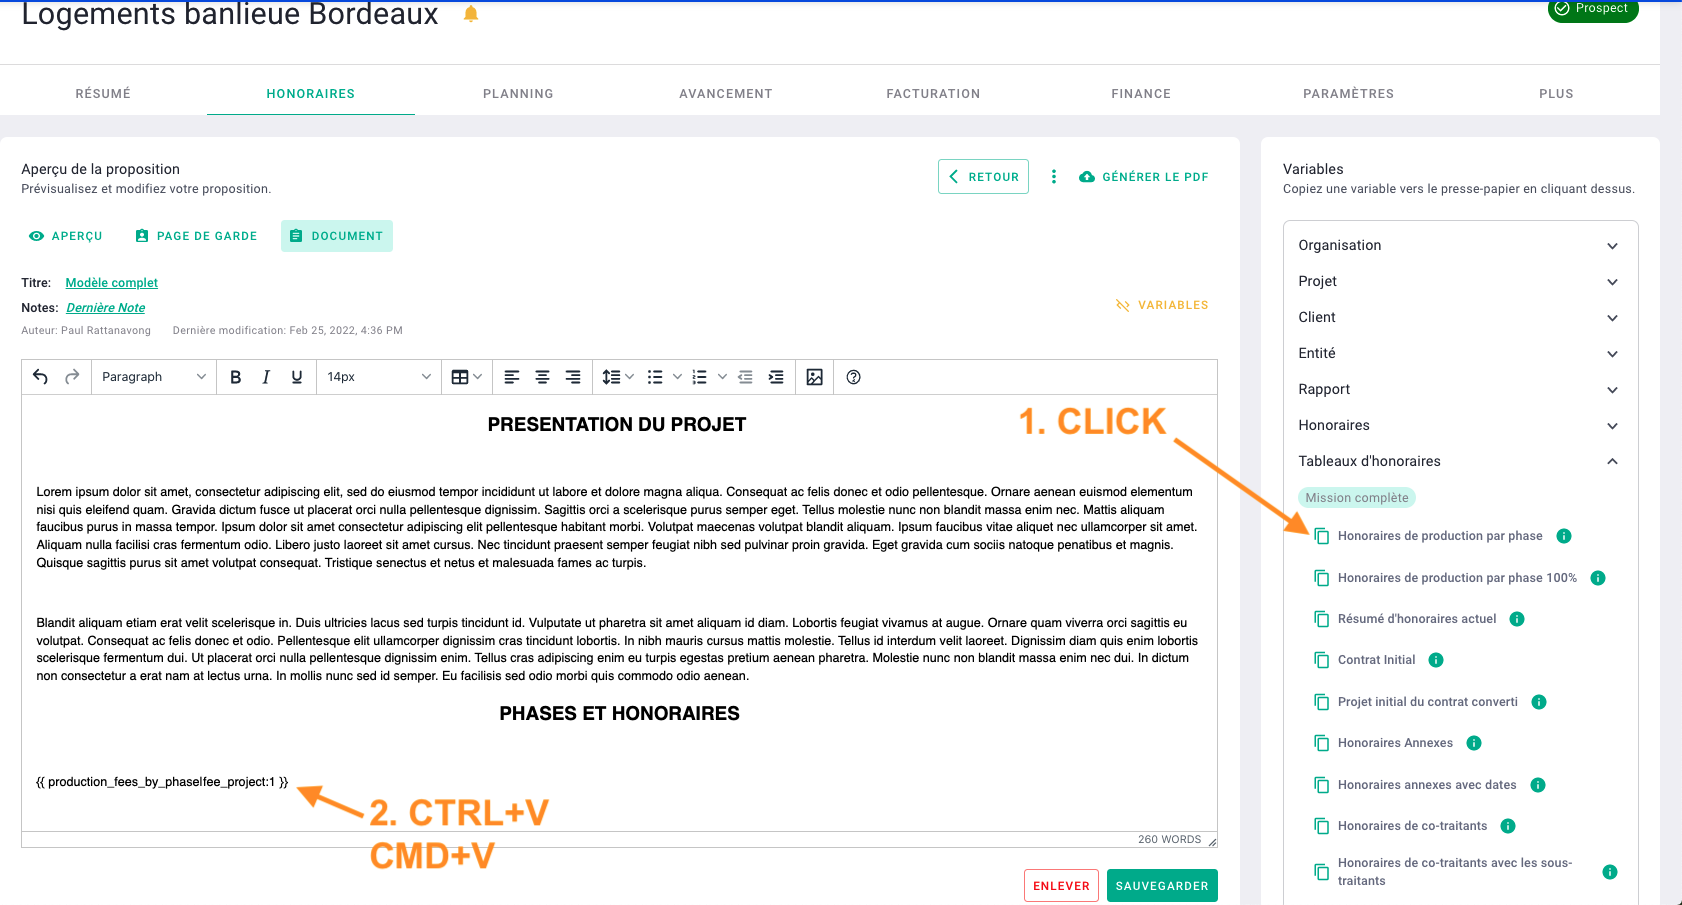
Once your text has been created and completed with variables, click save.
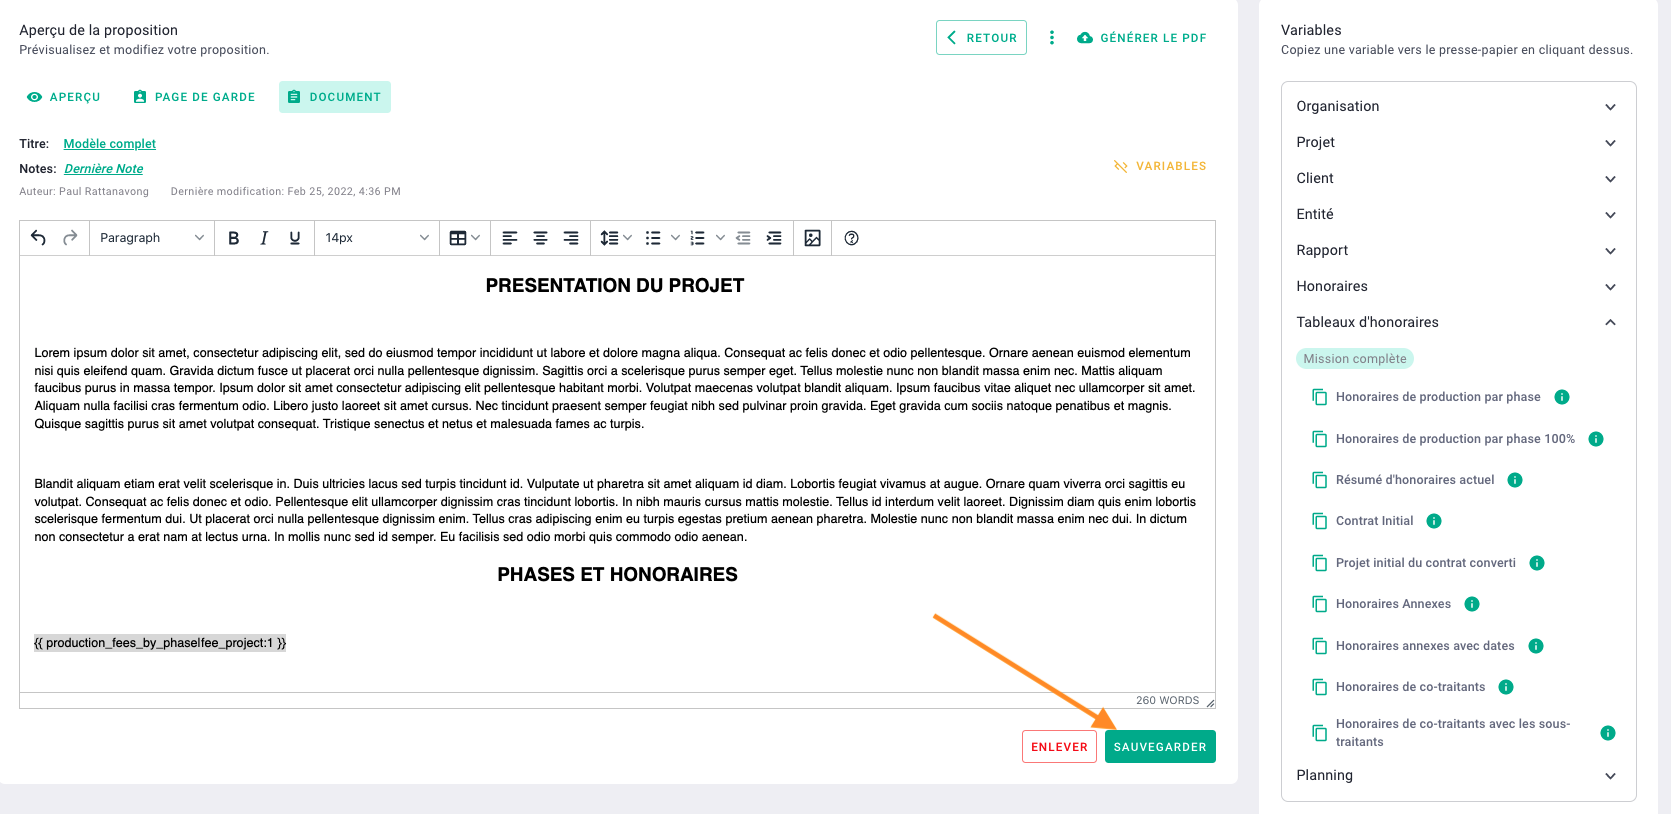
Once saved, go to preview to see the rendering.
💡 The variables will be specific to projects, customers etc.
So if you use your proposal with variables, the variable data will adapt according to the project and its information.
IV/ Save a proposal as a template and reuse it
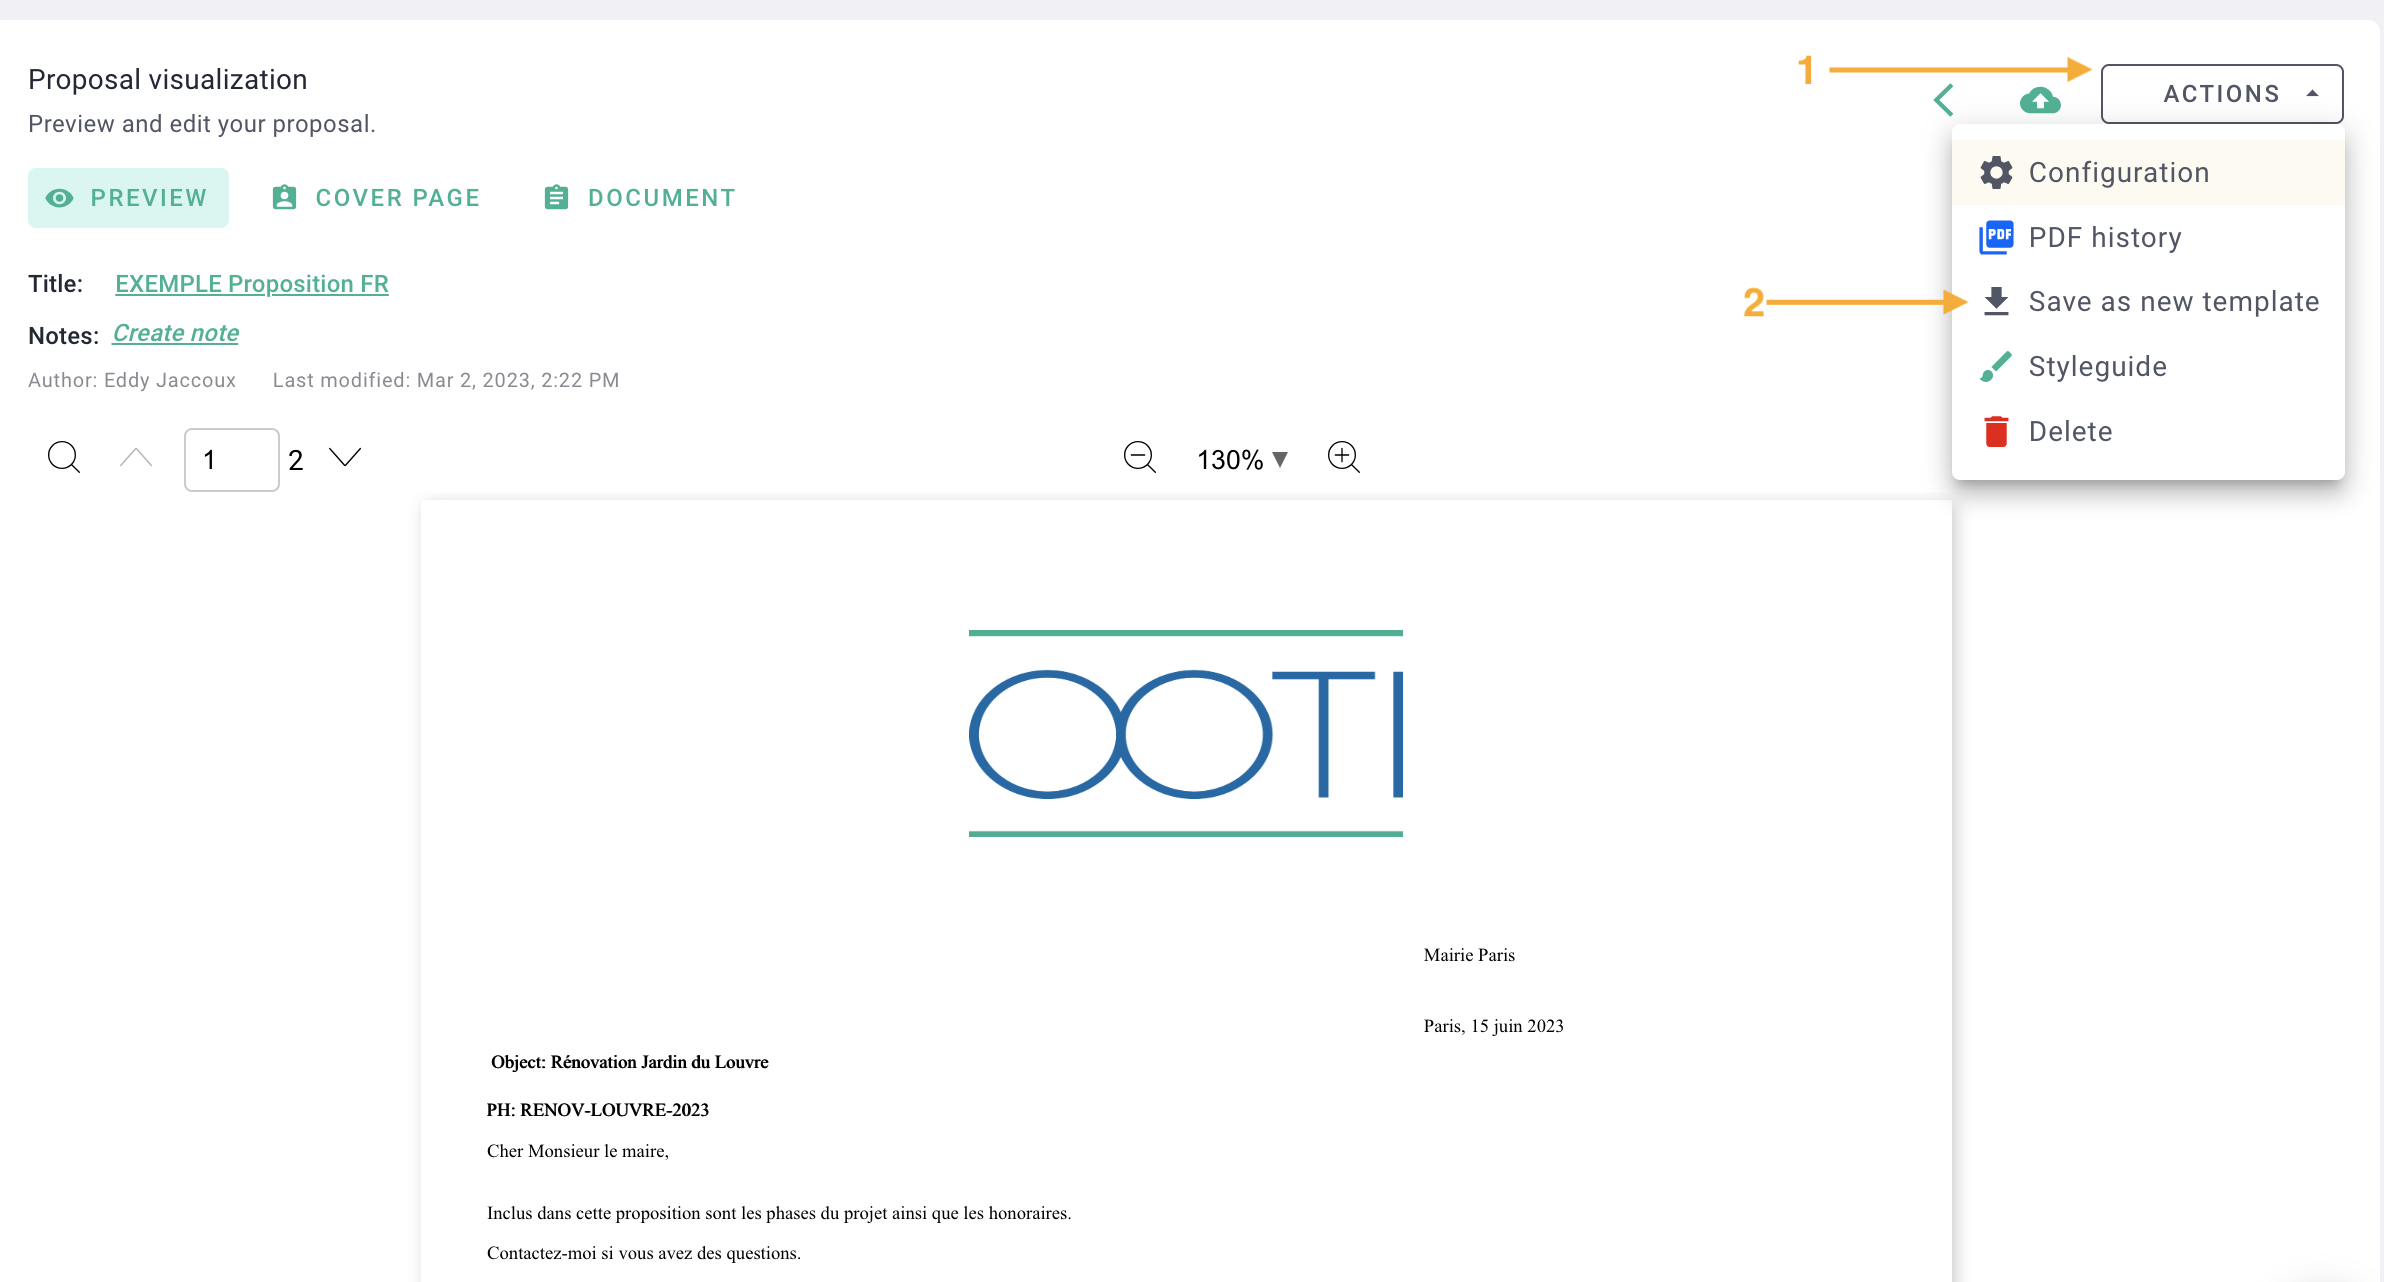
In the proposal, click options > save as new template.
When creating a new proposal for a deal (project or opportunity), select the template you saved and then have a proposal created.
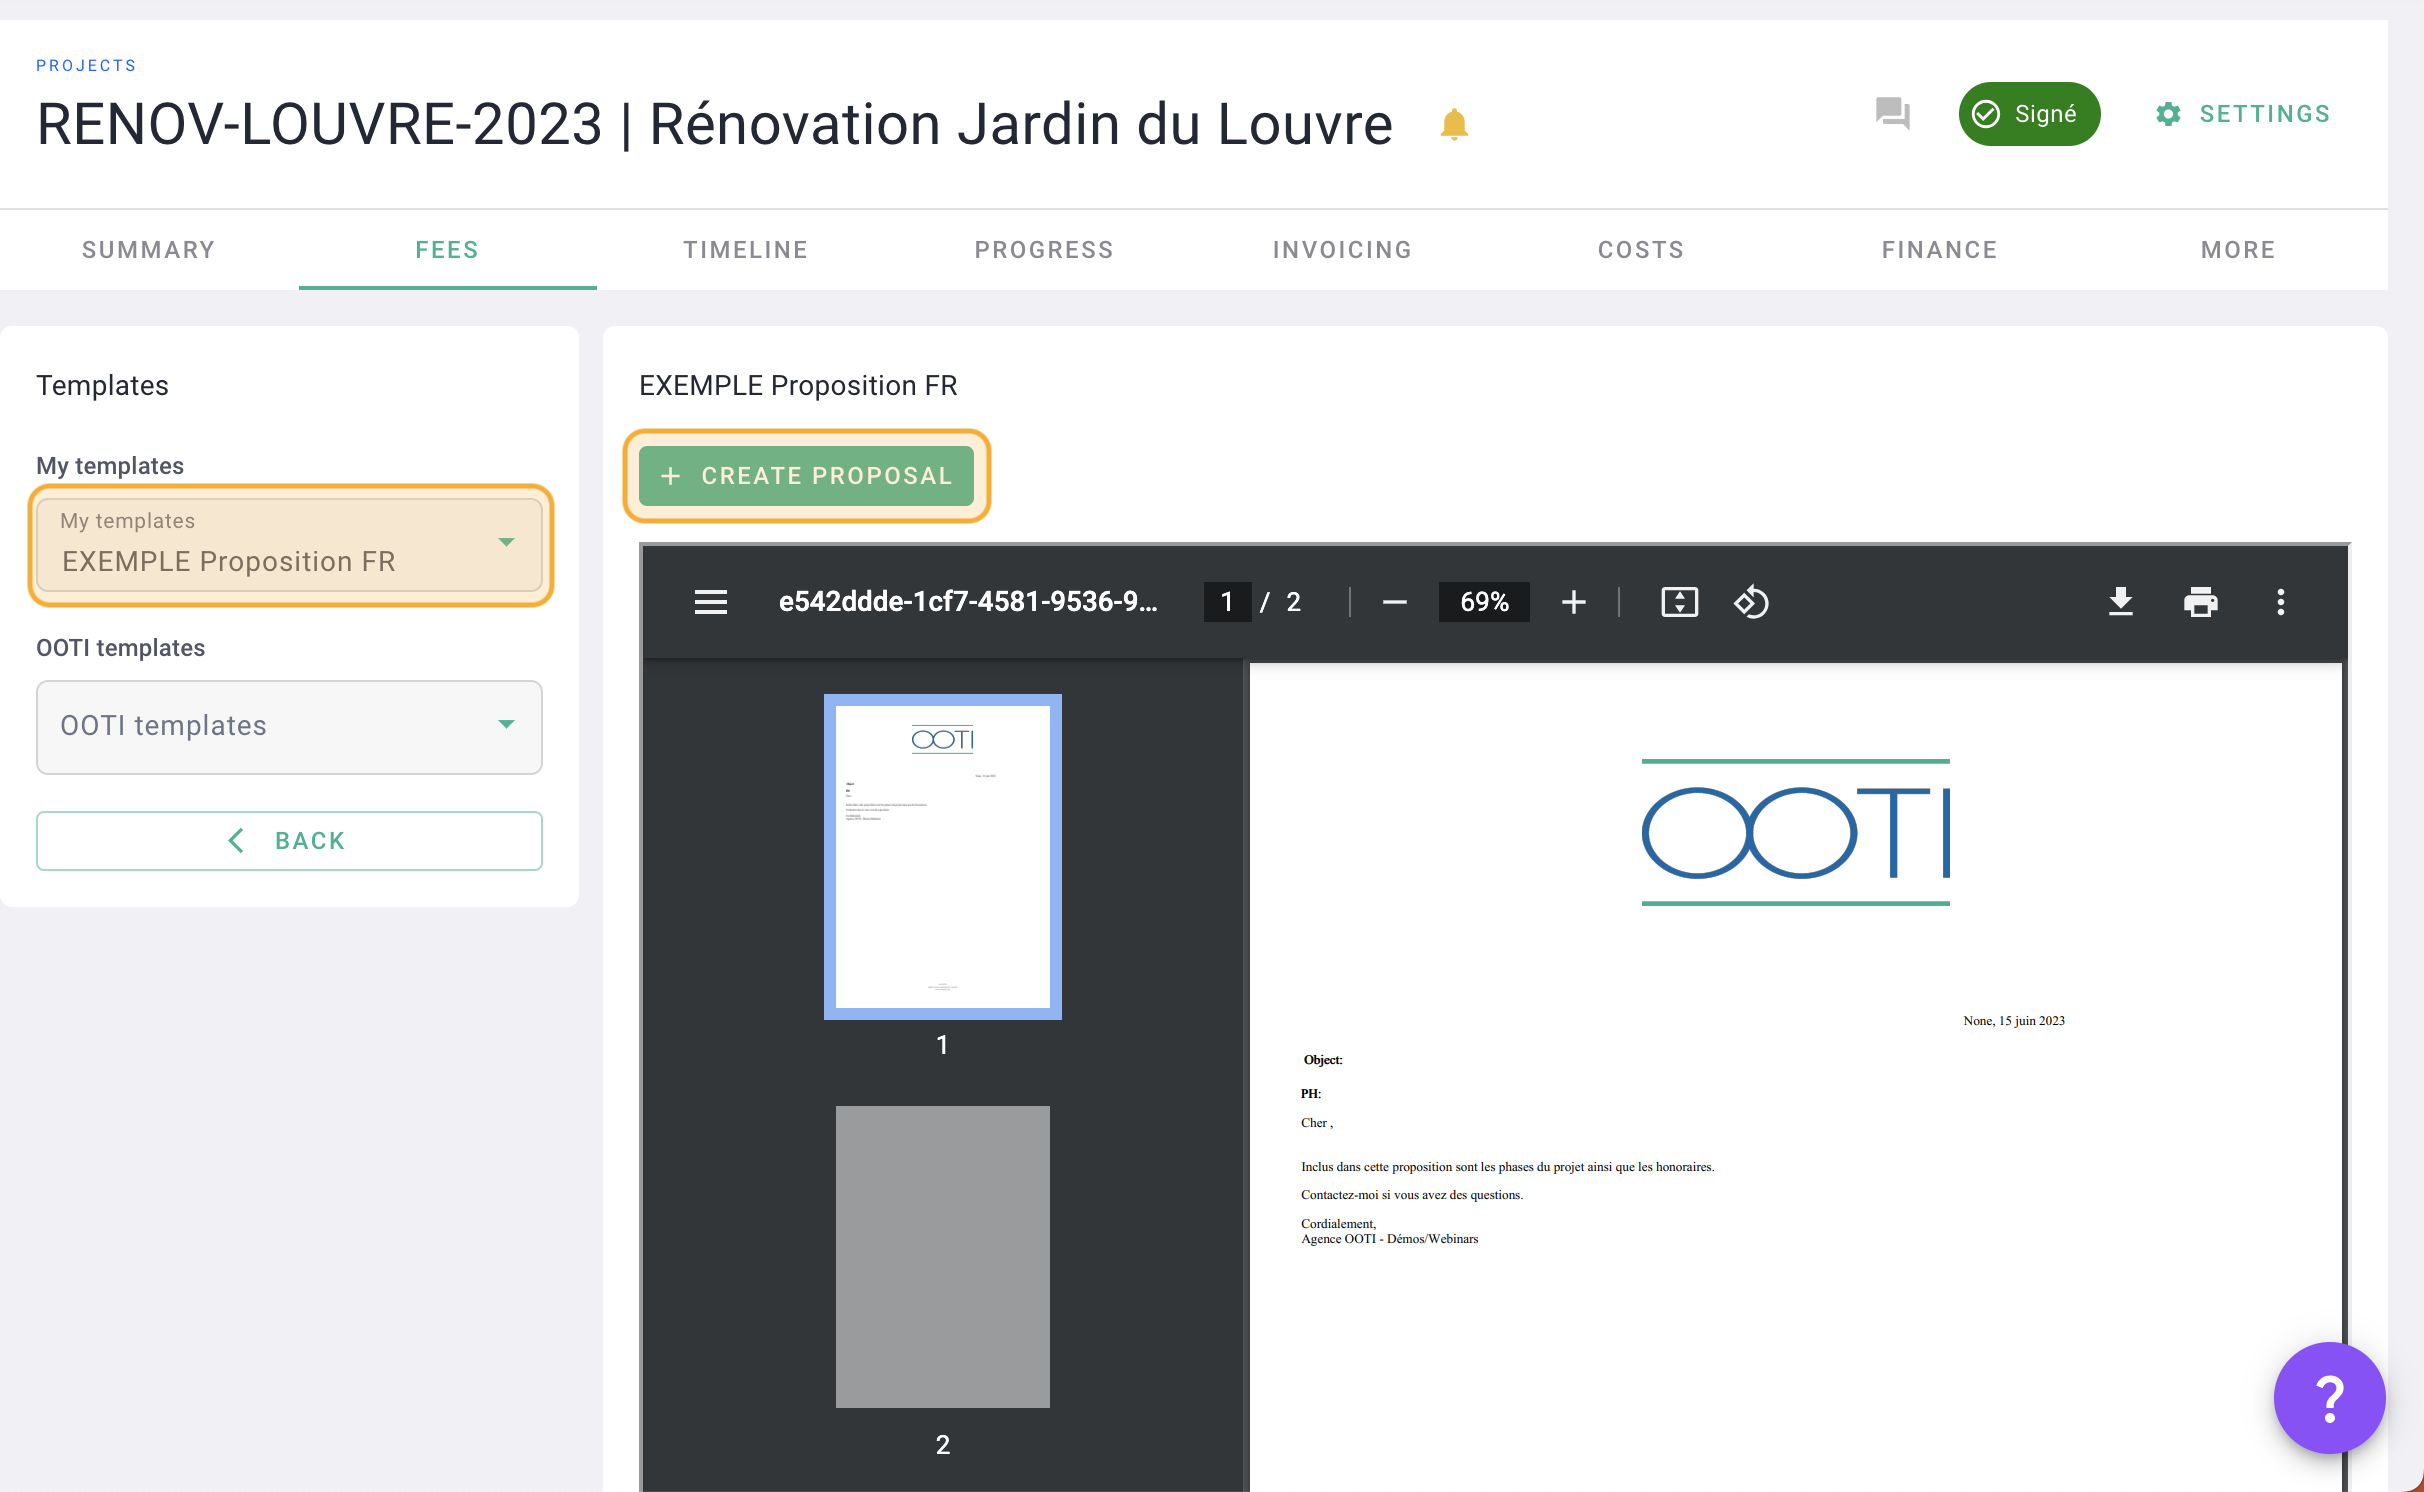
And again, if your proposal had variables, the proposal will contain the information related to the project.

