
Time tracking is essential for a thorough analysis of your projects or opportunities and, in general, for agency time management. Let us show you how it works. Don't worry; it won't take too much of your time :)
✅ Time types, entry limits, % or hours, project assignments... These configurations are managed by the account administrator(s). If needed, check with them for guidance :)
🔓 Required permissions
Super Admin
| Reading time | 3 min |
| Setup length | 1 min |
| Steps | 2 |
Summary
I/ Recording times: Entry, Modification, Deletion
II/ Calendar time entry
I/ Recording times: Entry, Modification, Deletion
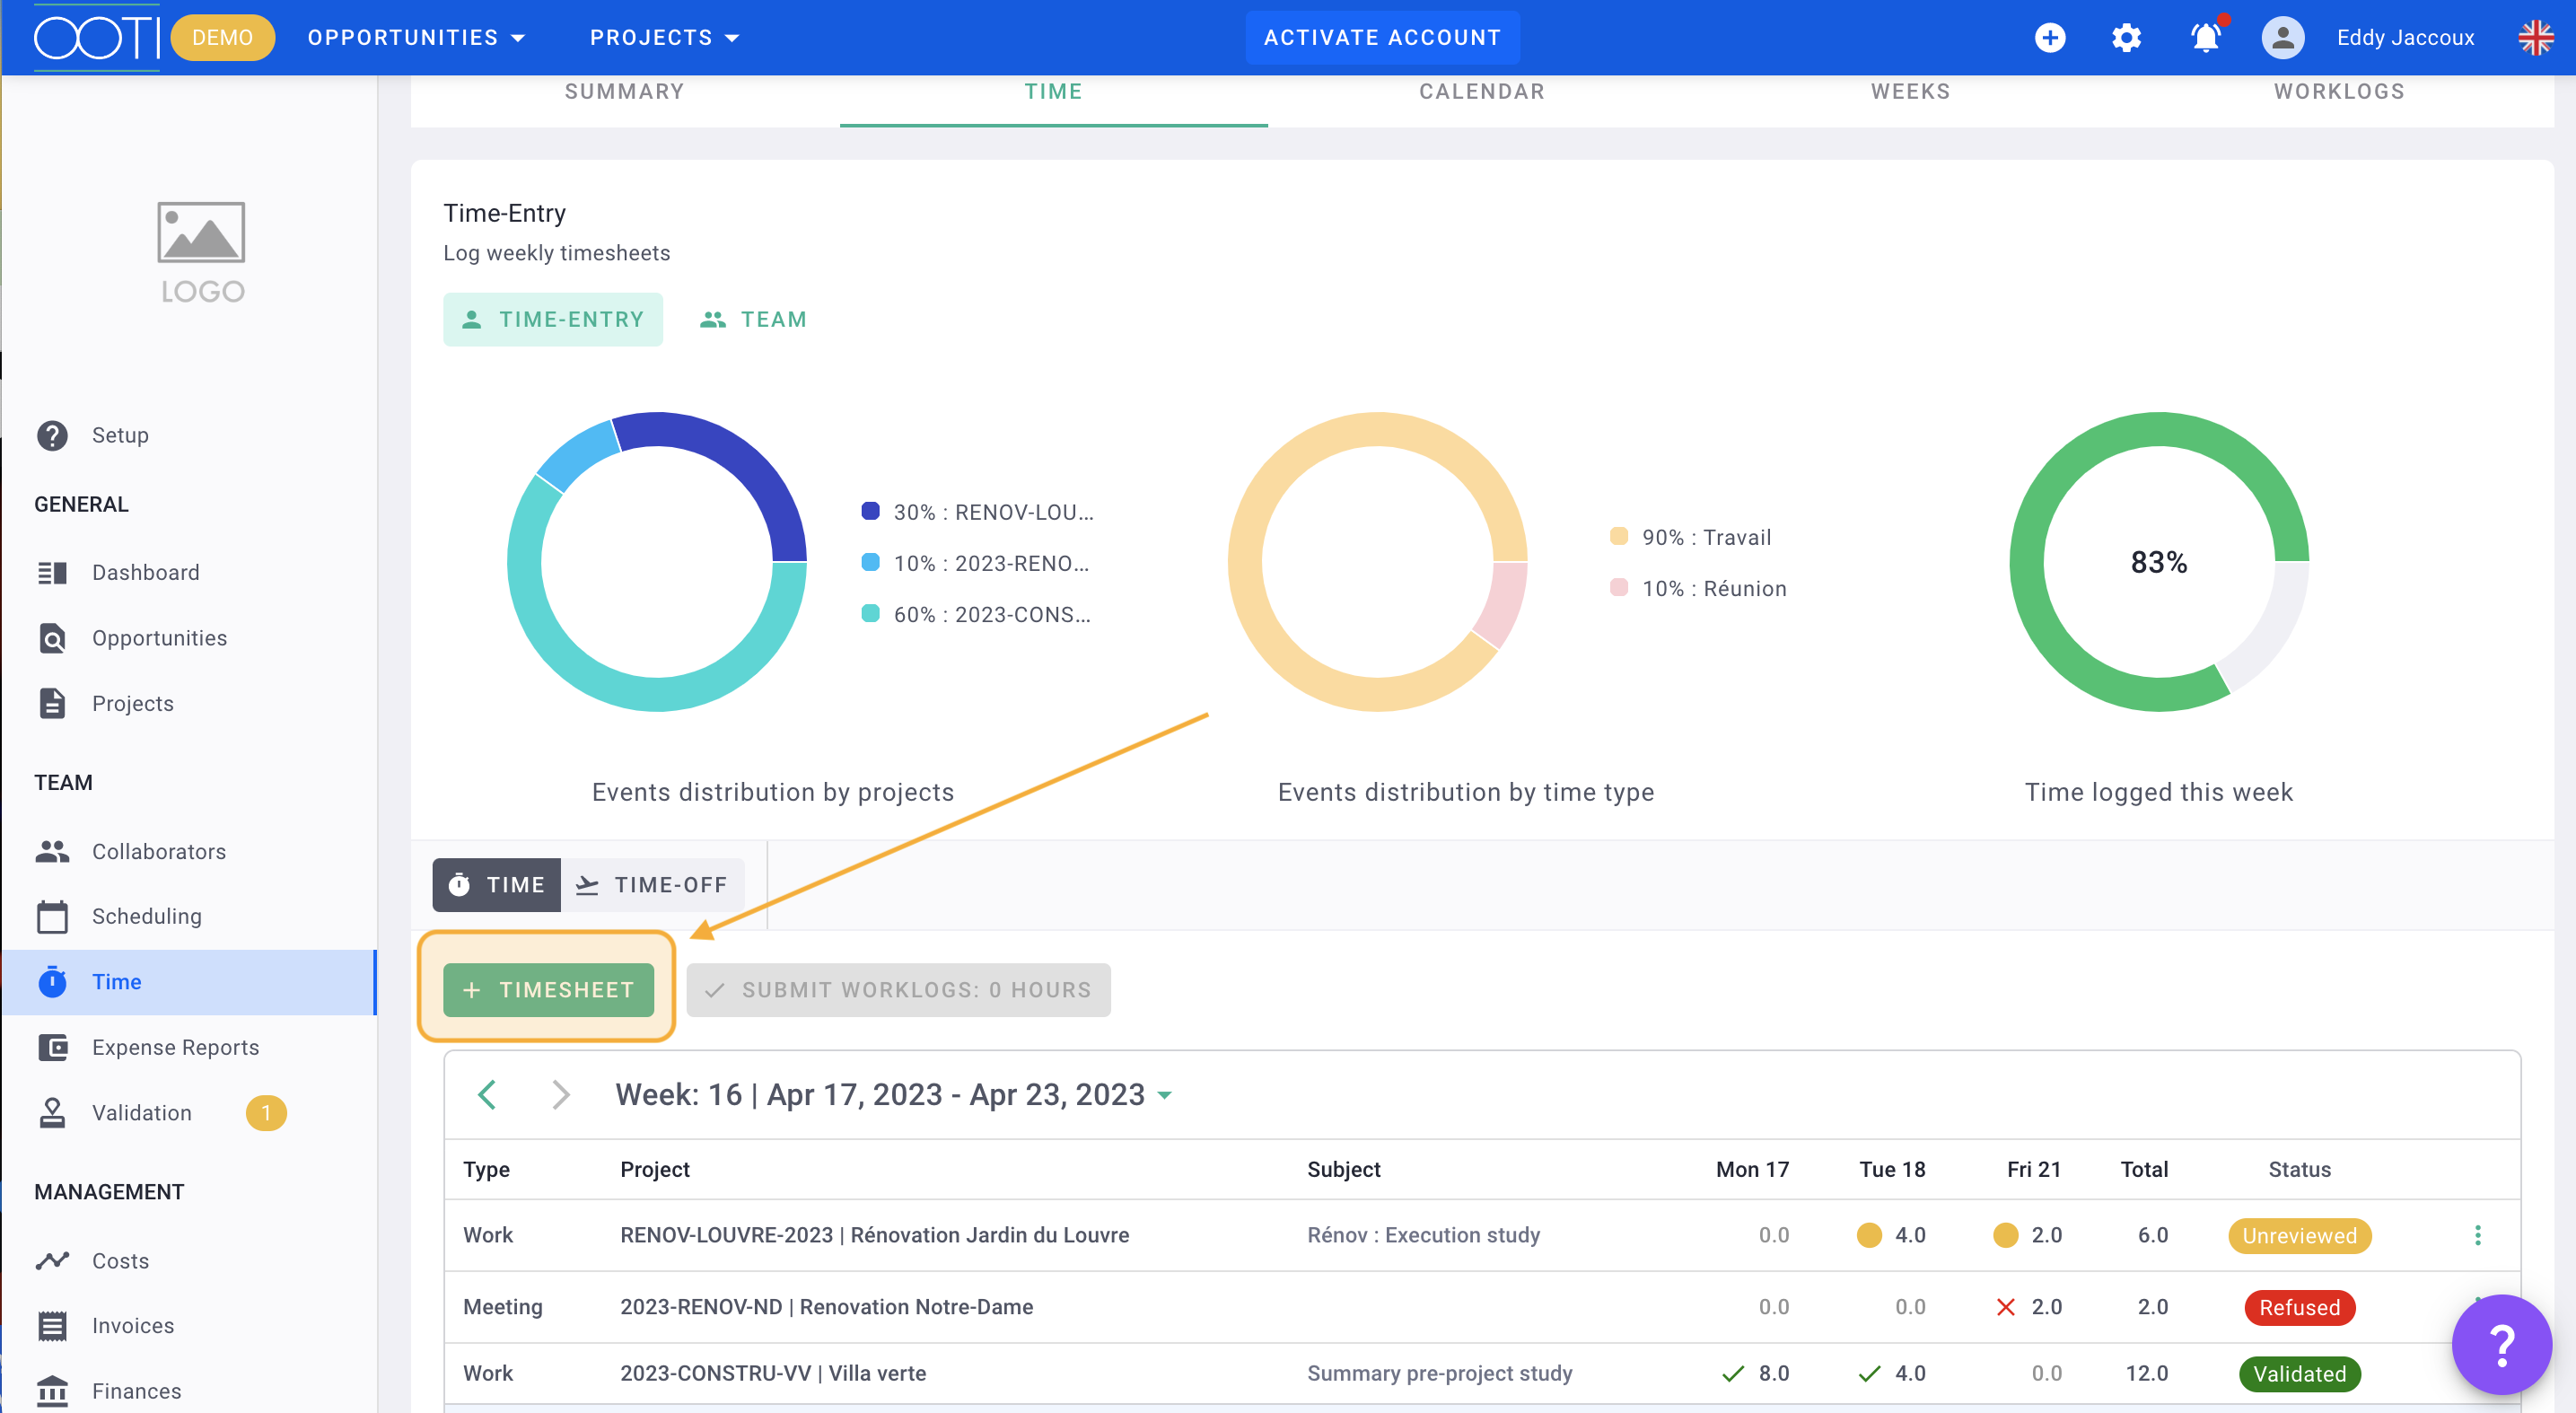
Go to the "Time" menu and then click on the "Time" tab.
Select the week. By default, you are on the current week, but you can view the last 12 weeks if you forgot or didn't have time to fill them in.

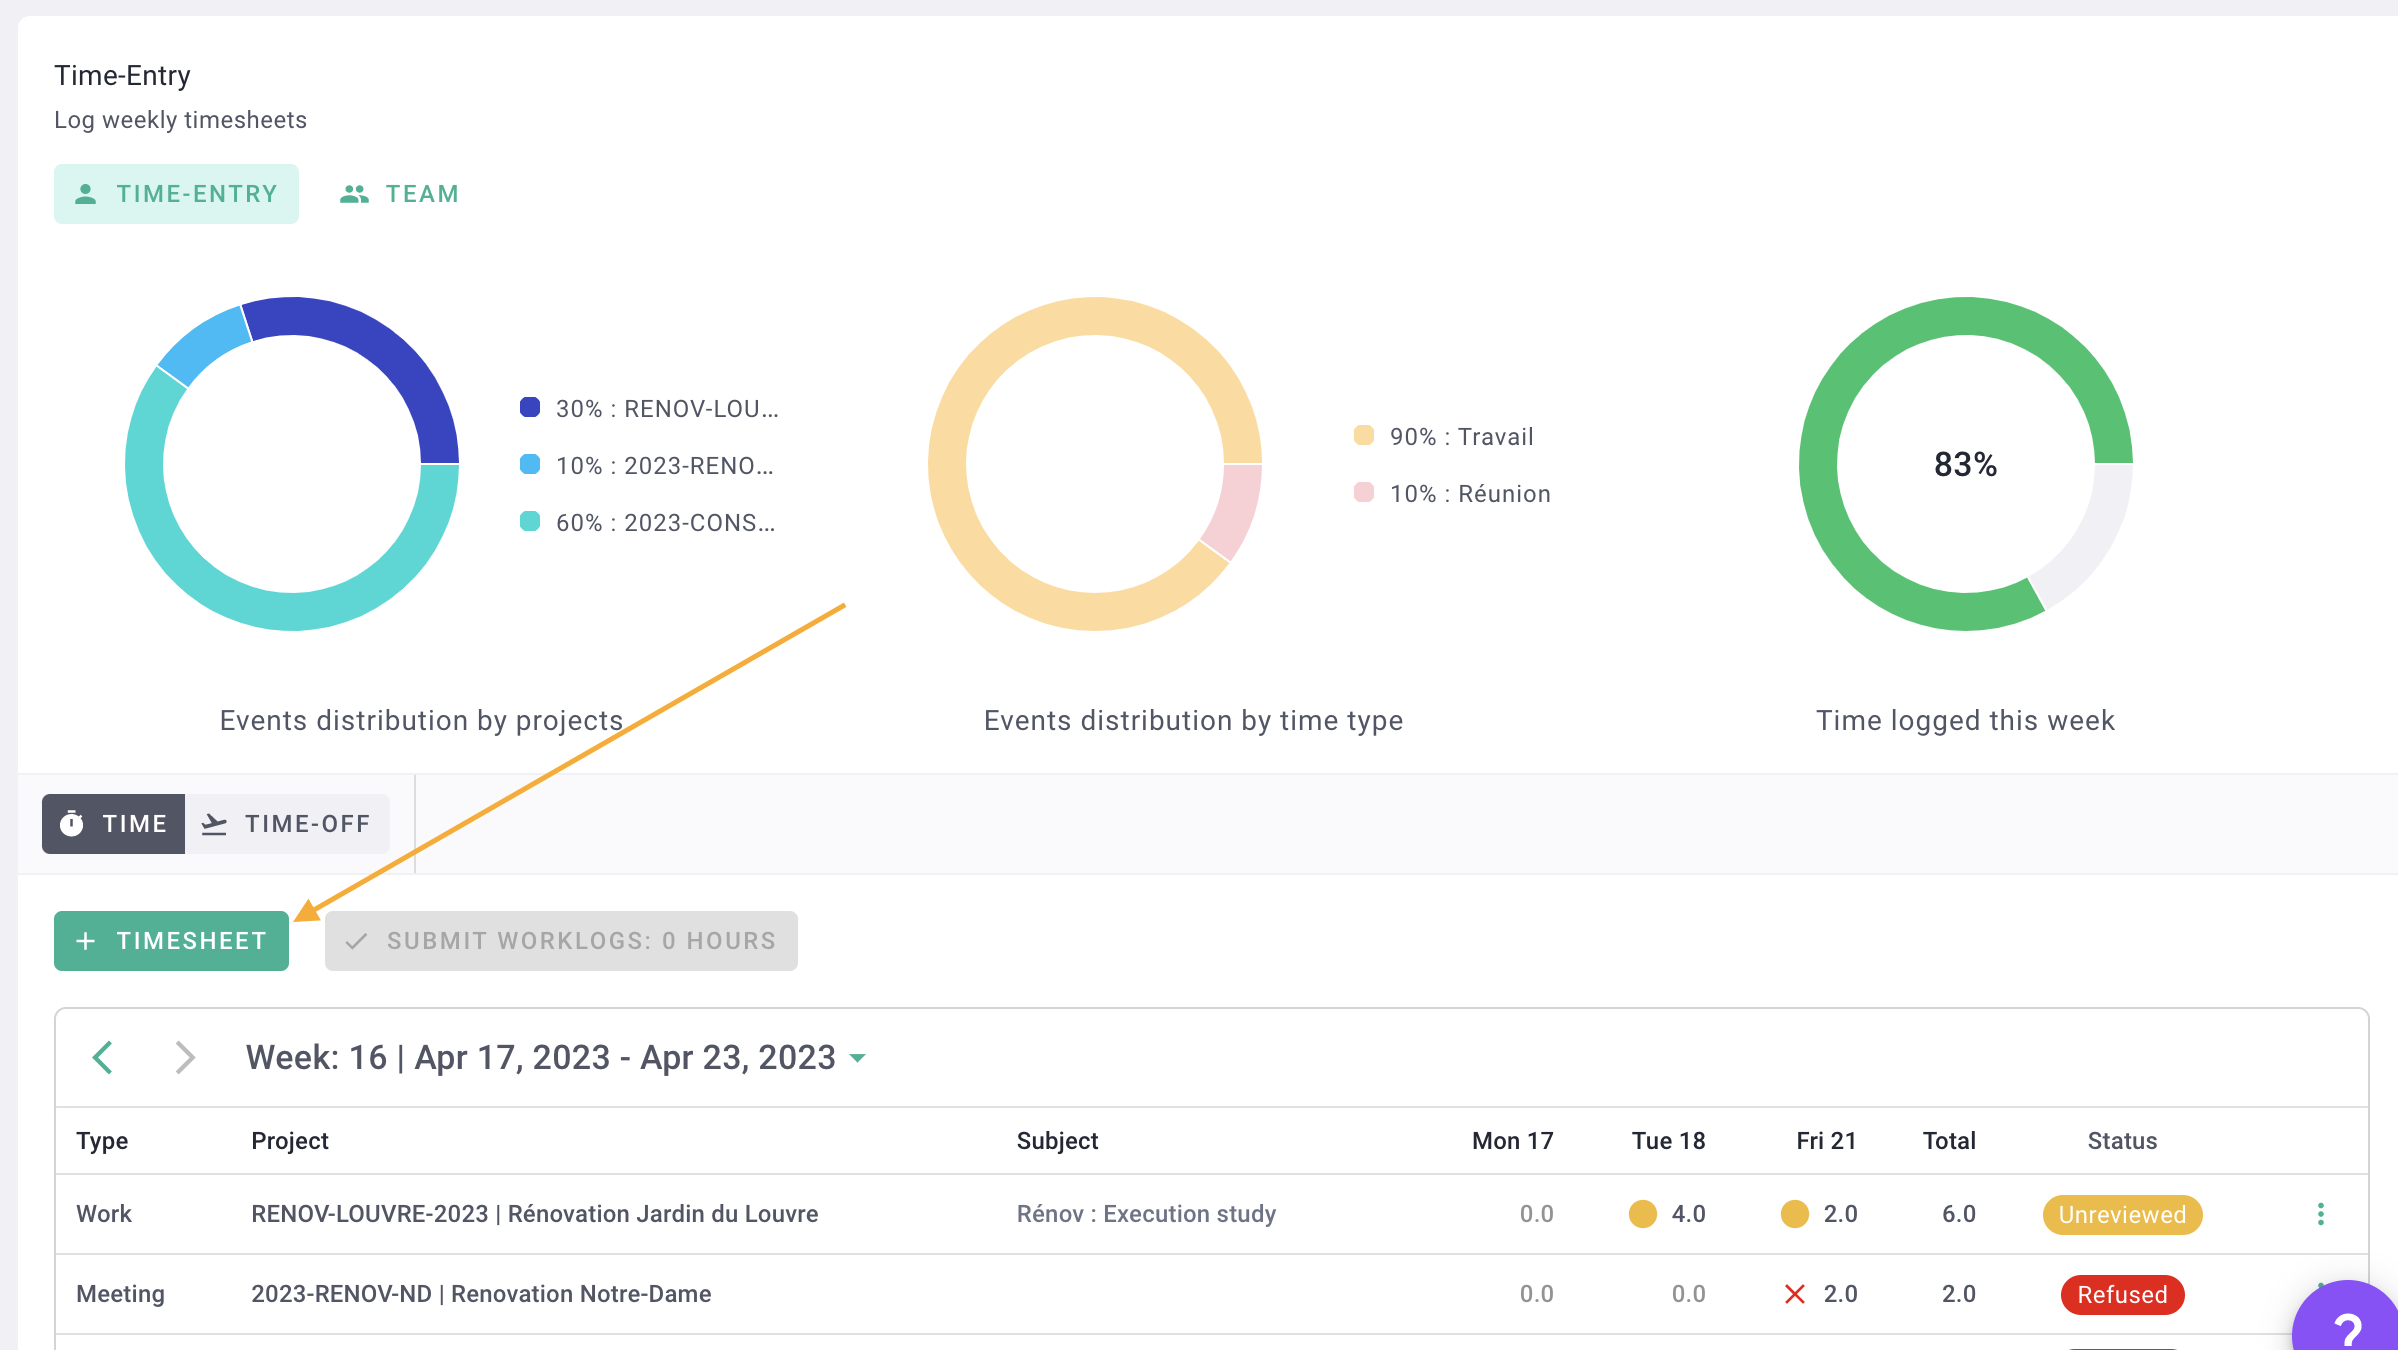
Click on + Timesheet.
In the form, choose the time type.
Depending on the type, you can link it to a project or opportunity, and for even more precision, you can choose a phase.
💡 If you can't find your project, refer to your admin, who can add it for you.
Then, enter your times (hours or percentage, depending on the account settings) for each day and click "Save."
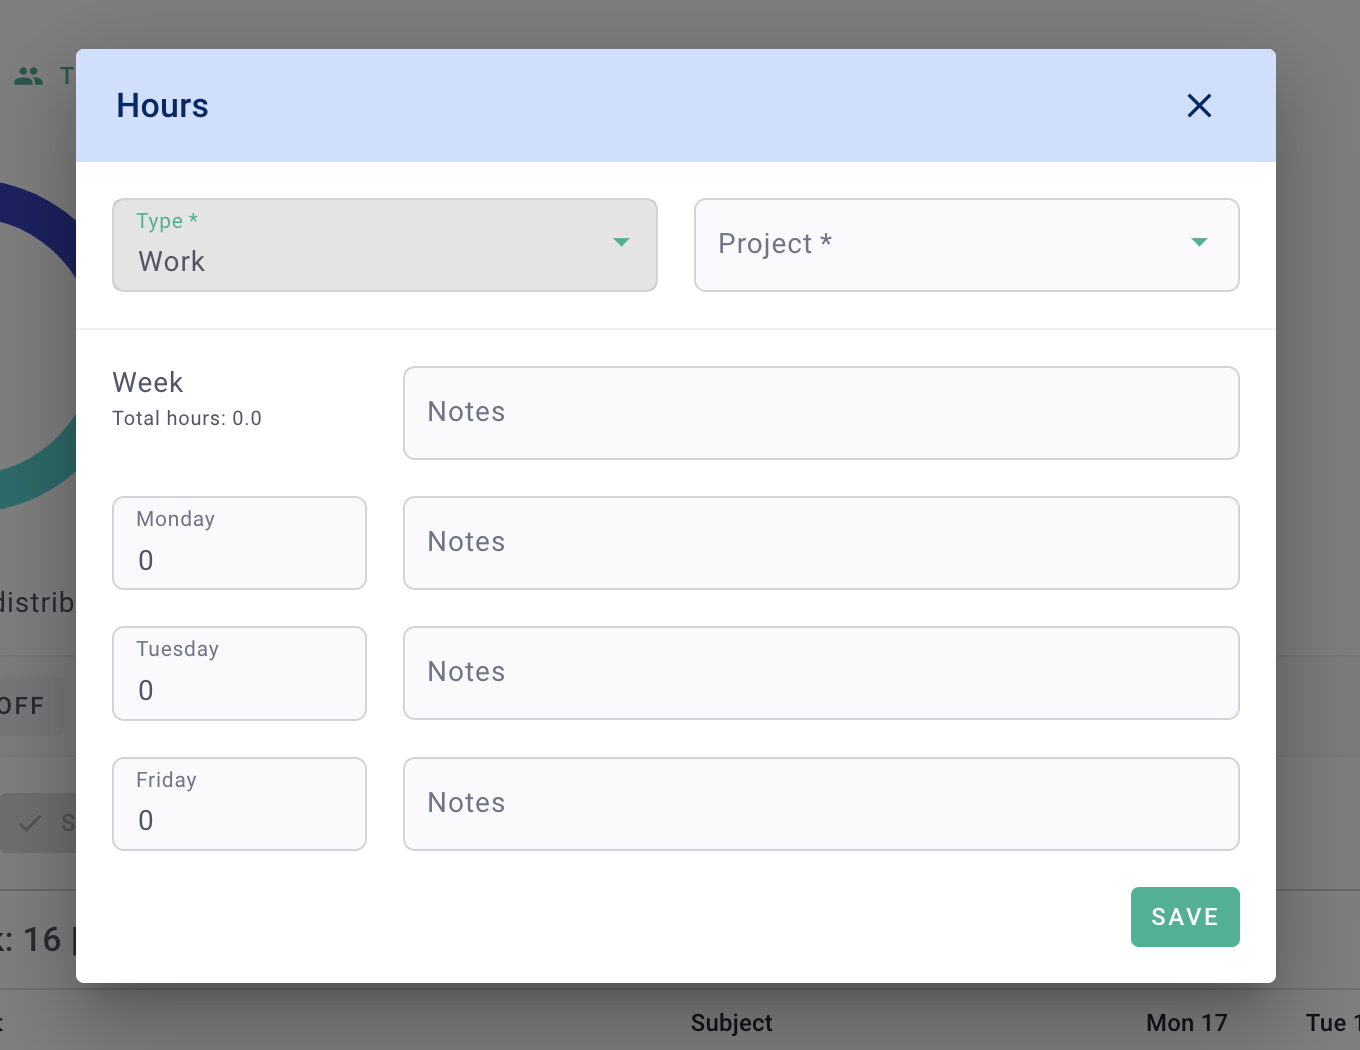
You have created the first time entry!
You can complete your week by clicking again on + Timesheet. For example, when you work on another project, phase, or simply something other than project time, such as training or a meeting.
Here, we have recorded regular work hours (without a project or phase) and meeting time.
Your times are in draft mode, and you can always modify them.
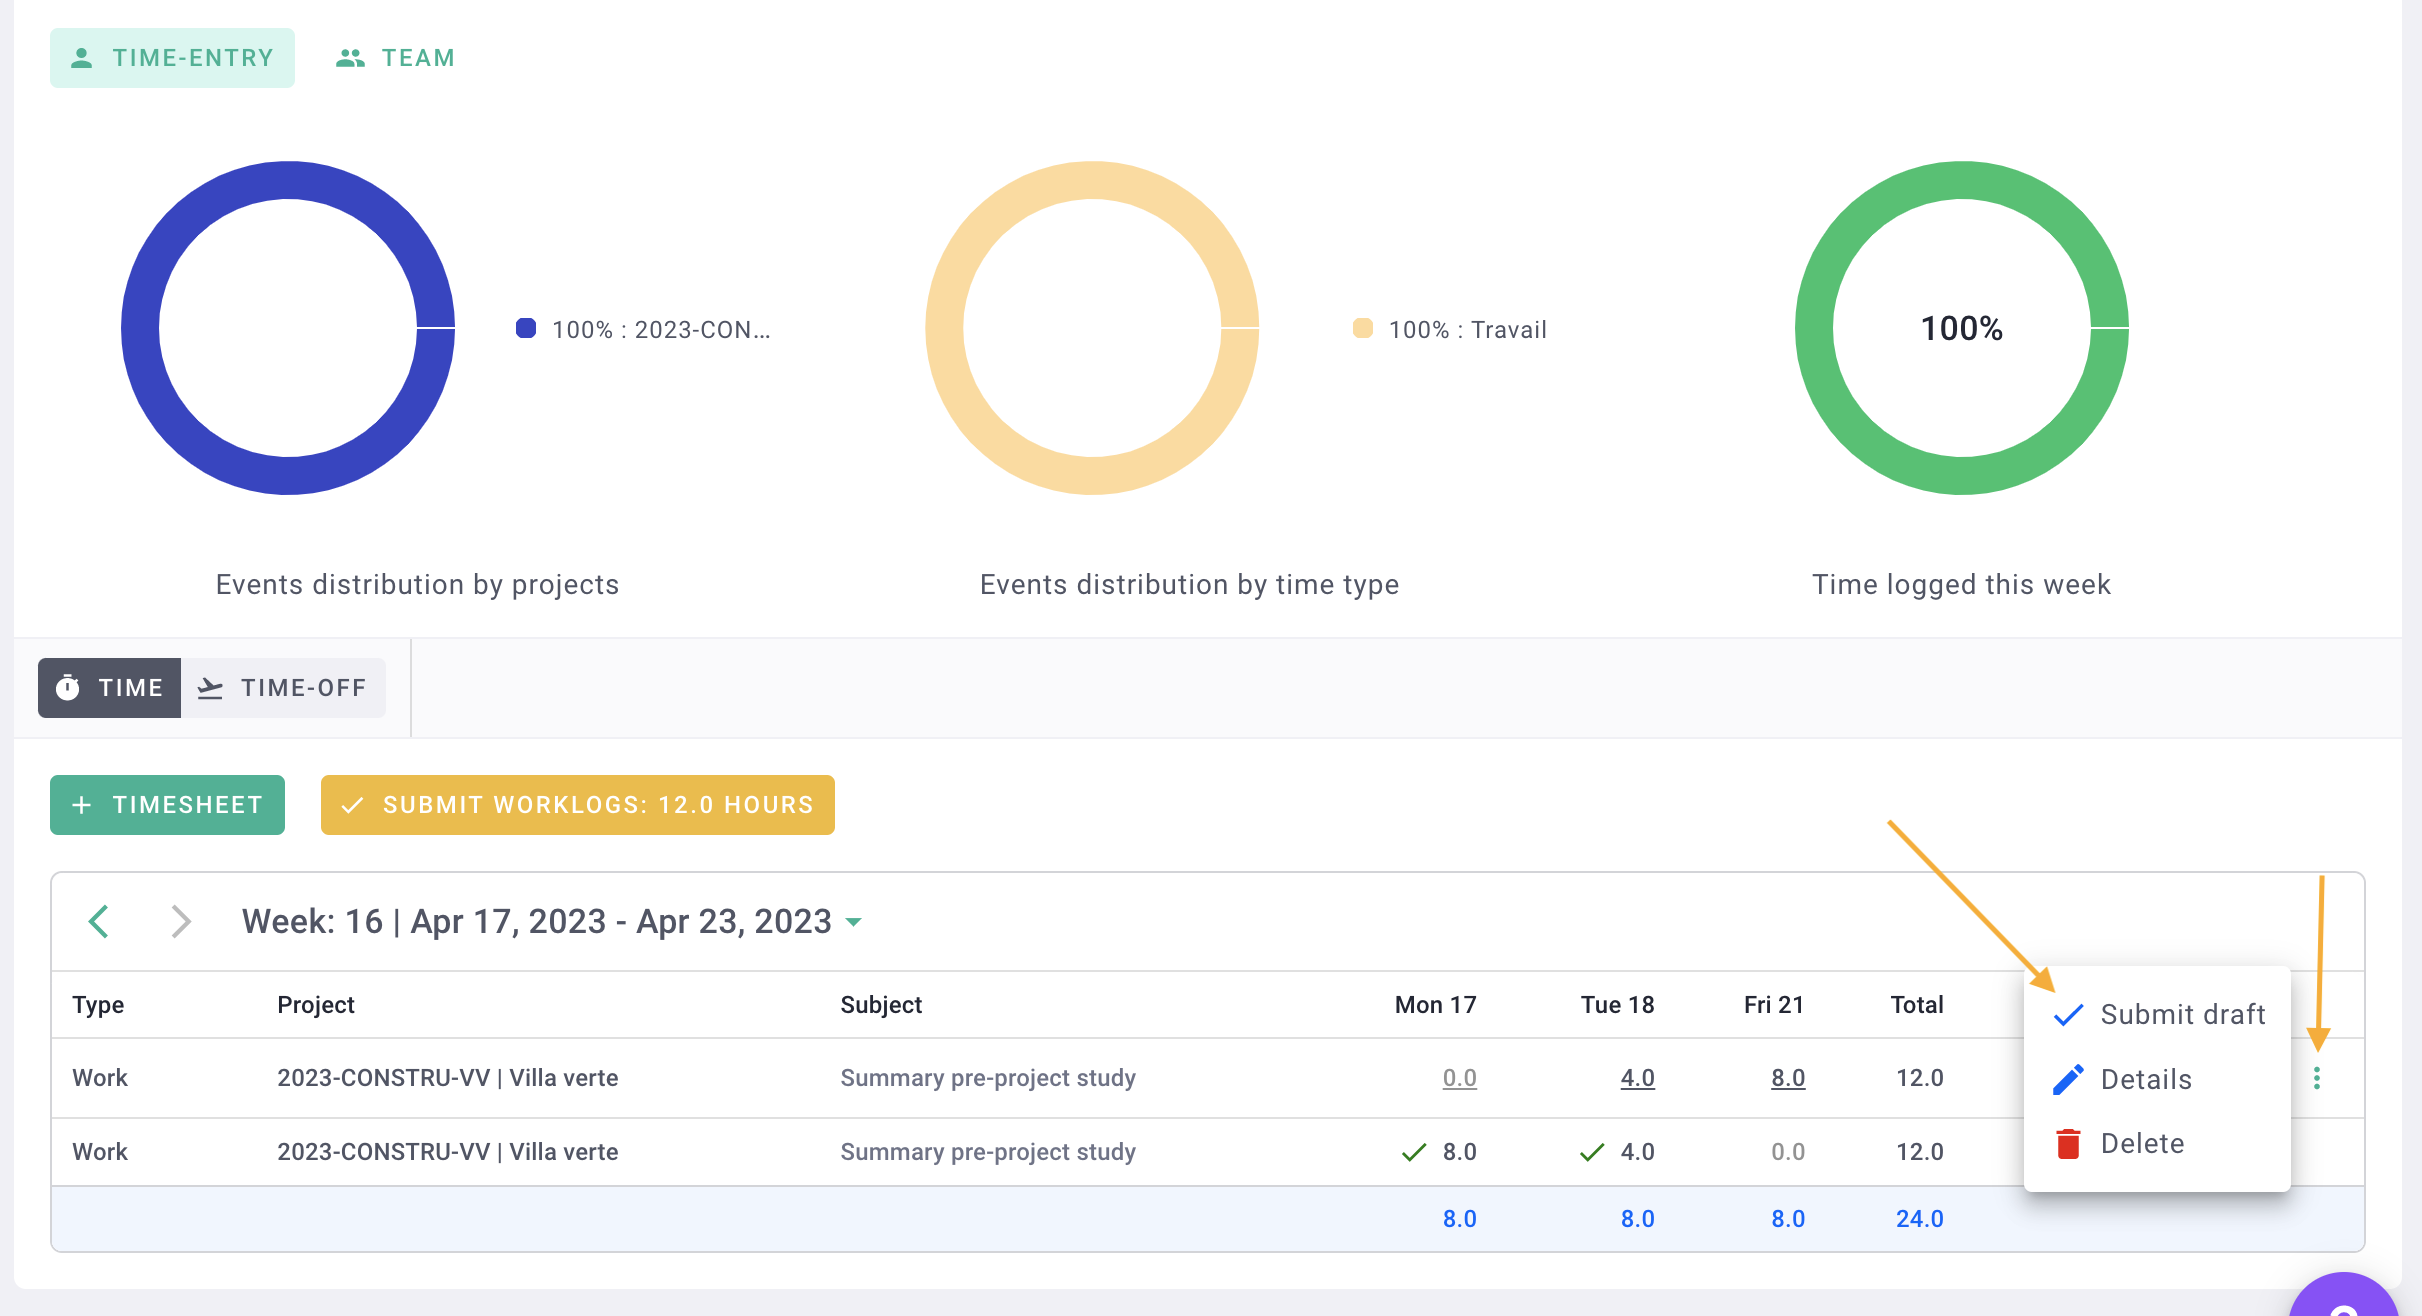
Simply click on a cell to edit the times; this is easier than creating a new row each time.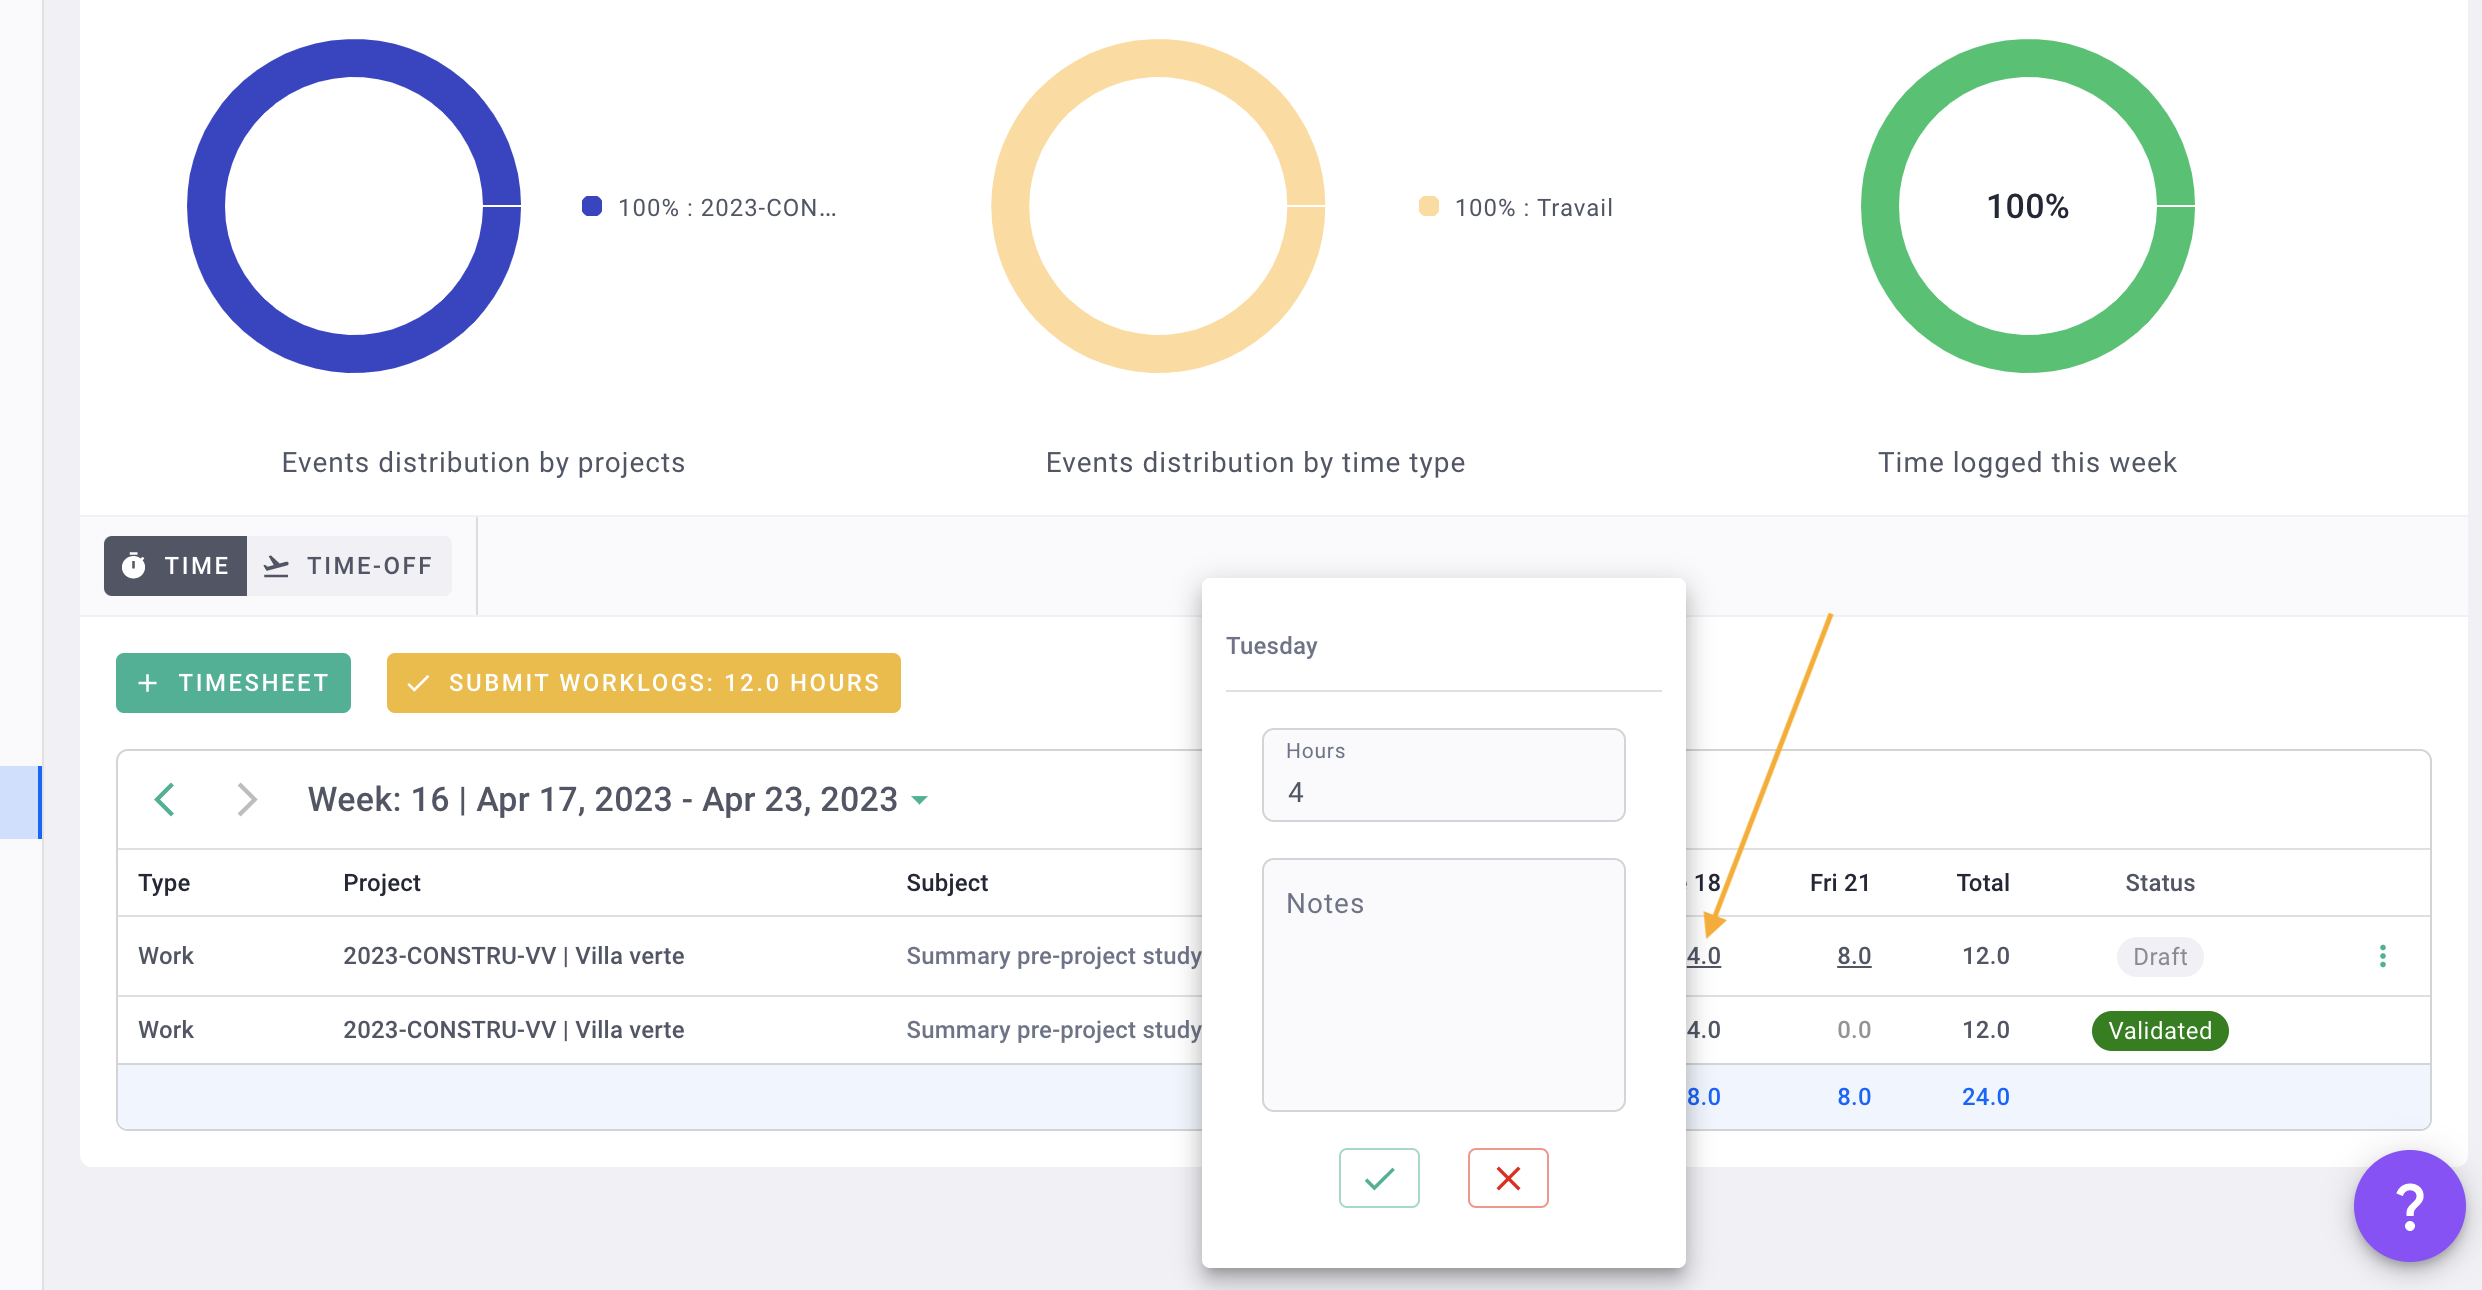
At the end of each row, click on the options "..." to delete your entry or access the details to modify the type, project, etc.

Once your week is filled, click "Save Drafts: X hours" to ensure they are properly accounted for.
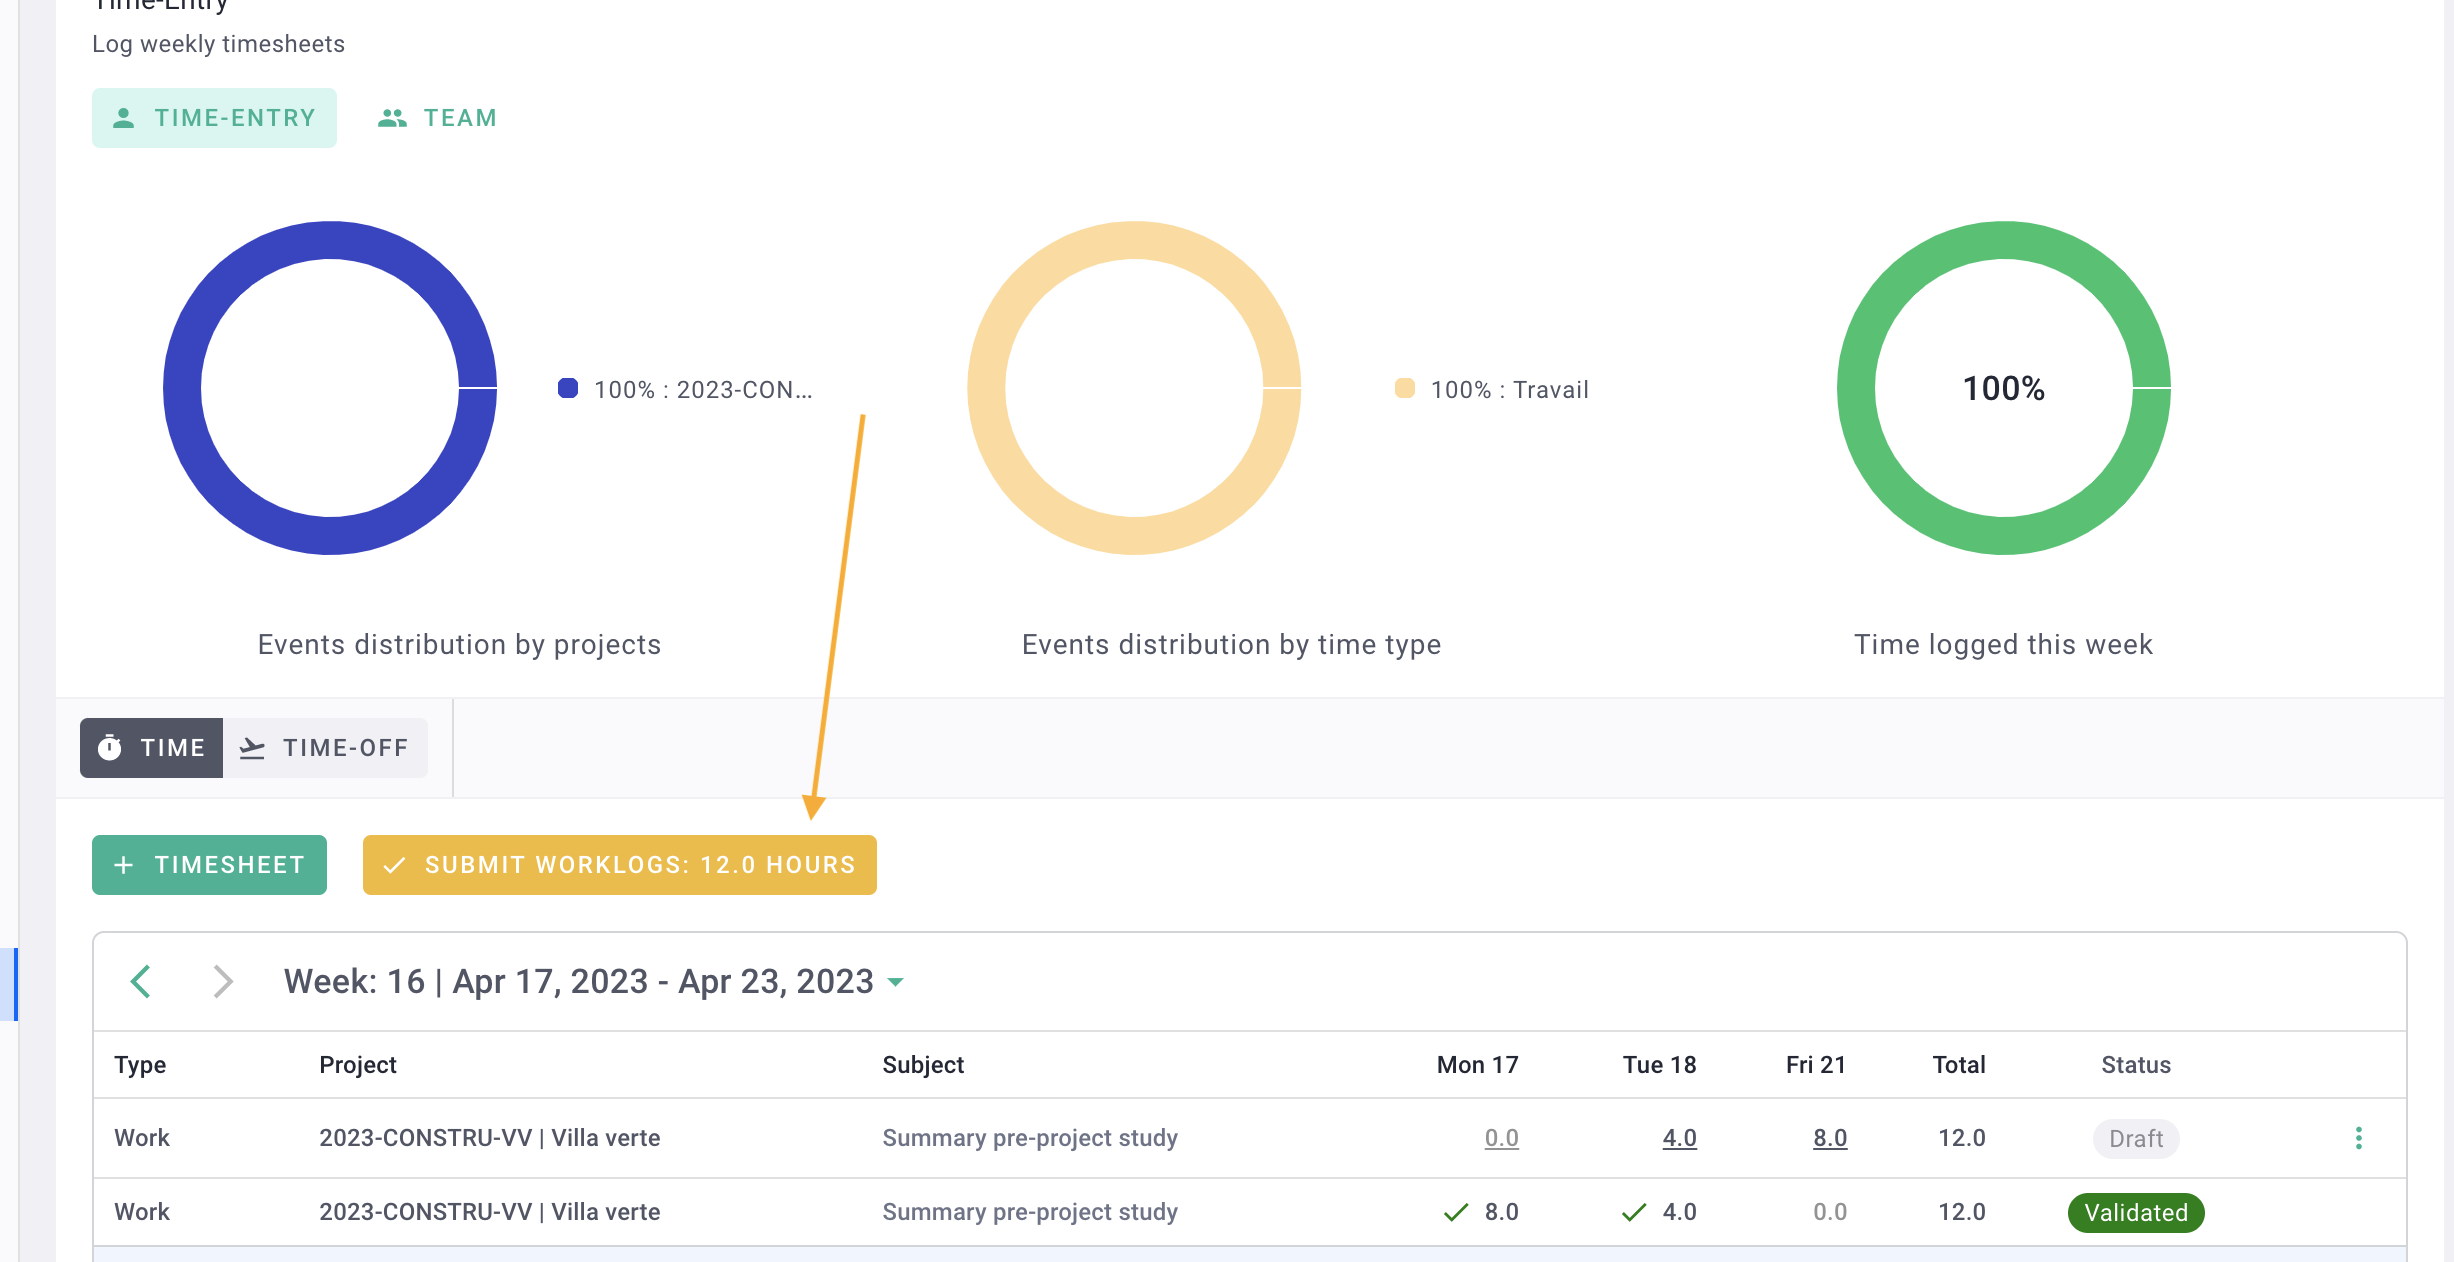
Done! You have recorded your times! 🎉
Your times will be reviewed and approved by management or designated personnel.
You can always modify your times when they are "not validated". Click options... > convert to draft.
II/ Calendar time entry
Go to "Times" > "Calendar."
You can use the filter to view daily, weekly, monthly, or yearly.

For example, here we are in daily view. Click on "+ Event" to record your times.

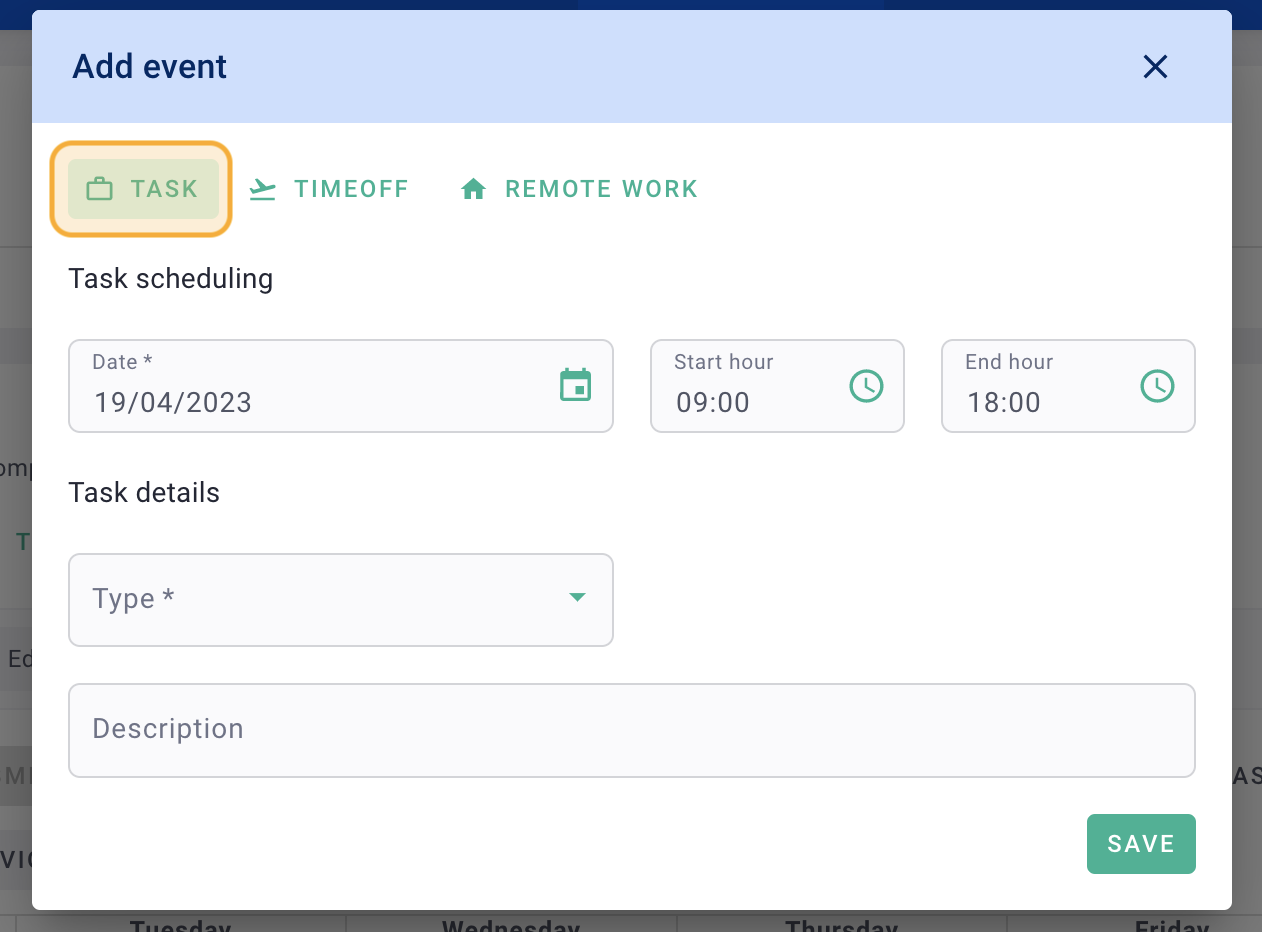
Ensure you are in the "Task" tab.
Complete the form by entering the start/end time, time type, project and phase (if applicable).
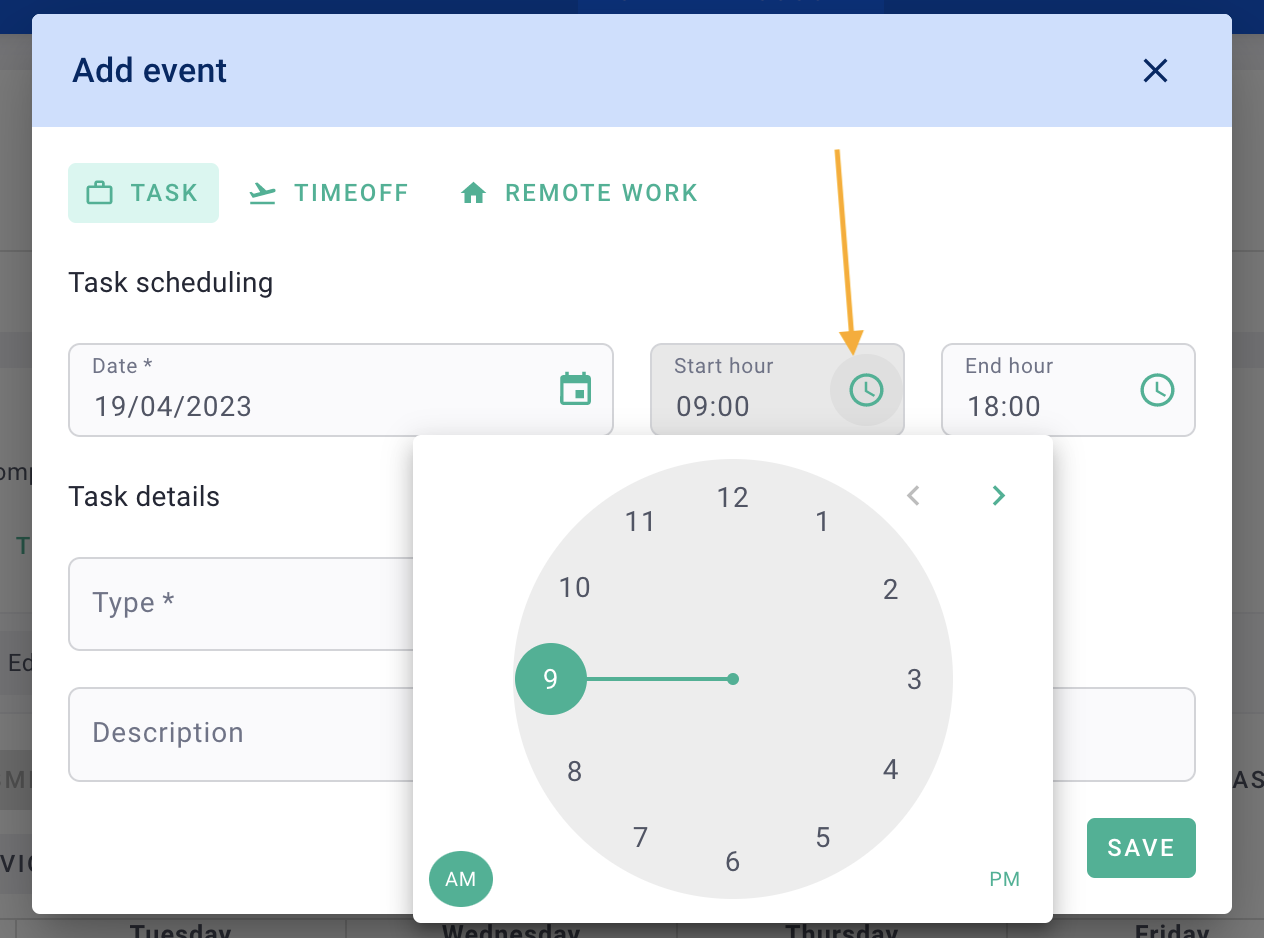
Click on the clock icon to use the time picker.
Click "Save."
You have recorded your times from the calendar! 🎉
Similar to recording a timesheet from the "Times" tab, remember to save your drafts for them to go through the approval process.
💡 On the calendar, timesheets that are still in draft mode will appear with a hatched pattern.