Your employees have submitted their leave requests, and now it's your turn to approve (or not!).
✅ First, set up time and leave parameters, and keep your employees' balances up to date.
🔓 Required permissions
Super admin
| Reading time | 3 min |
| Setup length | 1 min |
| Steps | 2 |
Summary
I/ Approving leave requests
II/ Declining leave requests
III/ Modifying or requesting modifications for approved or delcined requests
IV/ Receive a summary email
I/ Approving leave requests
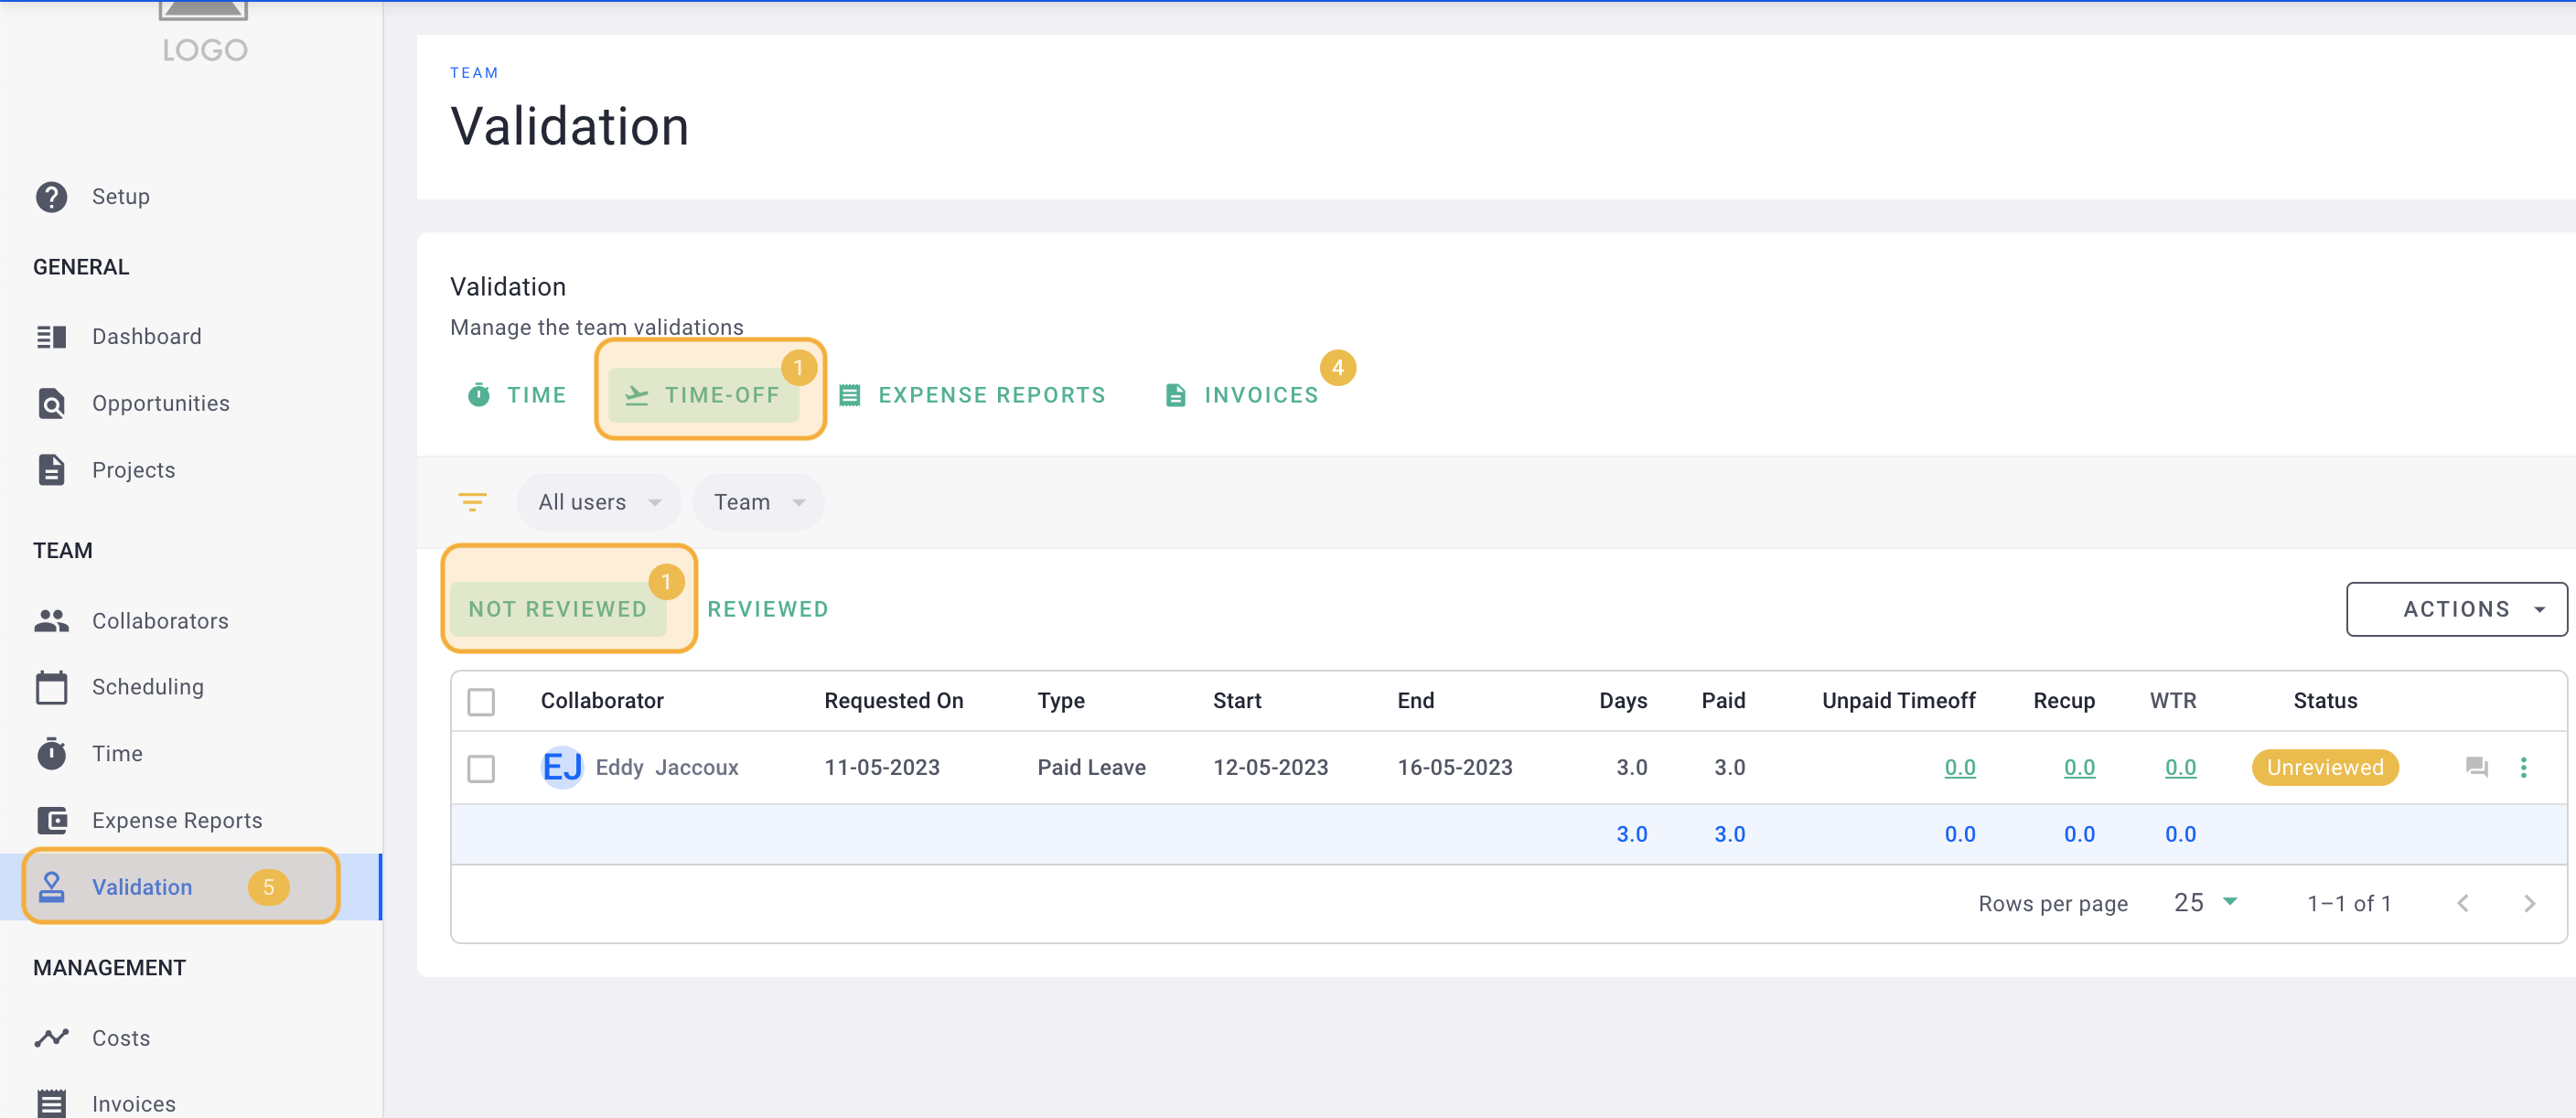
Go to the Validation section > Leave > Not Reviewed. Here, you will find all the leave requests that need to be managed.
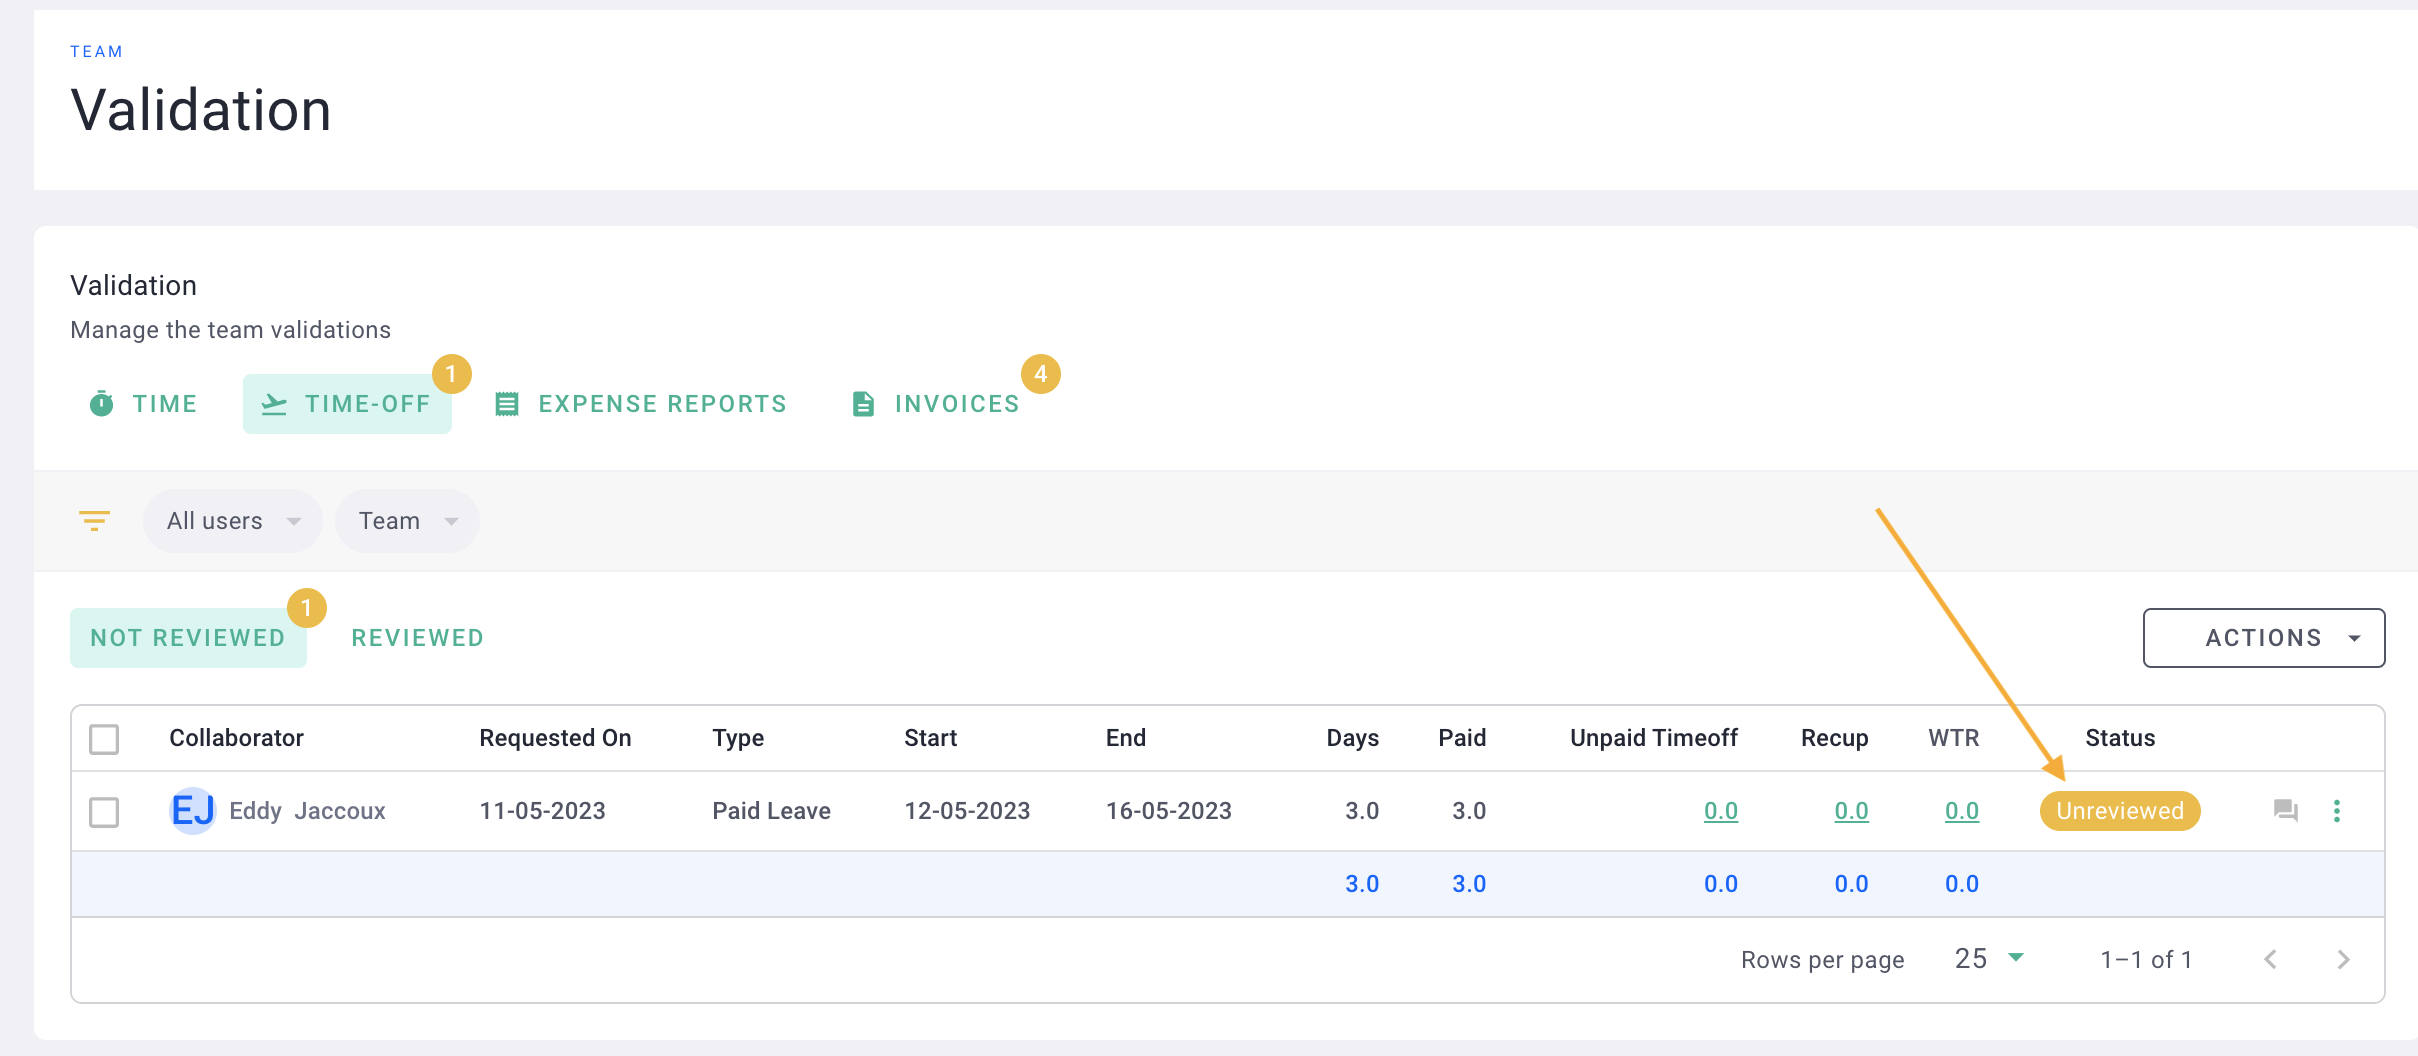
Click on the status of the request.
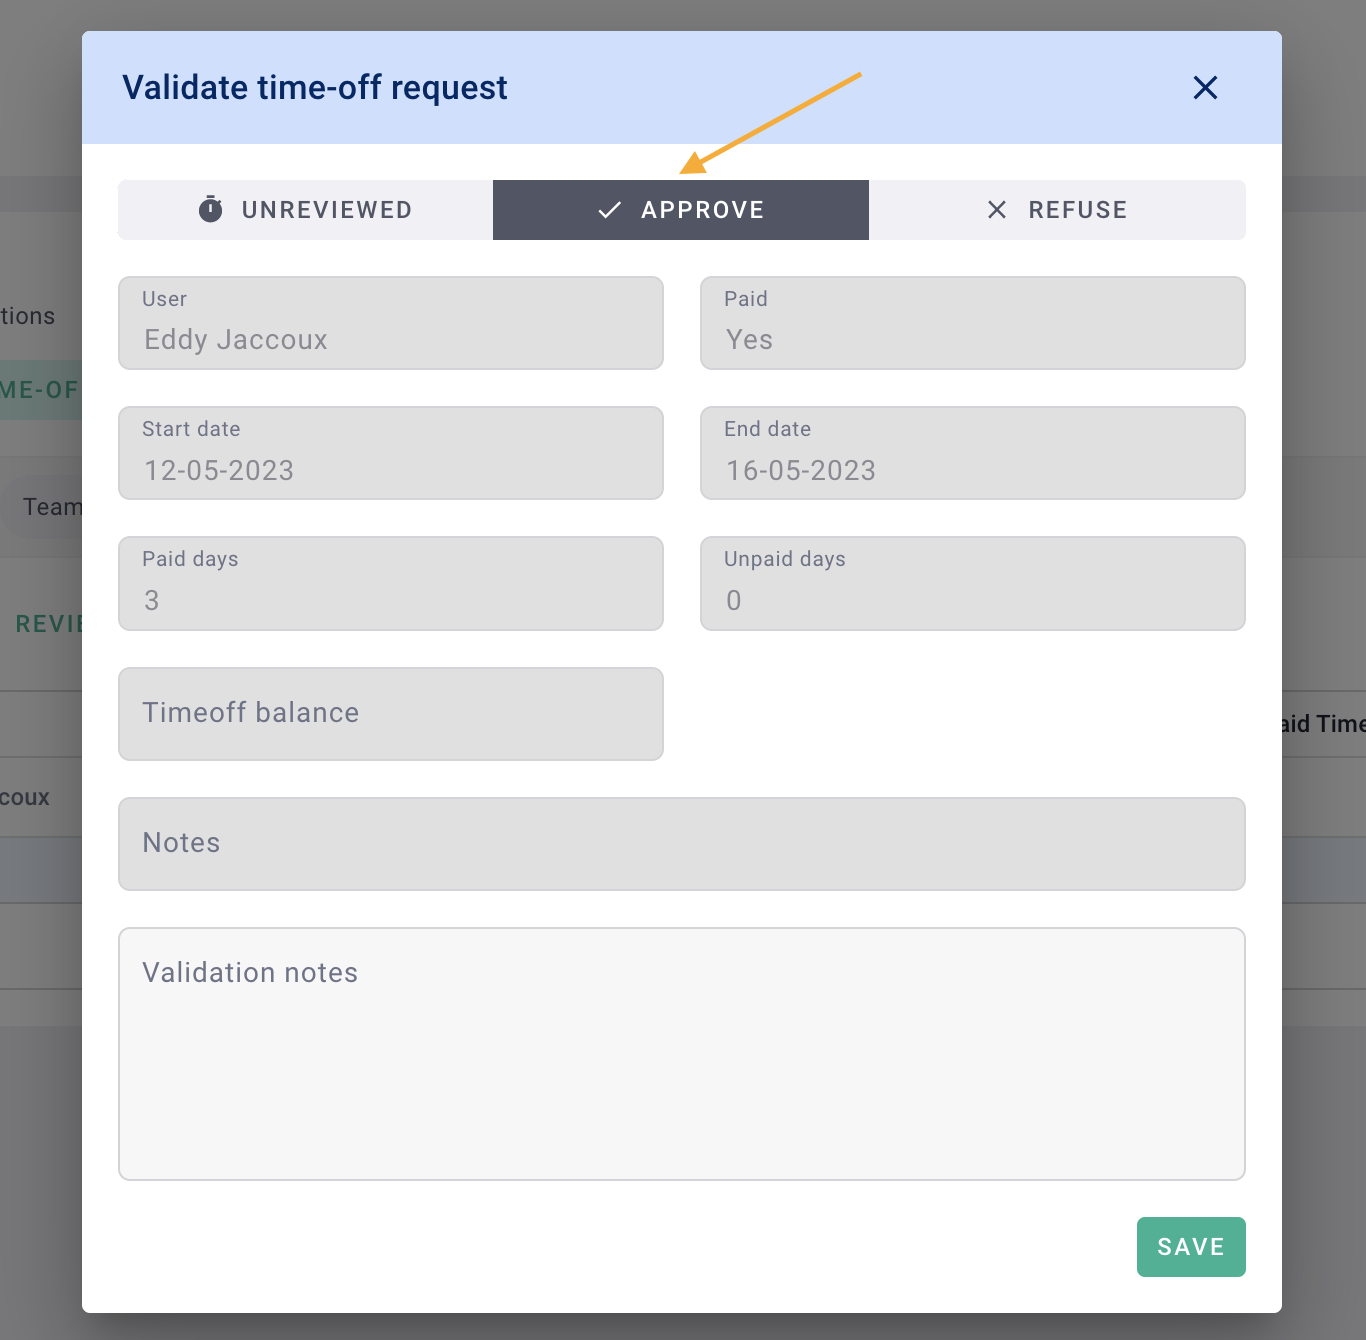
You will see the request details.
Click Approve and then Save to accept the request. Add notes if desired.
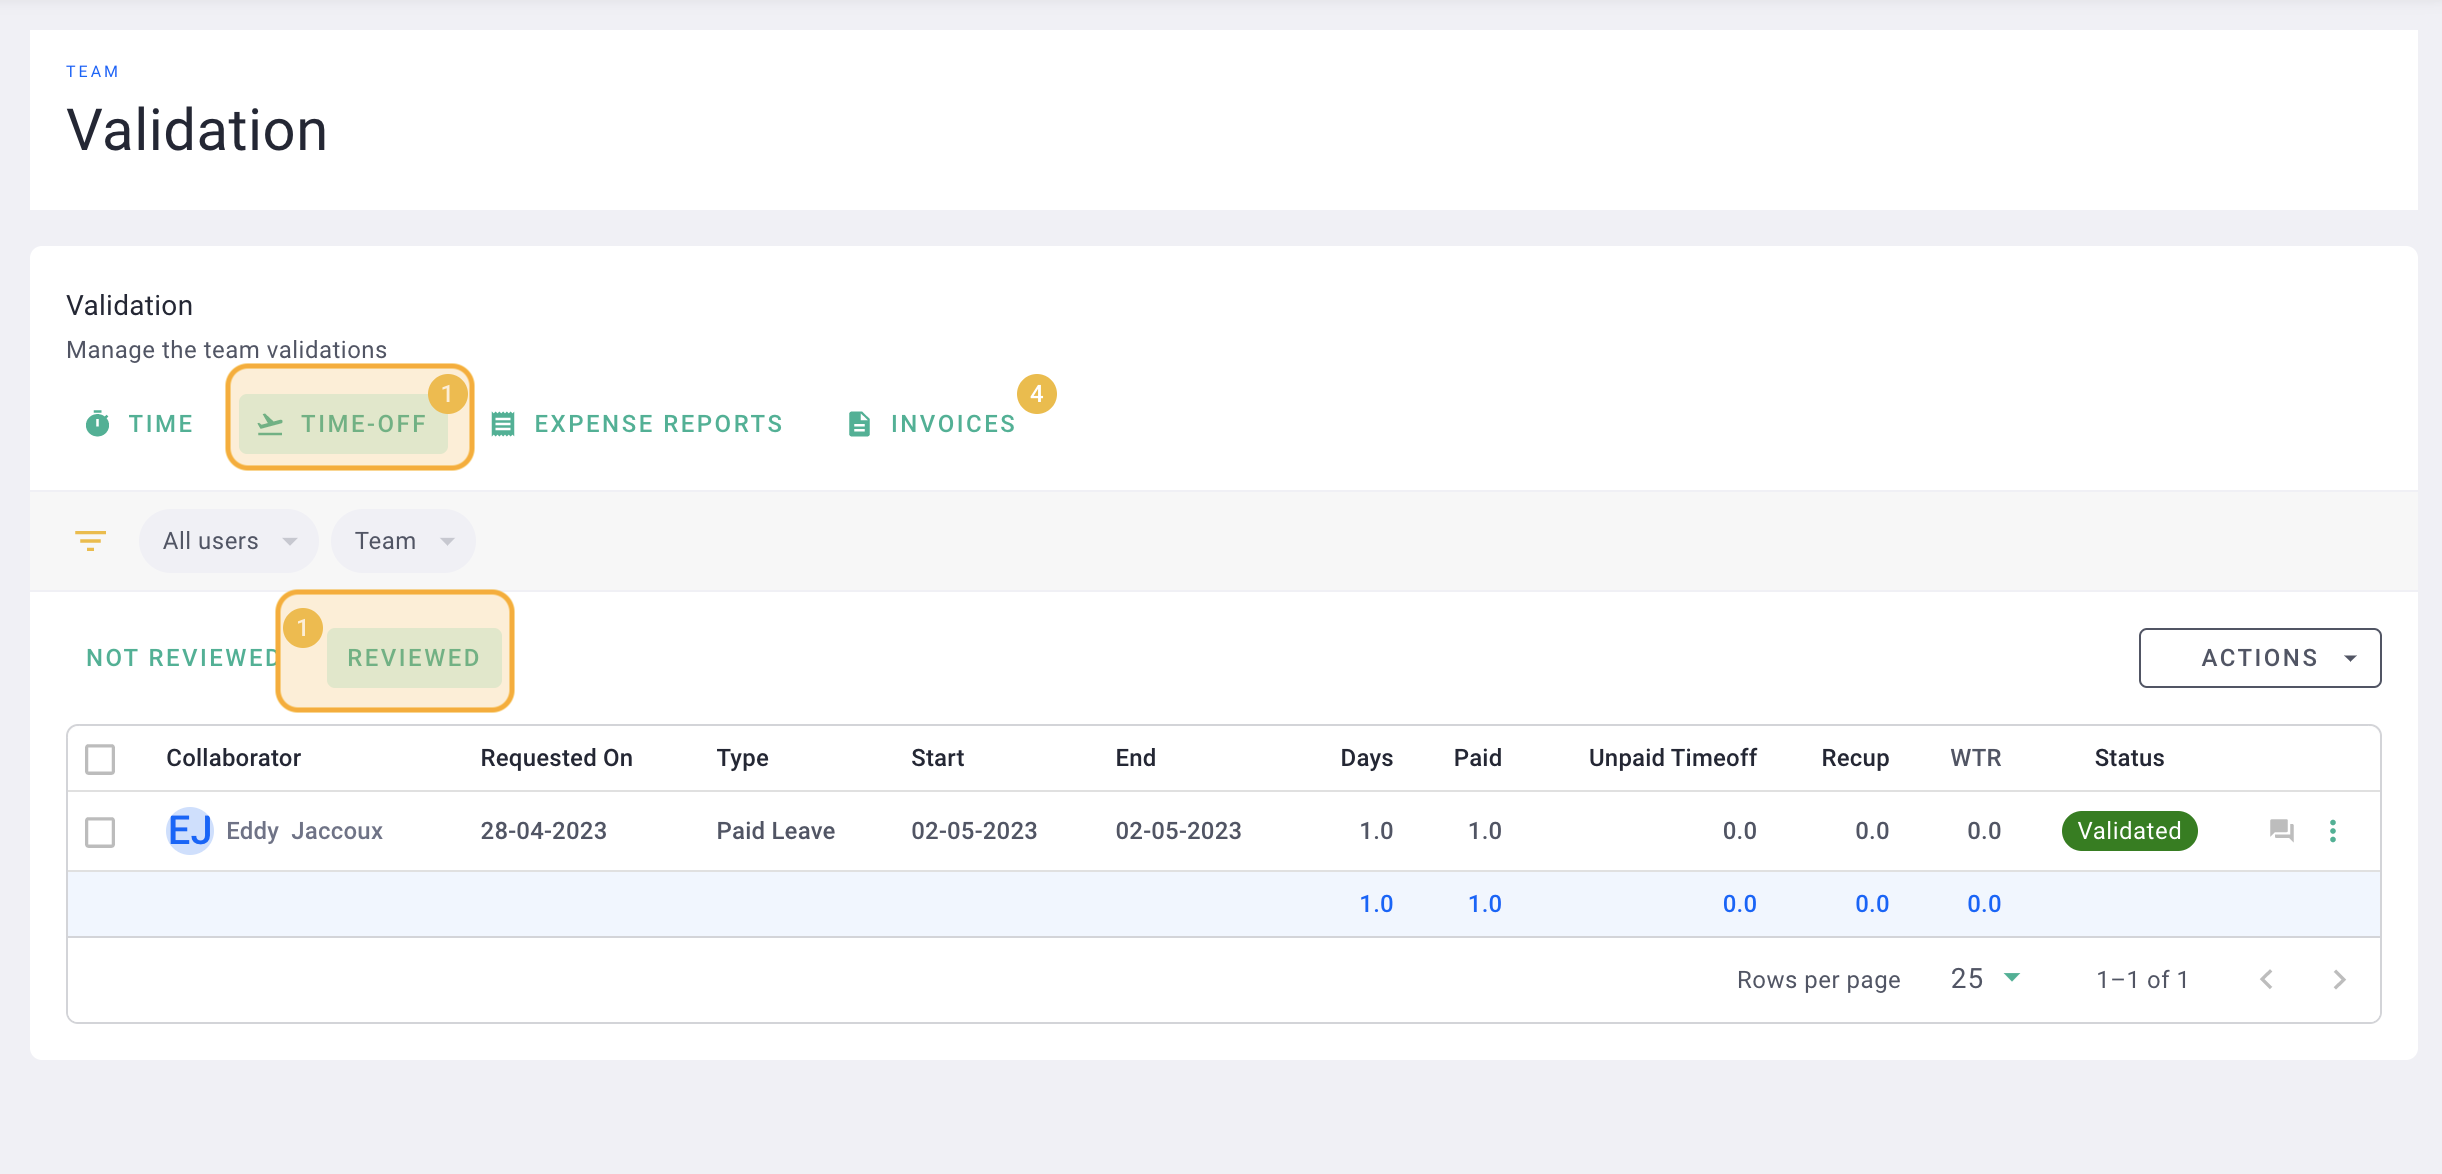
Done! You have approved the request. 🎉
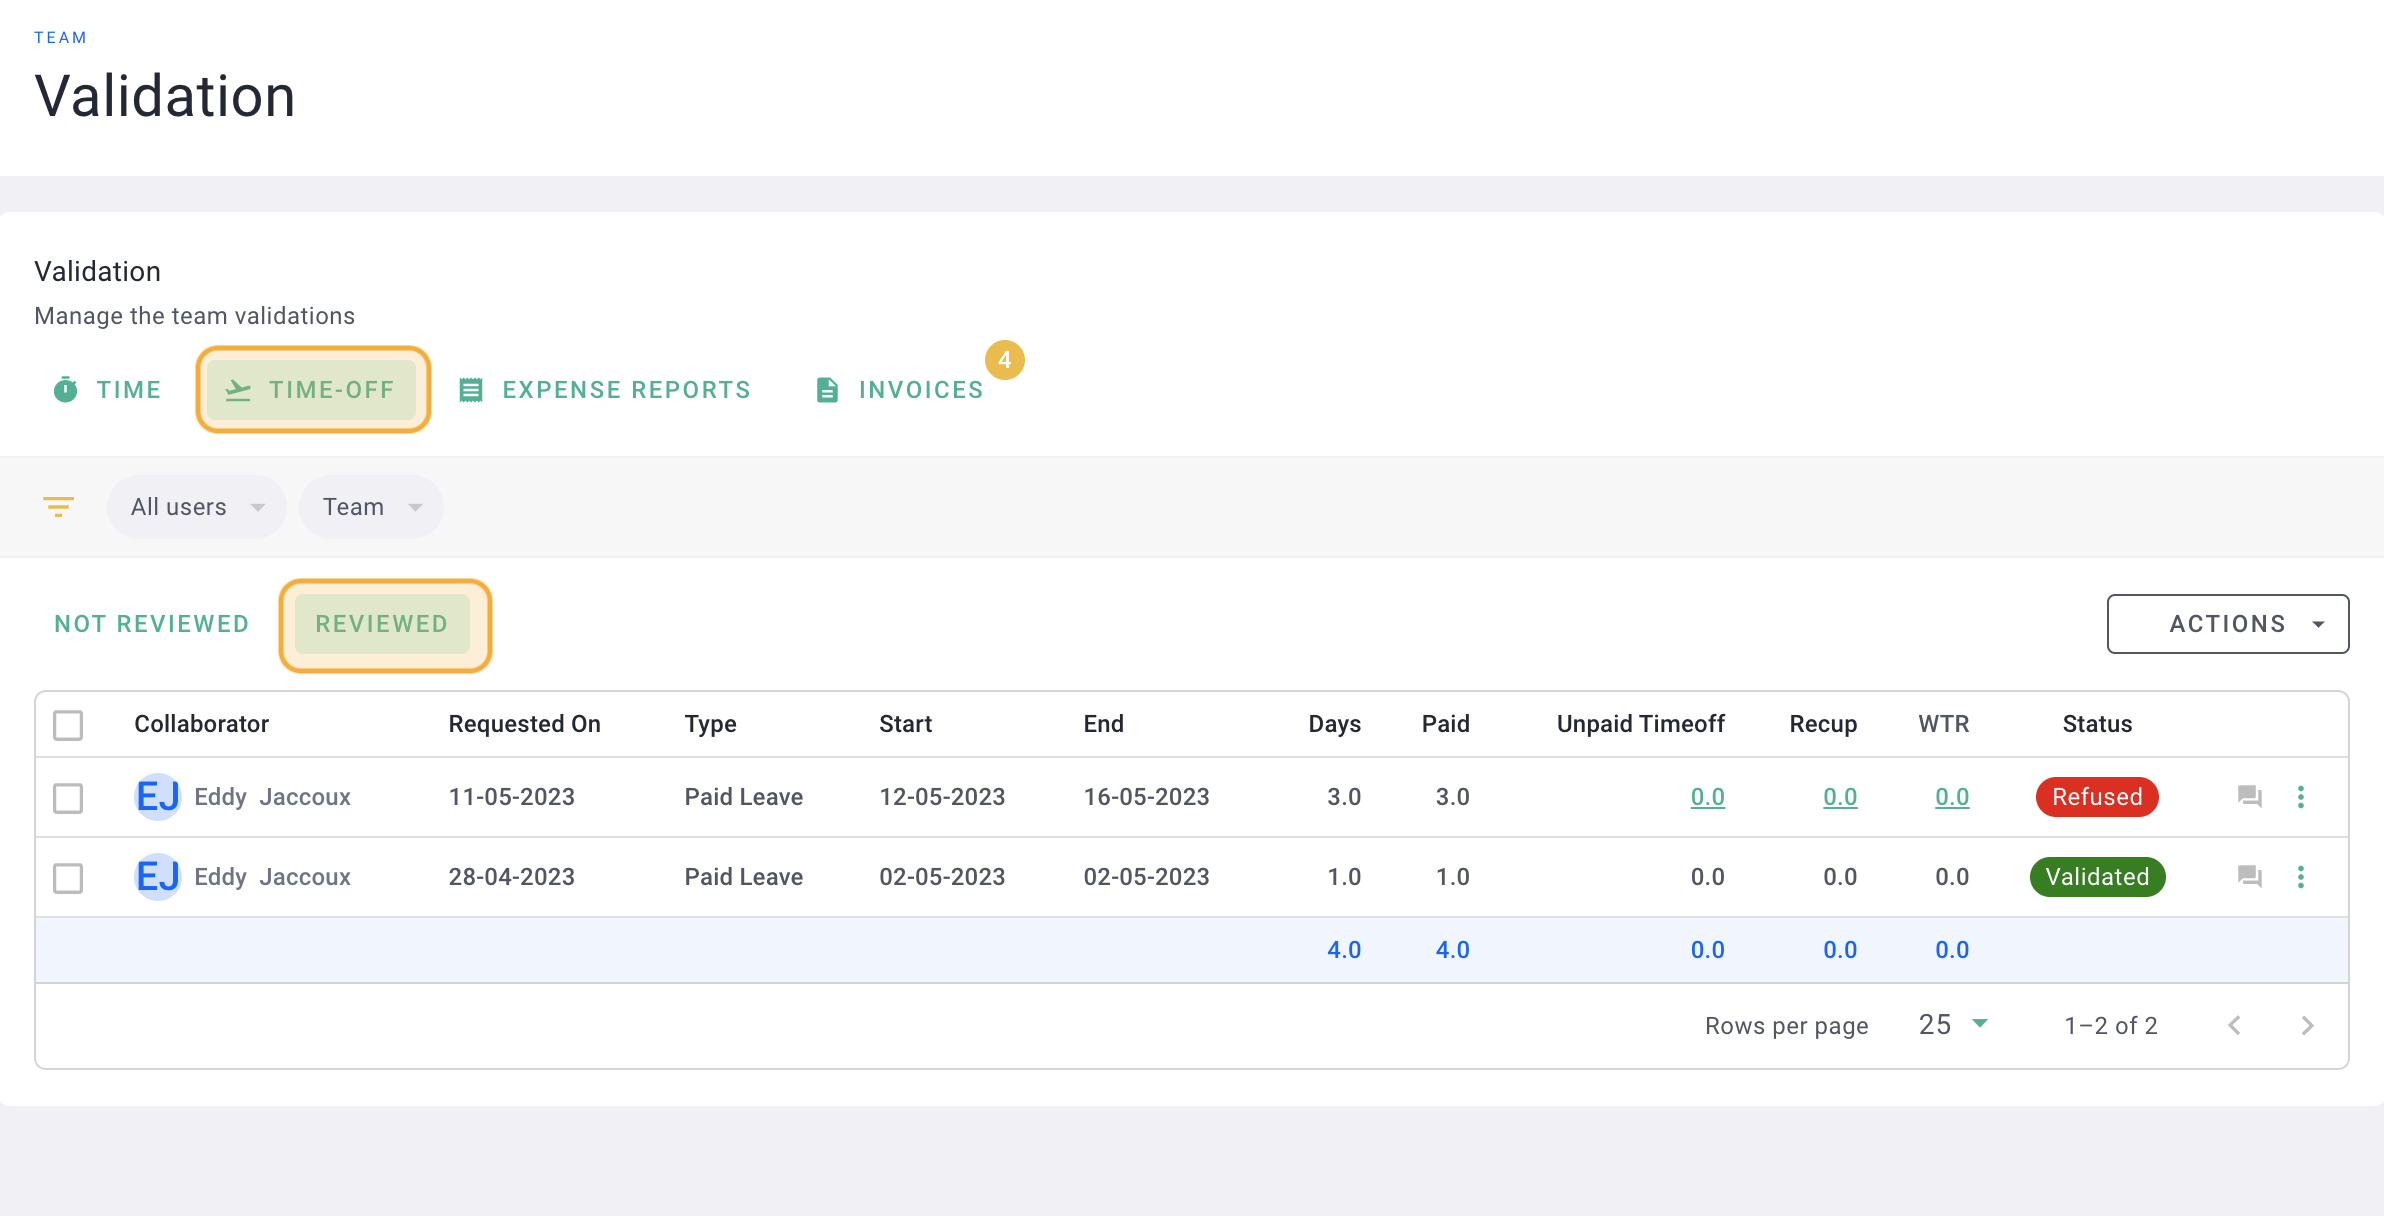
All managed requests can be found in the Riviewed tab.
II/ Declining leave requests
Don't want Adrien to go on vacation?
Click on the status of the request.
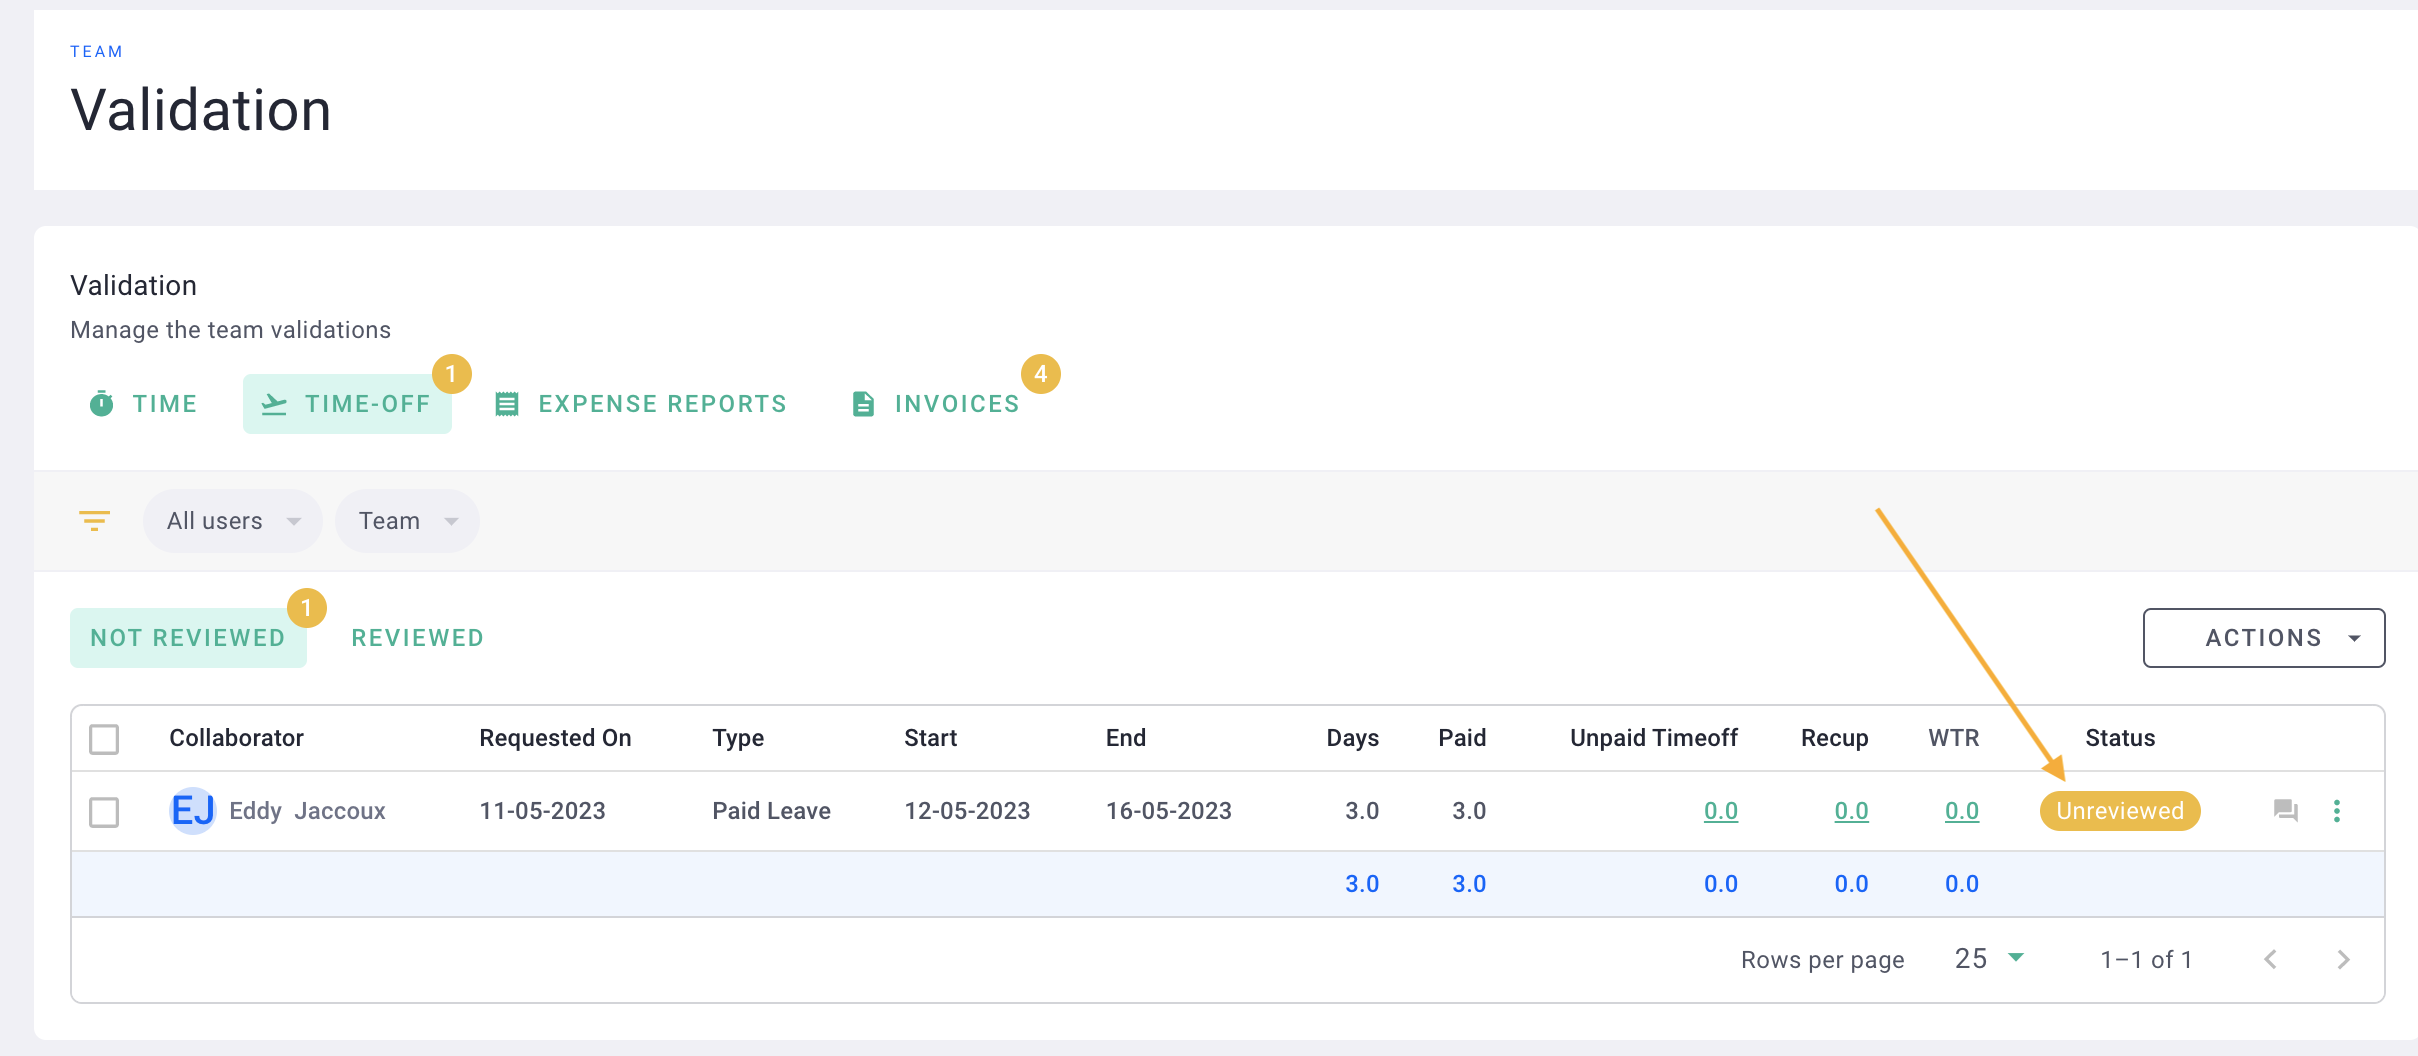
You will see the request details.
Click Decline and then Save the request. Add notes if desired.
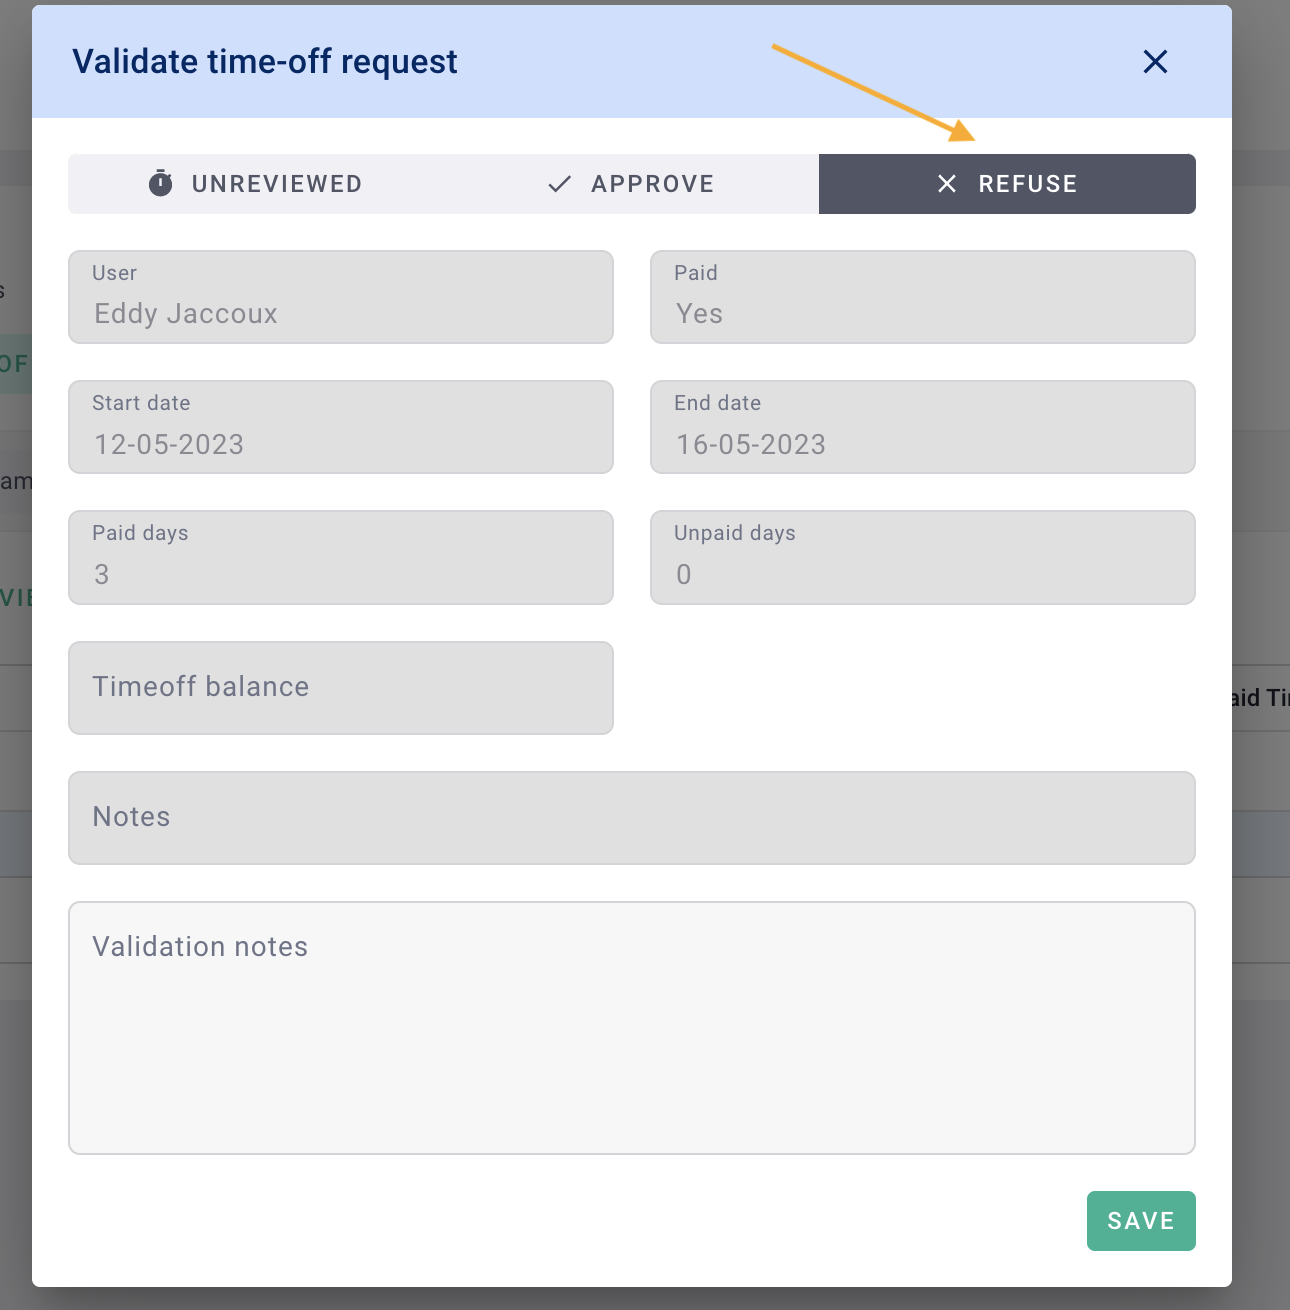
Done! You have declined the request. 🎉 Adrien will stay at the office.
All managed requests can be found in the Approved tab.
III/ Modifying/requesting modifications for approved or declined leave
All leave requests that have not been approved or declined can still be modified by the employee.
A request in the Leave > Not Reviewed tab can be directly edited by the employee.

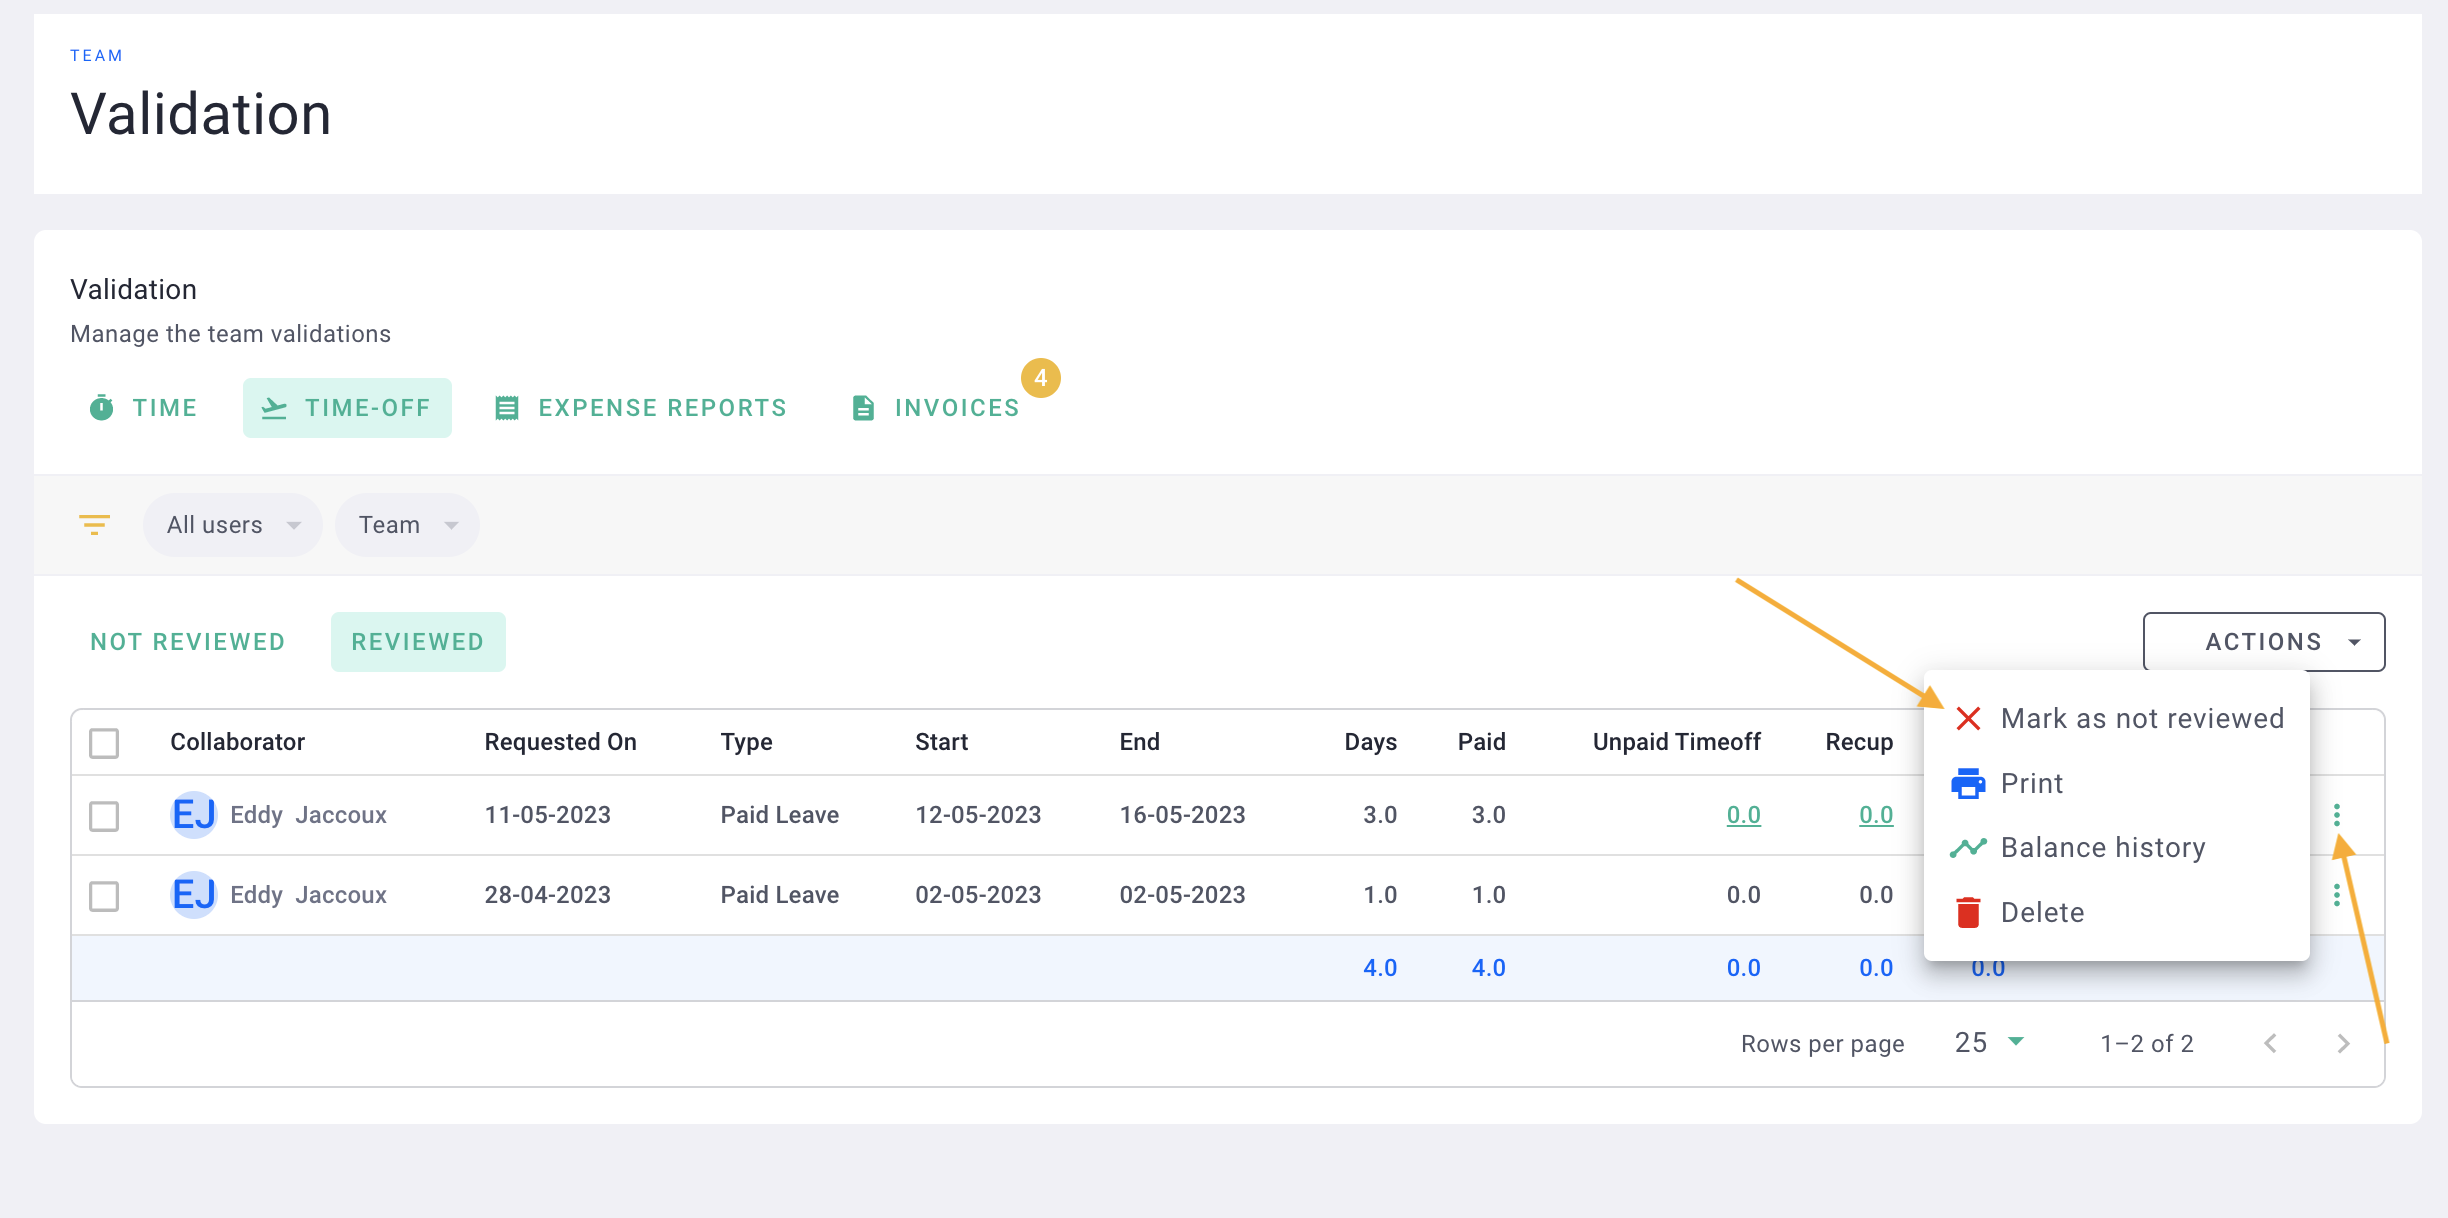
In the Approved tab, you can backtrack on requests that have been approved or declined.
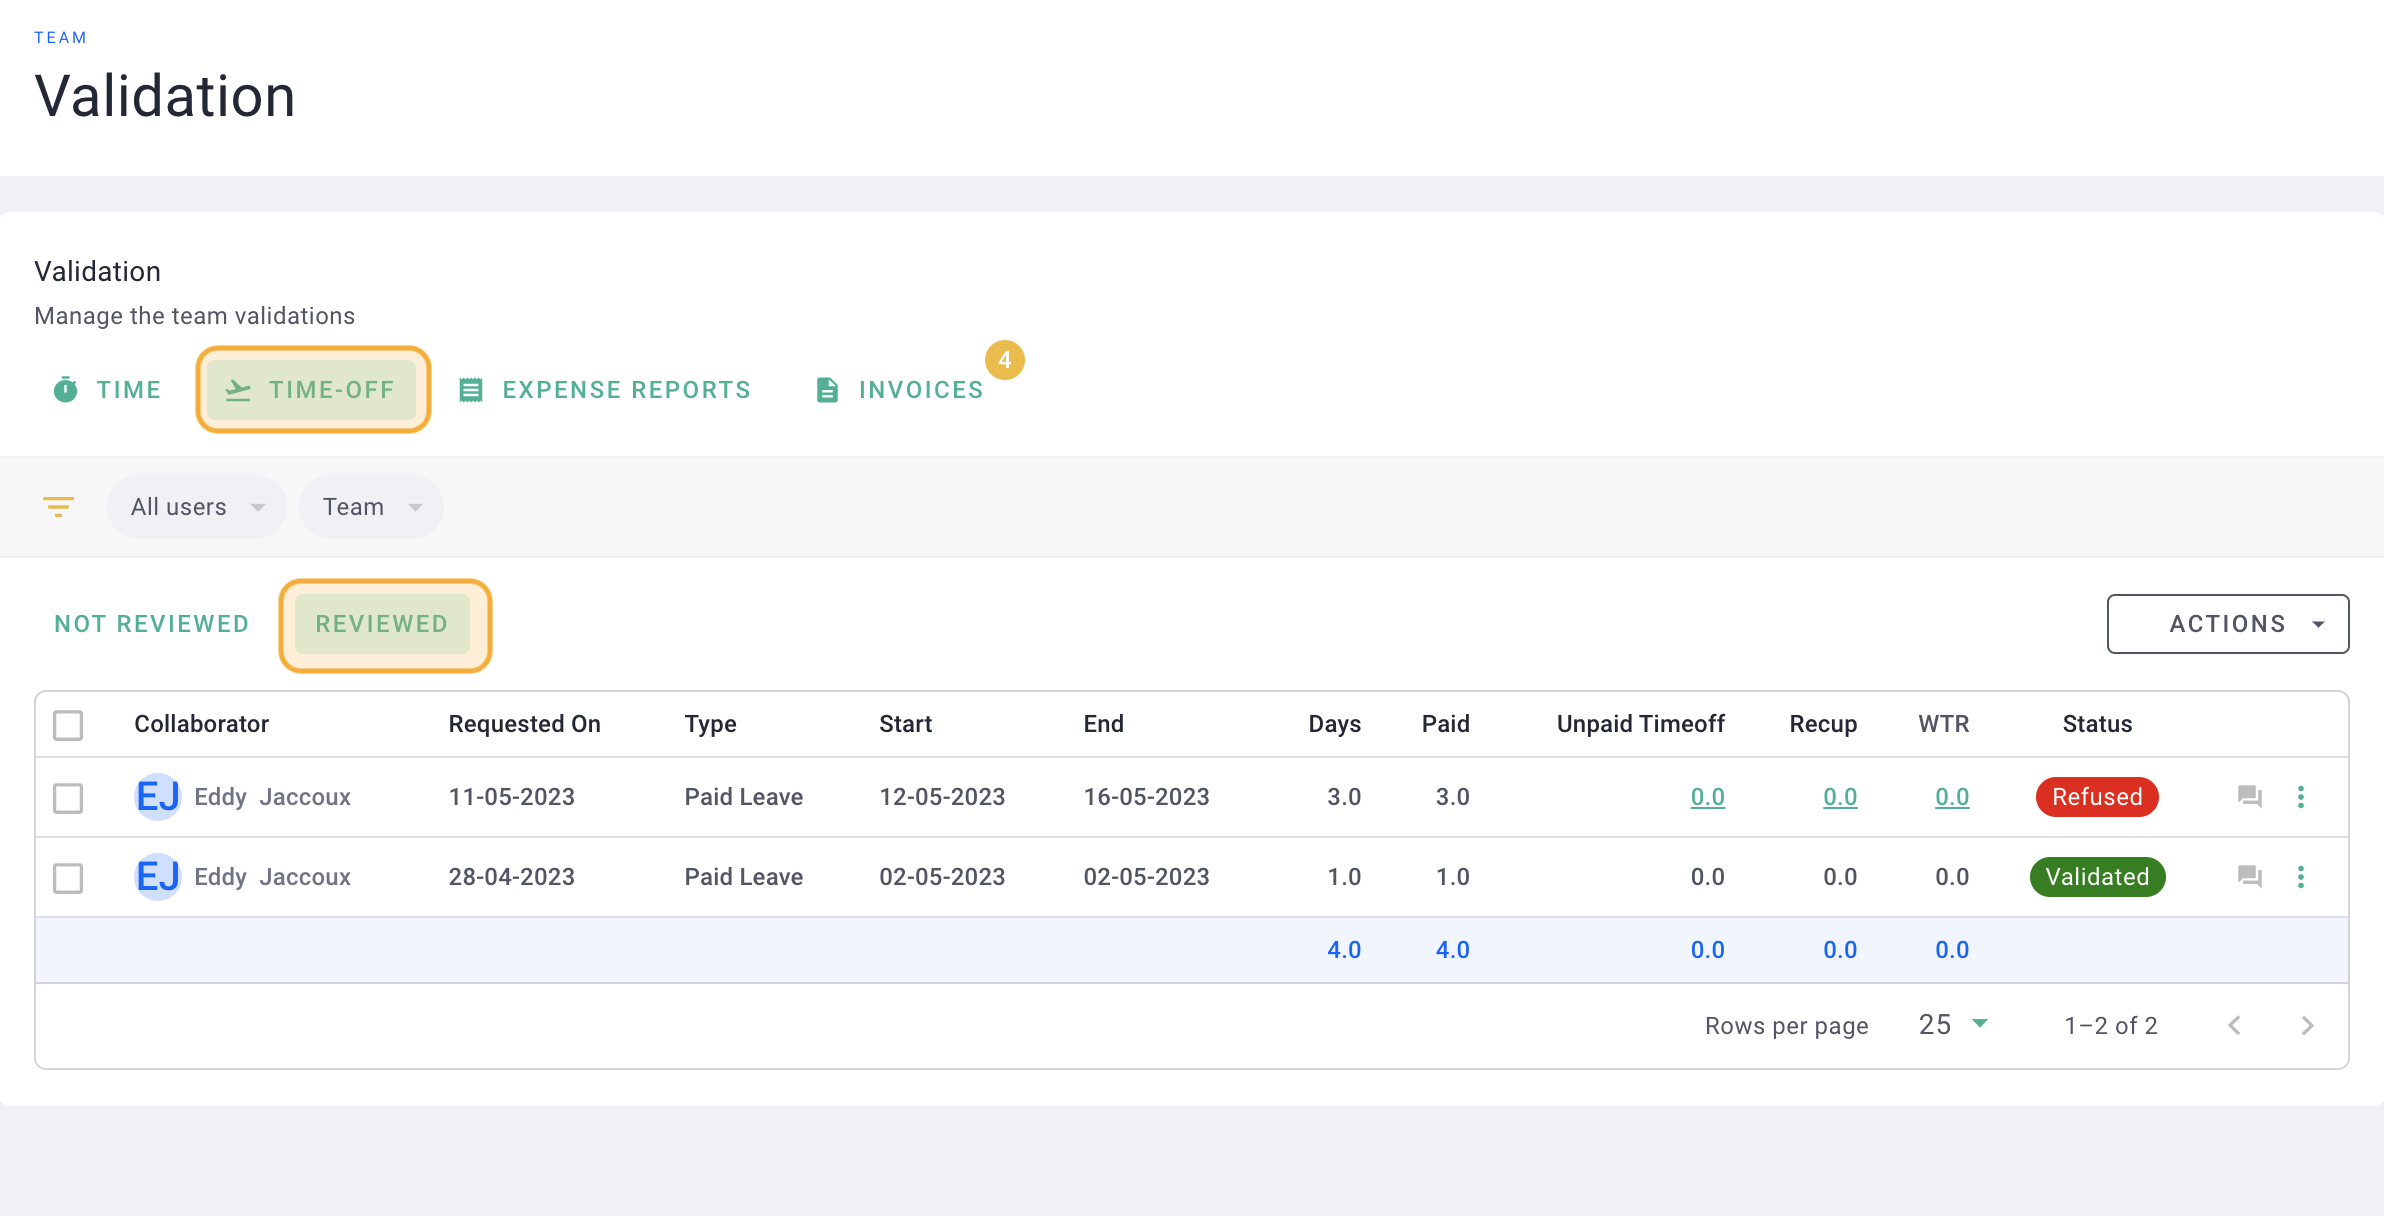
Simply click on the options "..." > mark as to validate
This way, the employee can modify their leave request.
If necessary, you can delete the request.
Done! 🎉
IV/ Receive a summary email
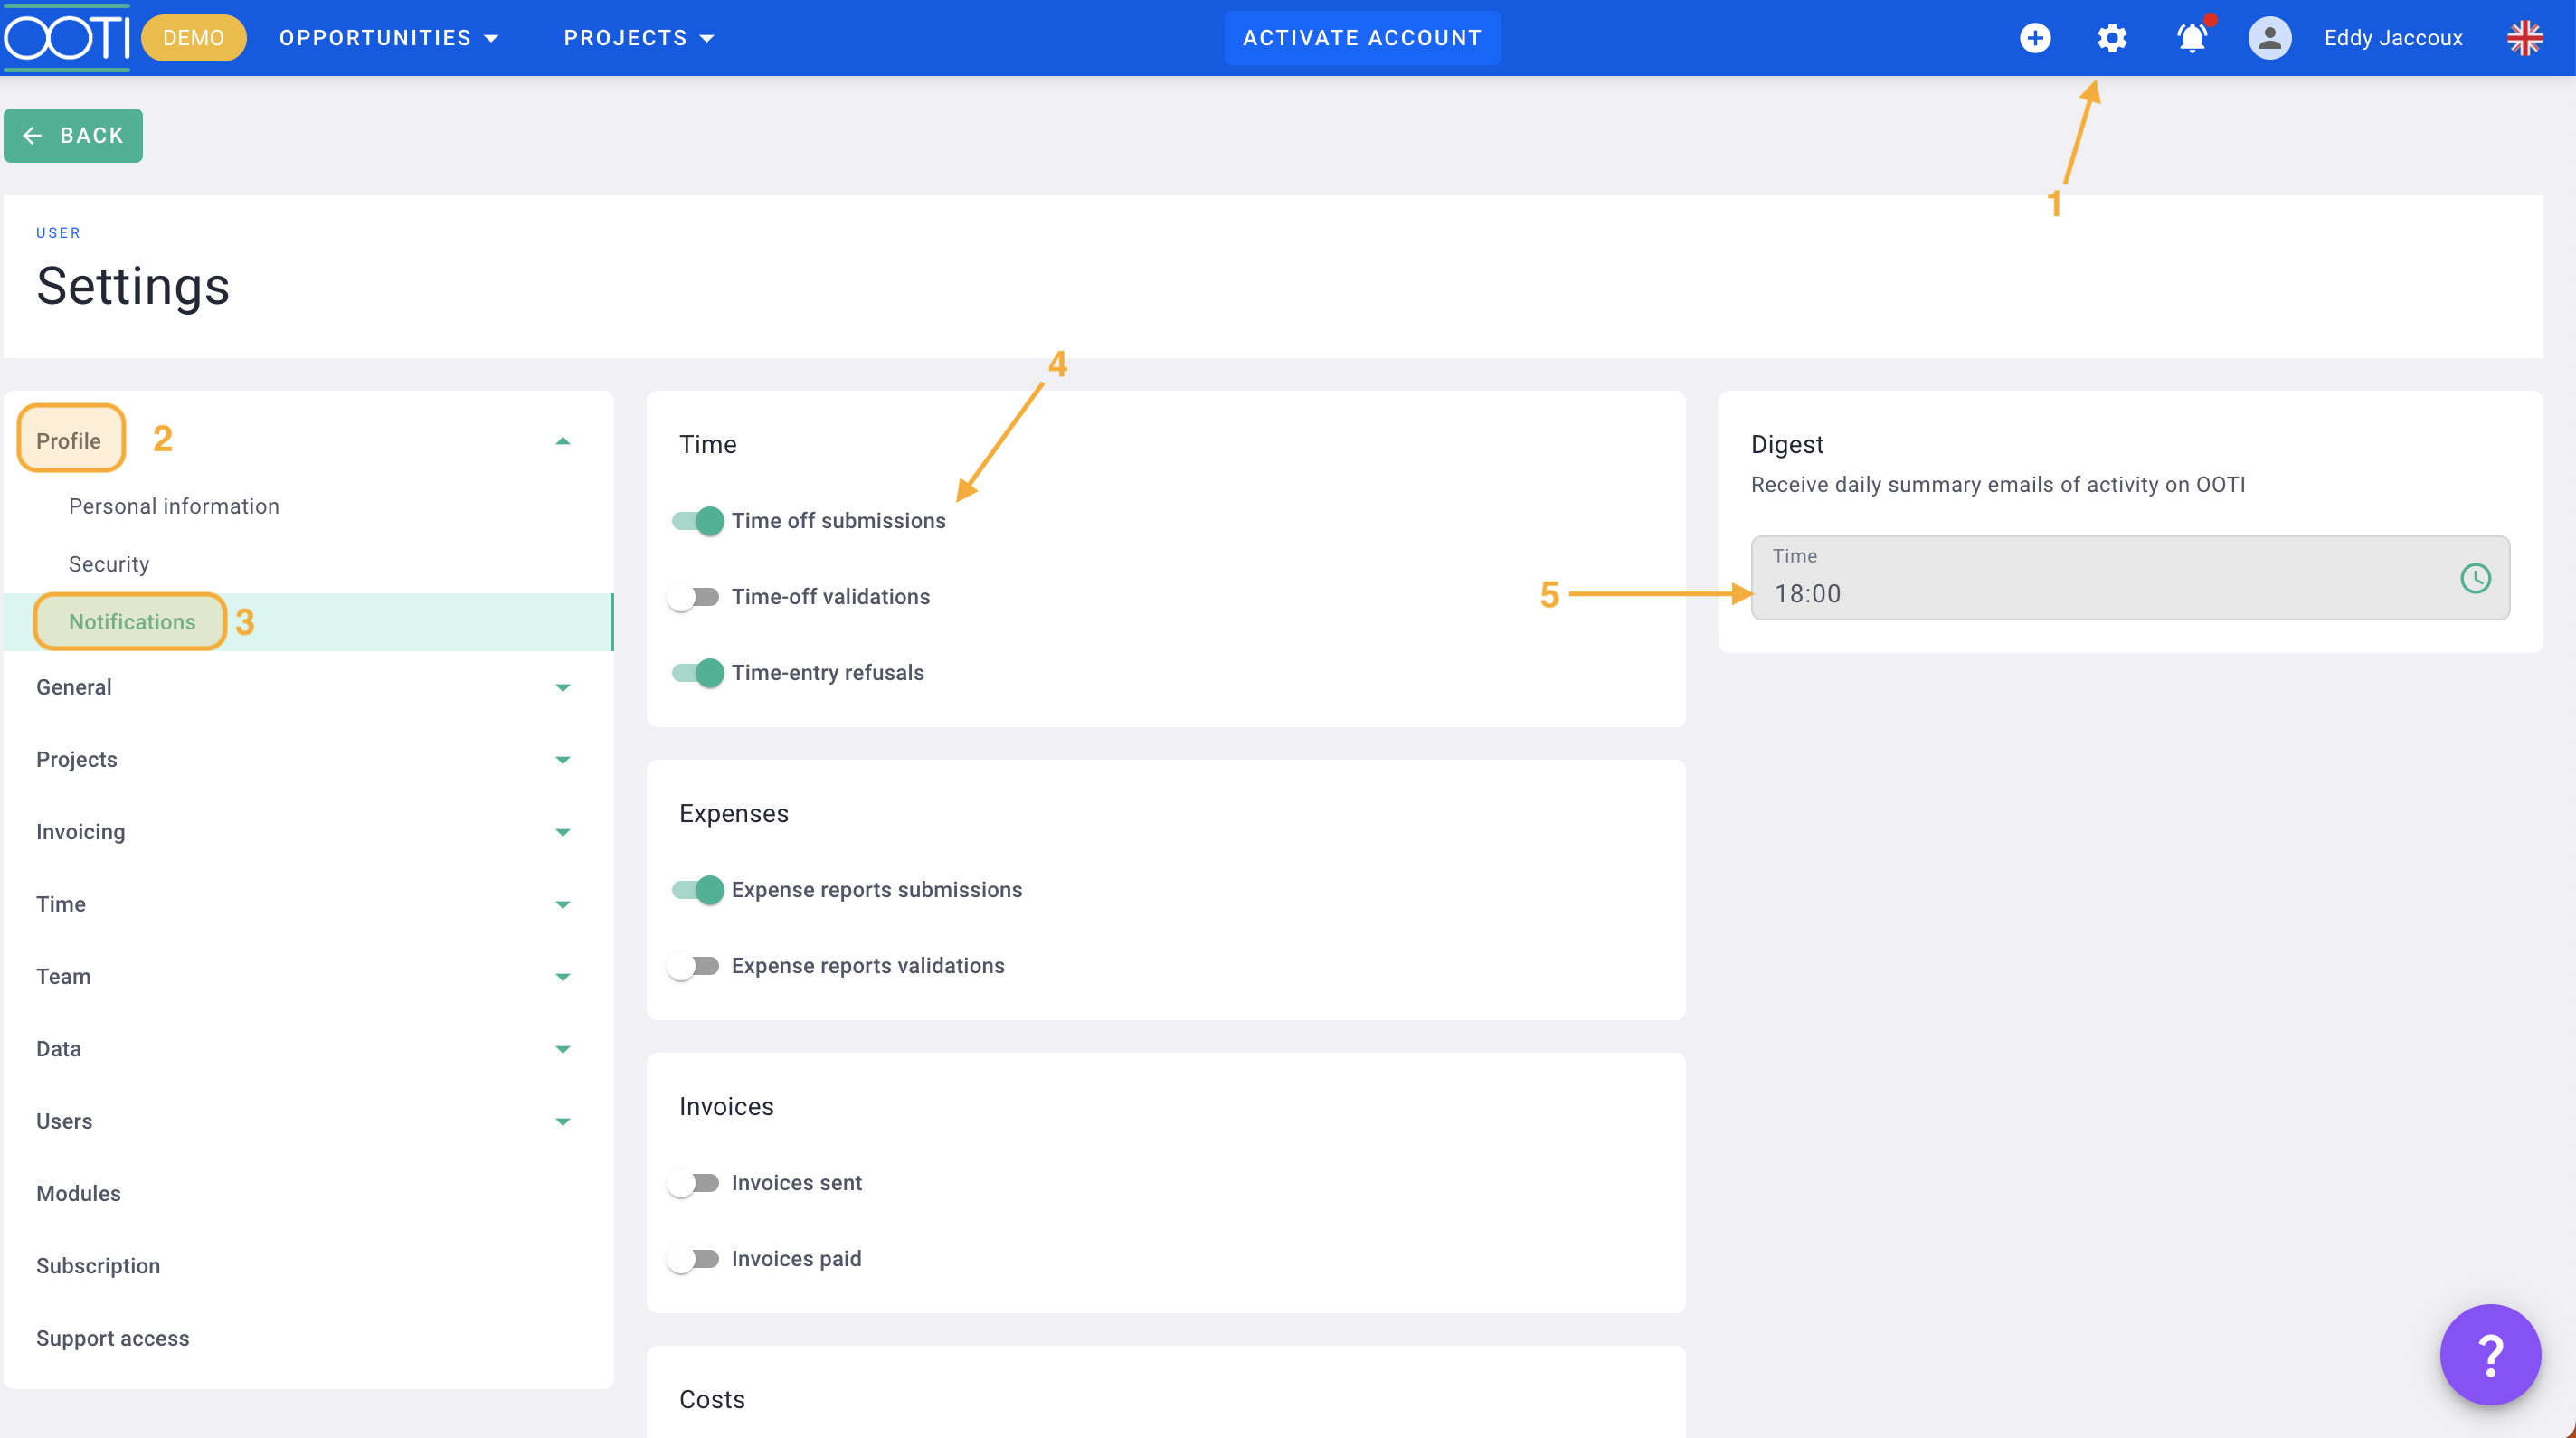
Be notified by email when your employees submit leave requests.
Go to Settings > Profile > Notifications > check "leave request" and specify a time at which you would like to receive the summary email.
This email is smart: you will only receive it when a leave request is submitted. 😀
