Add text to your invoices: purchase order, subject, references... Learn all about completing your invoices.
🔓 Required permissions
Team : View invoices and Manage invoices
Project : View invoices and Manage invoices
| Reading time | 3 min |
| Setup length | 3 min |
| Steps | 2 |
Summary
I/ Use available fields
1) Fields common to the entire project
2) Fields specific to each invoice
II/ Create your own custom fields
I/ Use available fields
To customize your invoices effectively, you have several fields at your disposal. You can set them as default at the project level to display them on each invoice (e.g., a purchase order), or you can enter them for each invoice individually.
1) Fields common to the entire project
When you are on the project, go to Settings at the top right in green > Invoicing on the left > Template tab > you can enter:
-
The unique invoice prefix for this project.
-
The default invoice purchase order.
-
The subject.
-
The default additional text for the invoice.
These fields will be pre-filled by default on all project invoices, but you can still modify them from the invoice itself.
2) Fields specific to each invoice
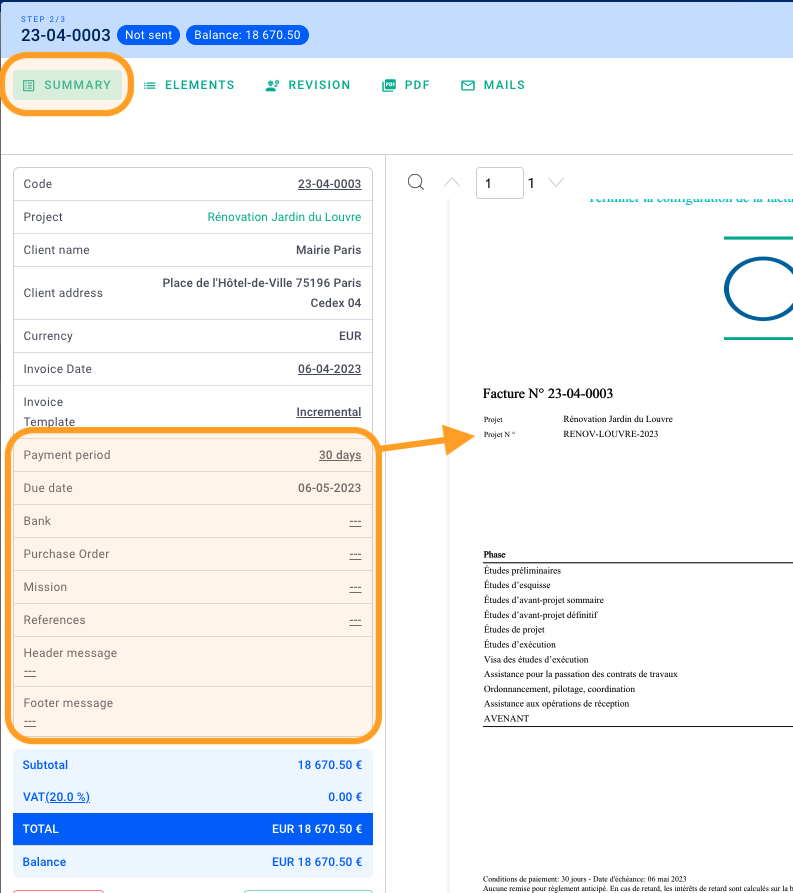
From the invoice > SUMMARY tab > you also have access to many fields, including those mentioned earlier. Complete the fields, and your notes will be added to the block on the left side of the invoice.

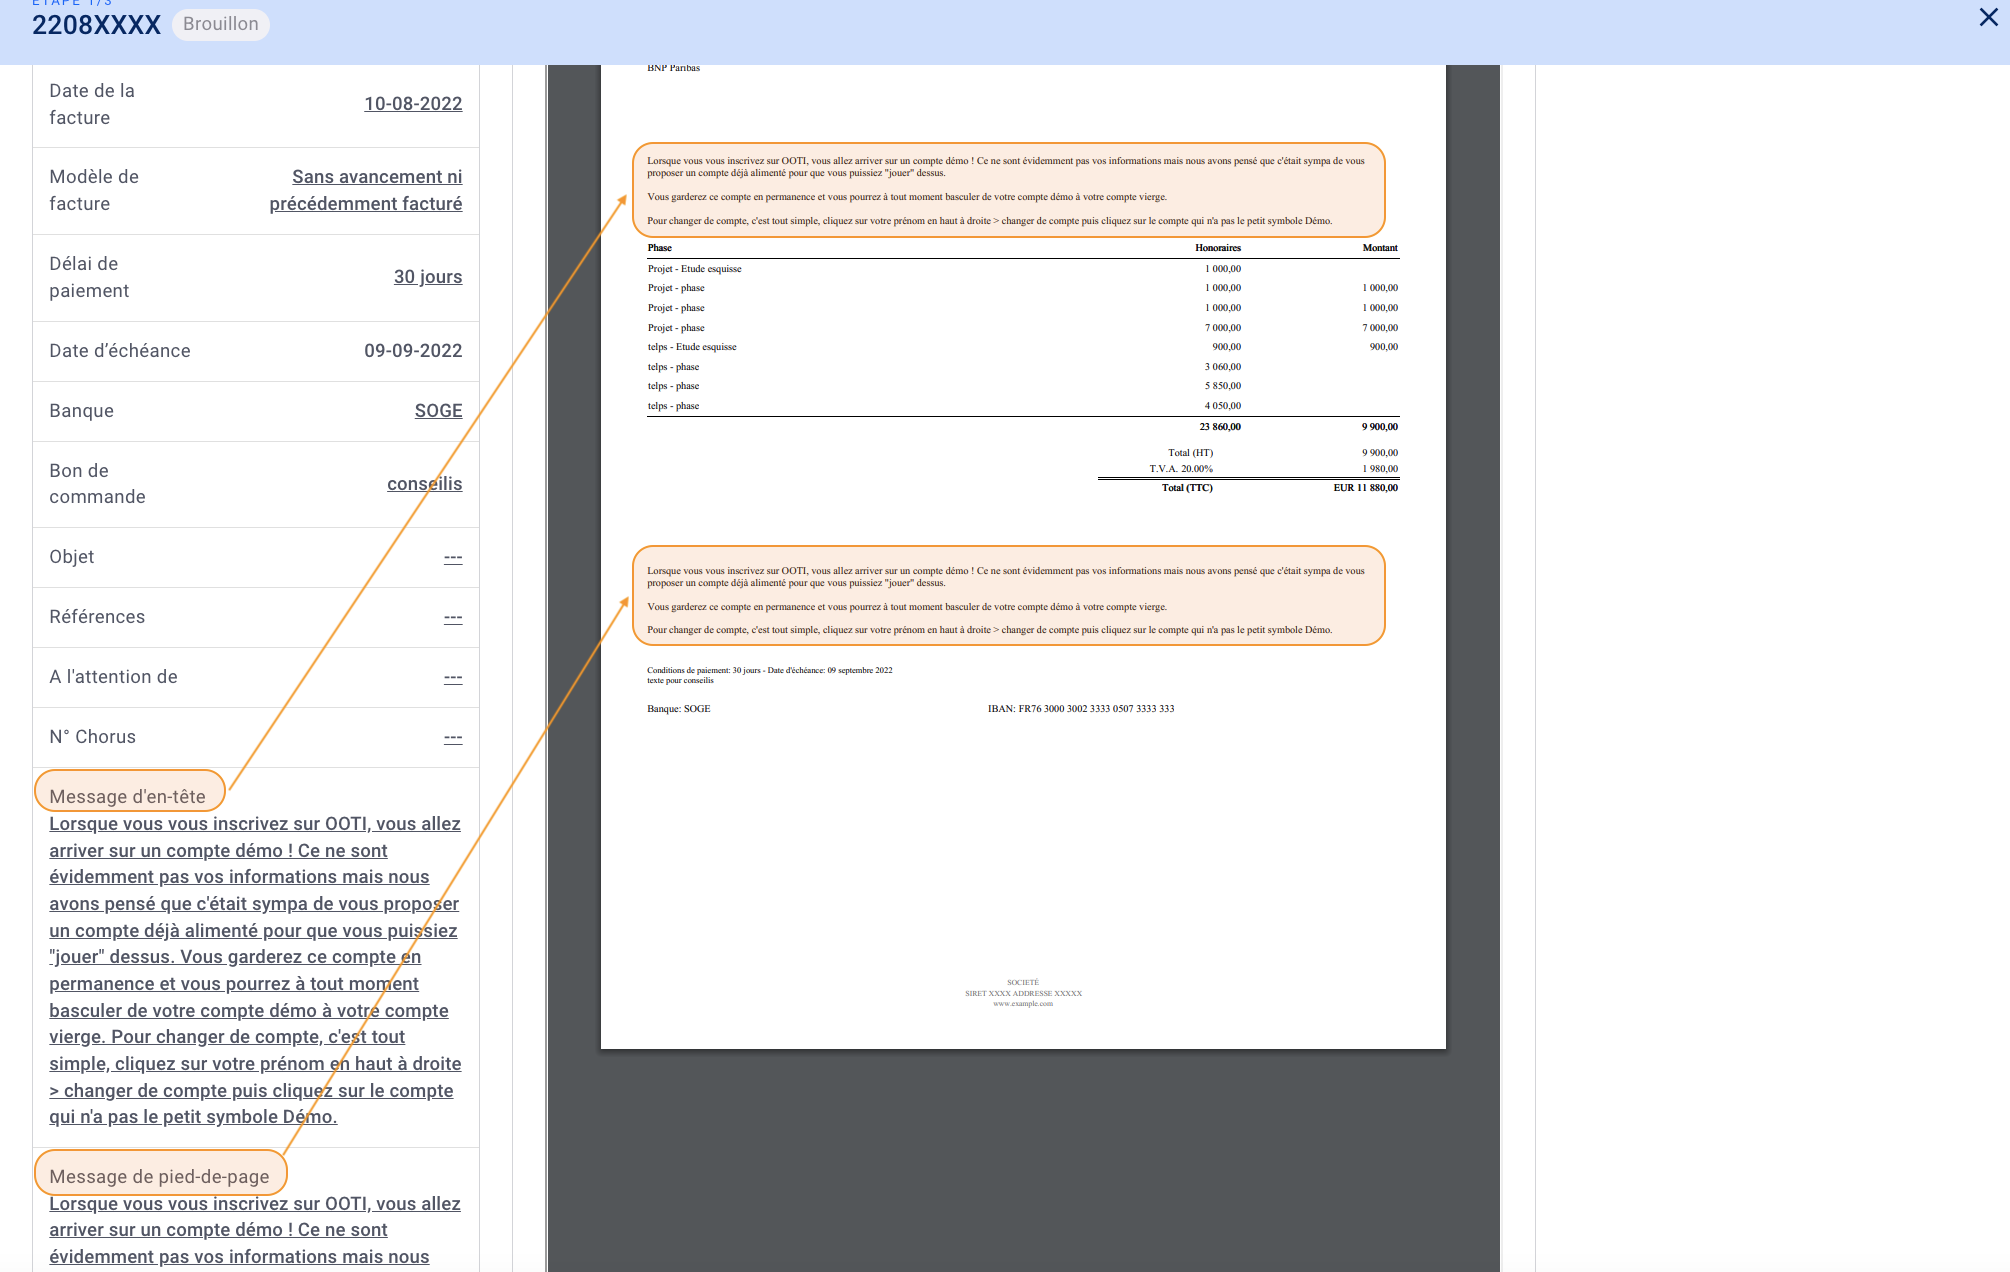
In addition to the fields presented above, you have 2 text blocks available, above and below the billing phases table. Customize your headers and footers.

II/ Create your own custom fields
In addition to the fields we provide, you can create your own custom fields that will appear exclusively on the invoices.
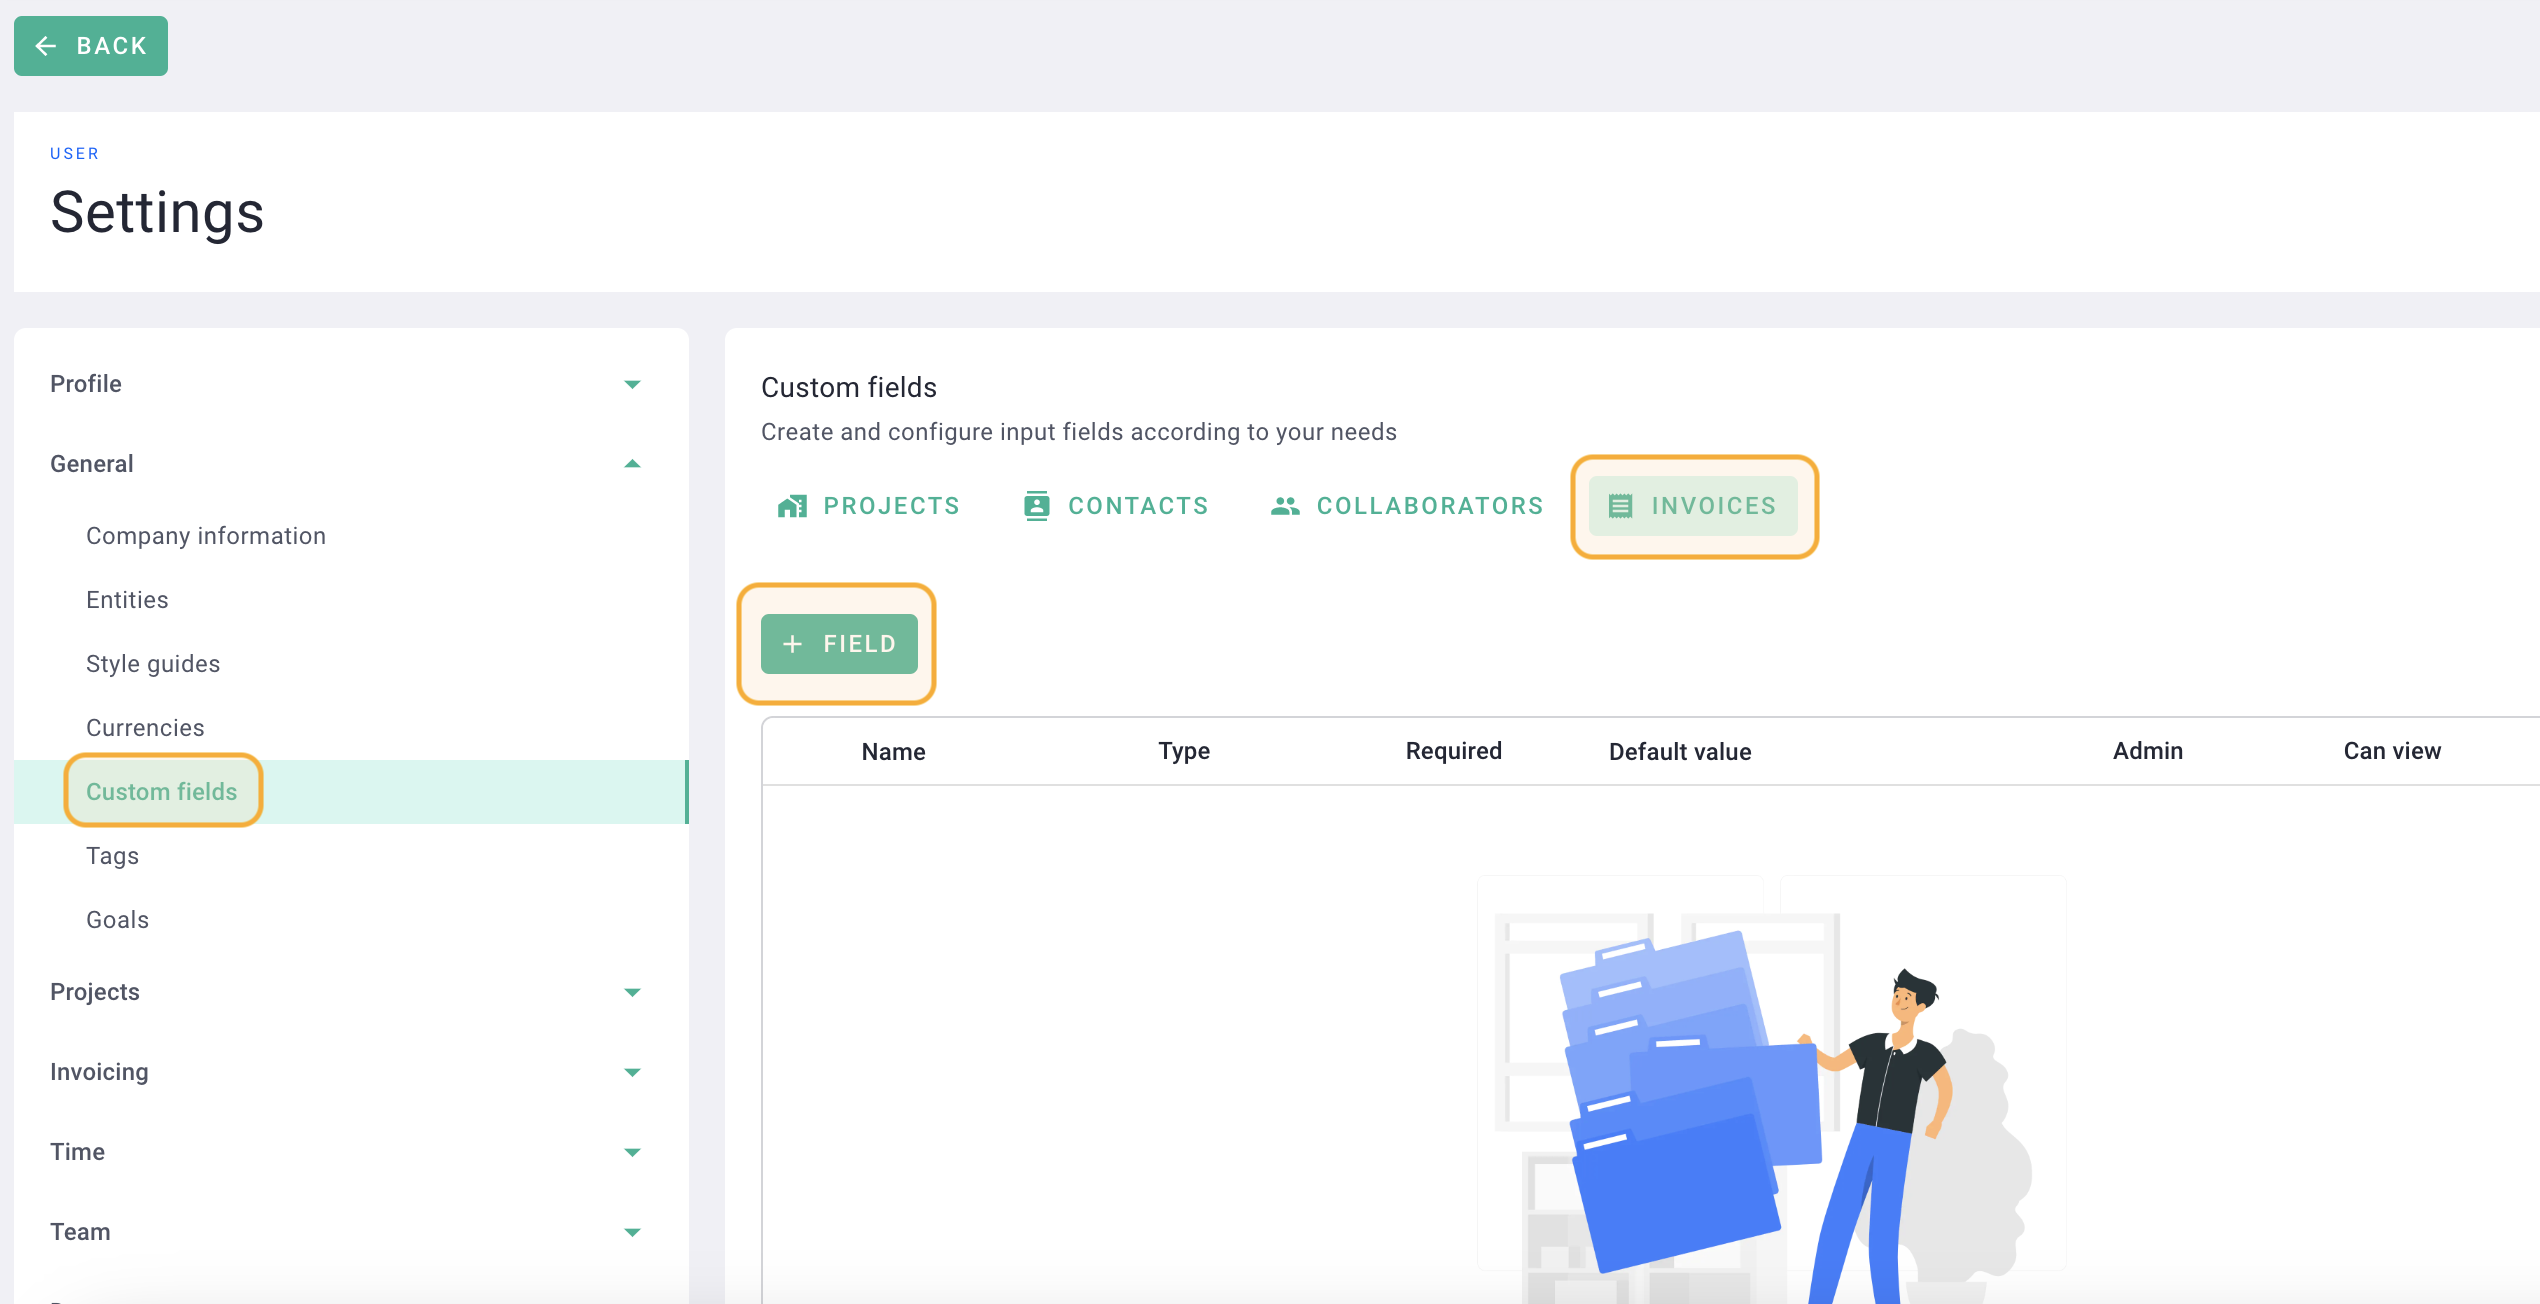
To create these fields, click on your first name at the top right > Settings > General > Custom fields > Invoices tab > + Field.

You will find this field on your Invoice > SUMMARY tab in the gray box on the left. The custom fields will be positioned in the header on the left side of the invoice.
You have customized the fields on the invoices! 🎉
