
Do you have multiple clients within a single project? Set up the project fees and add multiple clients to the same project. Allocate the project fees to each client to invoice them with the appropriate amounts.
🔓 Required permissions
Team : View Invoices and Manage Invoices
Project : View Invoices and Manage Invoices
| Reading time | 5 minute |
| Setup length | 5 minute |
| Steps | 4 |
Summary
I/ Project creation and adding fees
II/ Adding multiple clients to the project
III/ Allocating Project Fees
IV/ Invoicing
I/ Project creation and adding fees
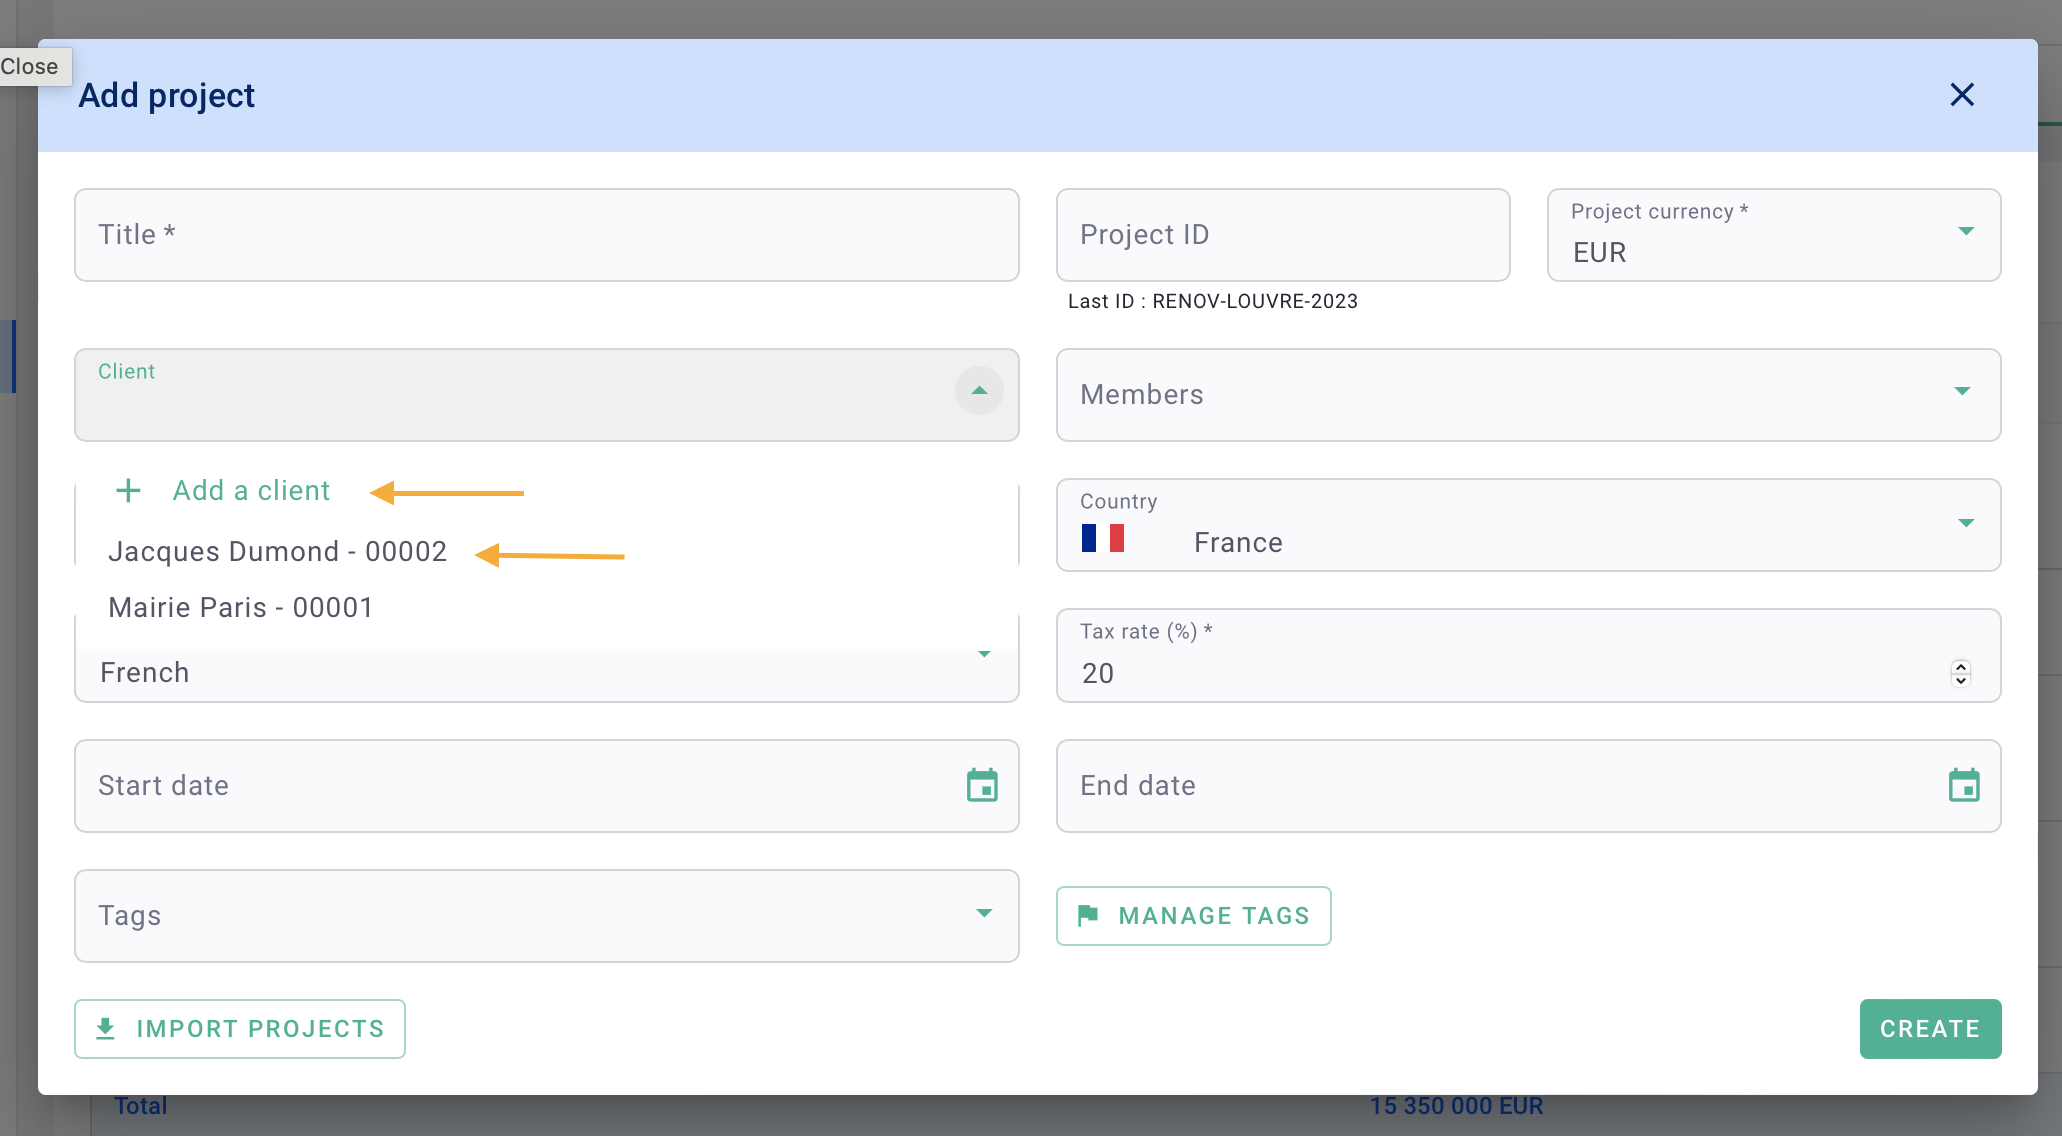
When you create the project, click on the "Client" field, then select the first billing client from your database or create a new one by clicking on + Add a client.
Next, go to the Fees tab, and on the Project Fees section on the left, add the market fees by clicking on the underlined numbers on the "Base Production Fees with all clients" row.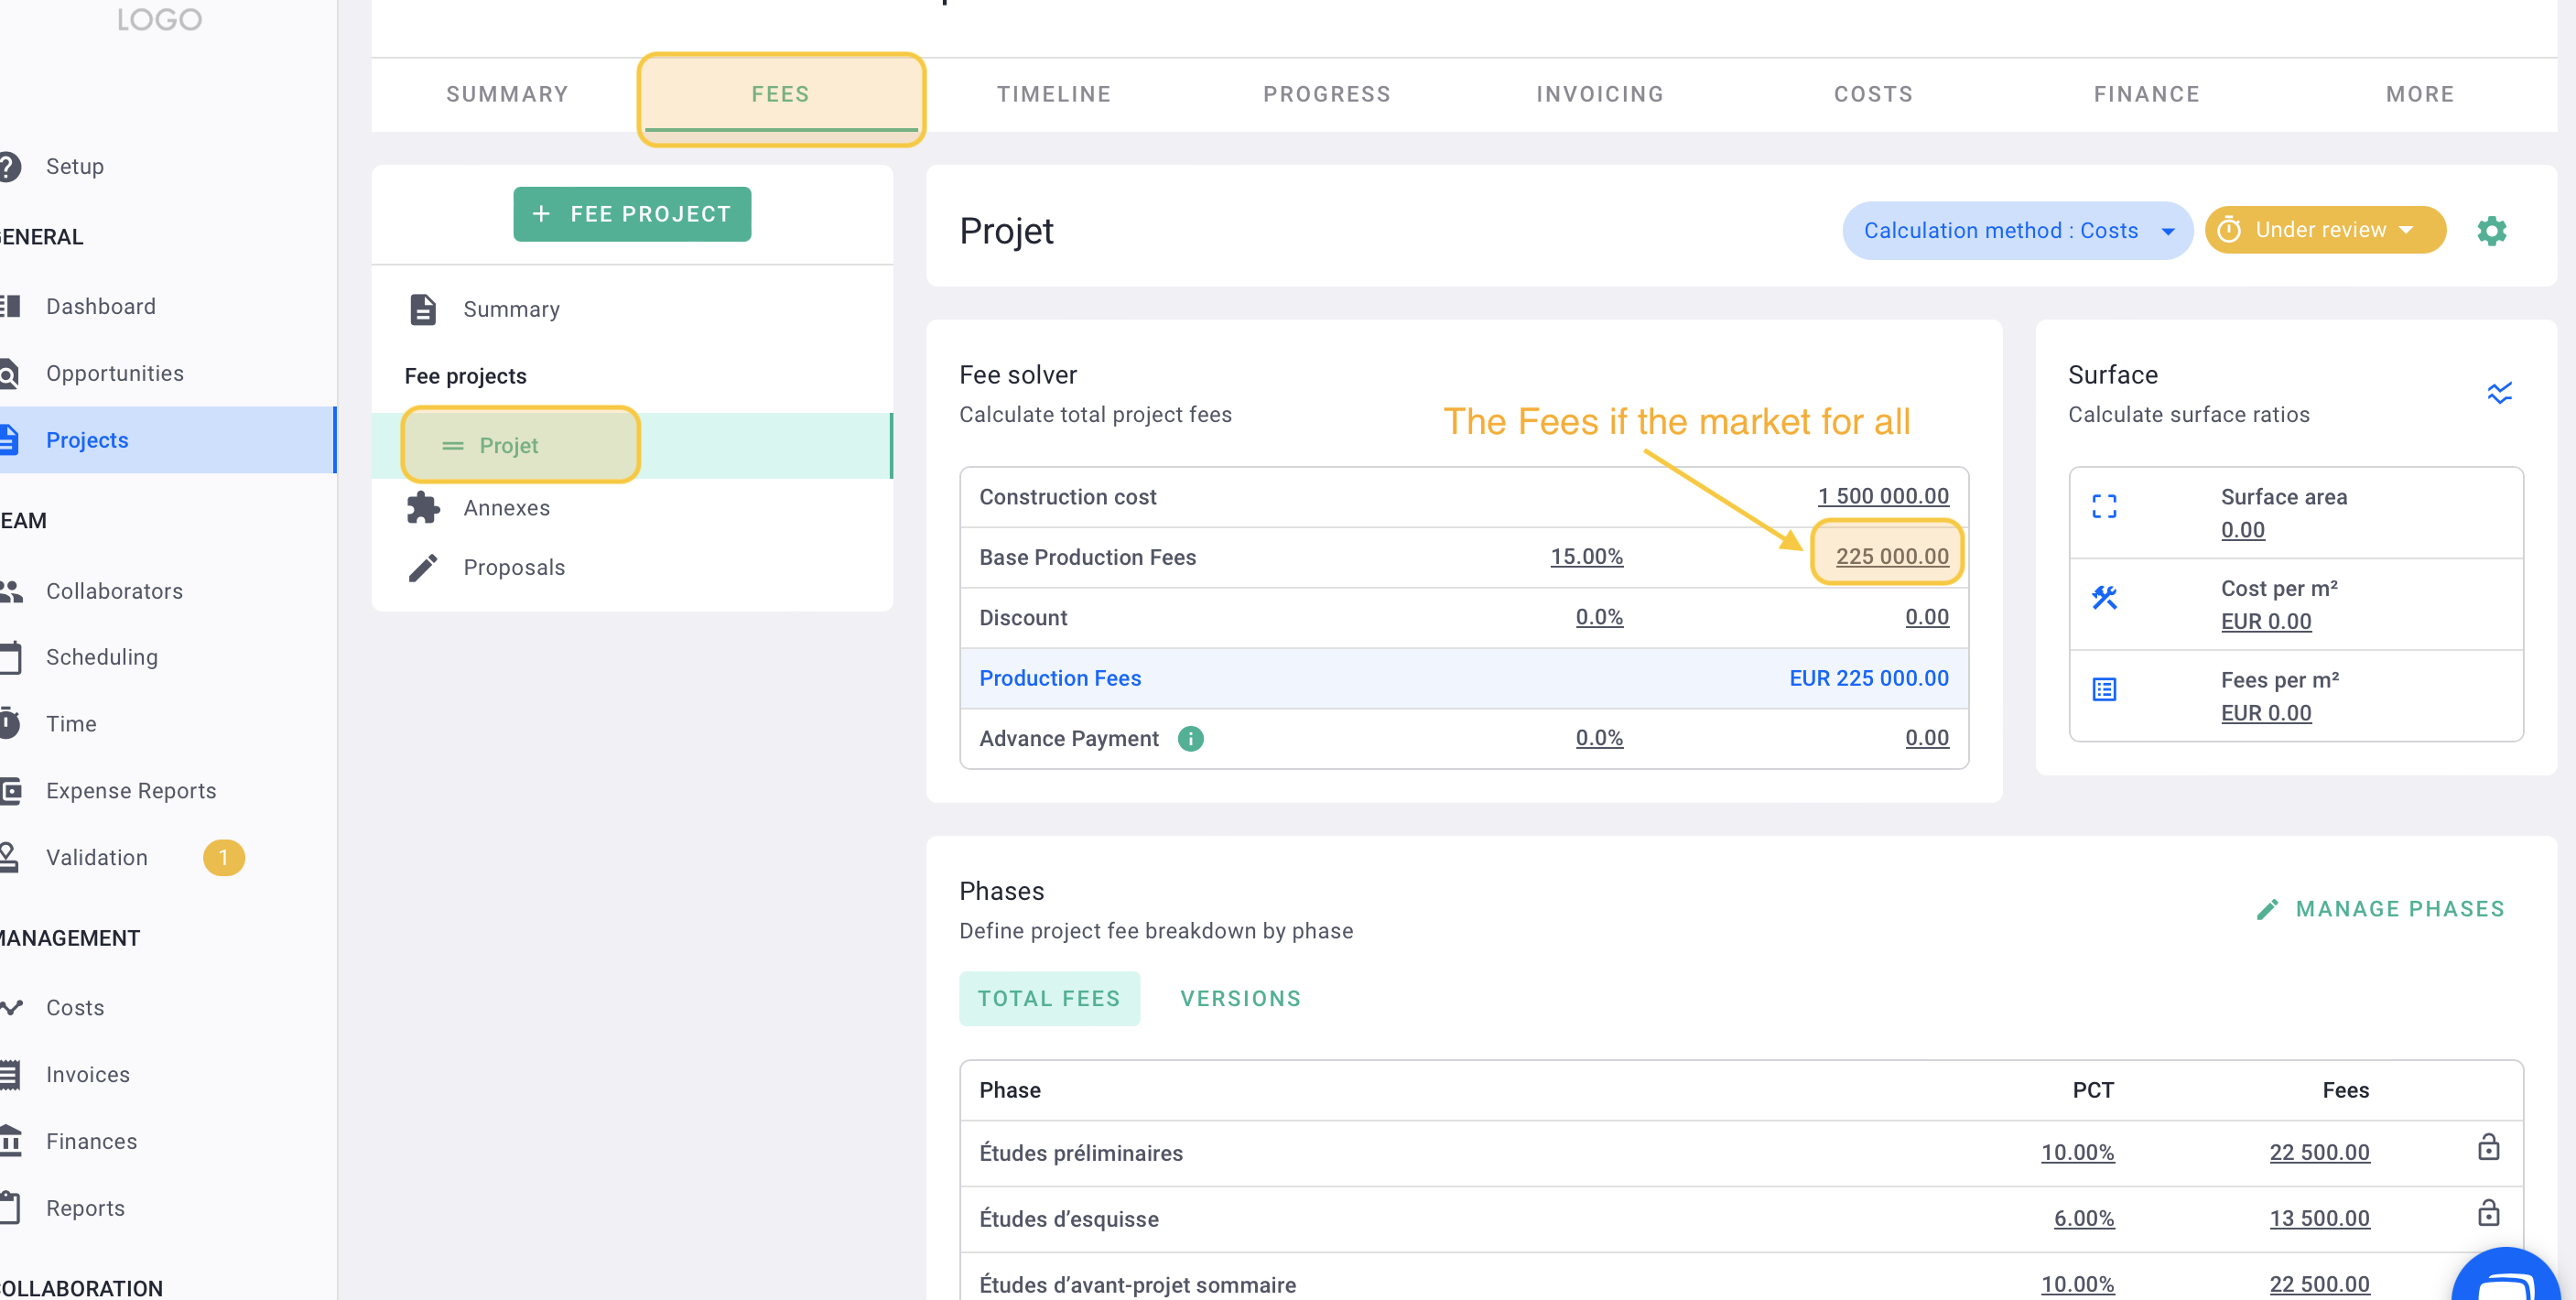
Add the billing phases.
💡 Click here to read the article on project creation.
Finally, set the project fees status to valid.
II/ Adding multiple clients to the project
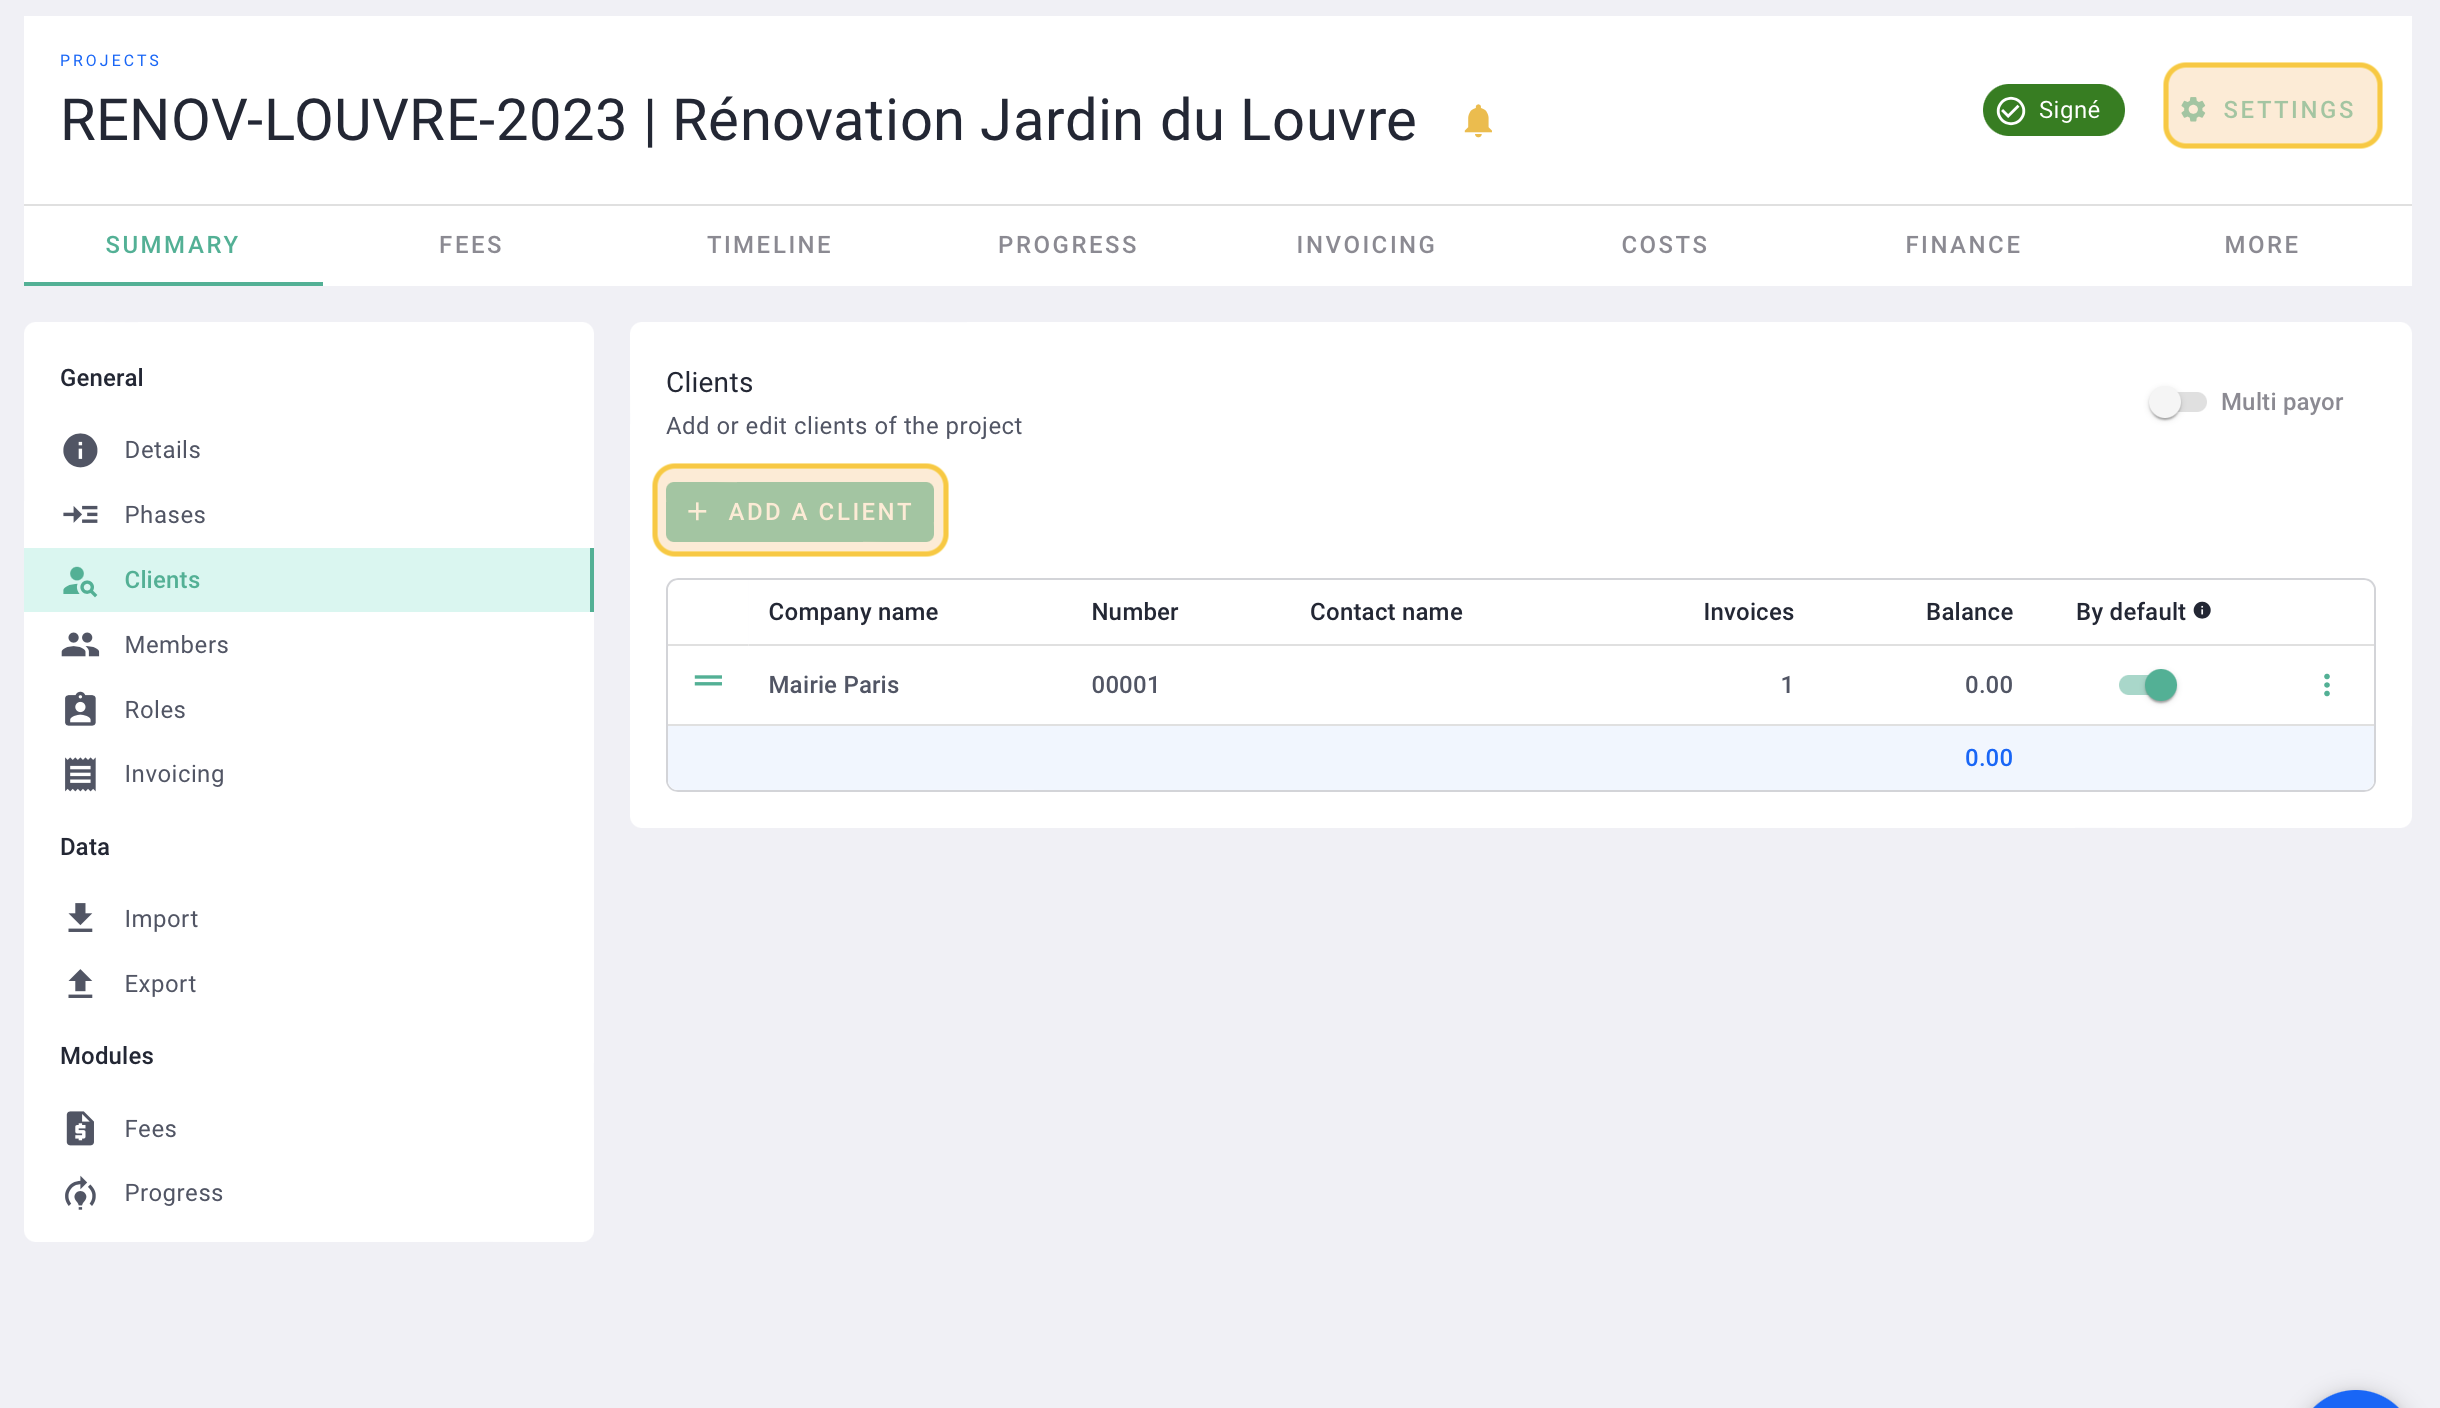
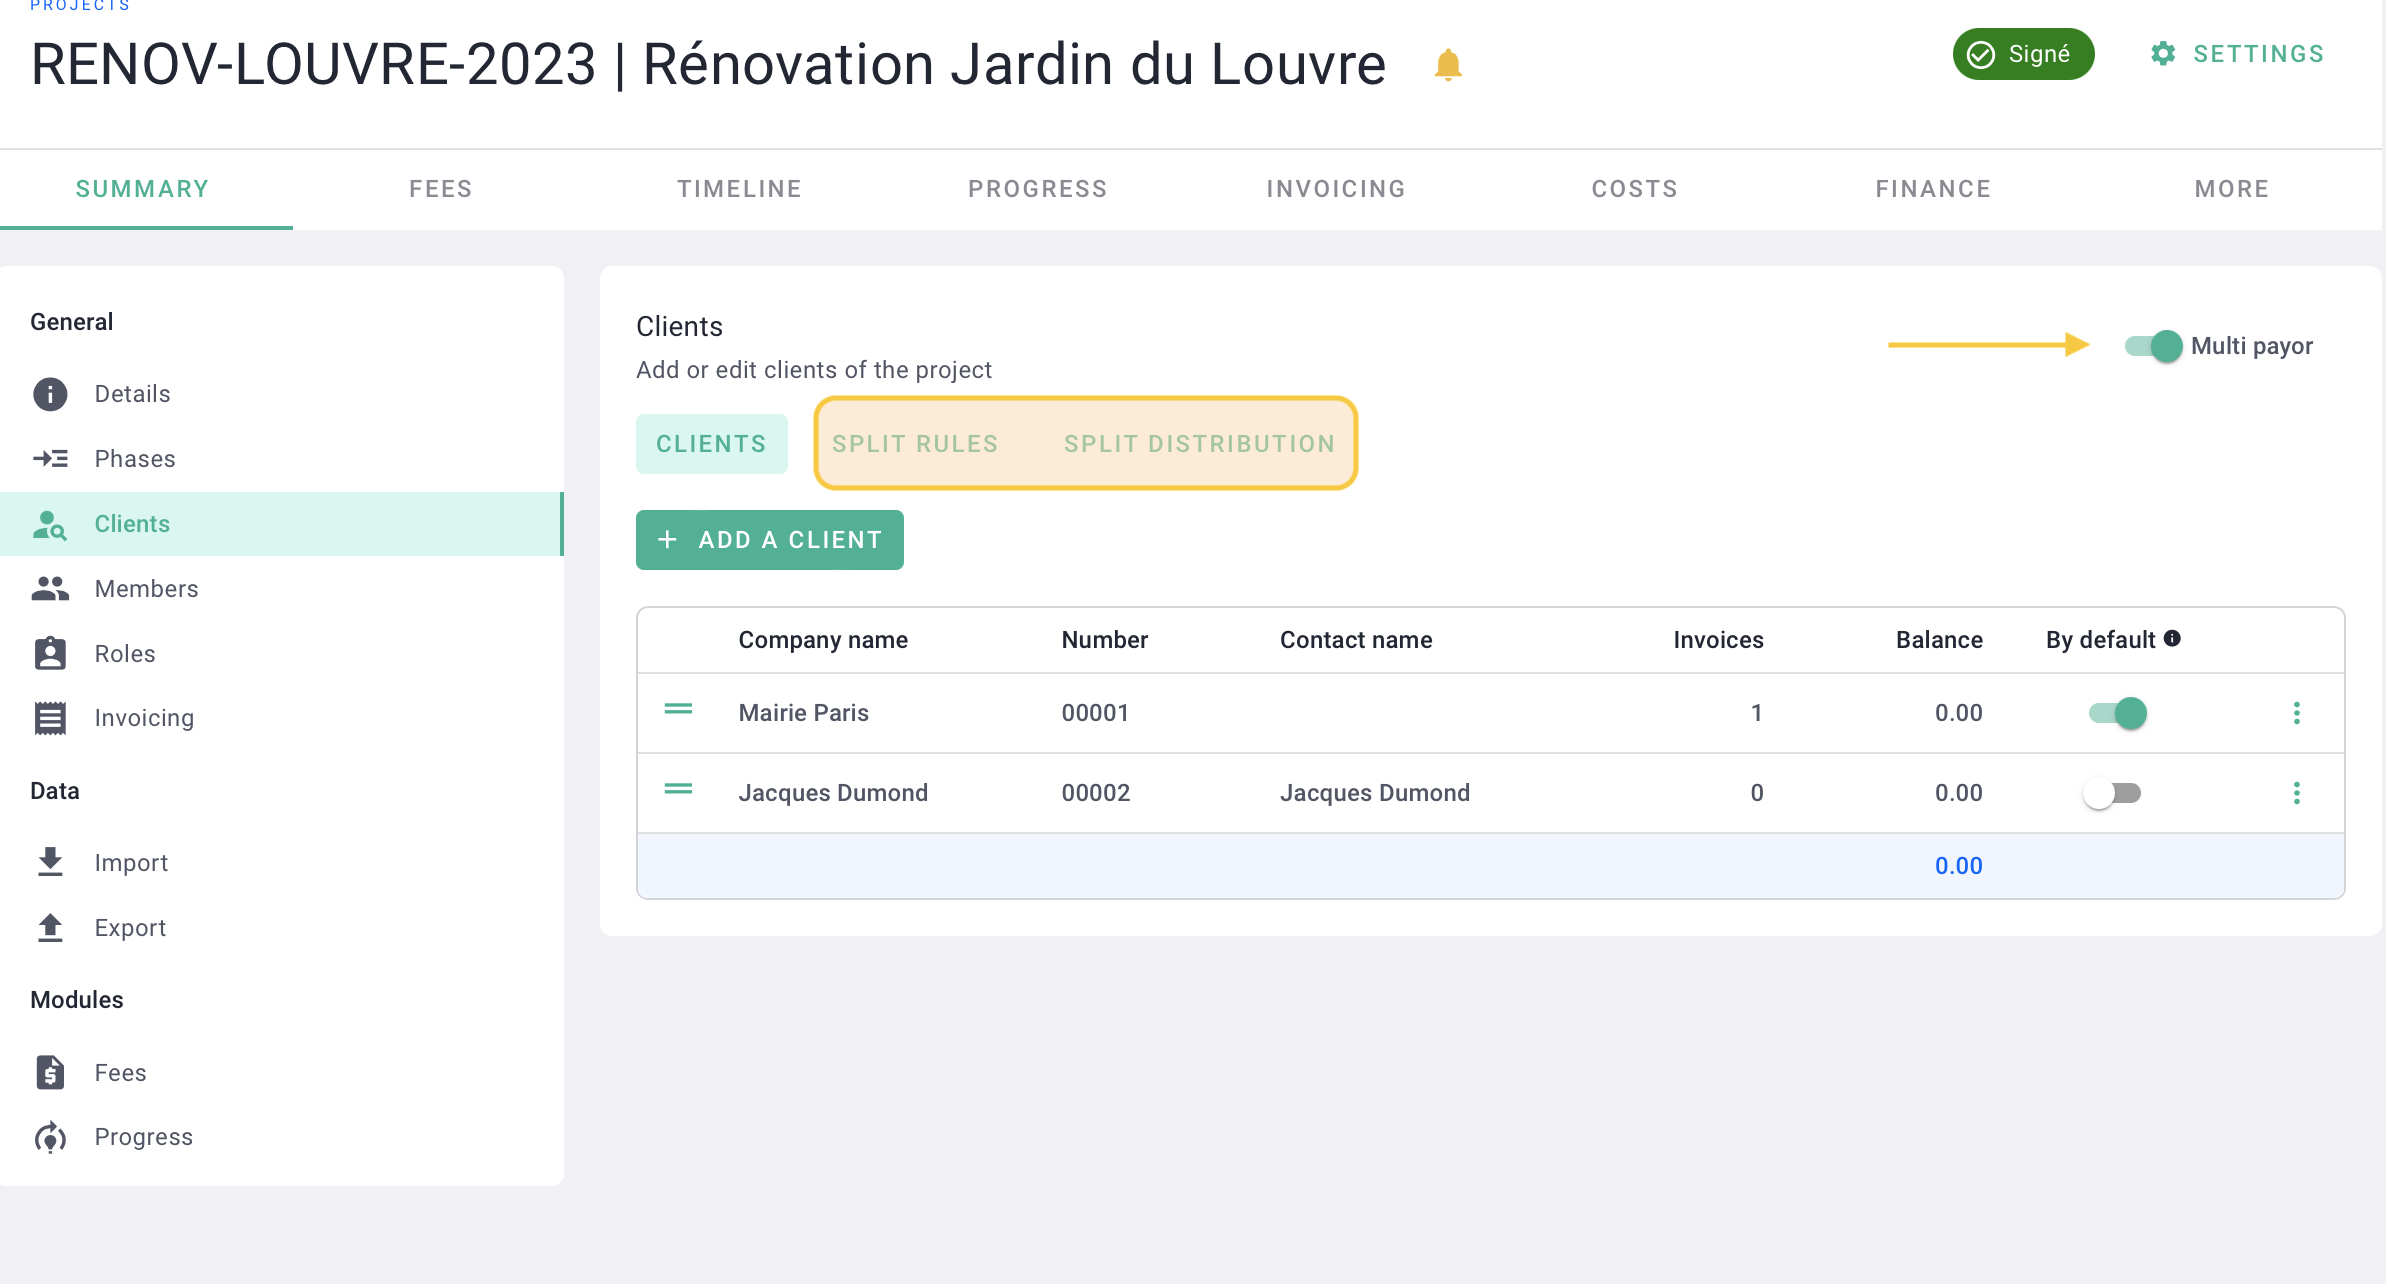
Once the fees have been added with their respective phases, go to the project settings. Click on "Settings" at the top right in green > then click on "Clients" on the left.
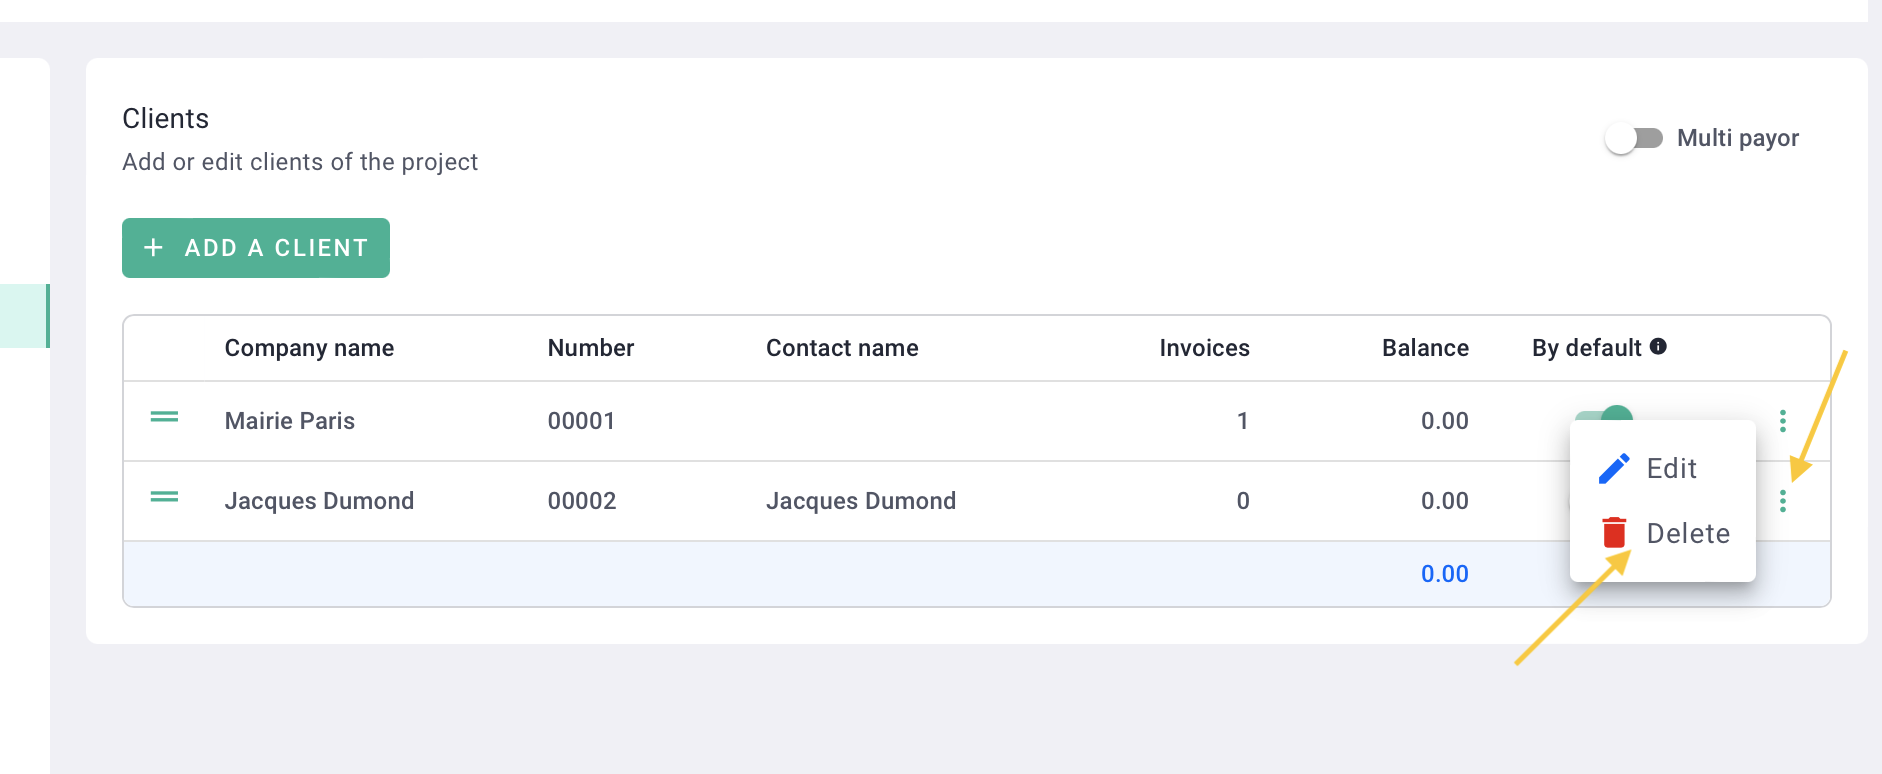
You will see the first client of the project. Click on + Add a client.
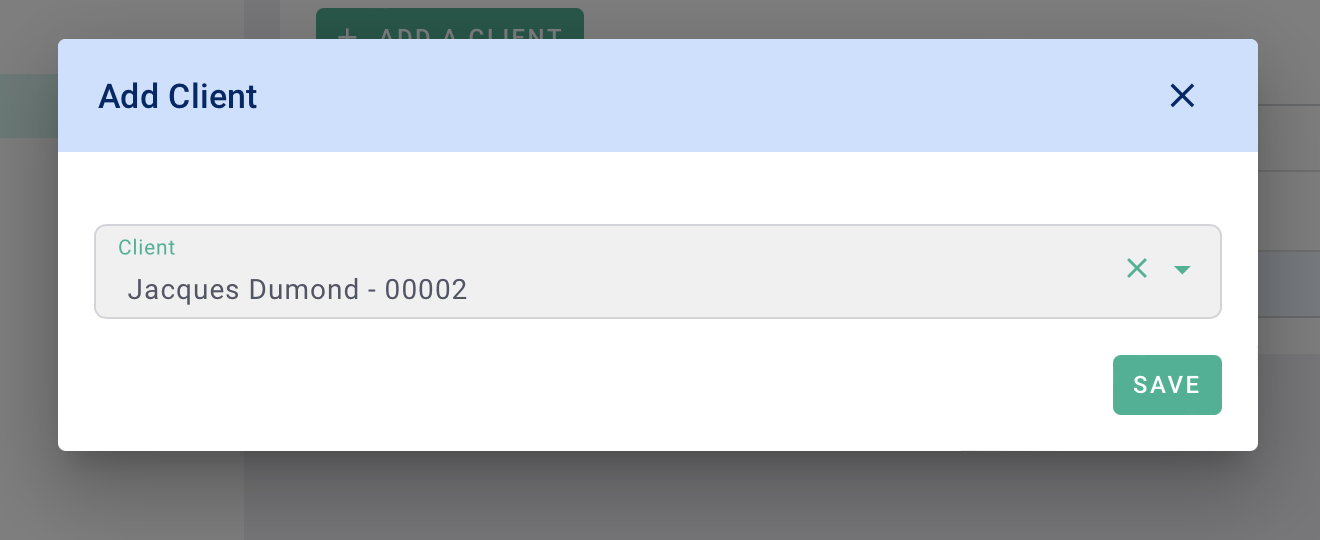
In the form, select an existing client from your database or click on + Add a client to create a new one. Click on Save.
You have now added your second client to the project. Click on + Add a client again to add the remaining clients to the project.
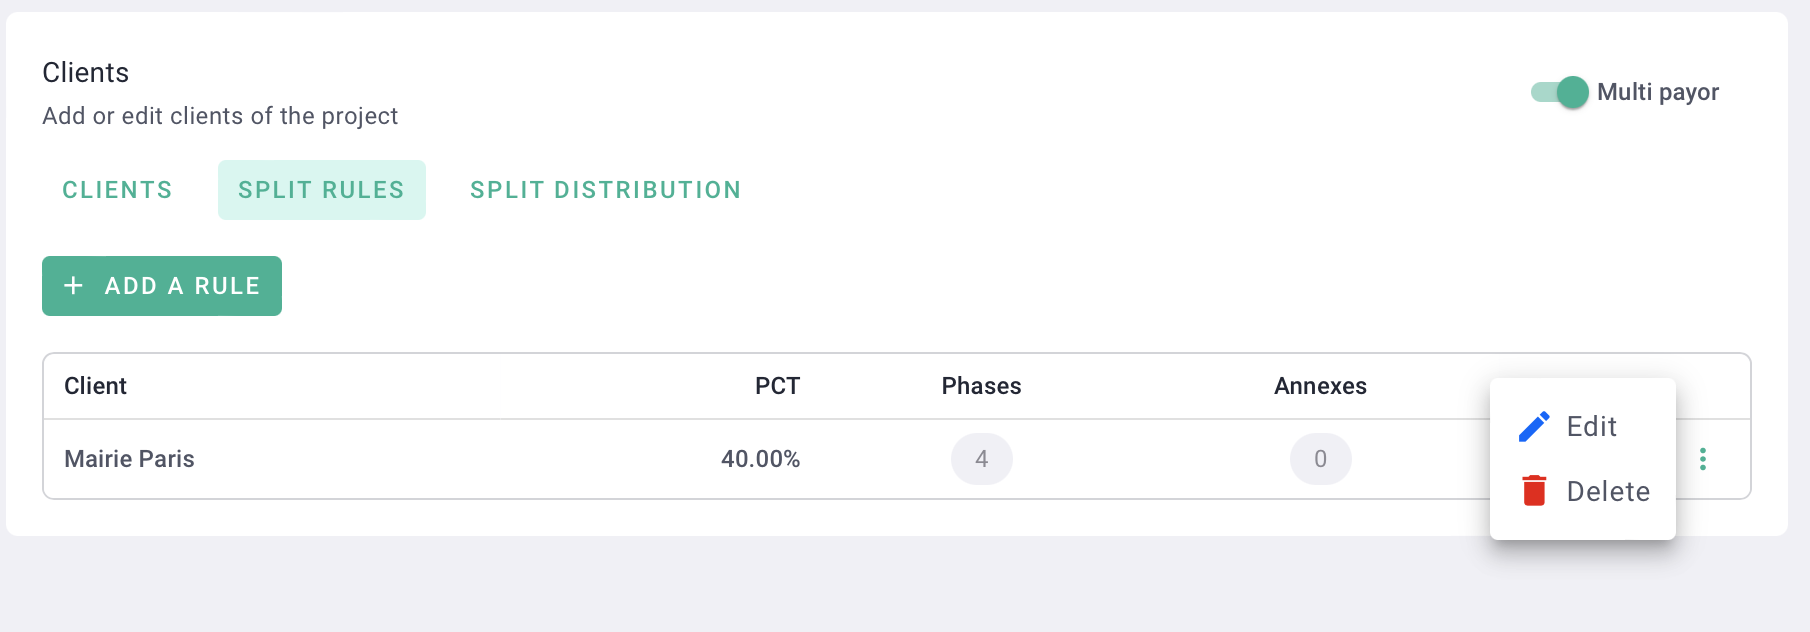
Click on the options "..." on the right side of the client's row to Edit or Delete the client from the project.
III/ Allocating Project Fees
Once you have added your clients, check the Multiple Payor option at the top right.
Two tabs will appear: Split Rules and Split Distribution.
Go to the Split Rules tab and click on + Add a rule.
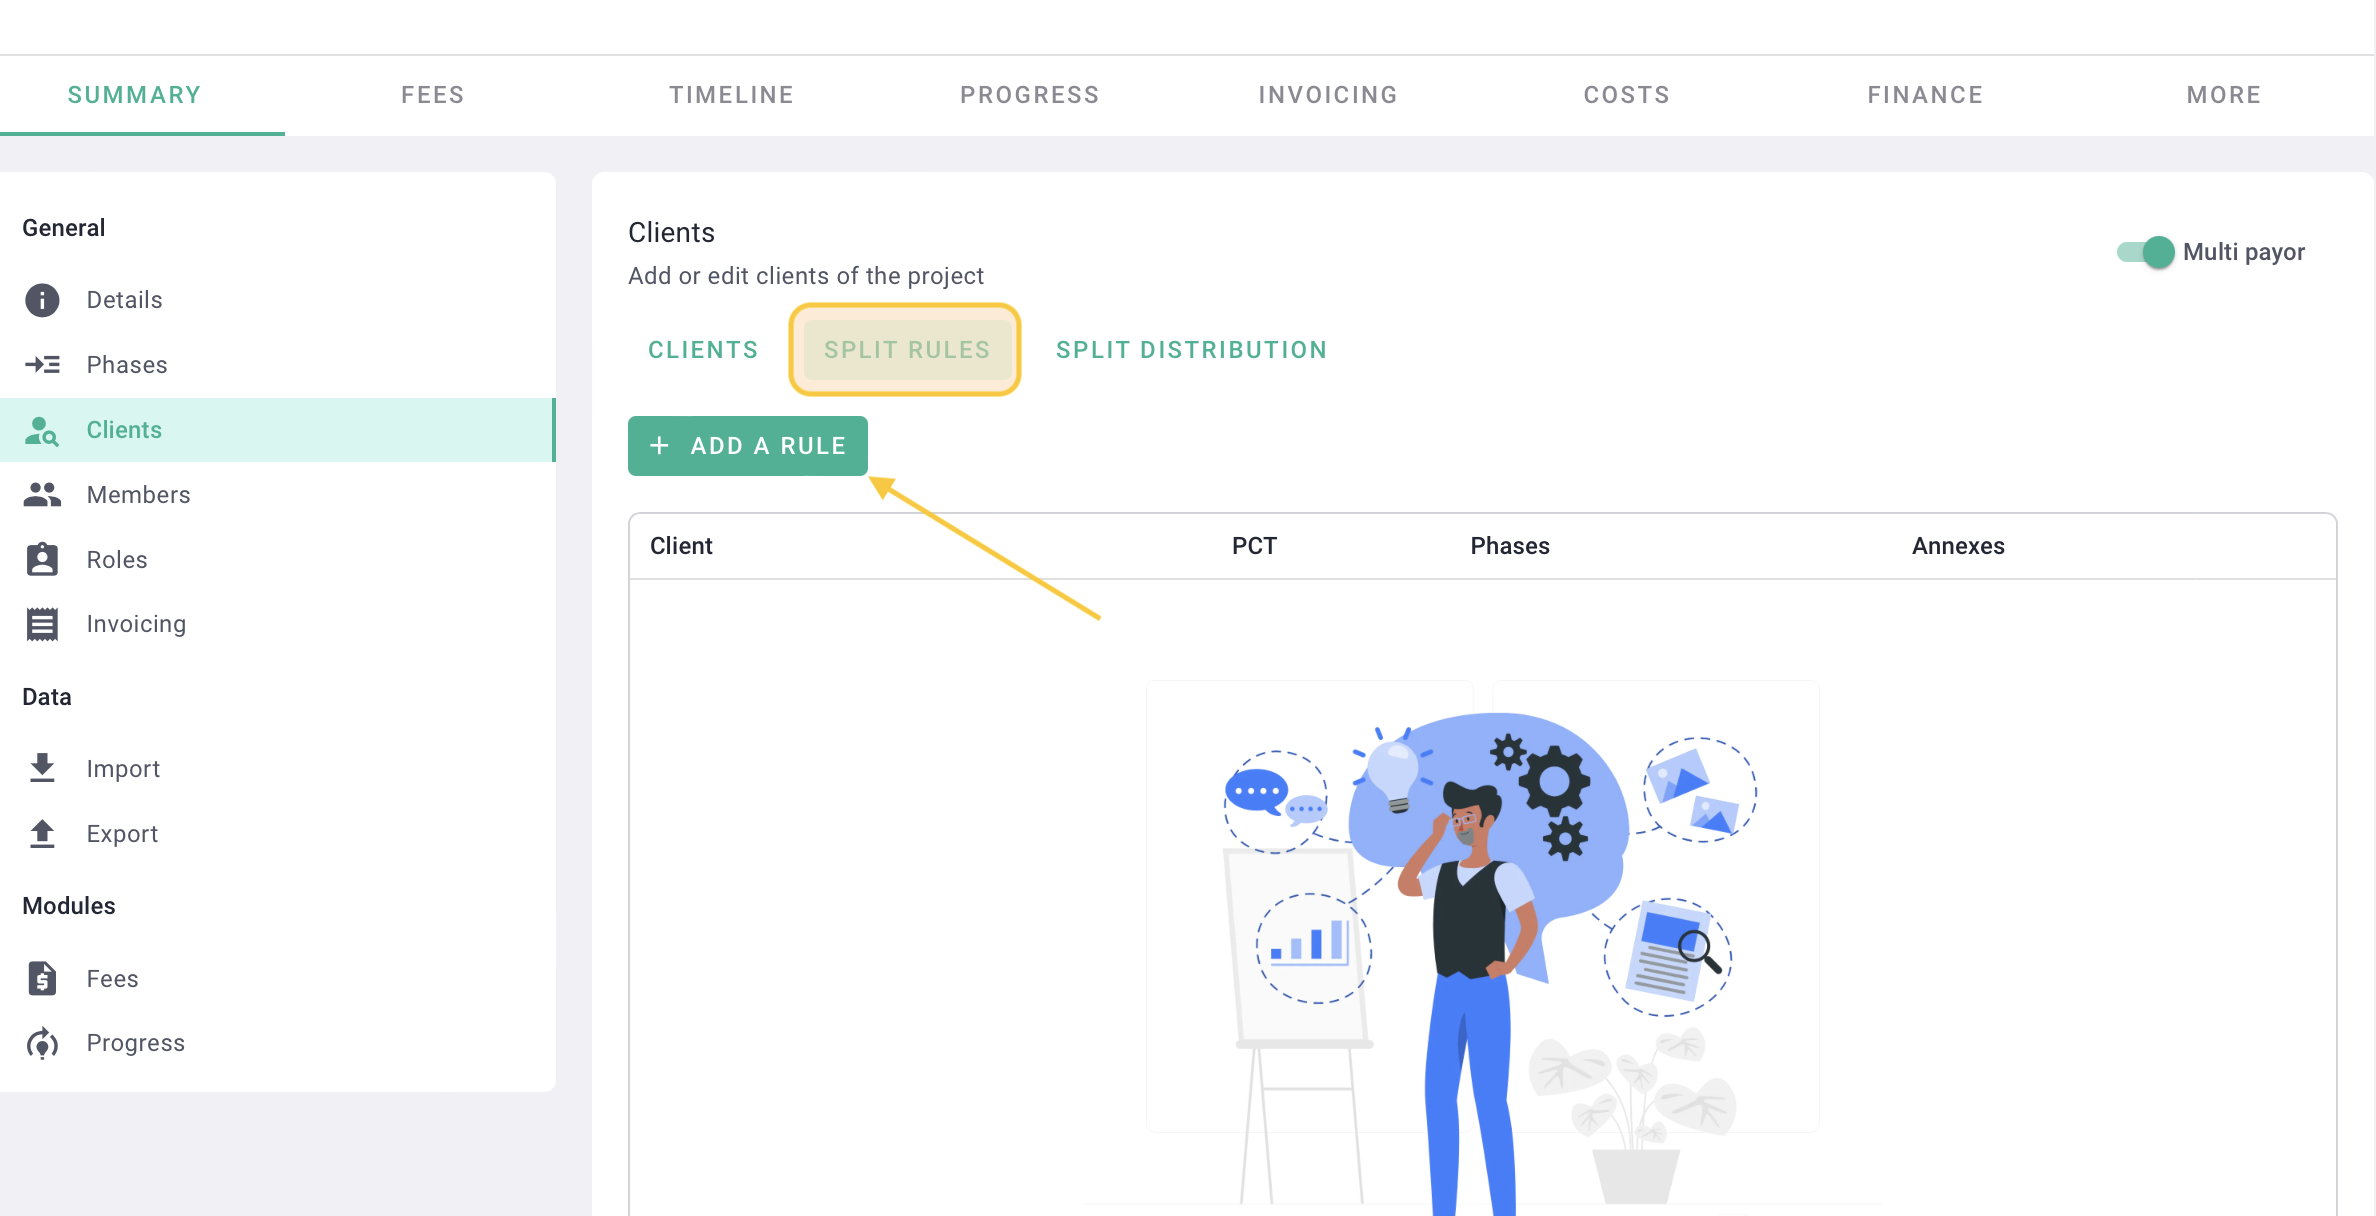
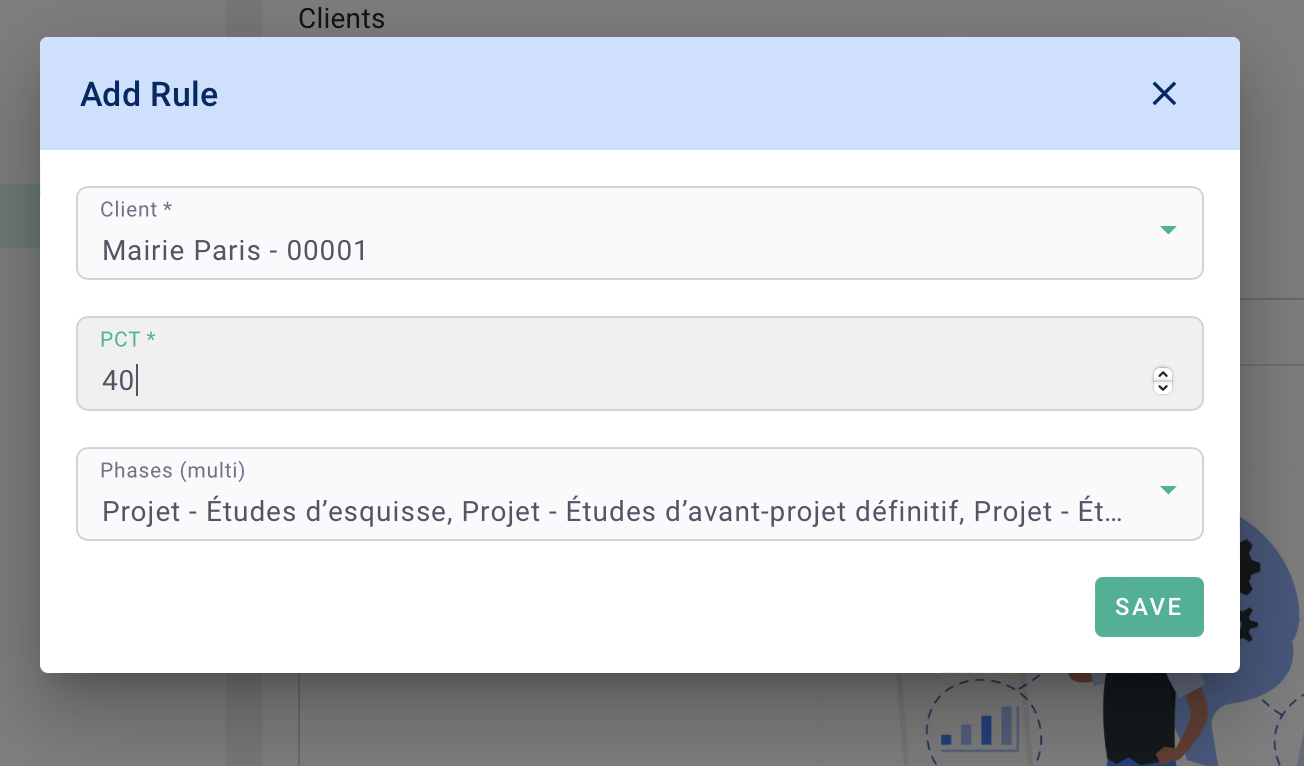
In the rule, select one of the Clients.
Then, enter the percentage (PCT) to allocate and the Phases to apply the allocation to. Click on Save.
You have now allocated the fees for your first client to one or several phases.
Click on the options "..." on the right side of the rule's row to Edit or Delete the rule.
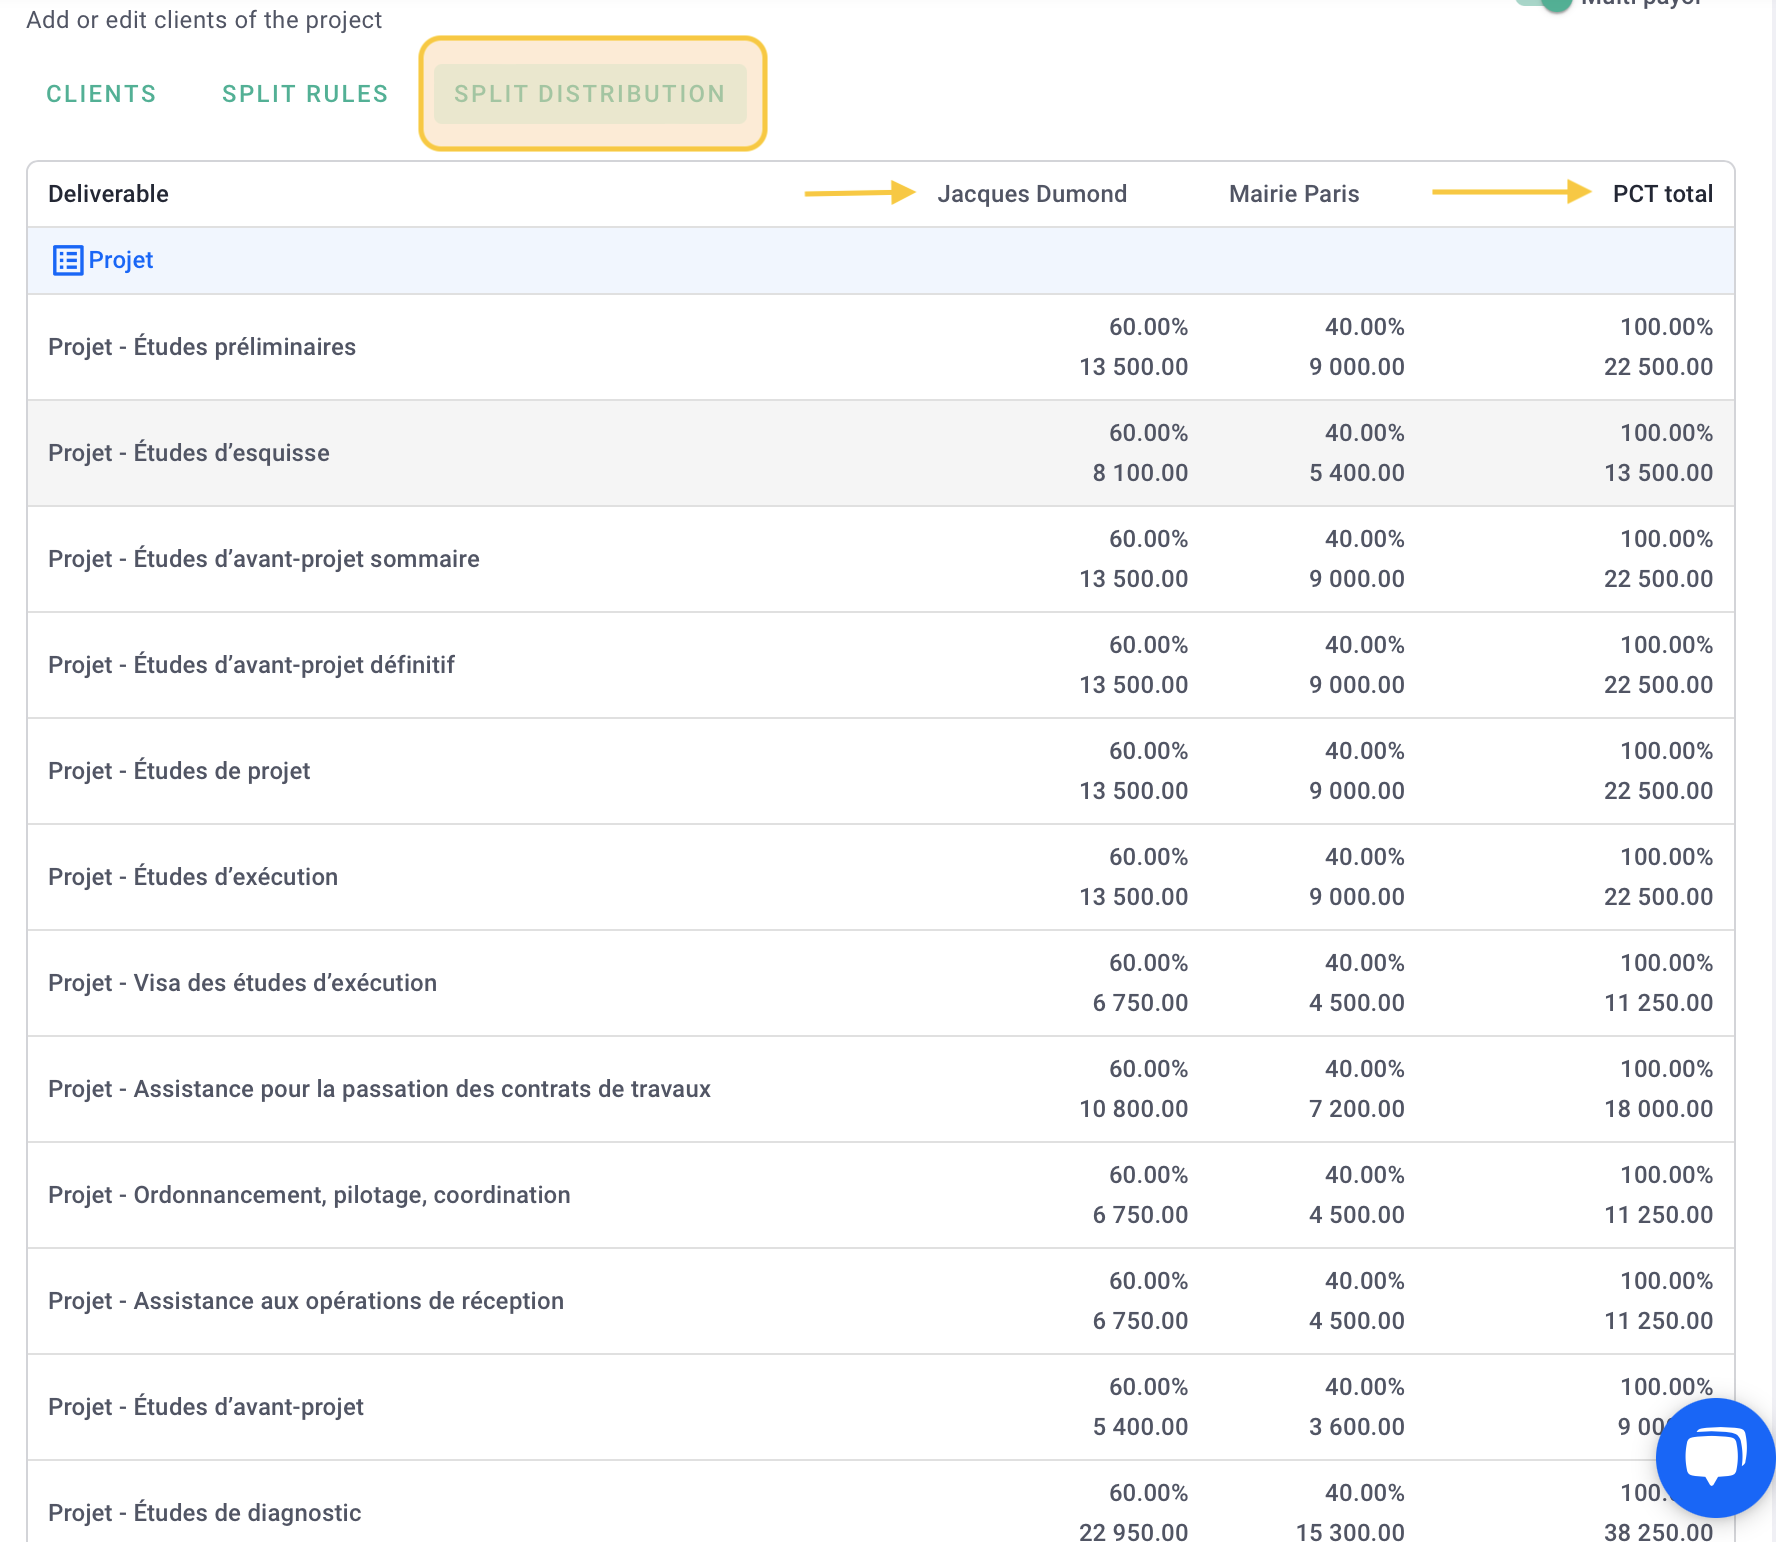
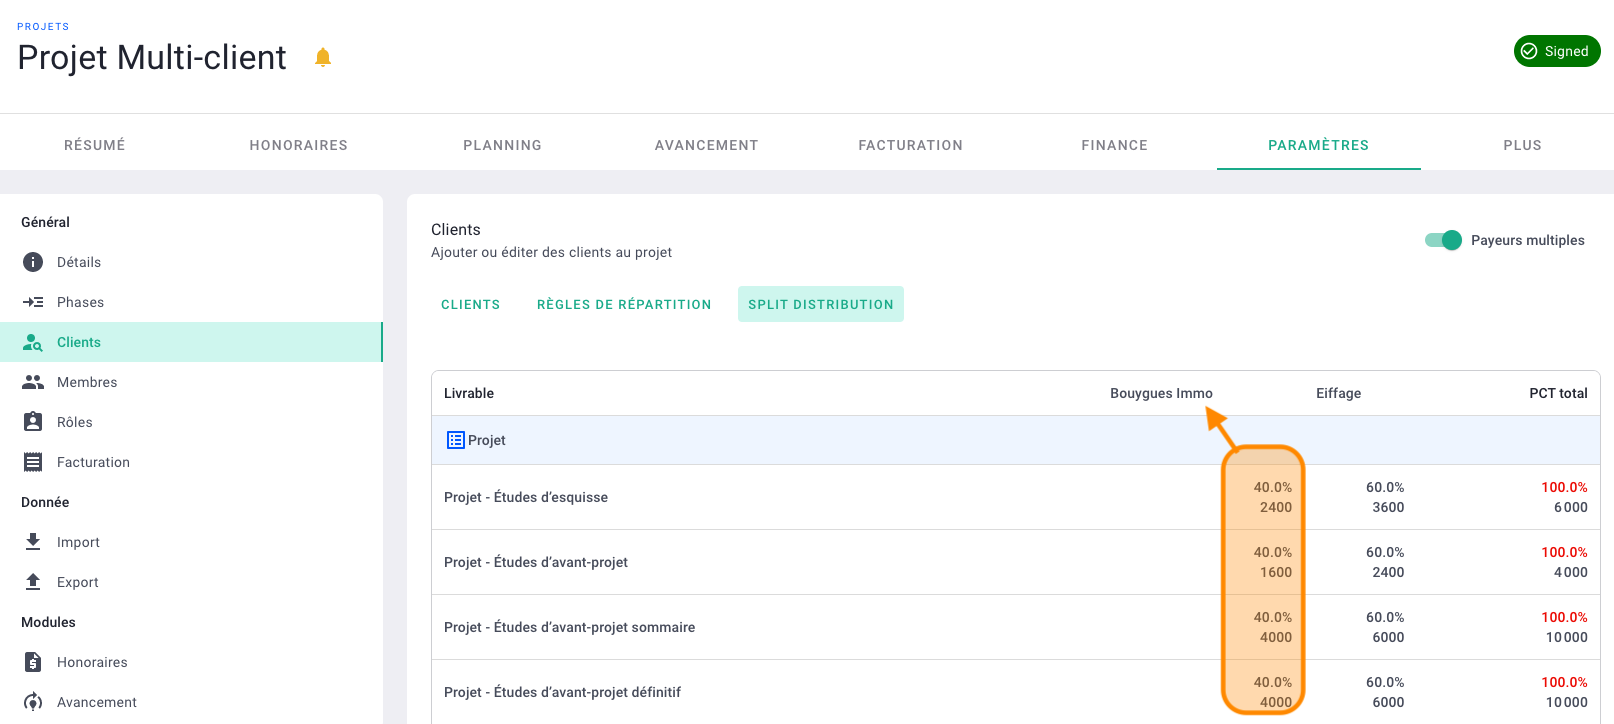
Go to the Split distribution tab to see the result and verify that the fees are correct for your client.
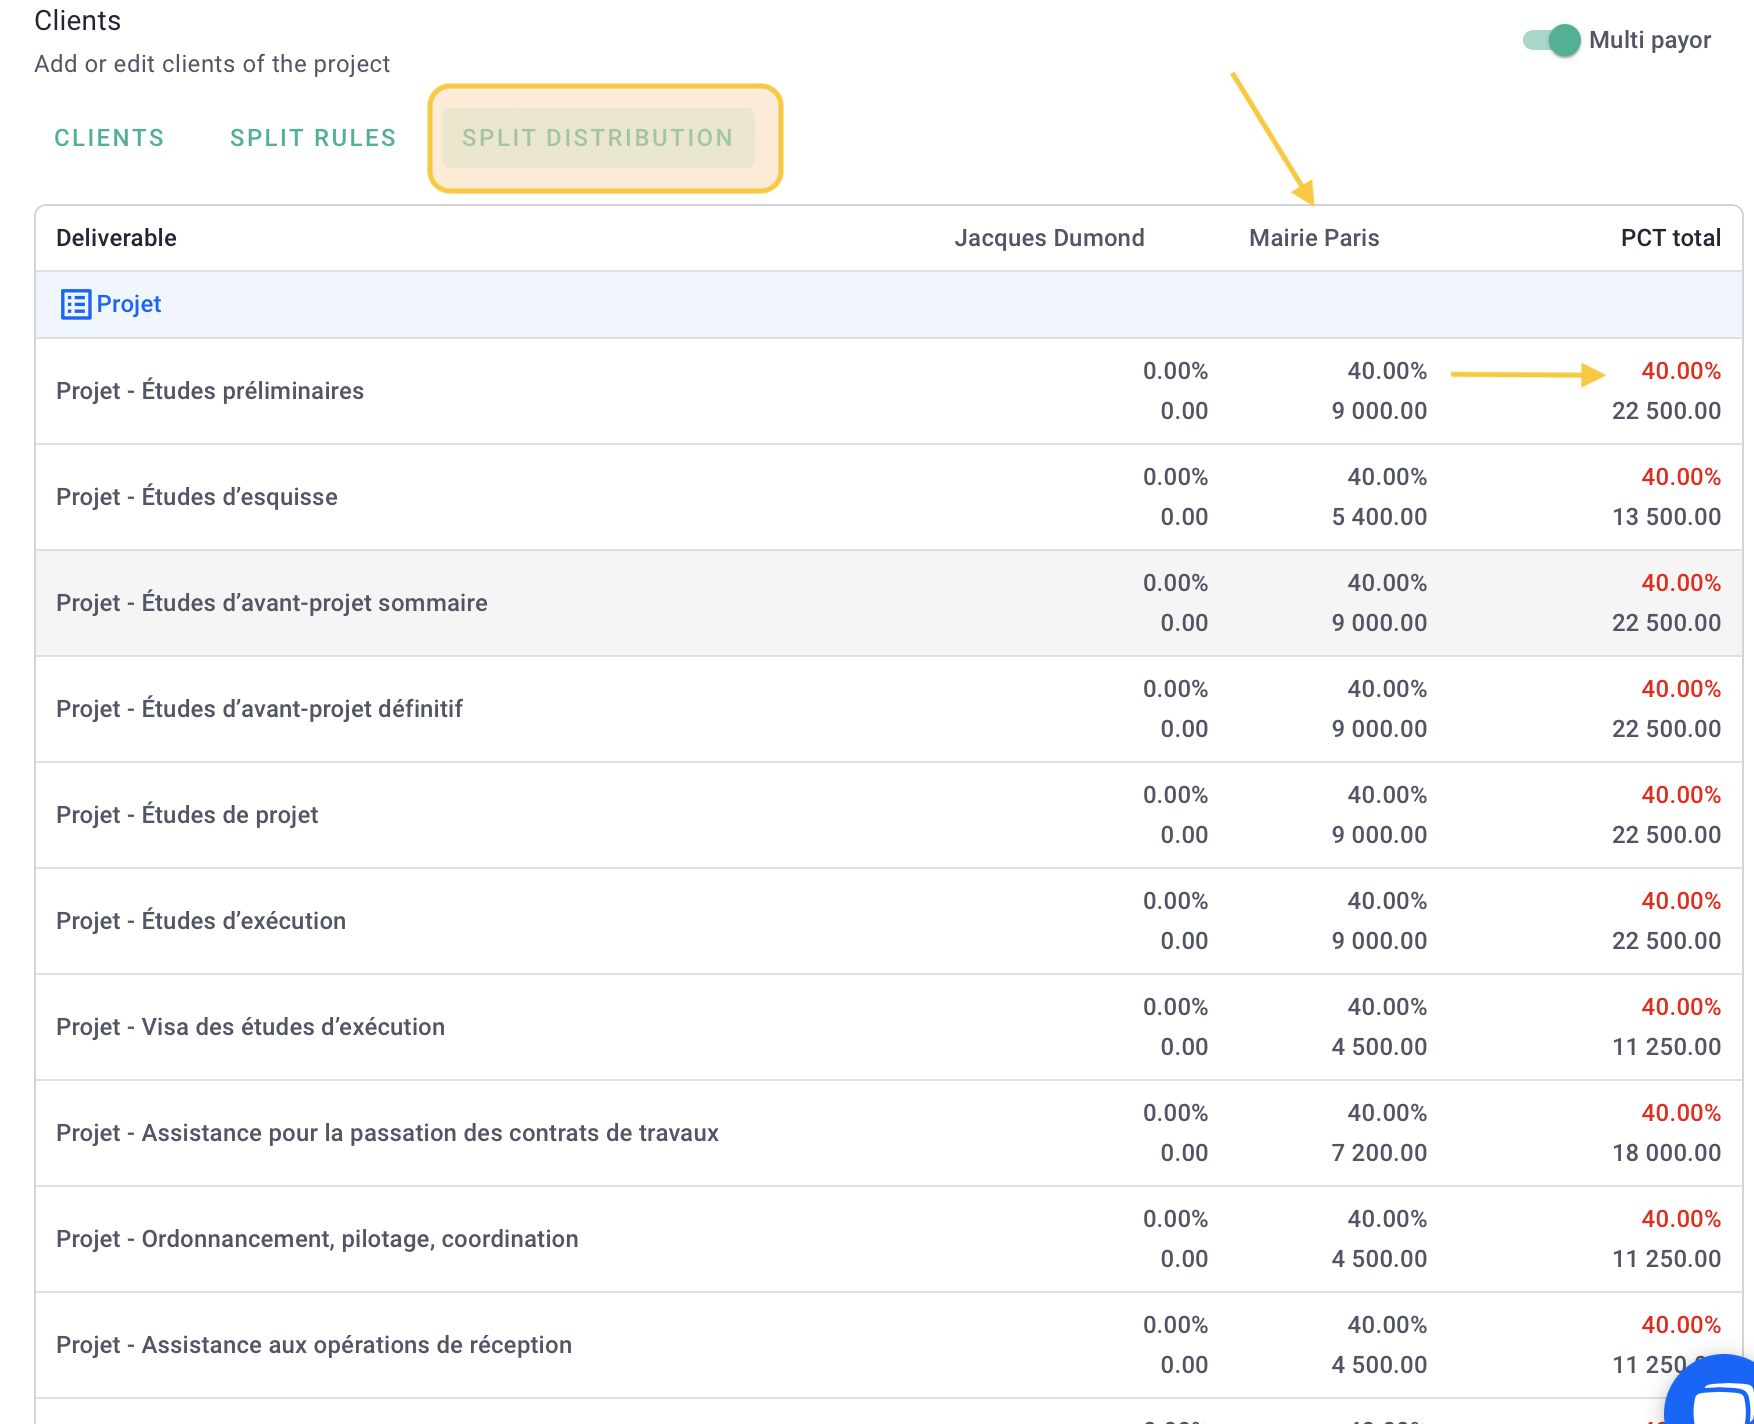
Go back to the "Allocation Rules" tab to allocate the fees for the other clients.
Finally, check in the "Allocation" tab that the total fees and PCT add up to 100%.
IV/ Invoicing
Each client will have their share of fees in their respective invoices. There will be no detailed breakdown of fee allocation, and the clients will not be aware of the allocation rules.
When you create an invoice, select one of the Clients.

The fees displayed in the "Items" tab of the invoice are the fees allocated to the selected client.
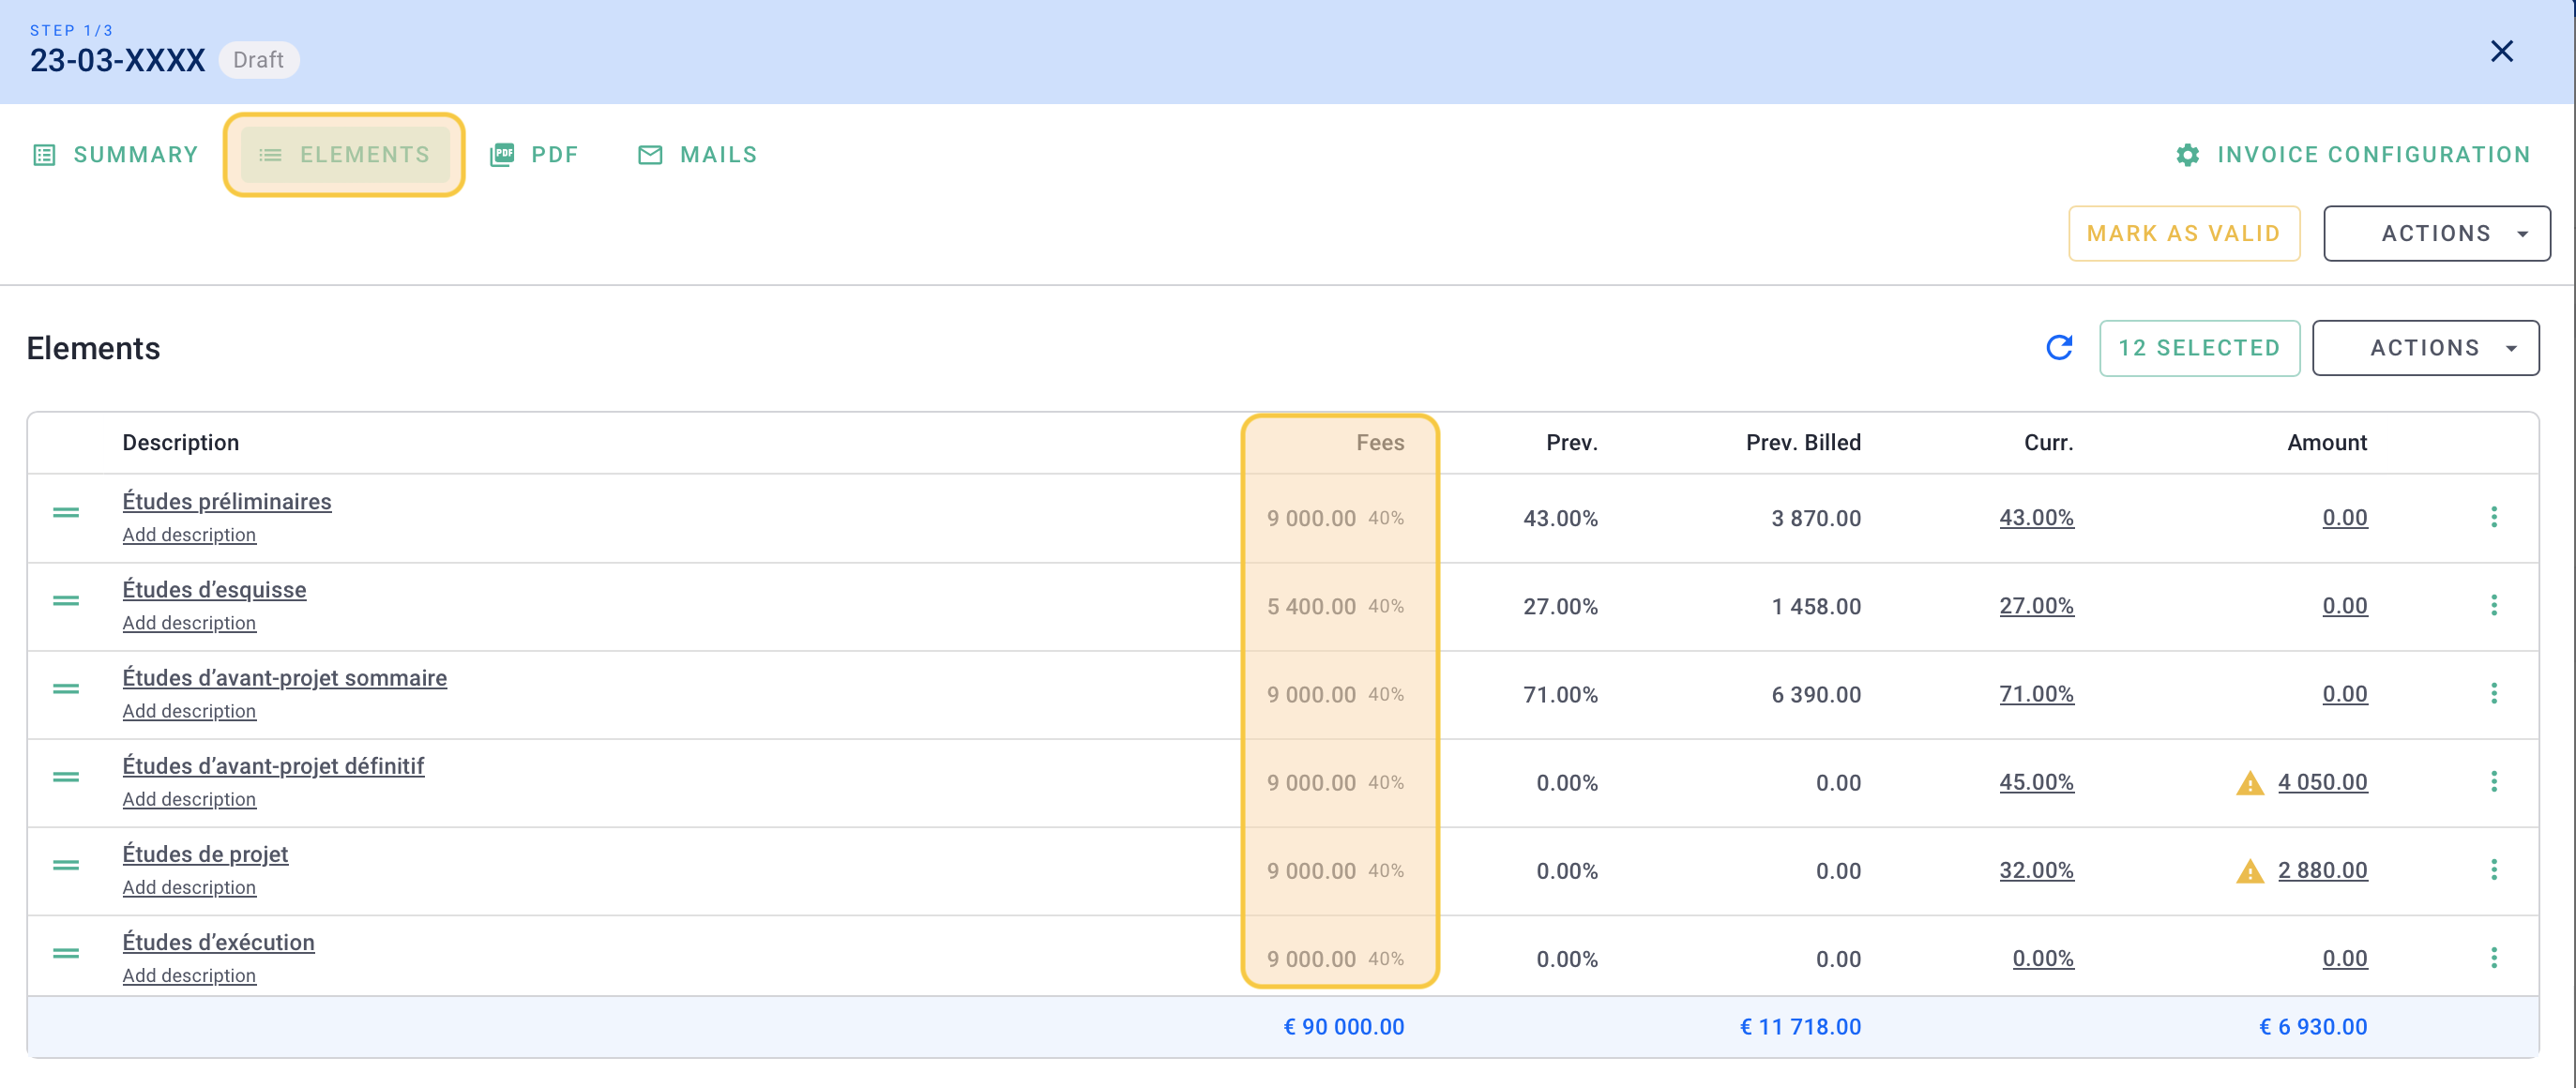
Here's the breakdown of the fee allocation for the client Bouygues Immo.
Great job! 🎉
You now know how to invoice multiple clients using fee allocation rules.