
Creating and managing a project from A to Z: setup, fee calculation, scheduling, progress tracking, invoicing, and configuration.
🔓 Required Permissions
Team: Create projects, manage phase models.
Project: View fees, manage fees, update projects.
| Reading time | 5min |
| Working time | 10min |
| Step | 4 |
Summary
I/ Project and client information
II/ Invoicing phases
III/ Fees
IV/ Project planning
I/ Project and client information
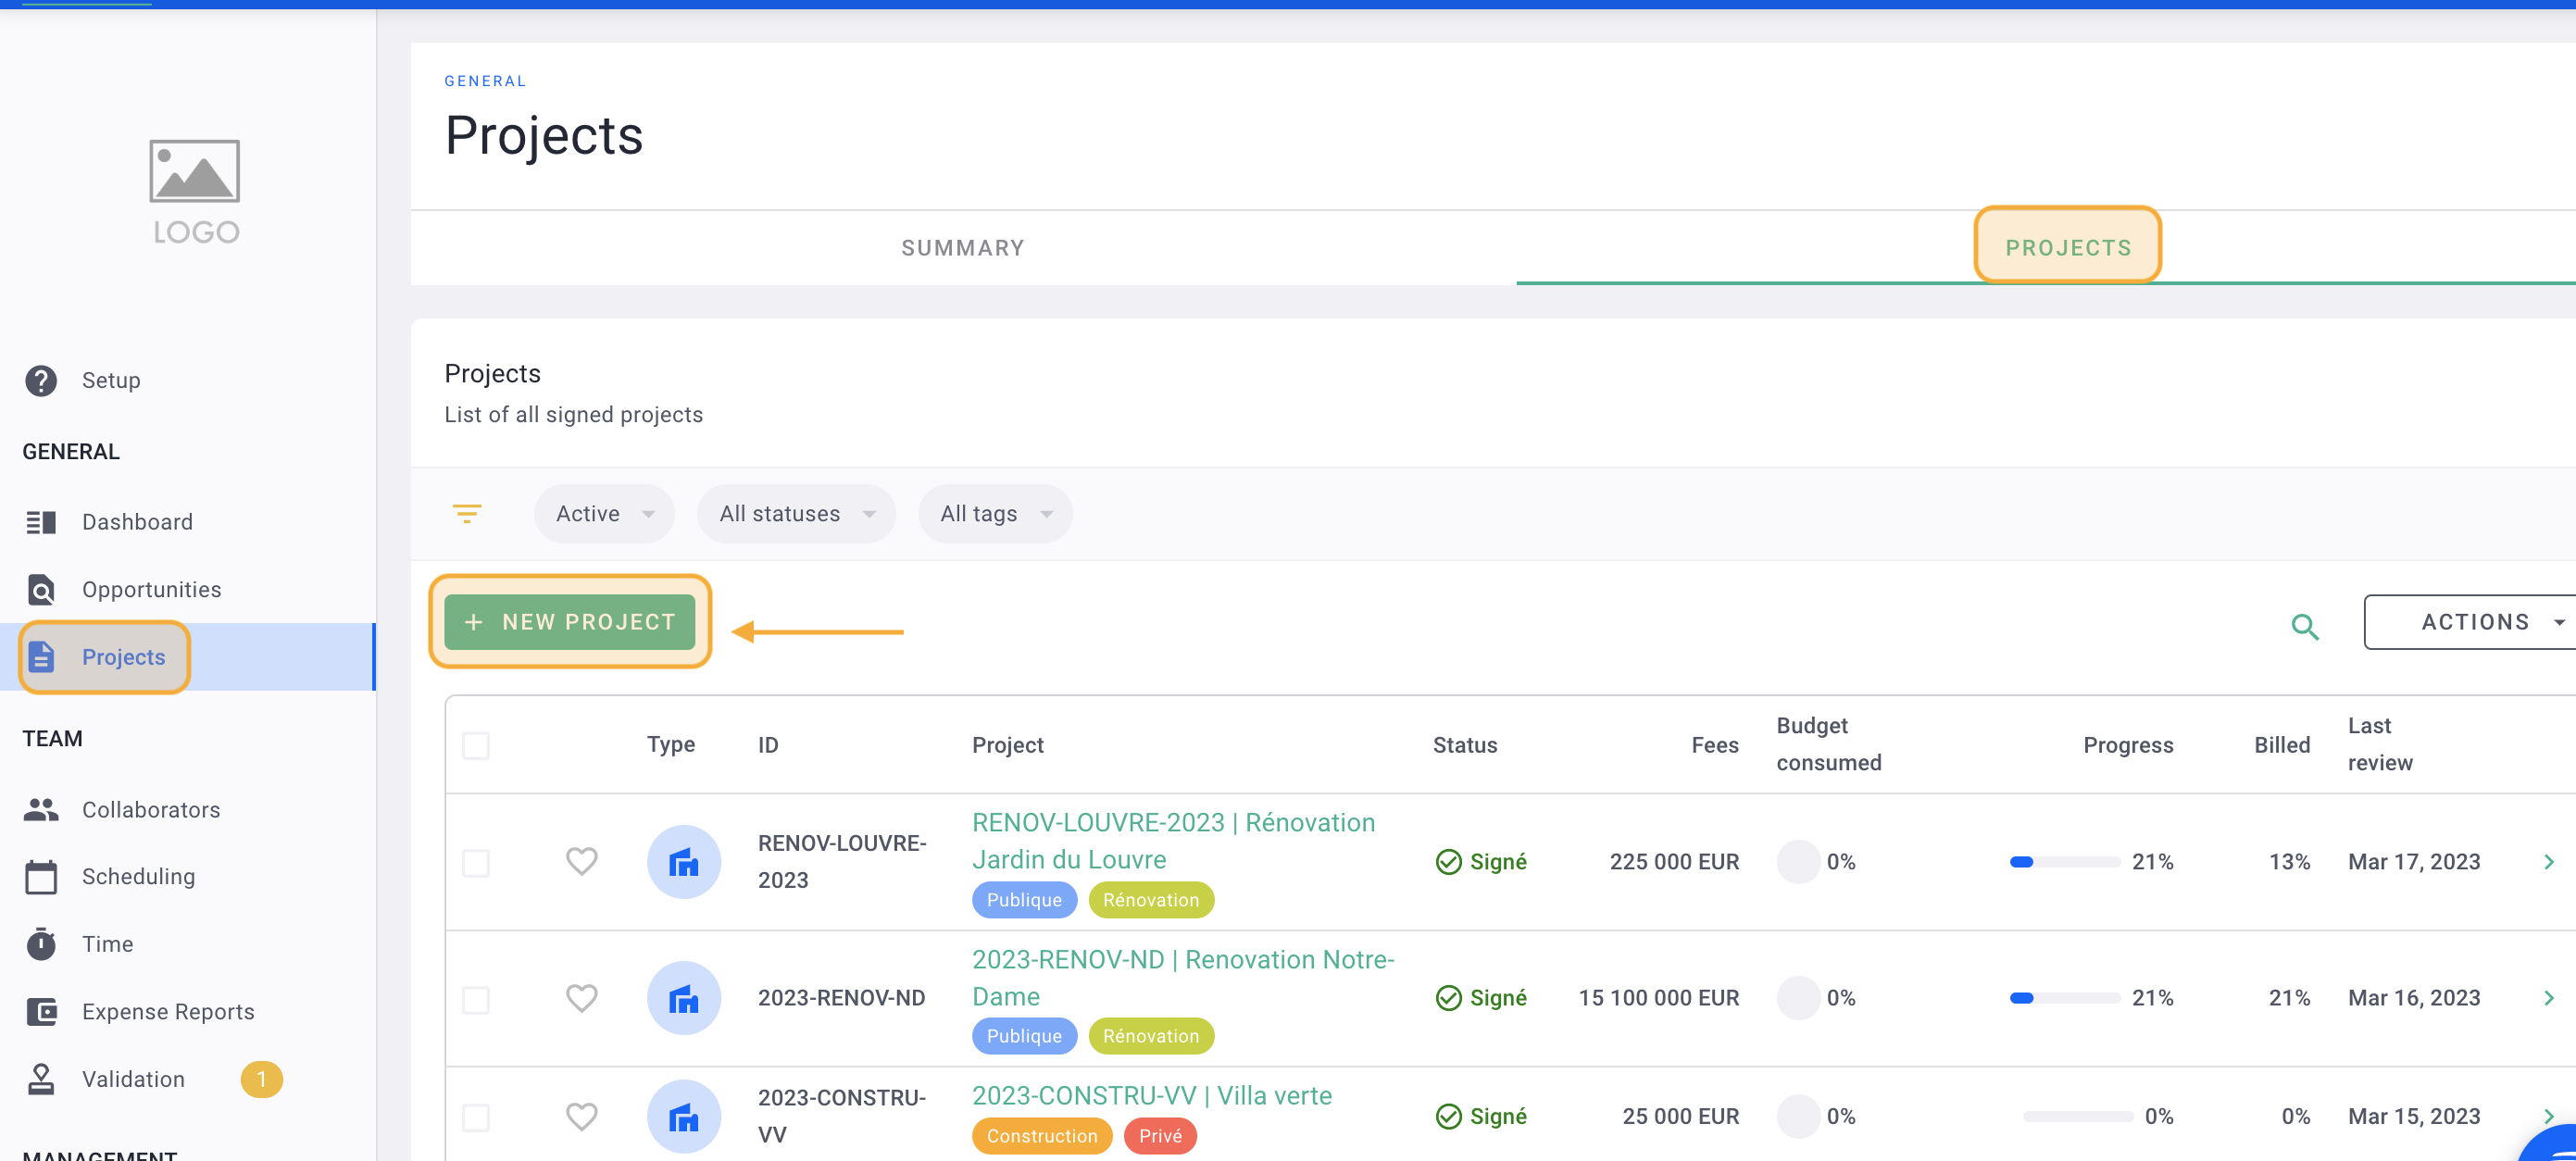
In the left column, click on Projects > Projects then add a signed project or on the + New Project button
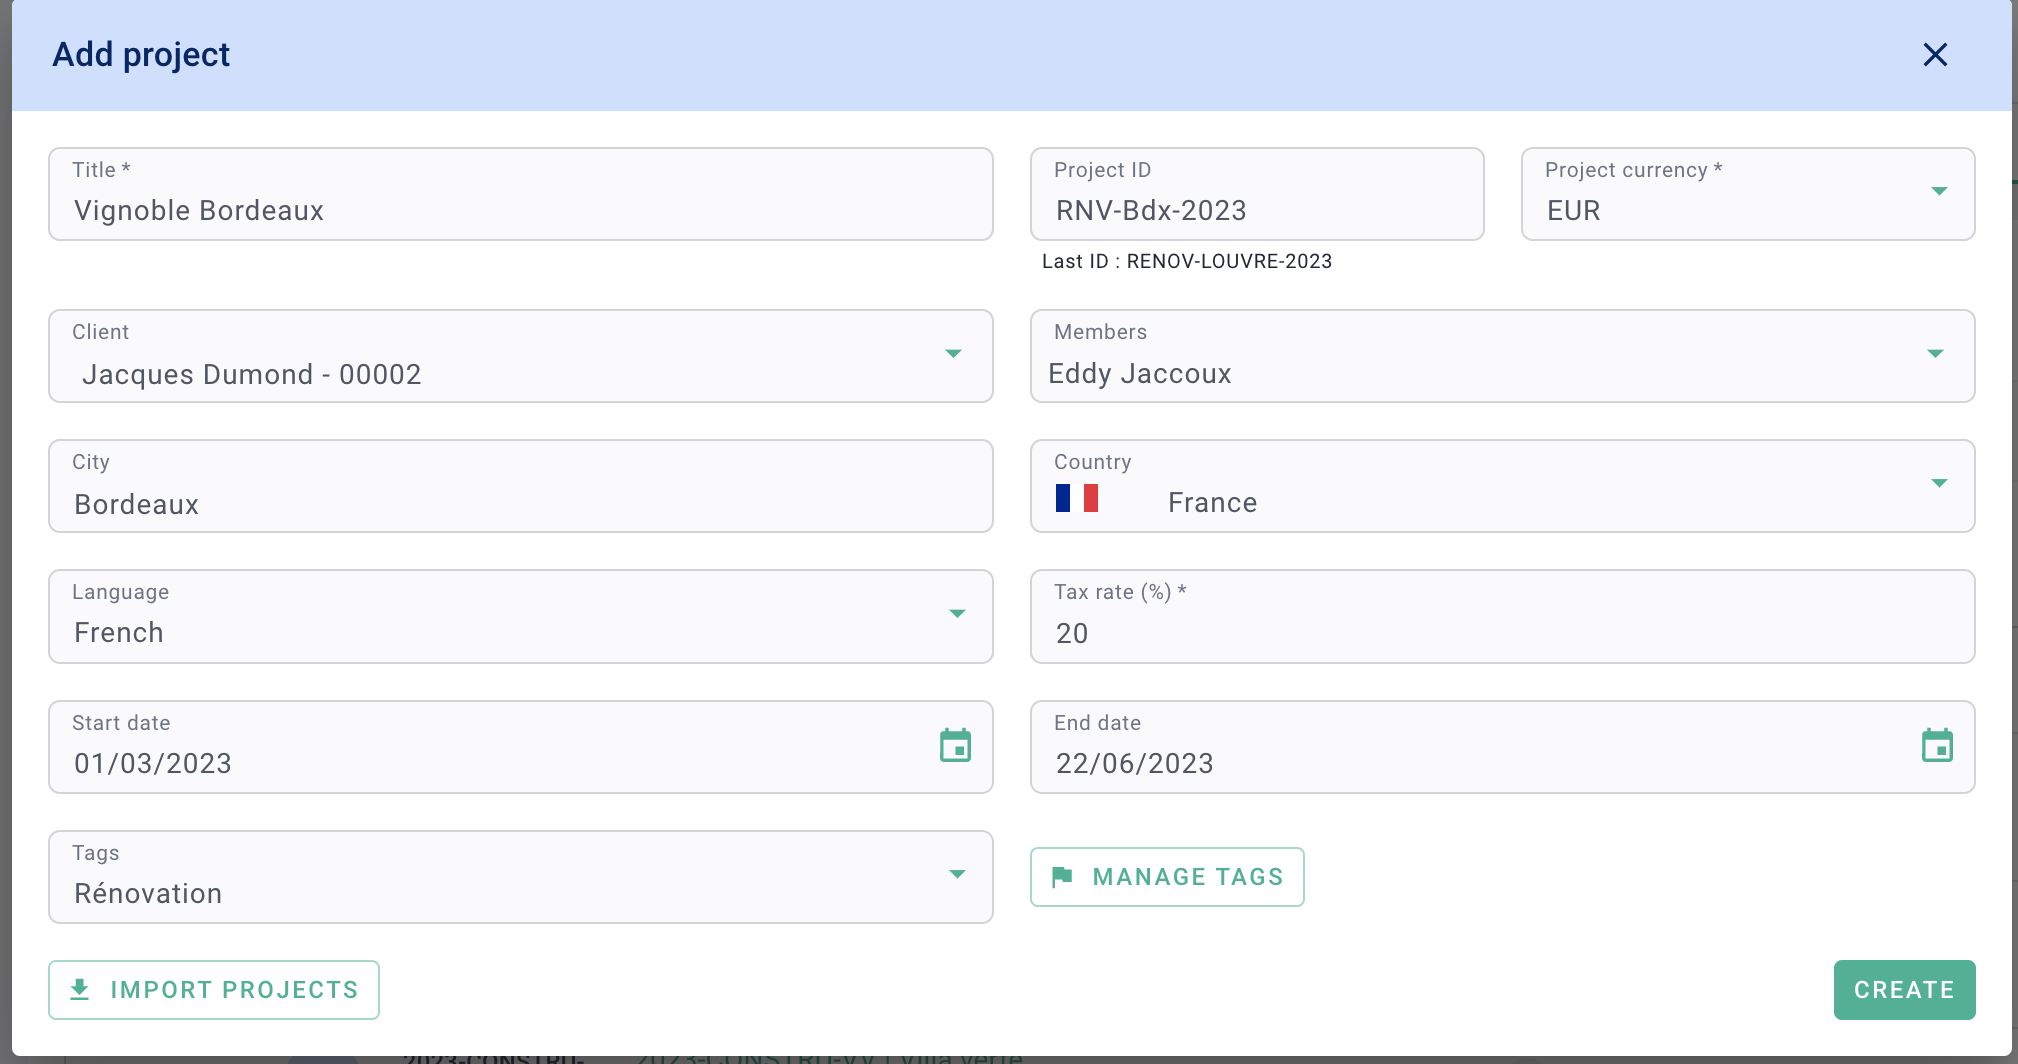
Complete the form :
- Project title
- Project ID (a business code that appears on invoices. Put whatever)
- select the currency of the project (you will be able to put the project fees on the currency and invoice on this currency)
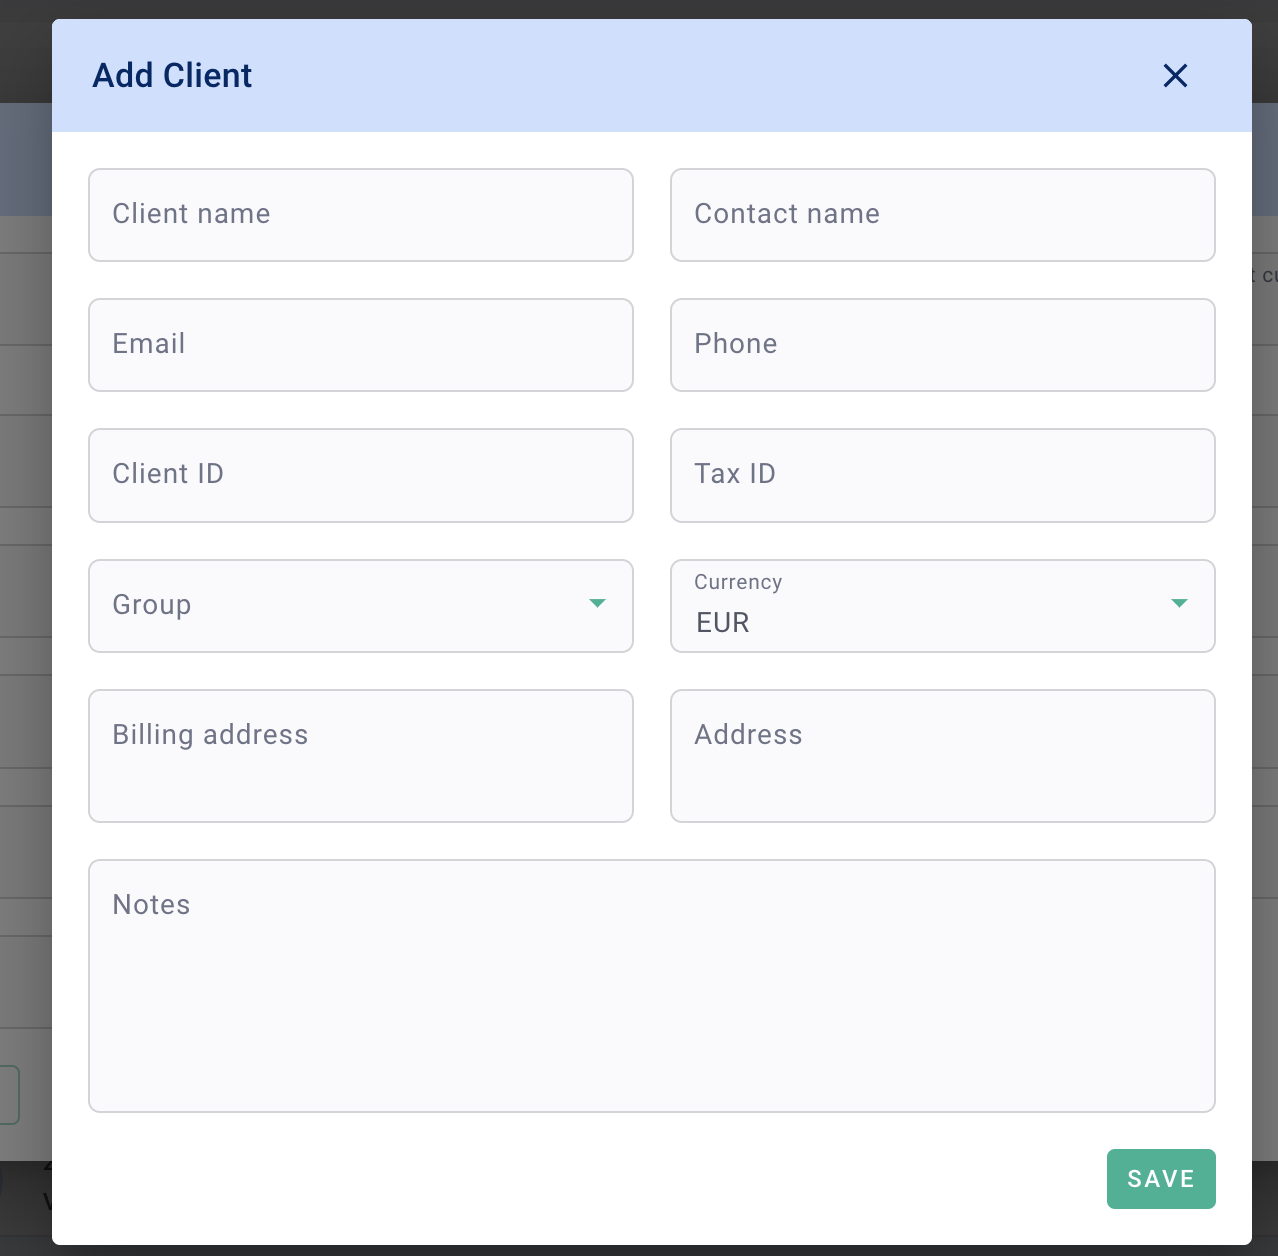
- select the billing customer. If it has already been created or imported, choose it from the list. (Click on + Client to create the client)
- the customer's name that will appear on the invoice
- the customer code, to avoid customer duplicates. This code is used for third-party accounts
- the billing address that will appear on the invoices (remember to return to the line by adding the PC and the city)
- the other fields are optional and do not appear in the invoices
- Click Create.
- VAT is the default VAT on project invoices. You can, whatever happens, modify the VAT on the invoices if necessary or put 0.
- project start and end dates. To create a provisional schedule that can be modified. You can still create the schedule in the project if you do not put dates
- project members. So that they enter their times and access the project
- labels or tags
Click Create.
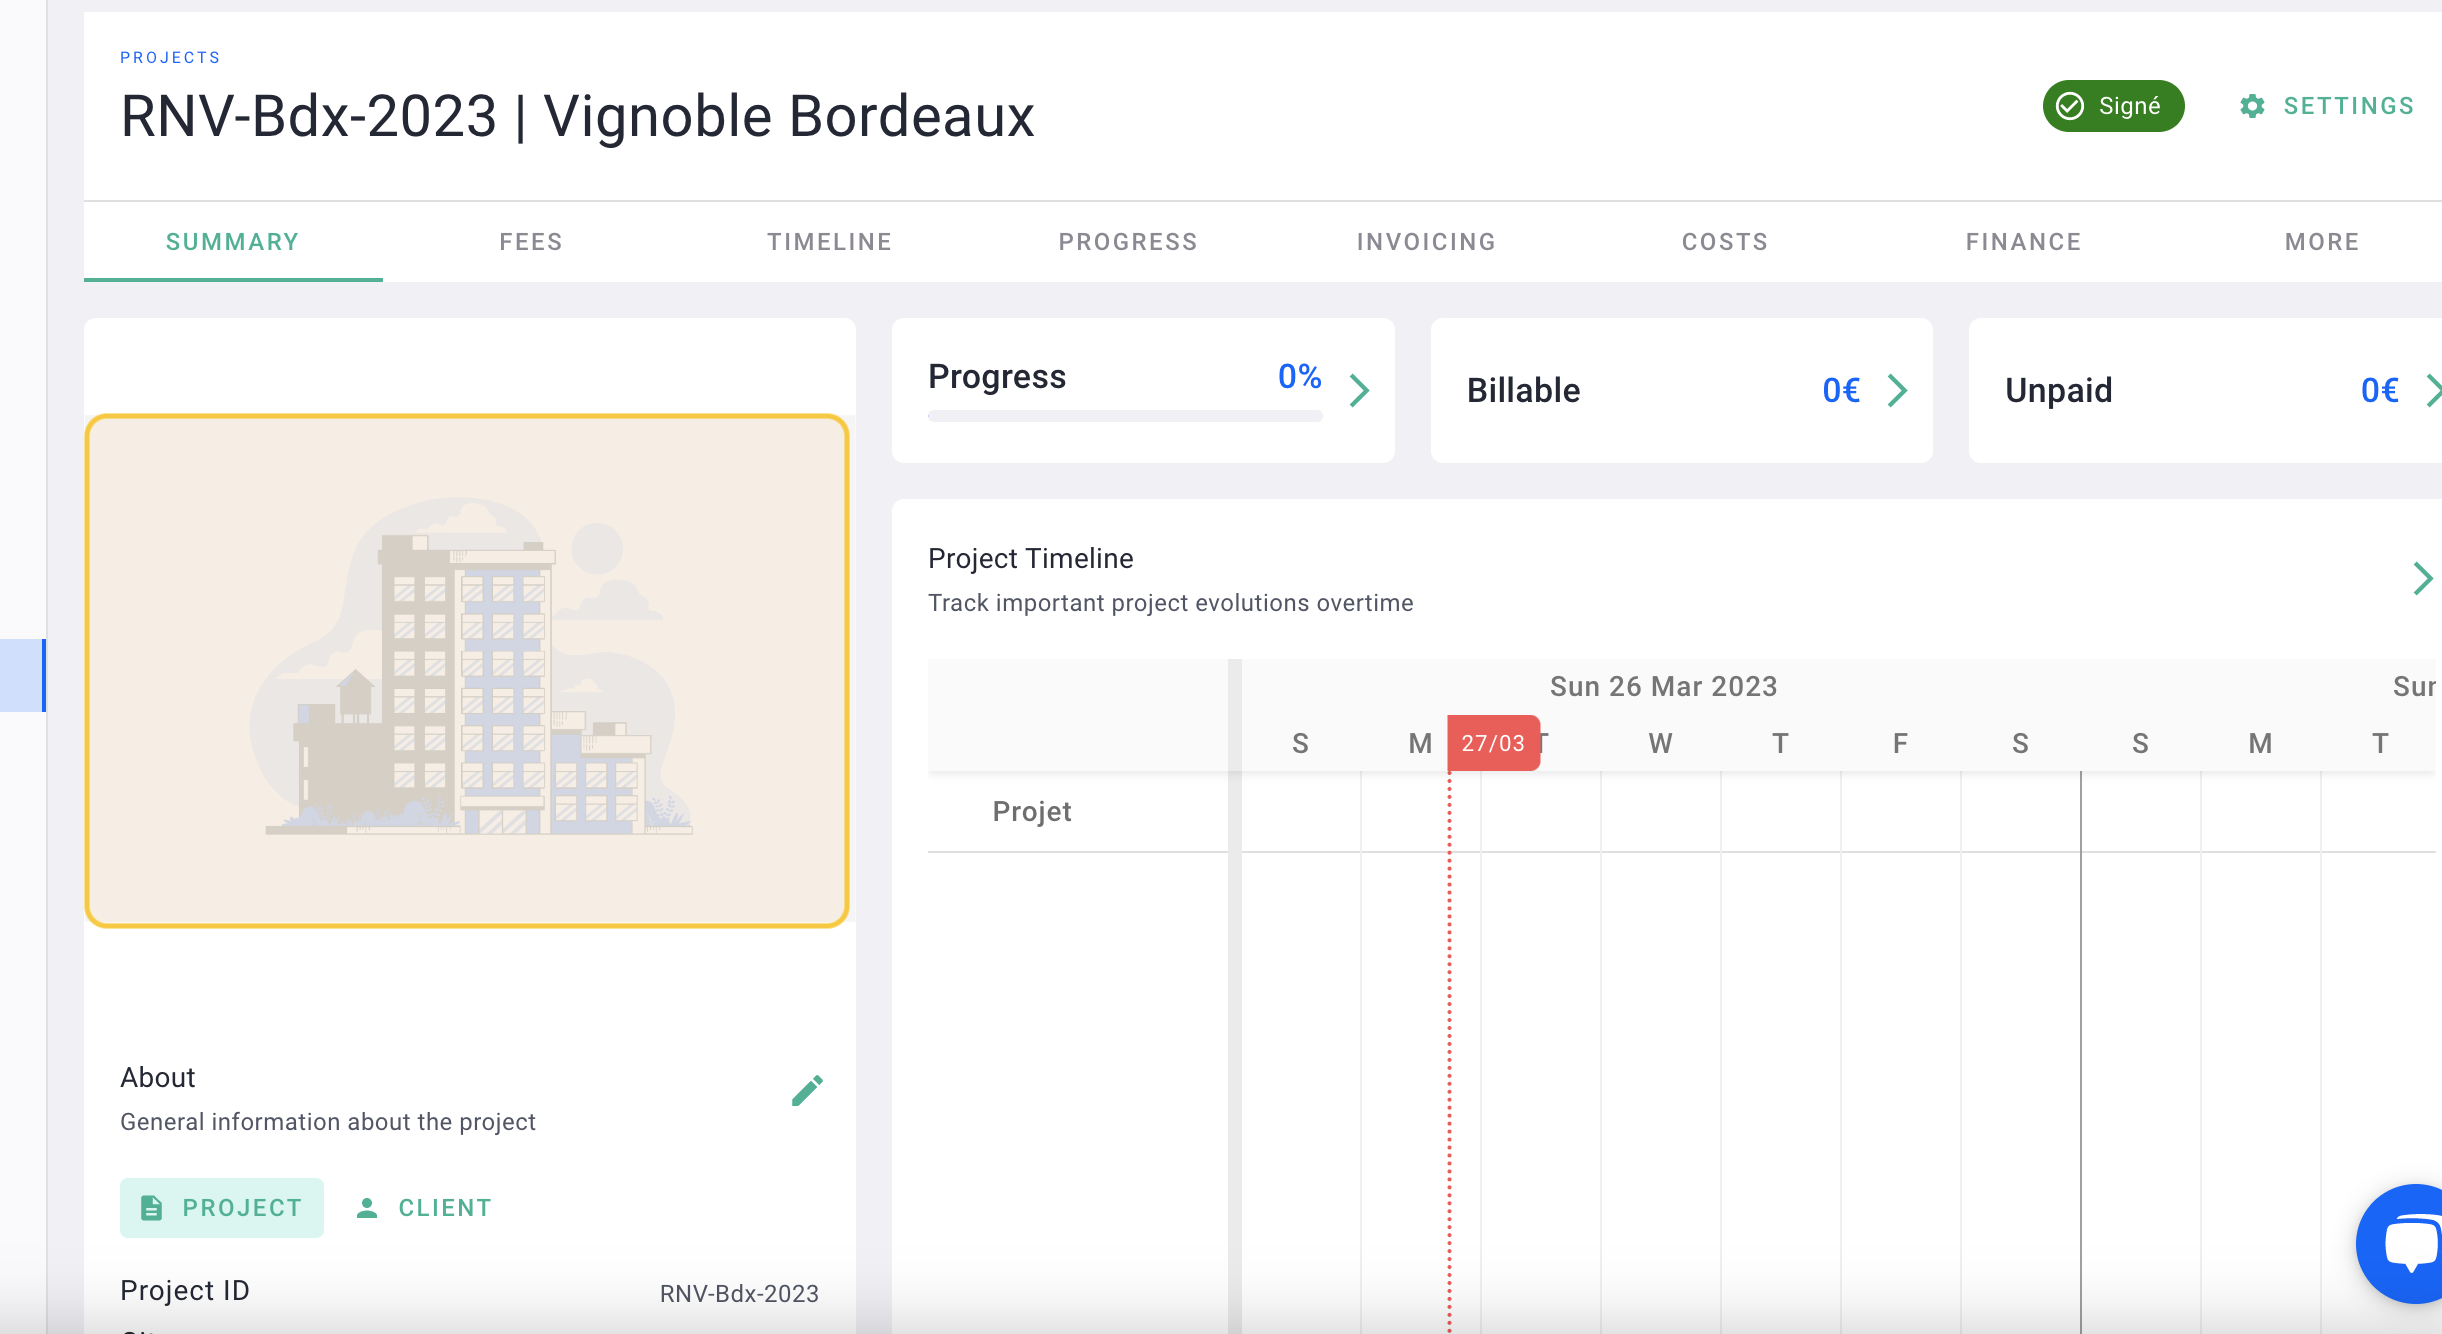
It's done ! 🎉
You have created your project!
Click on the icon to illustrate the project if you wish.
II/ Invoicing phases
These are the mission phases in the contracts.
These are the phases:
- that you will charge
- on which your employees can allocate their time
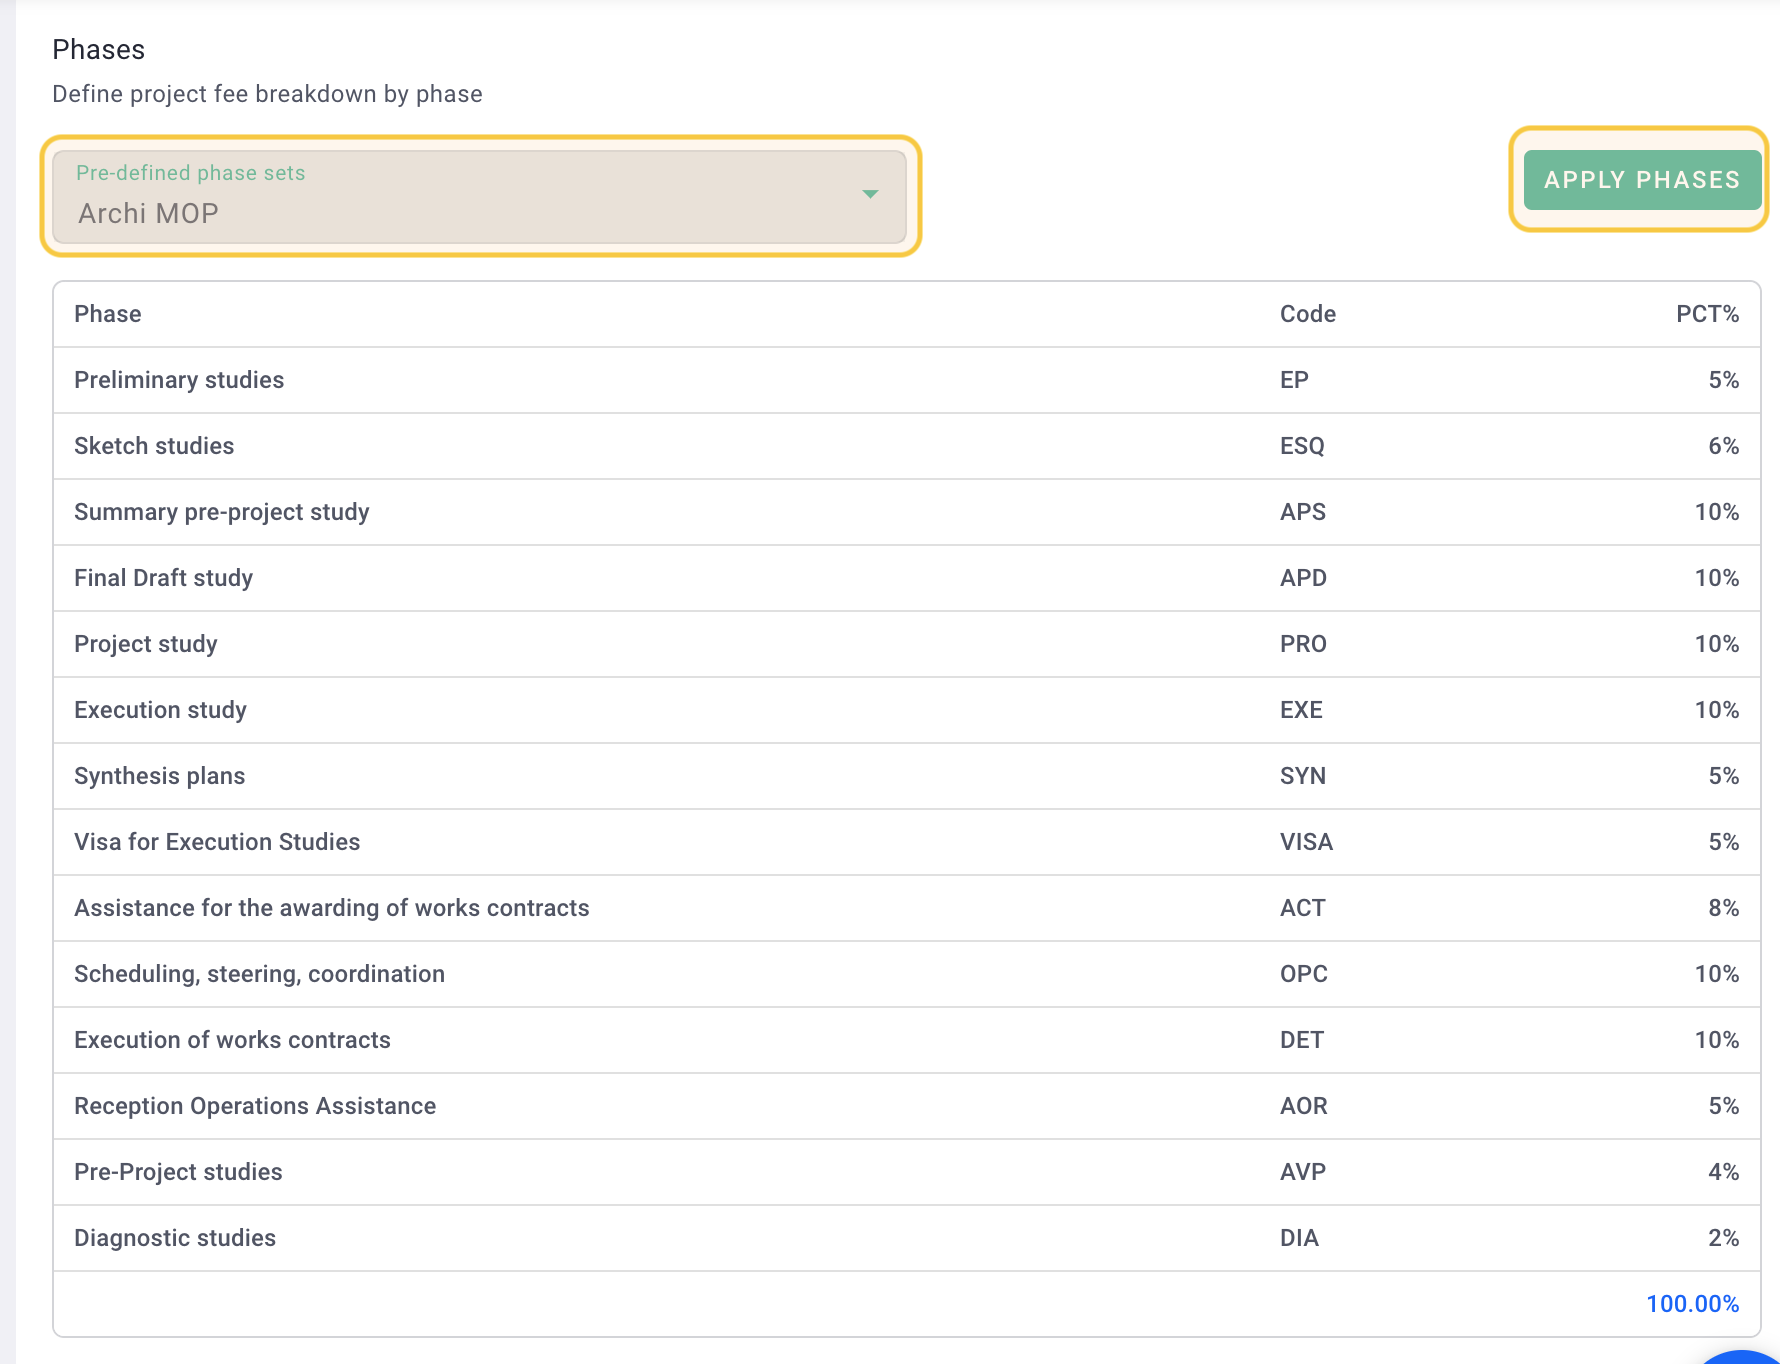
In the project, go to the Fees tab

You will find the default RIBA templates.
You can use the template, apply it and add/remove/edit phases, then click Apply Phases to update the project.
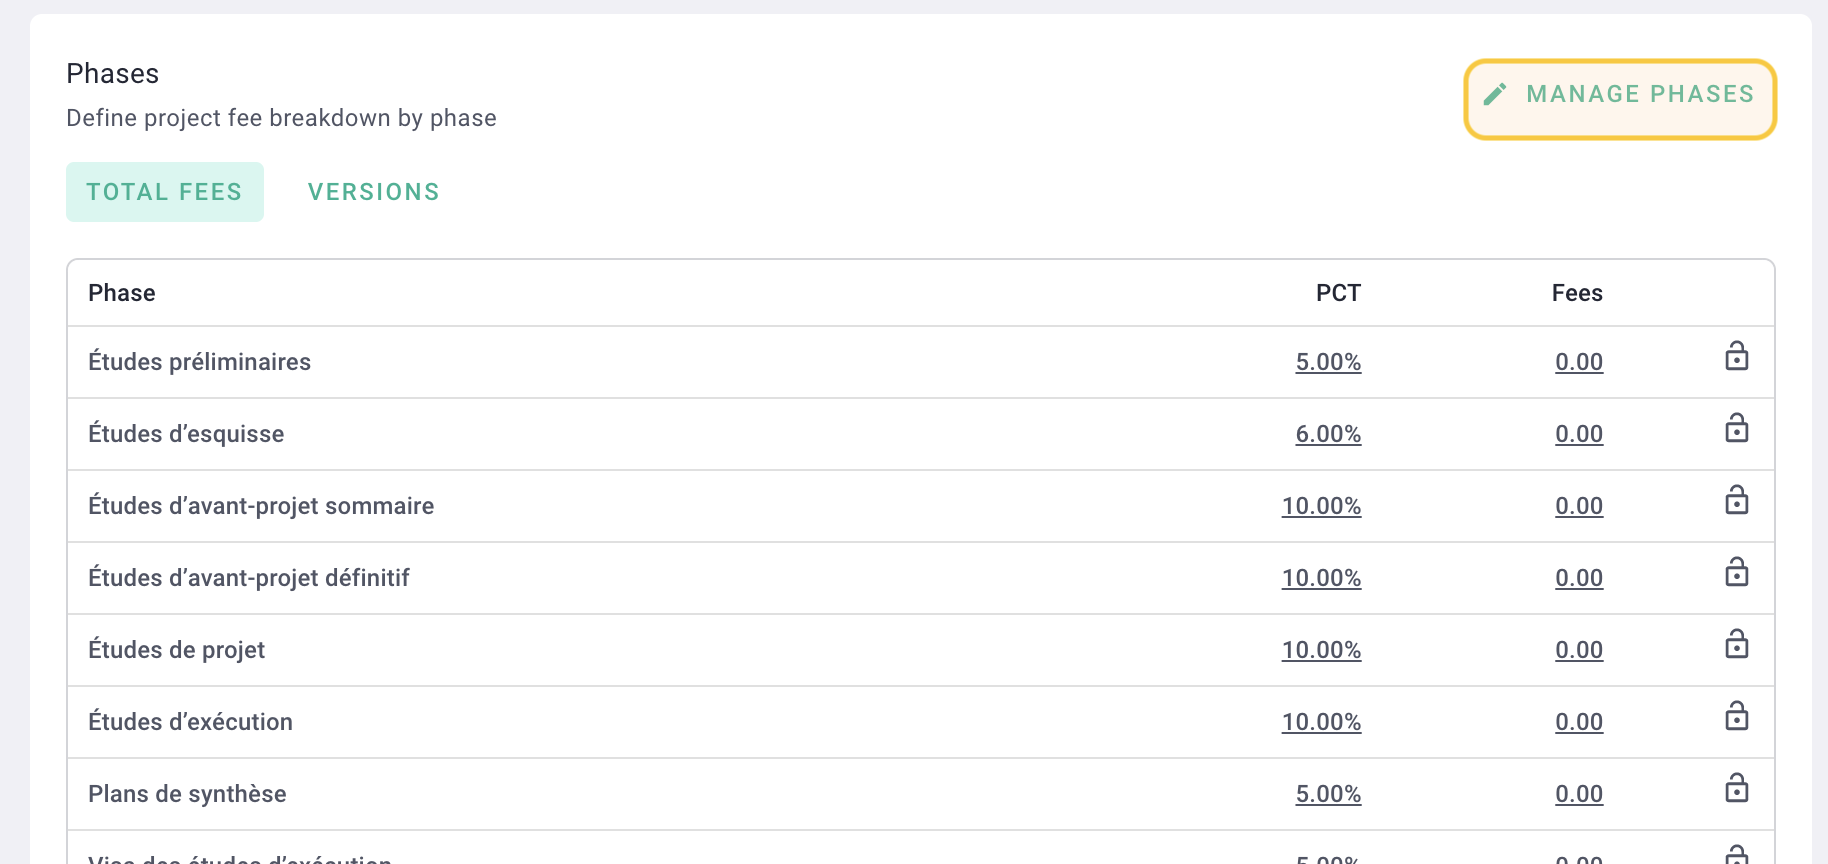
The phases are applied to the project but you can modify these phases by clicking on Manage phases.
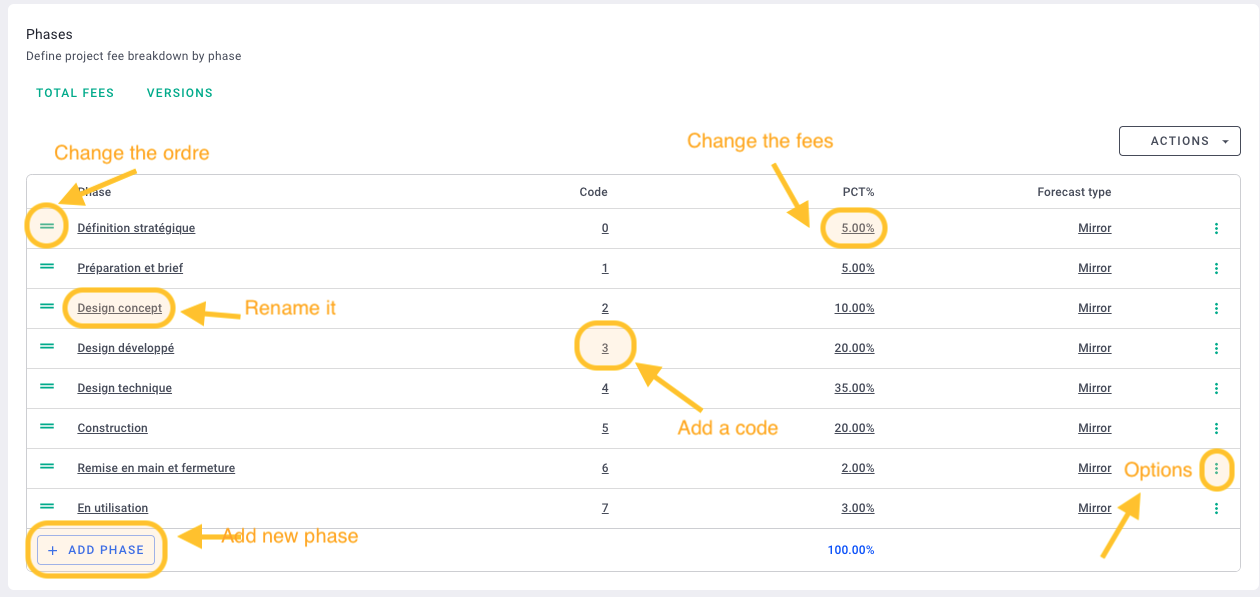
Here are all the possibilities
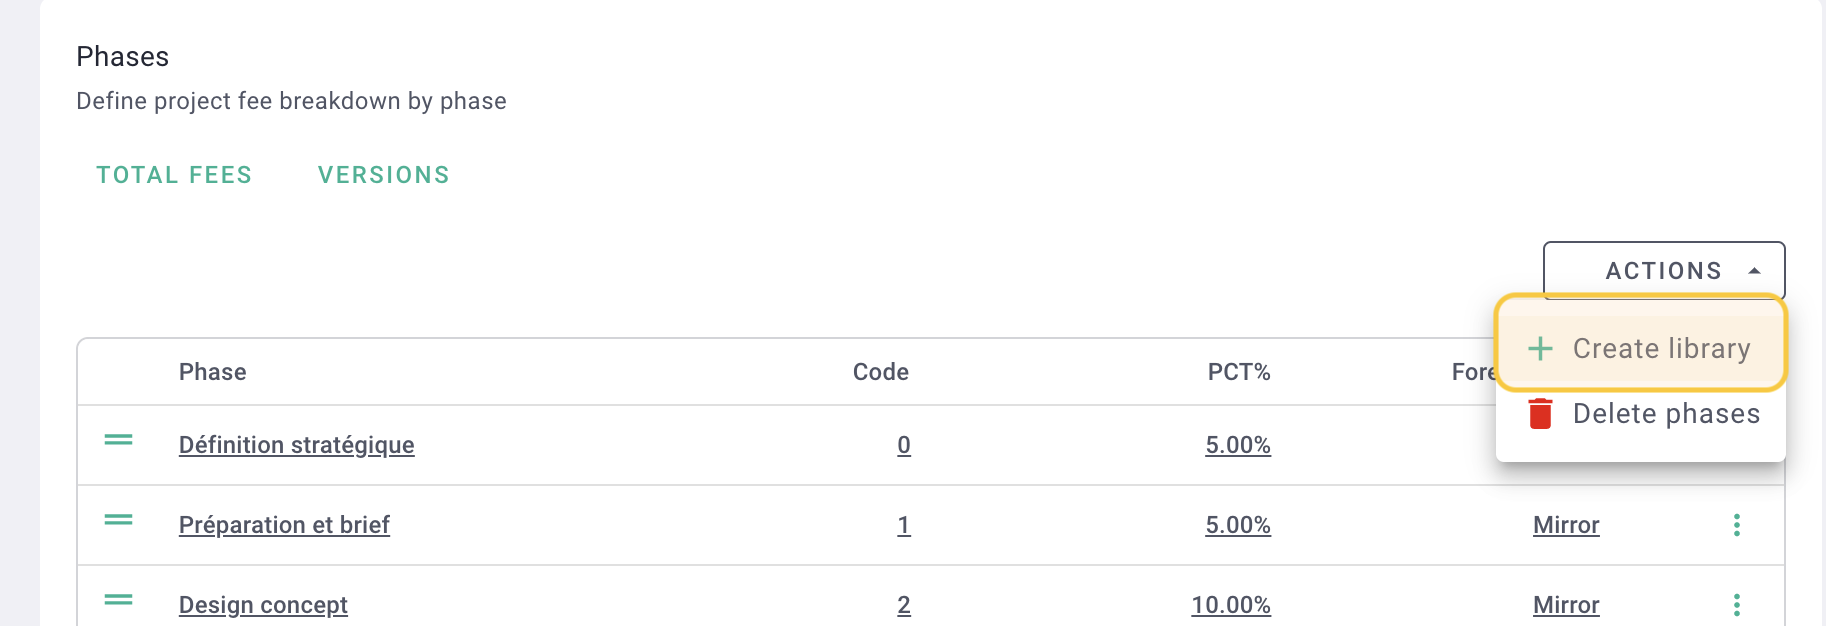
If your model can be used as a basis for other projects, save it by clicking on the options ... > create a model then name it.
You can use more time it then modify it if necessary on other projects or missions.
It's done ! 🎉
You have applied the phases of the project.
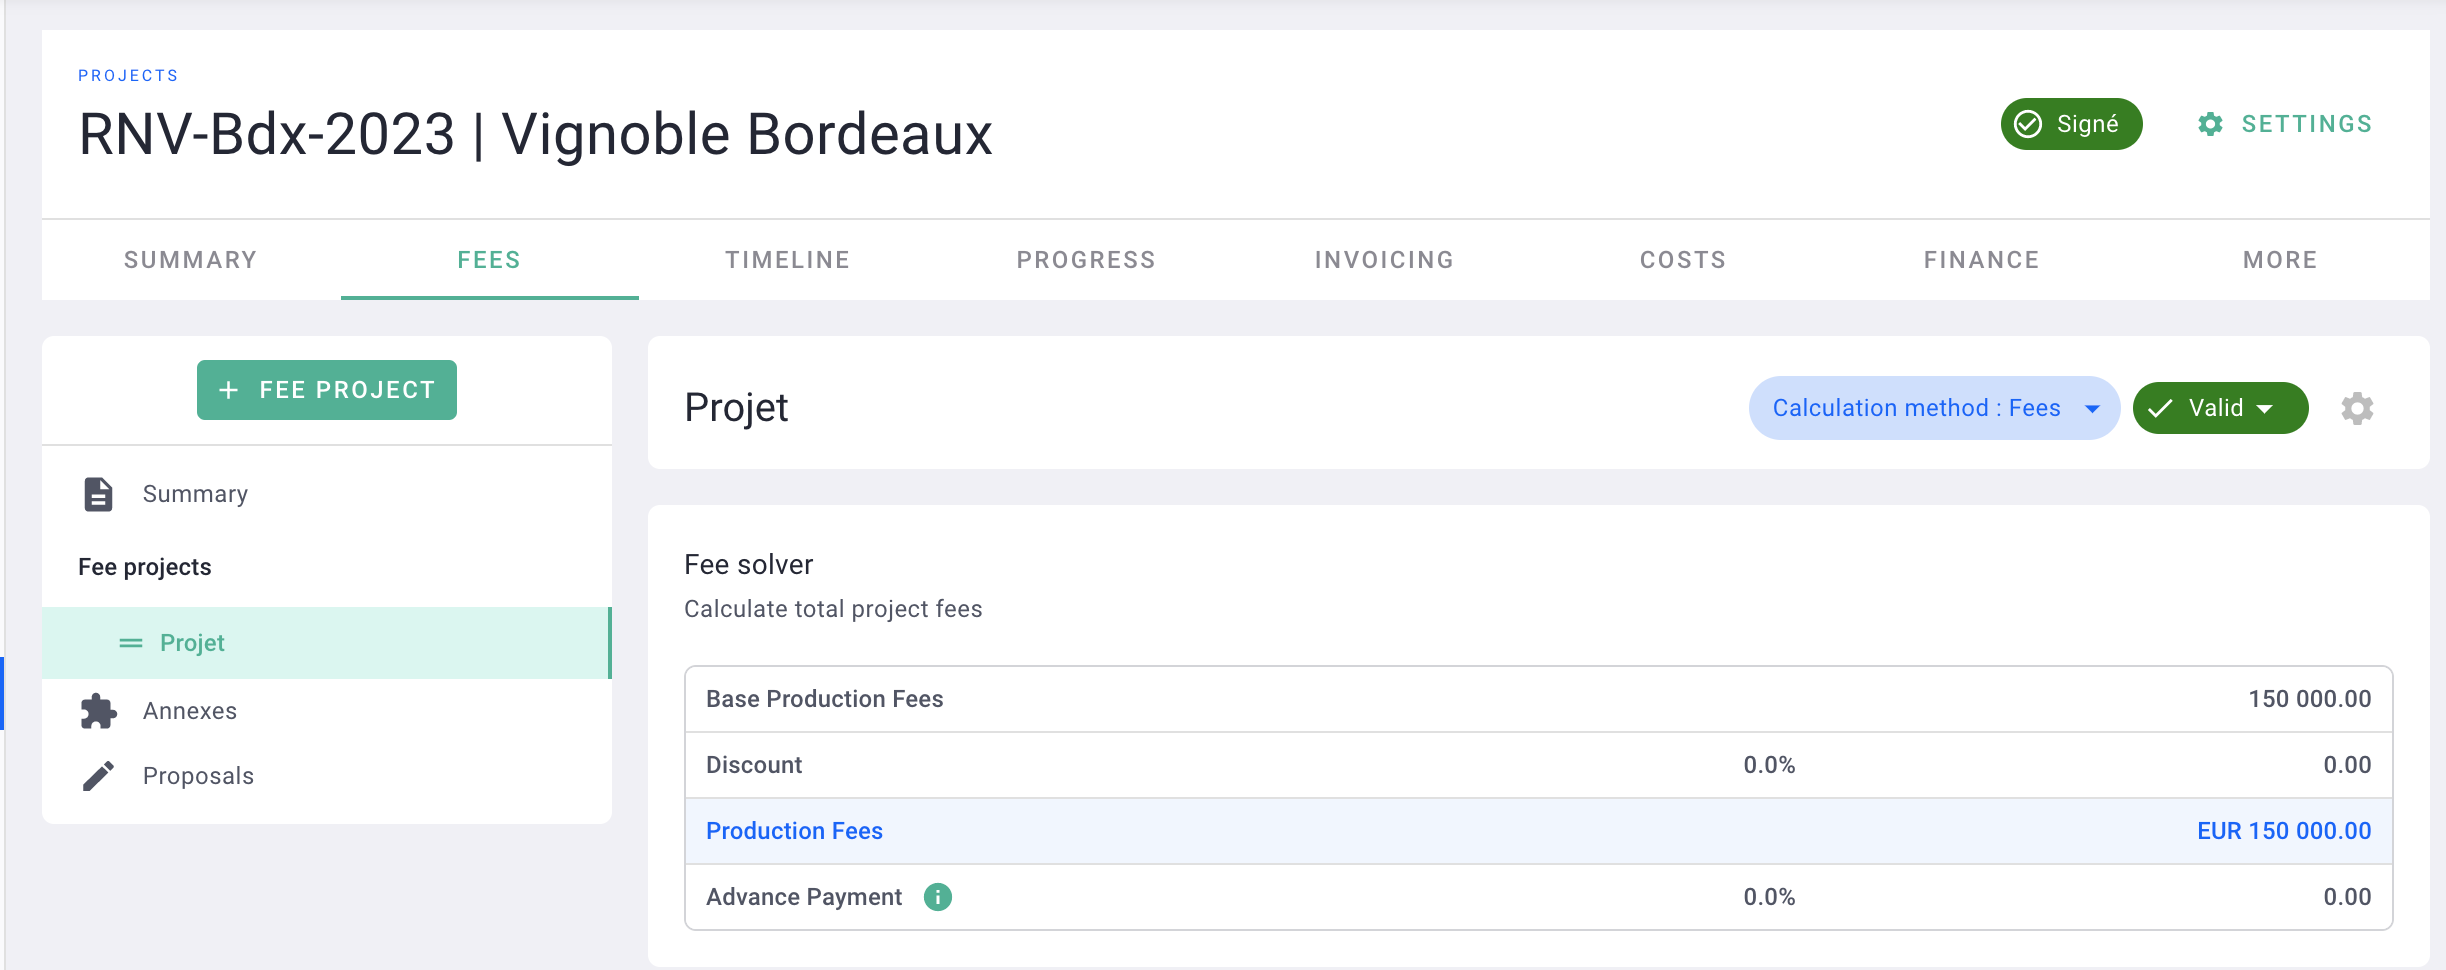
III/ Fees
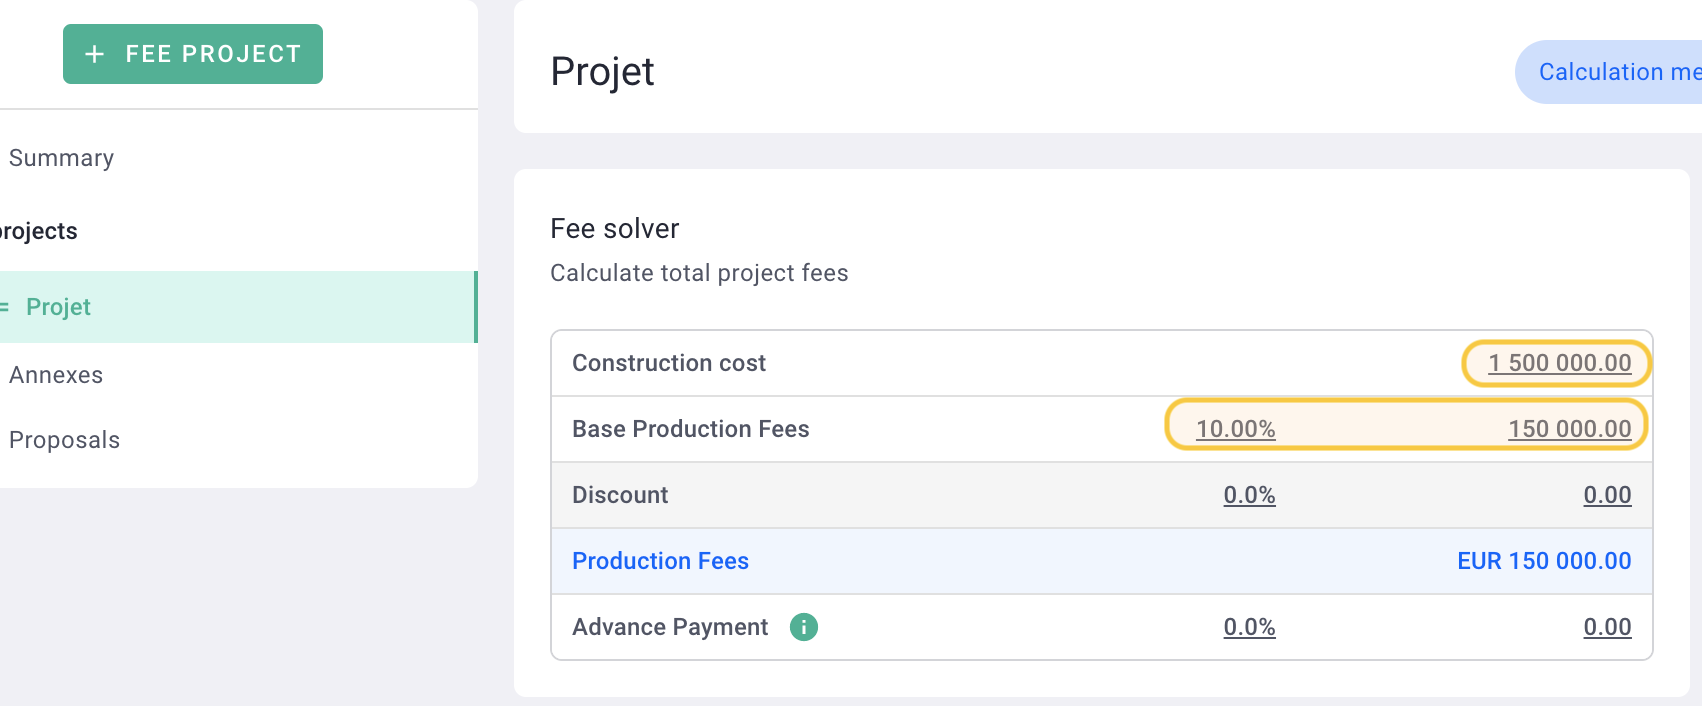
By default, the calculation method is in percentage of the cost of the works.
Put the cost of the work of the project then your fees, in amount or in %.
If your project is fixed price, only with fees and without work costs, modify the calculation method by clicking on Calculation method then uncheck Costs.
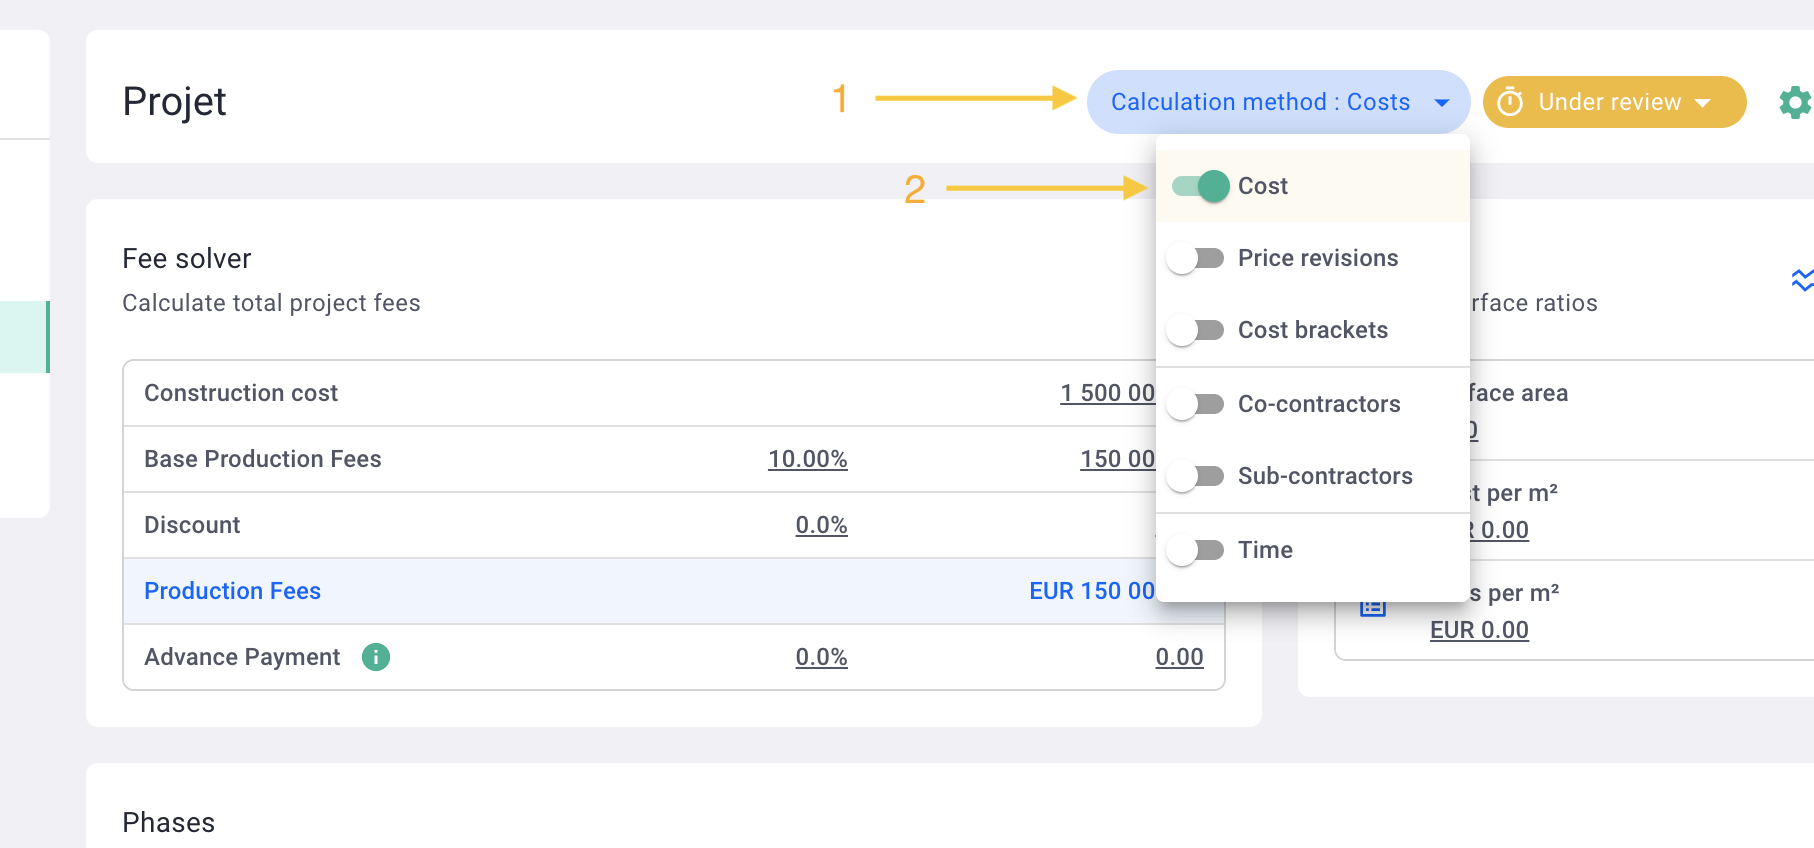
The Work Costs line has been removed, you can now add fees.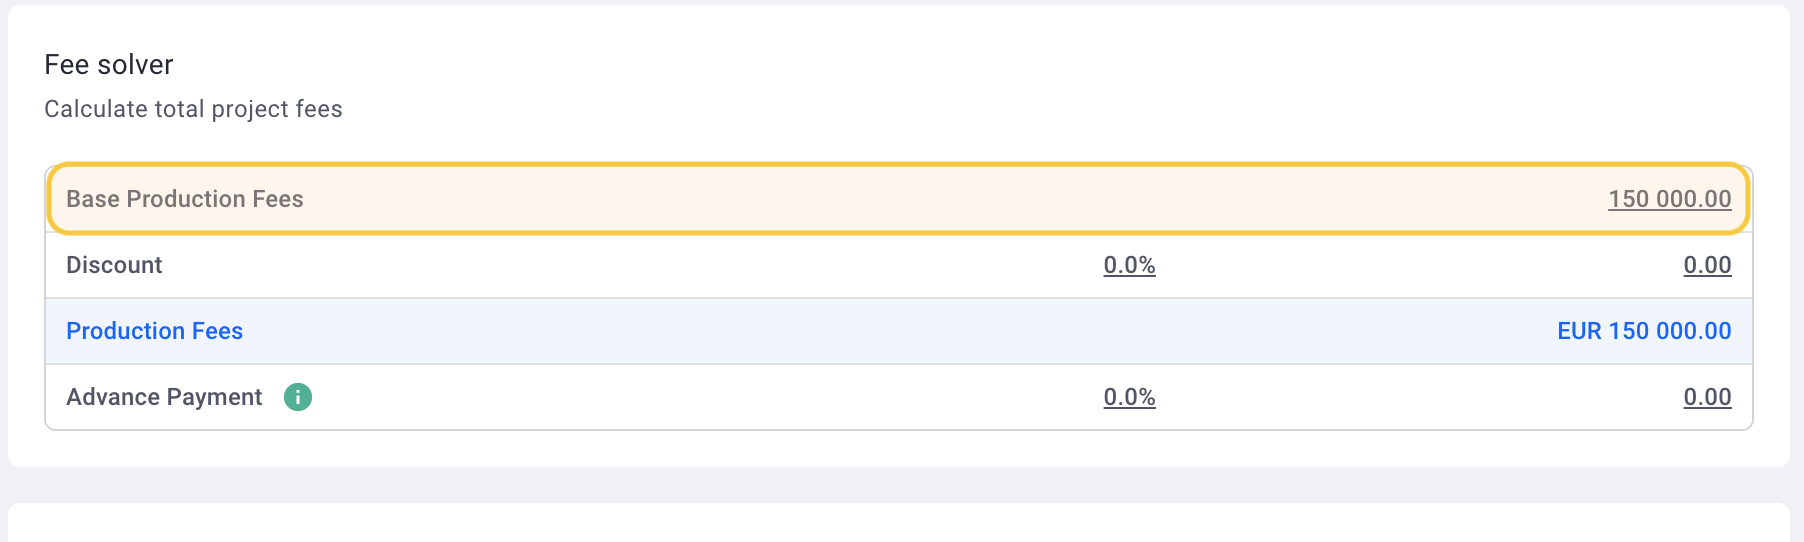
Once the fees have been added, you can break down the amounts or fee % to the phases.
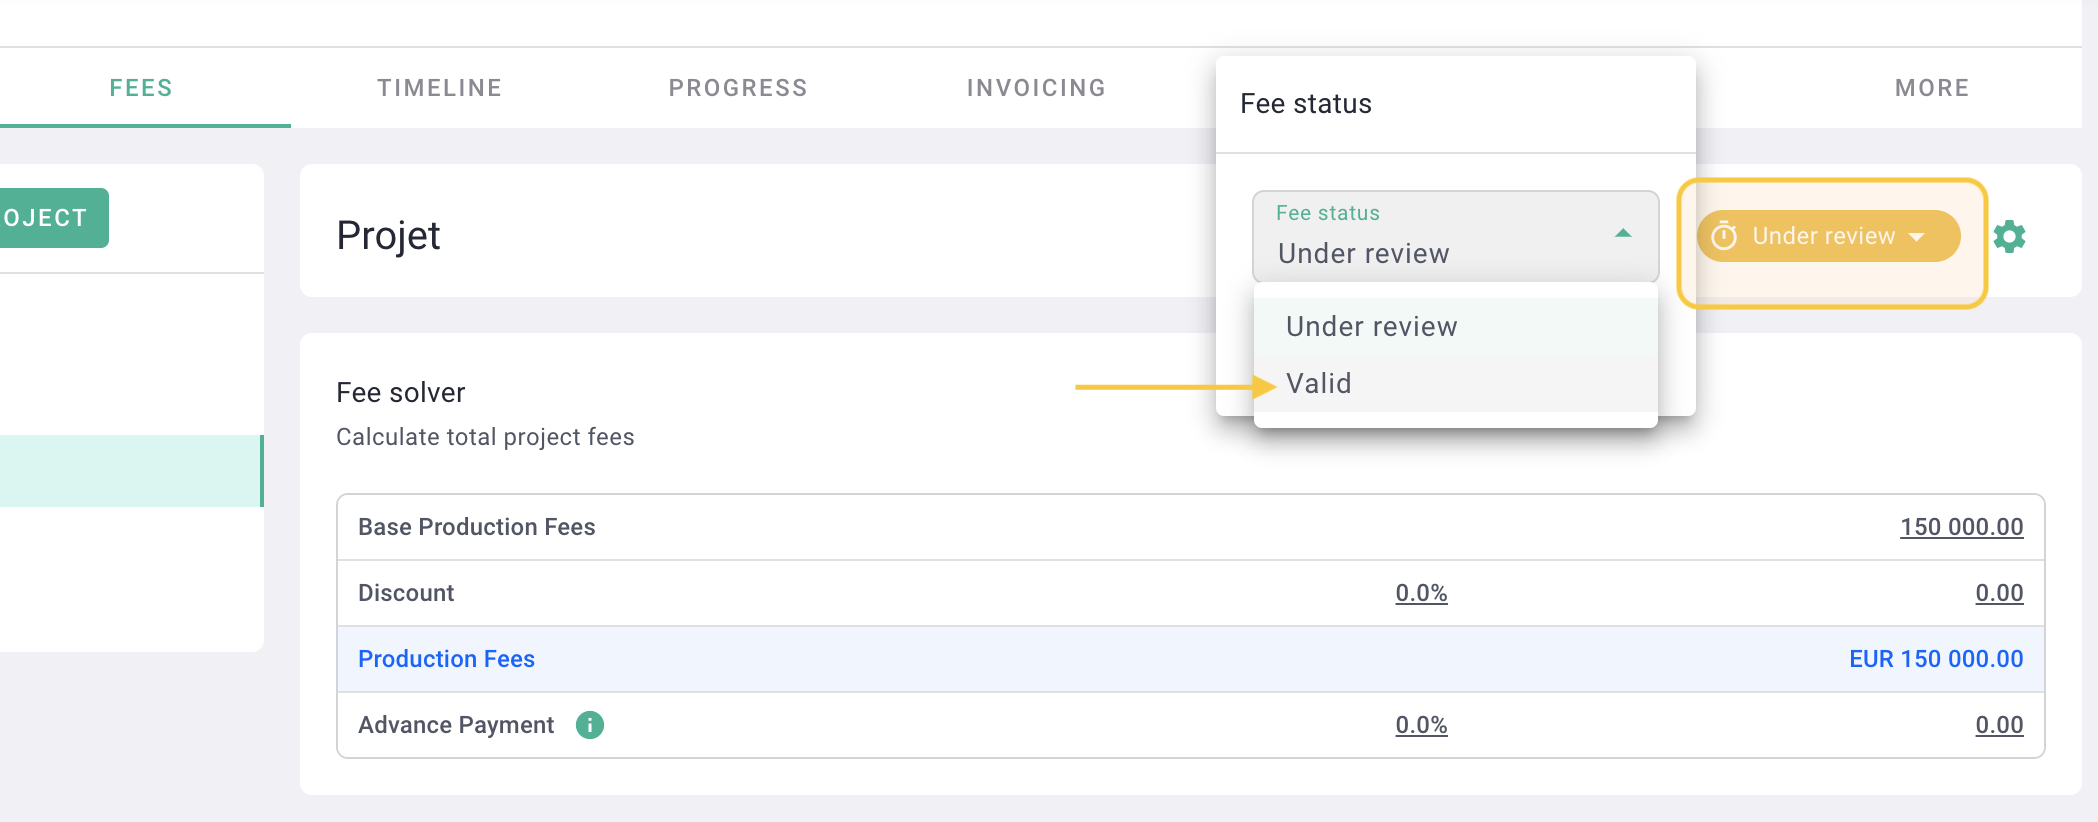
You can then change the status of the fees from “In review” to “Validated” so that it is counted in the turnover of the agency.
It's done ! 🎉
You have added the project fees.
IV/ Project planning
In the project, go to the Planning tab > Planning
Put the start and end dates of the project then save.
If you do not know the exact dates, put fictitious dates; the schedule is provisional and modifiable.

Your schedule is generated!
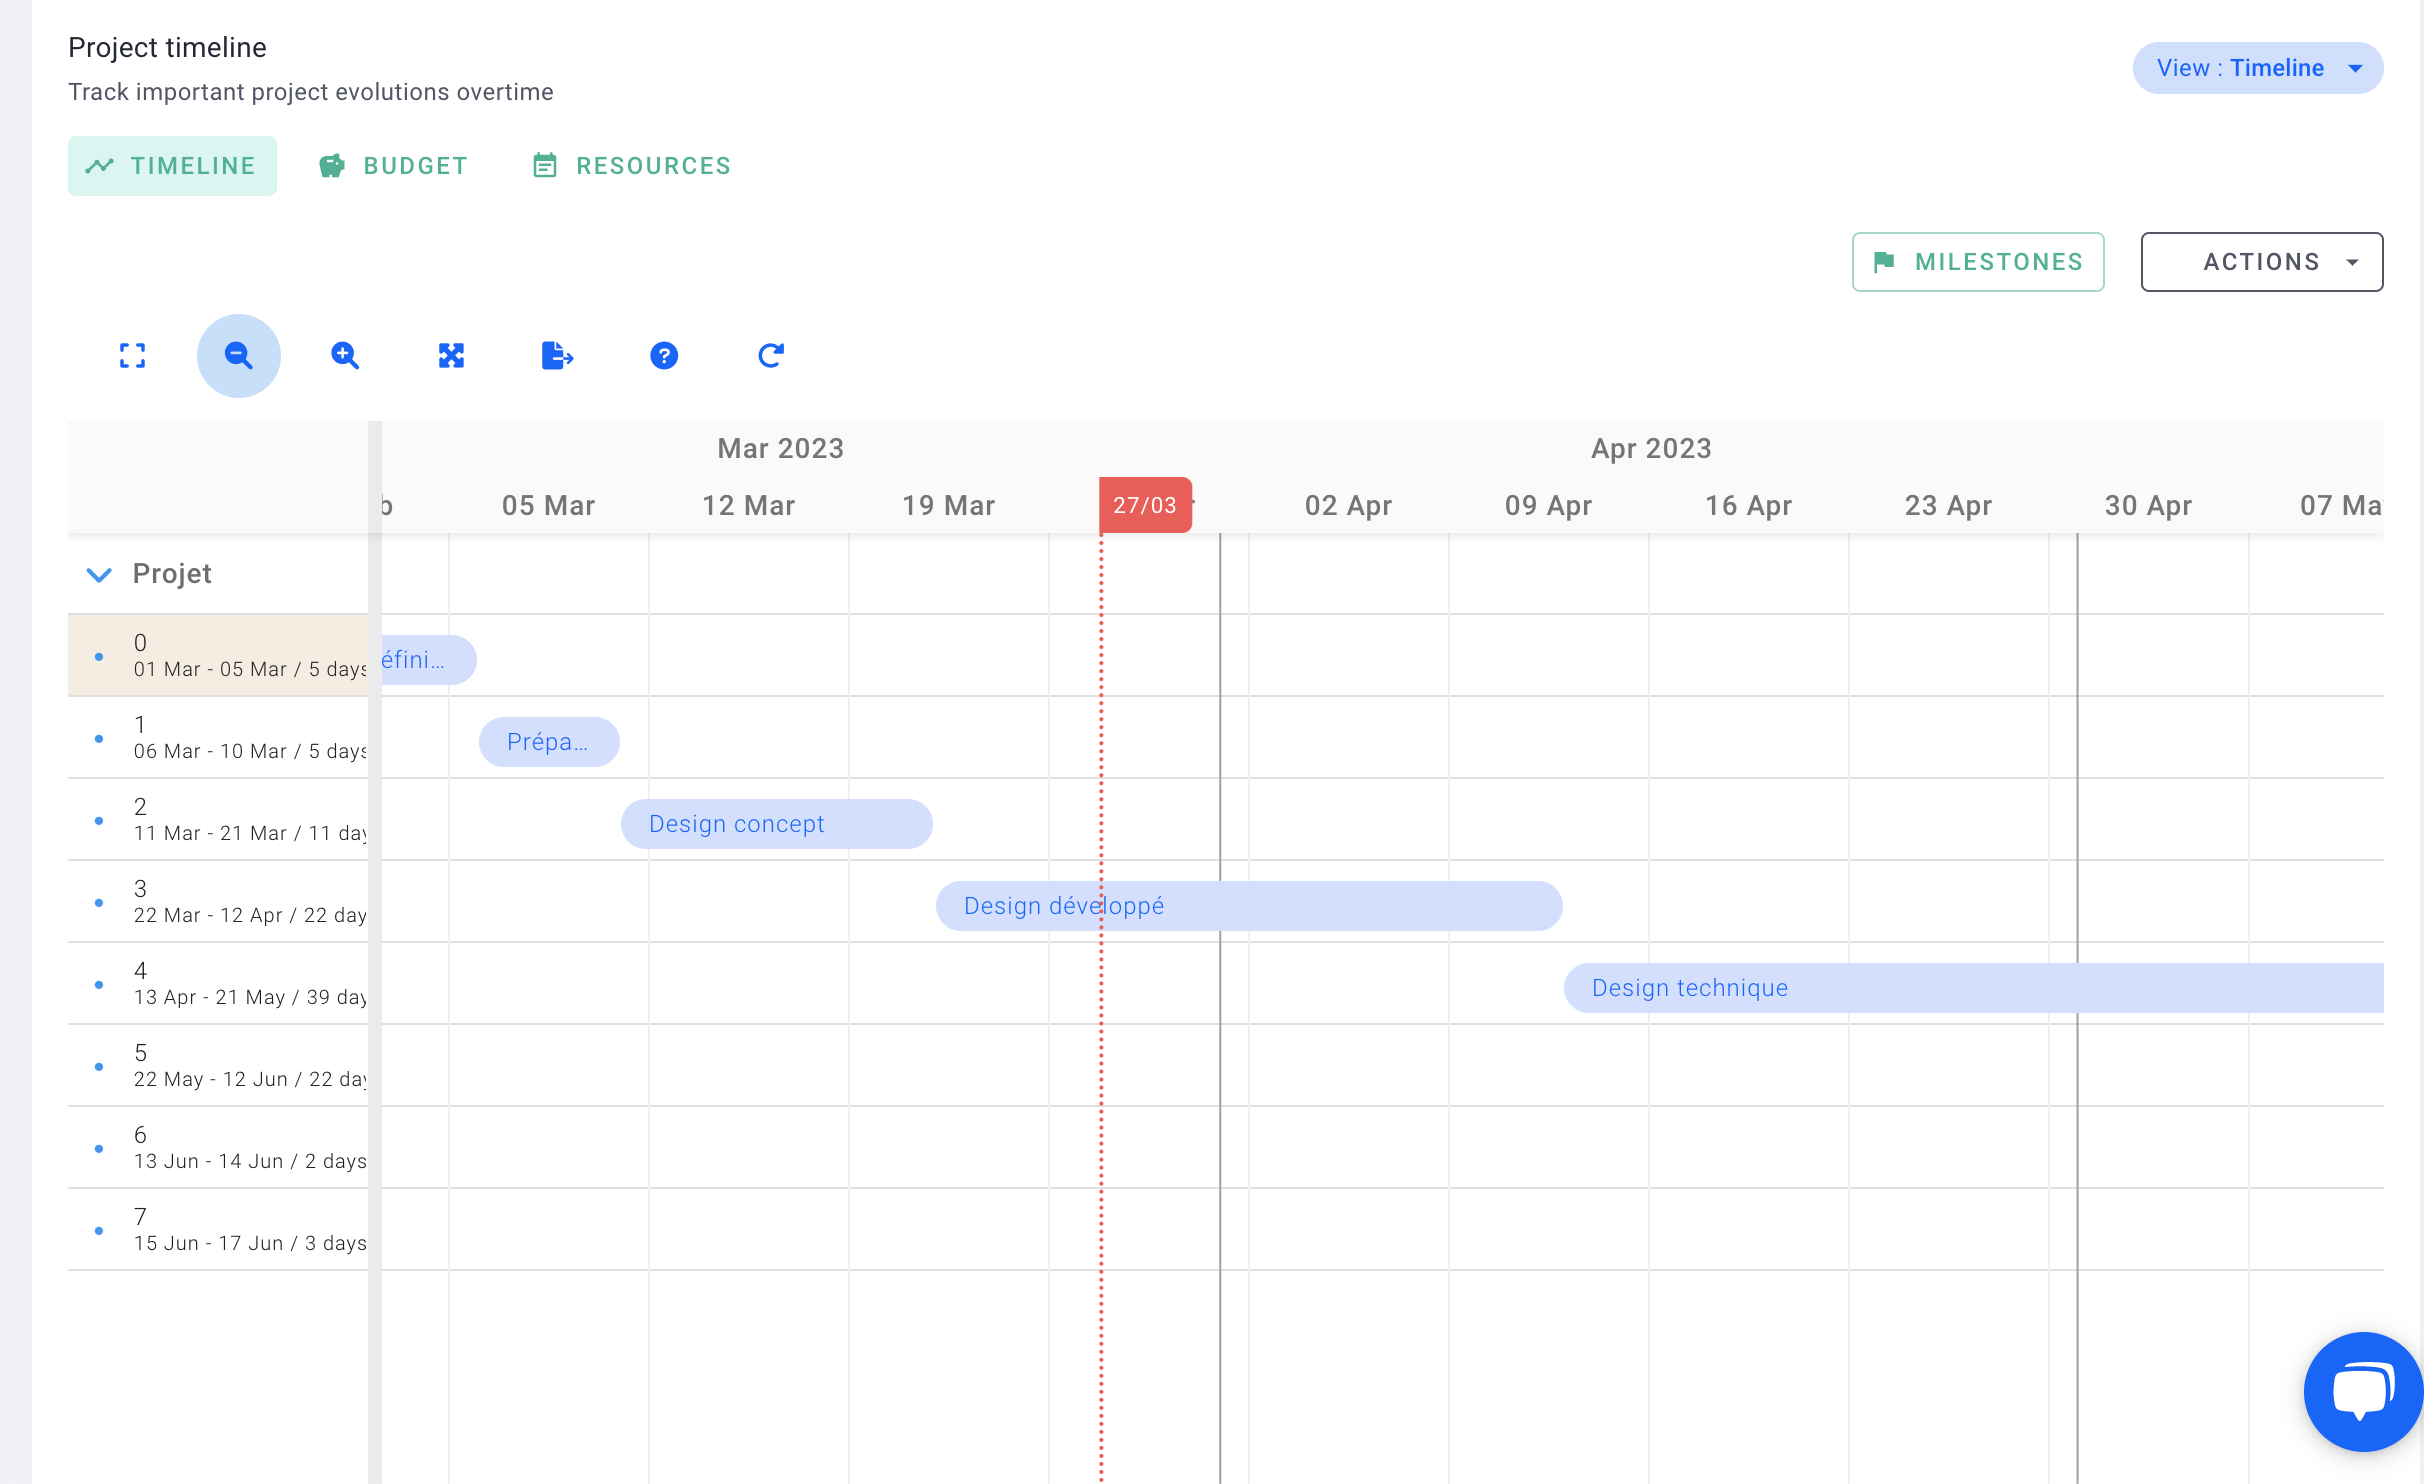
To modify the schedule:
- Click on a phase then move it
- Click on the ends of a phase to expand/collapse.
- For more precision, double-click a phase to modify its start and end dates.
- move multiple phases together
on PC: do ctrl + click on the phases
on Mac: do cmd + click on the phases
Or click on Actions > Move > select the phases concerned in the drop-down menu then the direction in which you want to move it/them and the number of days.
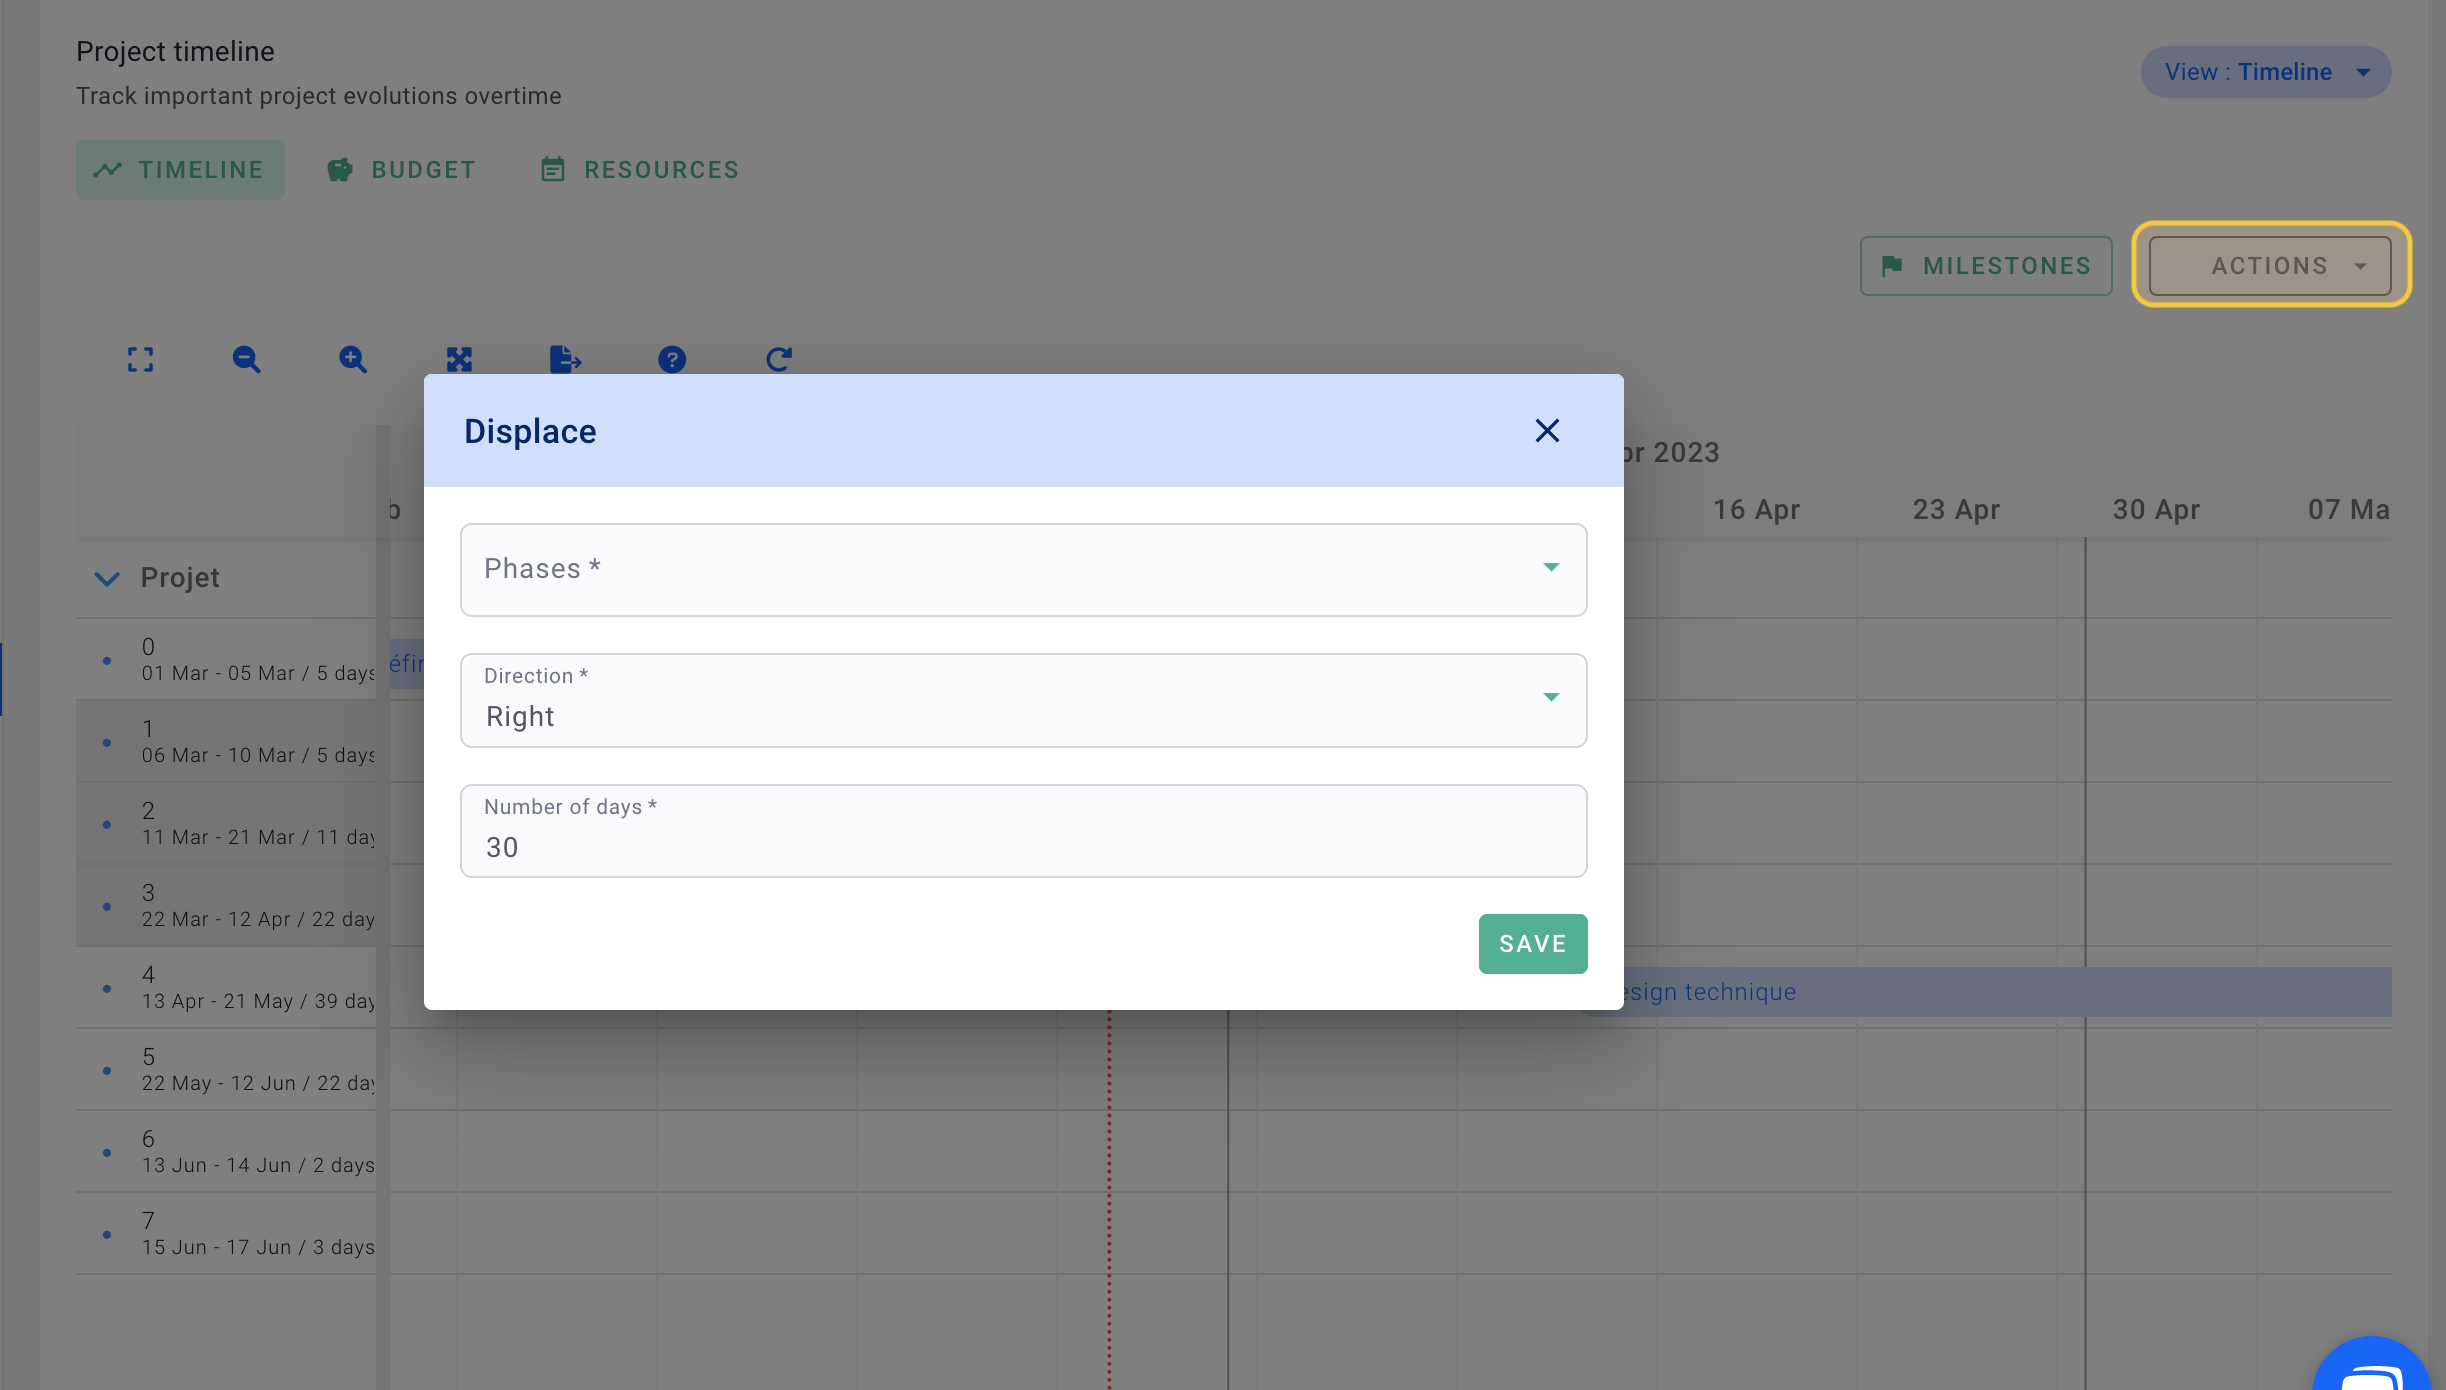
It's done ! You have created the project schedule.
💡 Click on Actions > Validate Planning Dates to display the established phases as dashed lines. Your schedule is likely to evolve during the project's lifespan. With these dashed lines, you can analyse how your schedule has changed over the course of the project!