Everything you need to know about a production invoice (also known as project phases and fees): from draft/pro forma to payment, covering all stages of invoice management.
🔓 Required permissions
Team : View Invoices and Manage Invoices
Project : View Invoices and Manage Invoices
| Reading time | 10 minute |
| Setup length | 15 minute |
| Steps | 5 |
Summary
I/ Where to create an invoice?
II/ Invoice dashboard and information
III/ Phases and amounts to be invoiced
IV/ Invoice status changes and their impact
V/ Invoice payment
I/ Where to create an invoice?
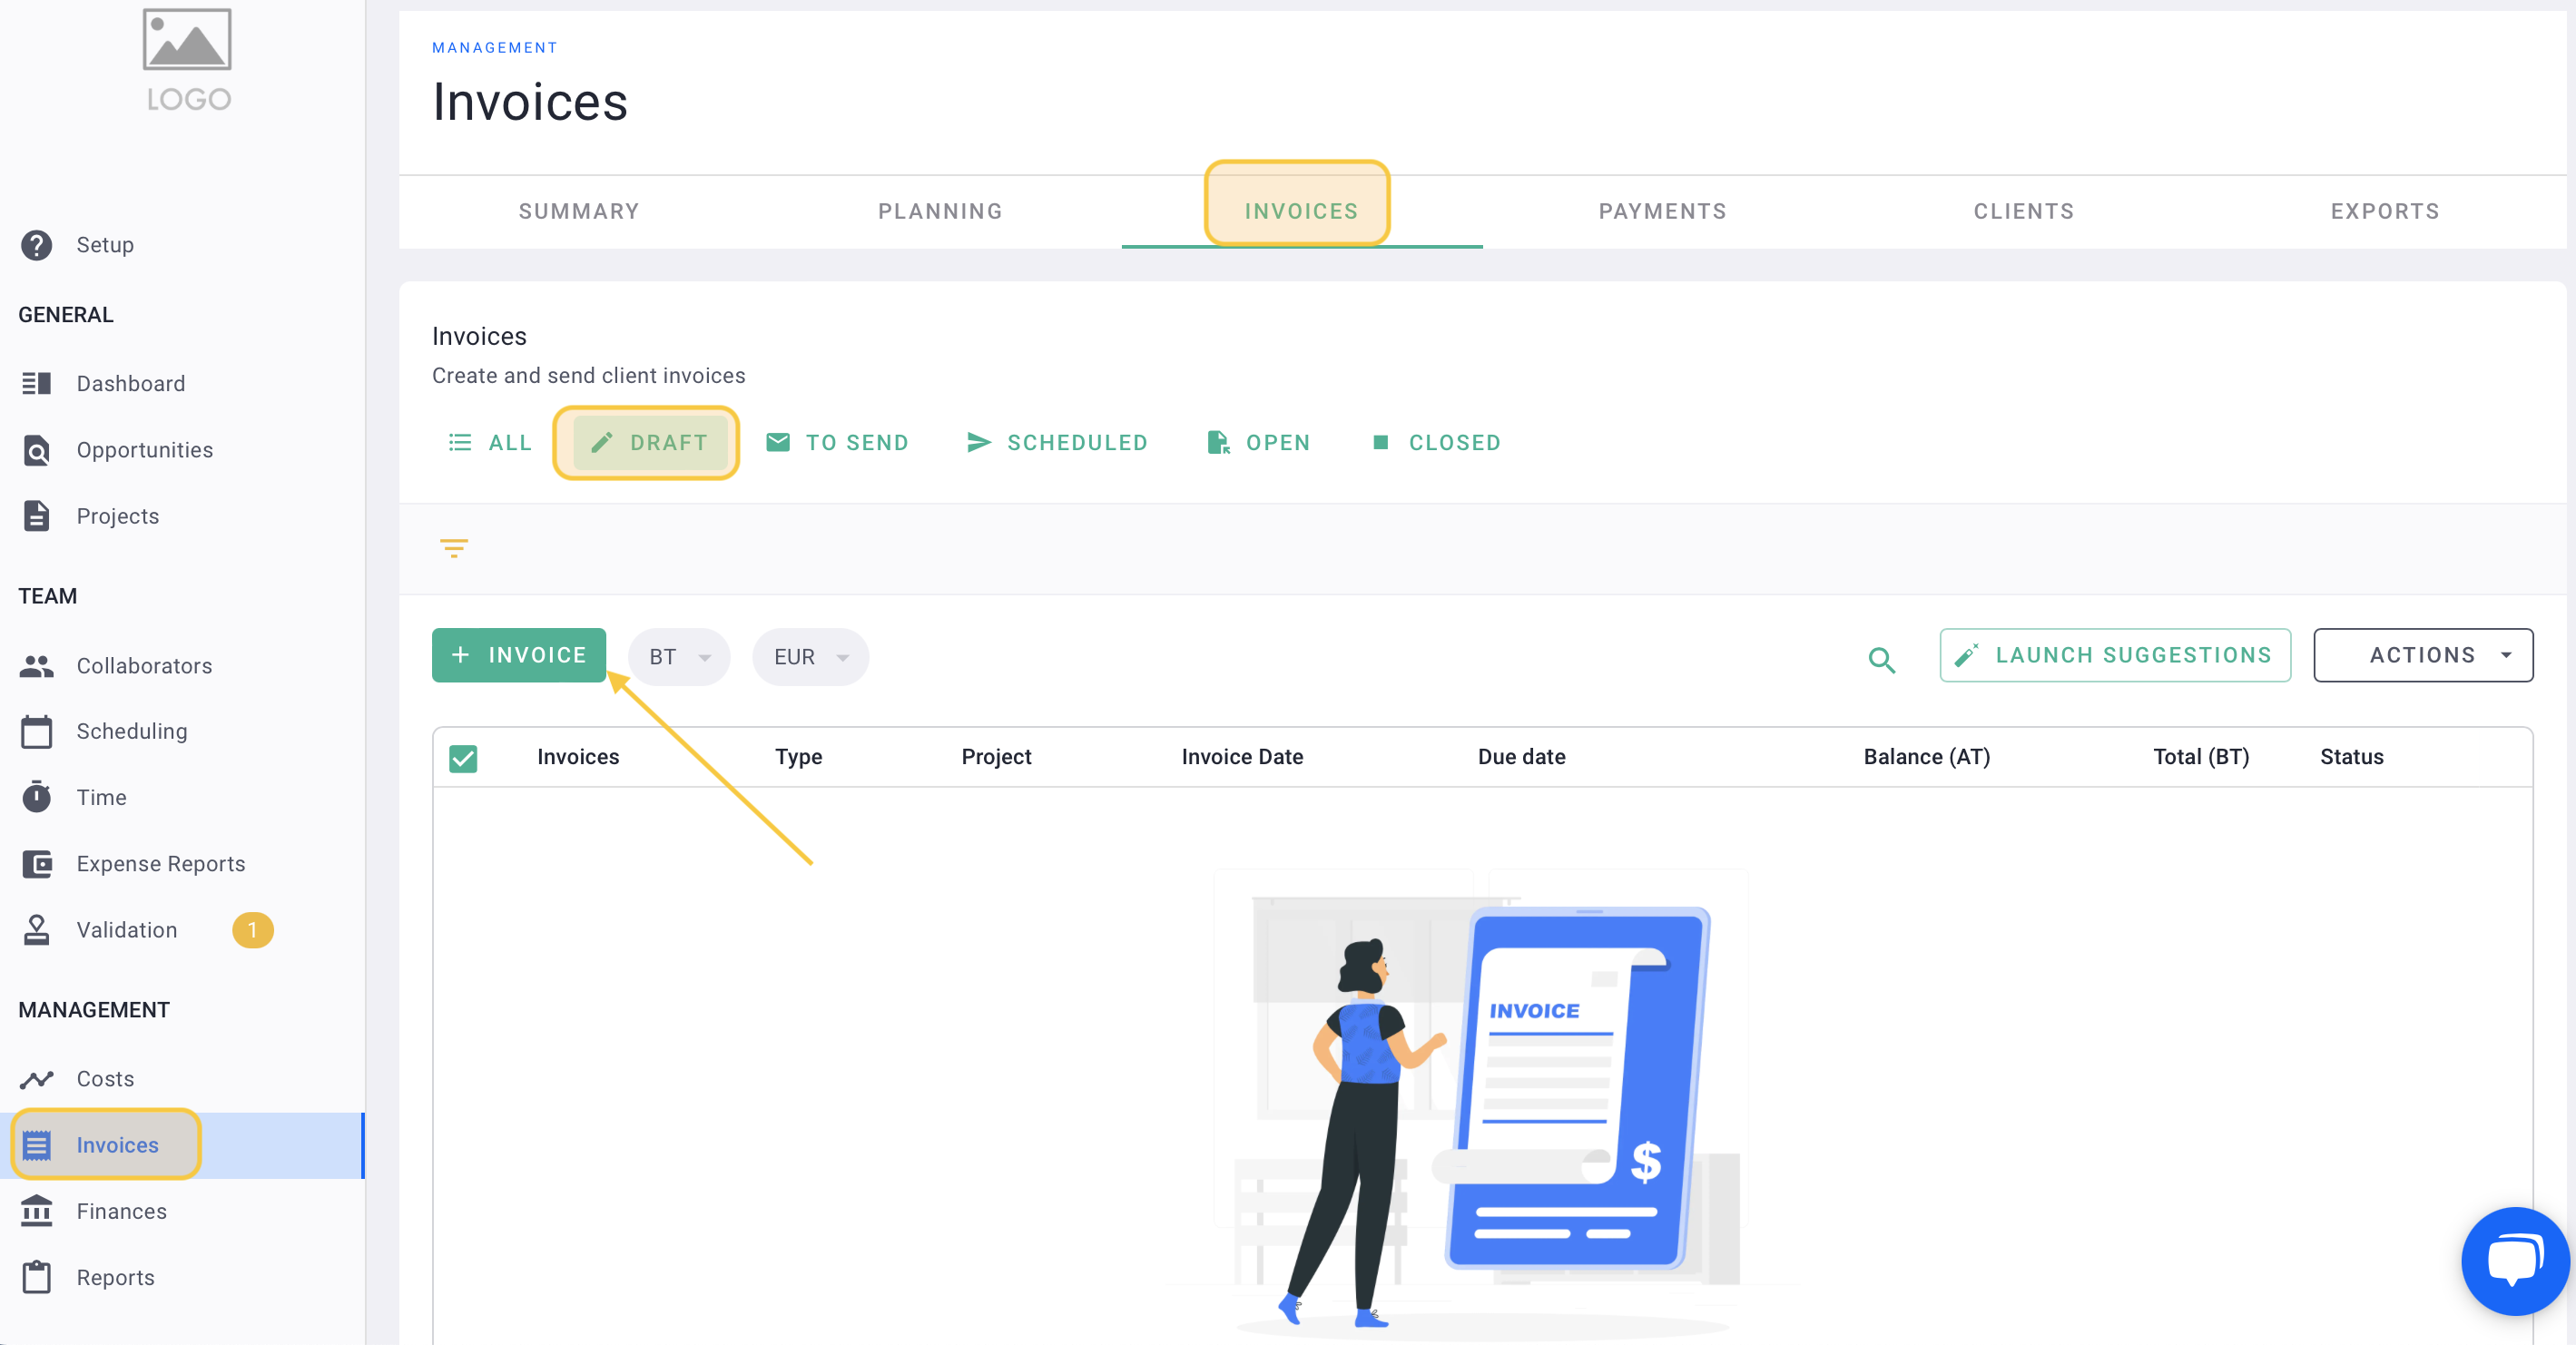
Go to the Invoices menu > Invoices tab > Draft tab.
Then, click on + Invoice.
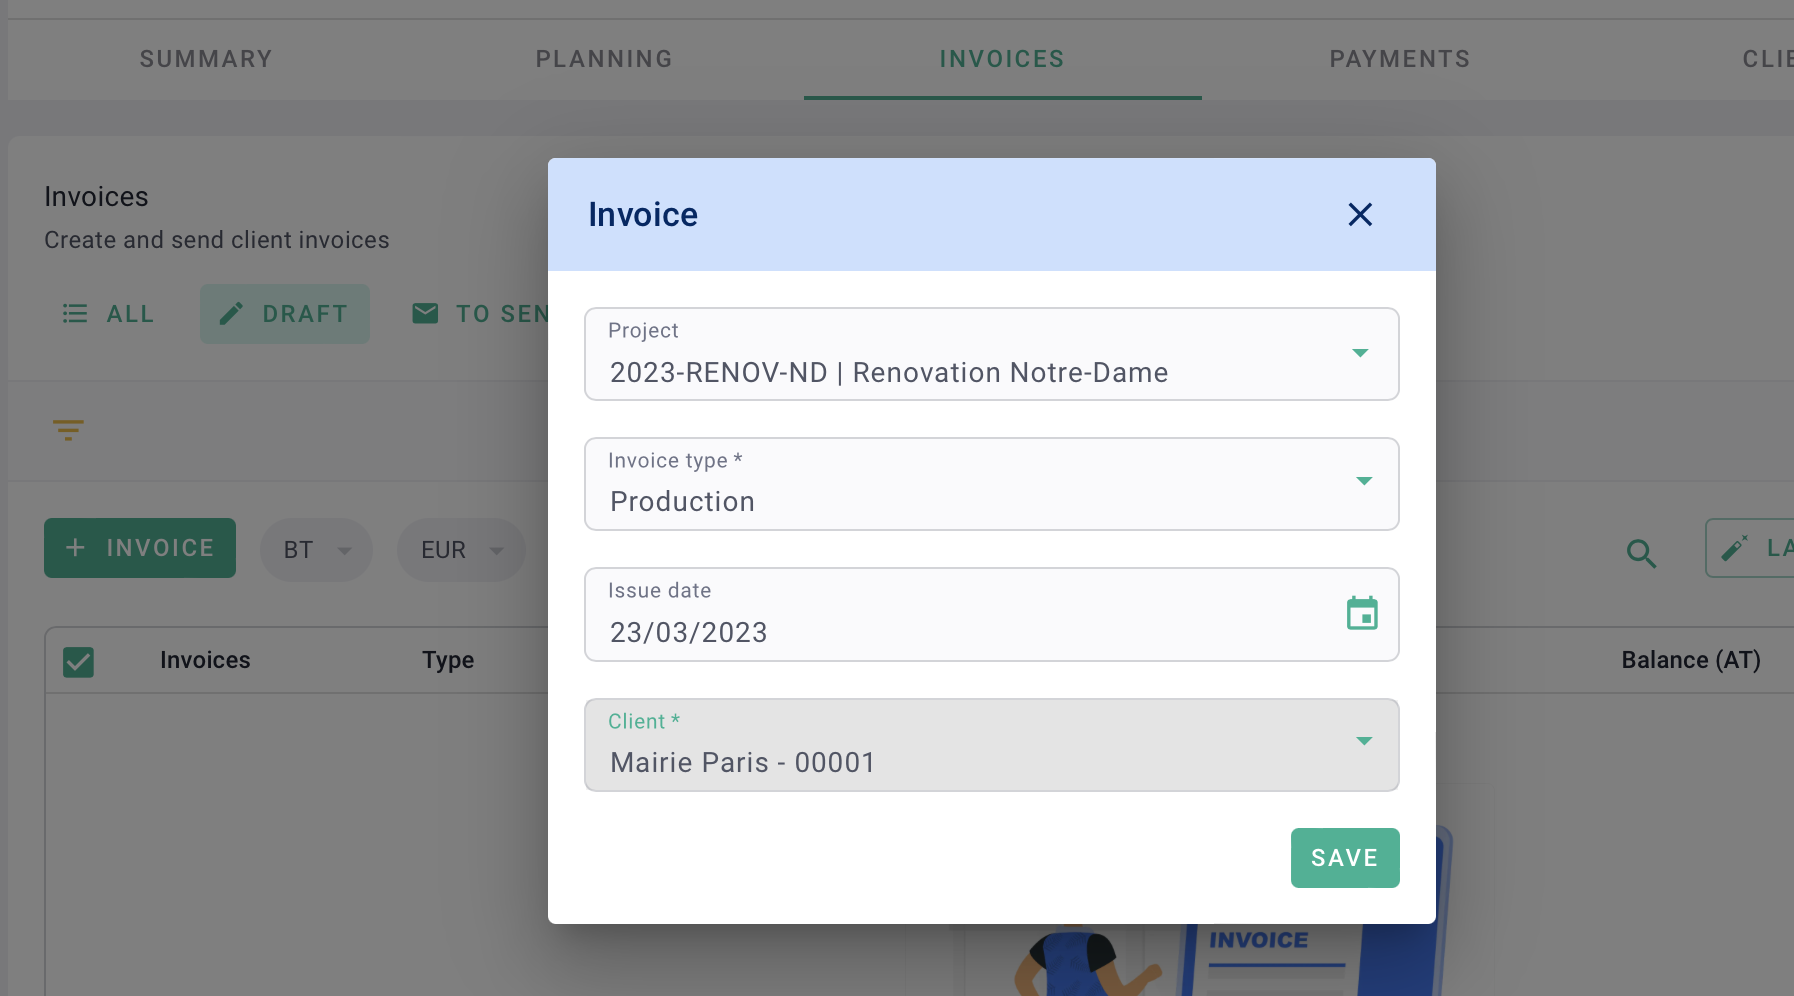
Next, select the Project, Invoice type, and Issue Date. The Client information associated with the project will be automatically populated.
Click on Save.
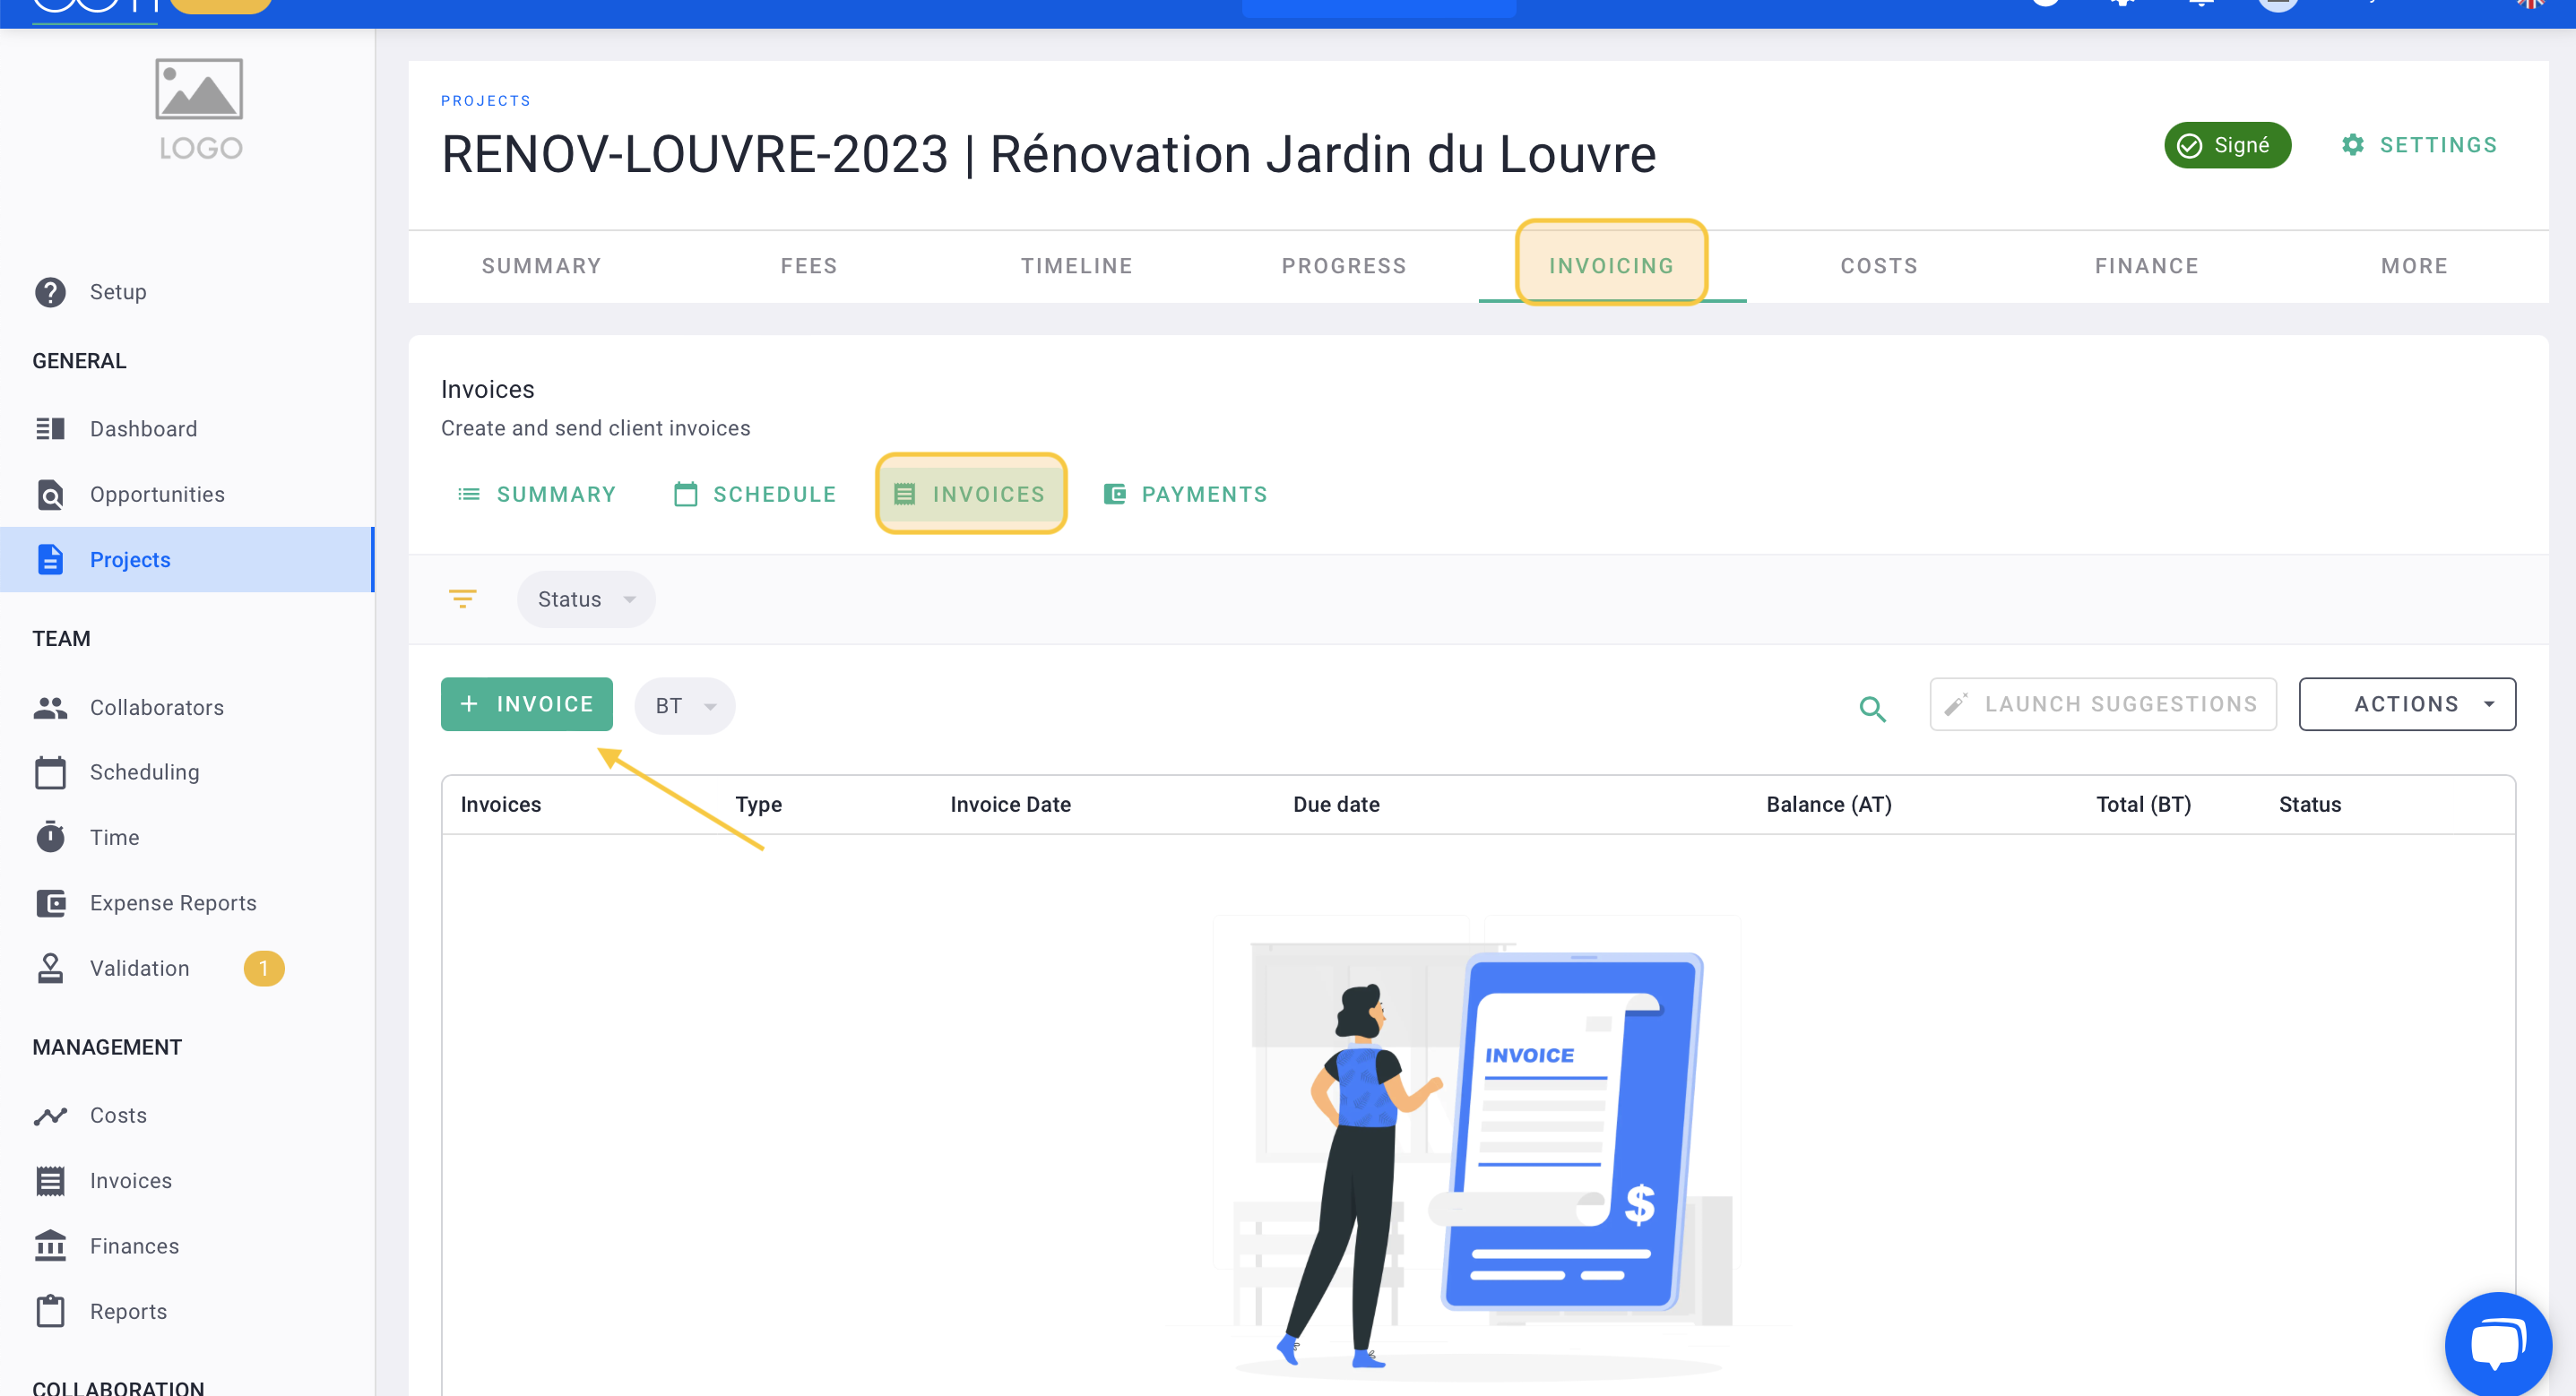
💡 You can also create an invoice within a project.
In the project, go to the Billing tab > Invoices tab, then click on + Invoice.
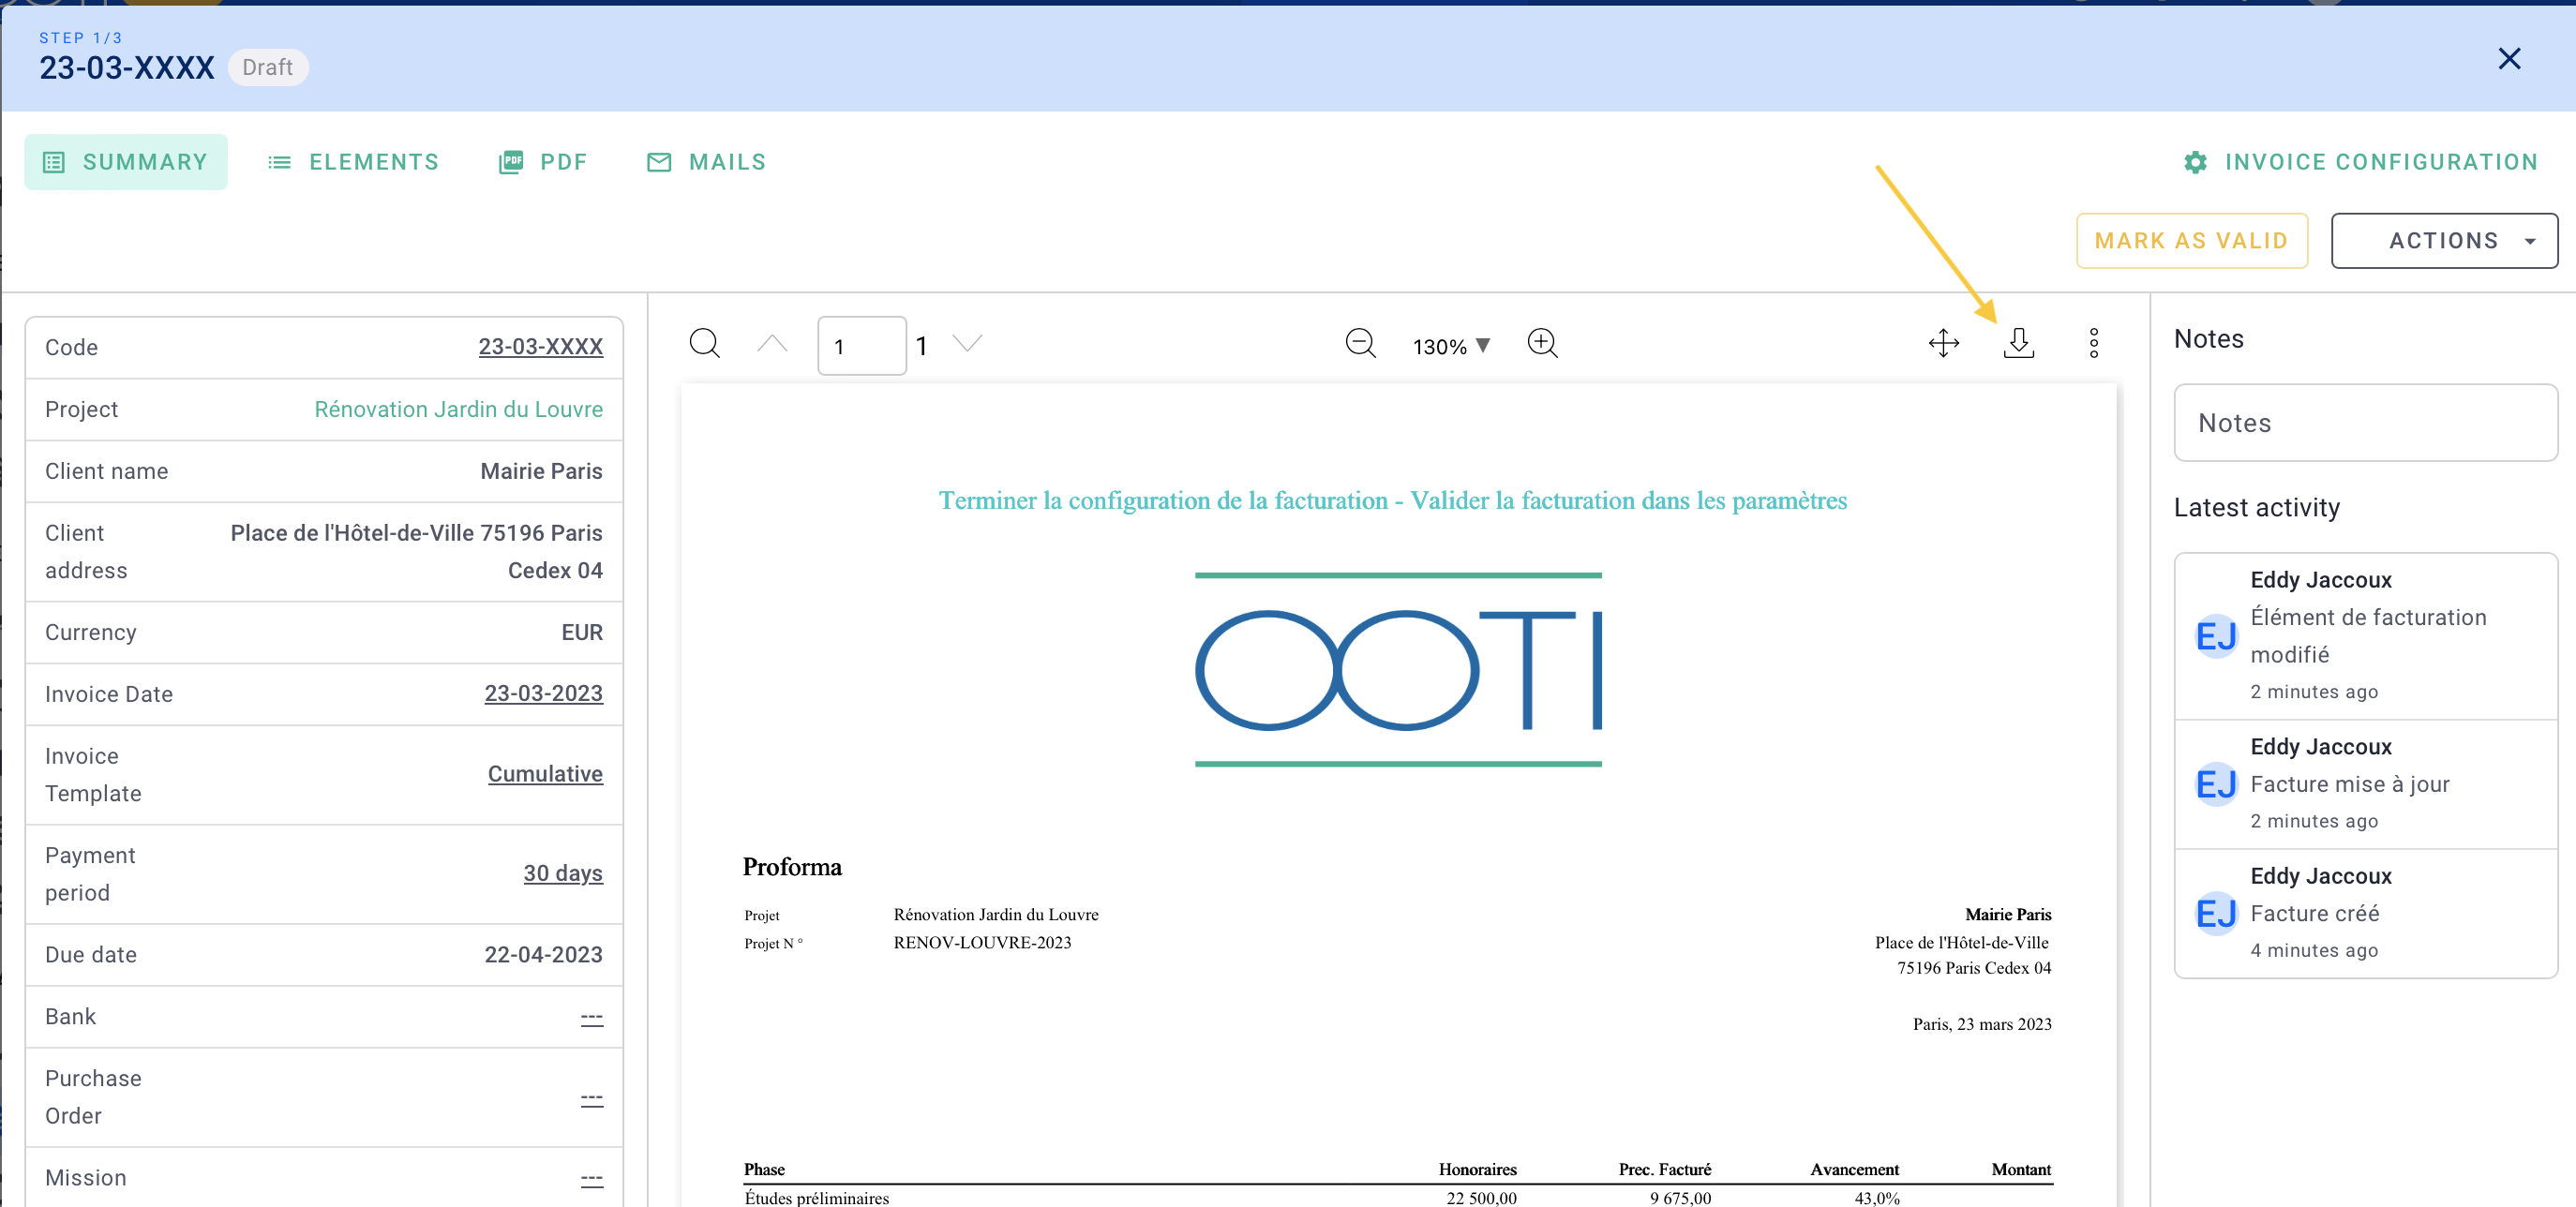
II/ Invoice dashboard and information
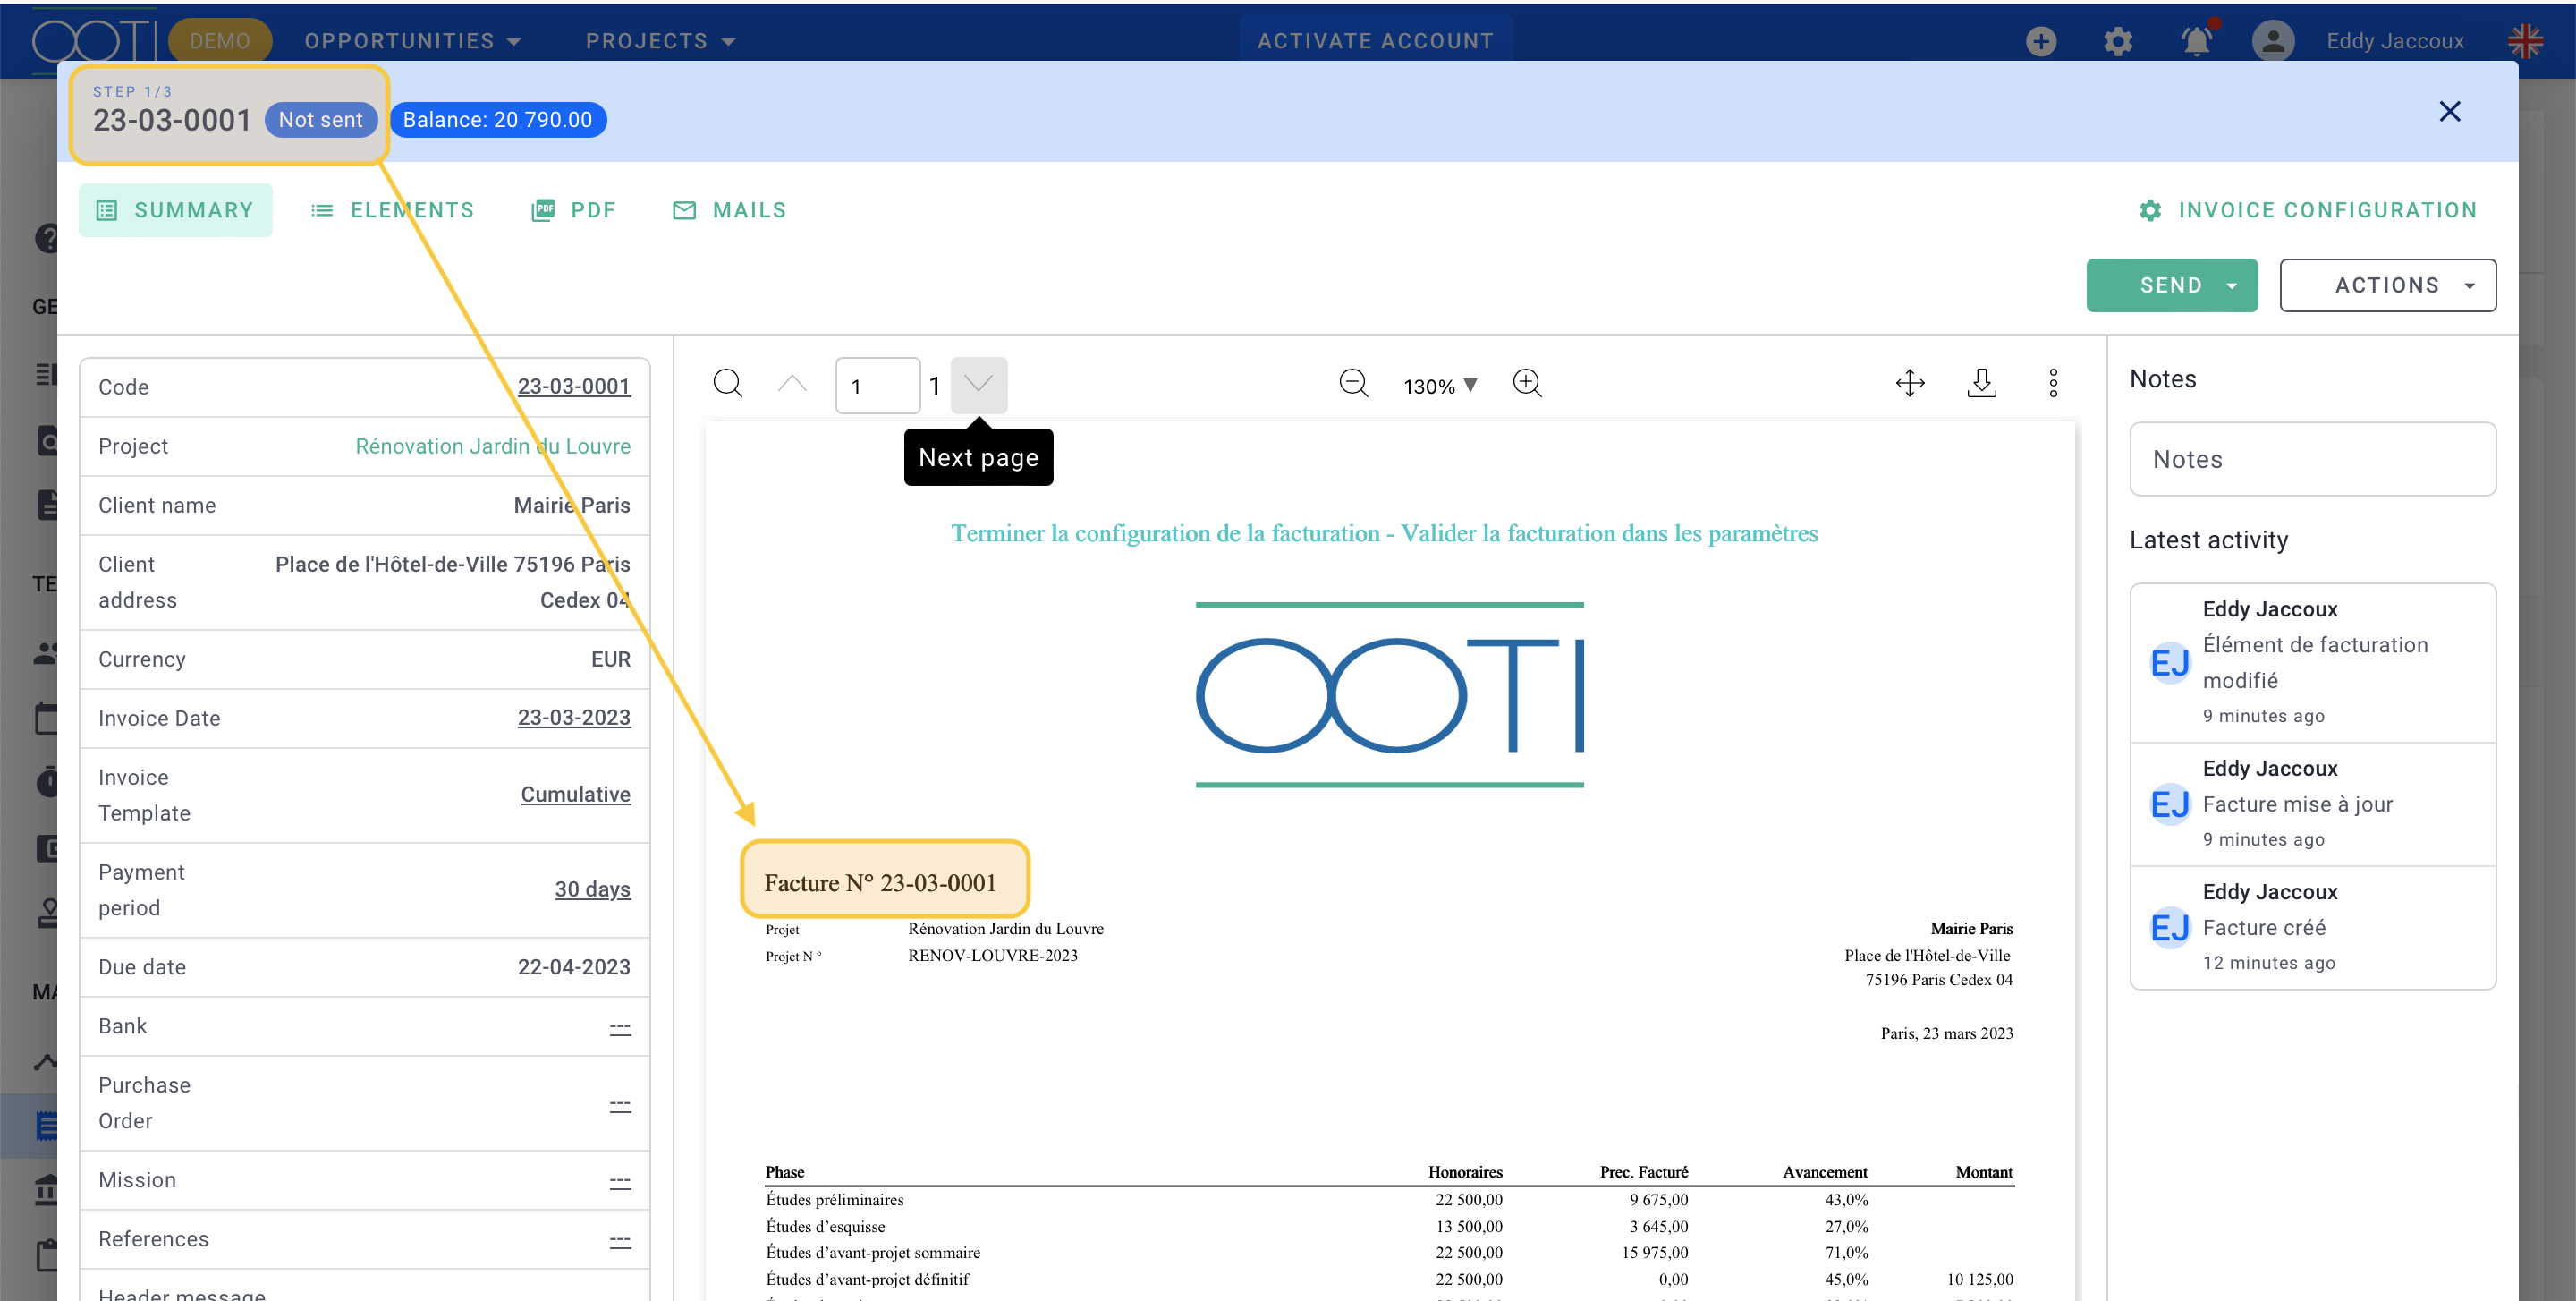
Here's how the invoice console looks like, with a central preview that you can download at any time.
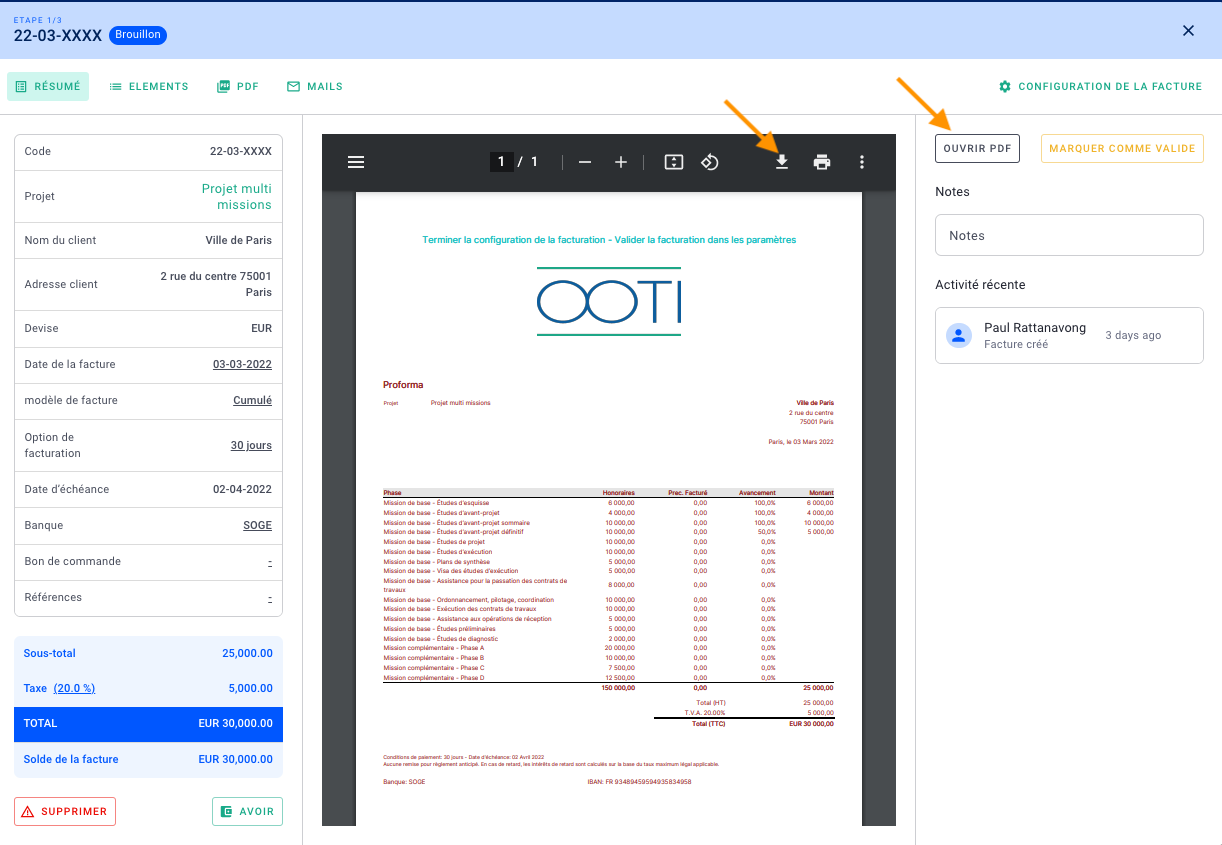
You will navigate through the four tabs:
-
SUMMARY for layout and modifications of the invoice date, adding invoice text, etc,
-
ELEMENTS for selecting the phases to be invoiced, along with the amount or percentage of fees to be invoiced,
-
PDF for viewing previews or updating the PDF if it does not update in the SUMMARY tab and
-
MAILS for sending invoices from OOTI.
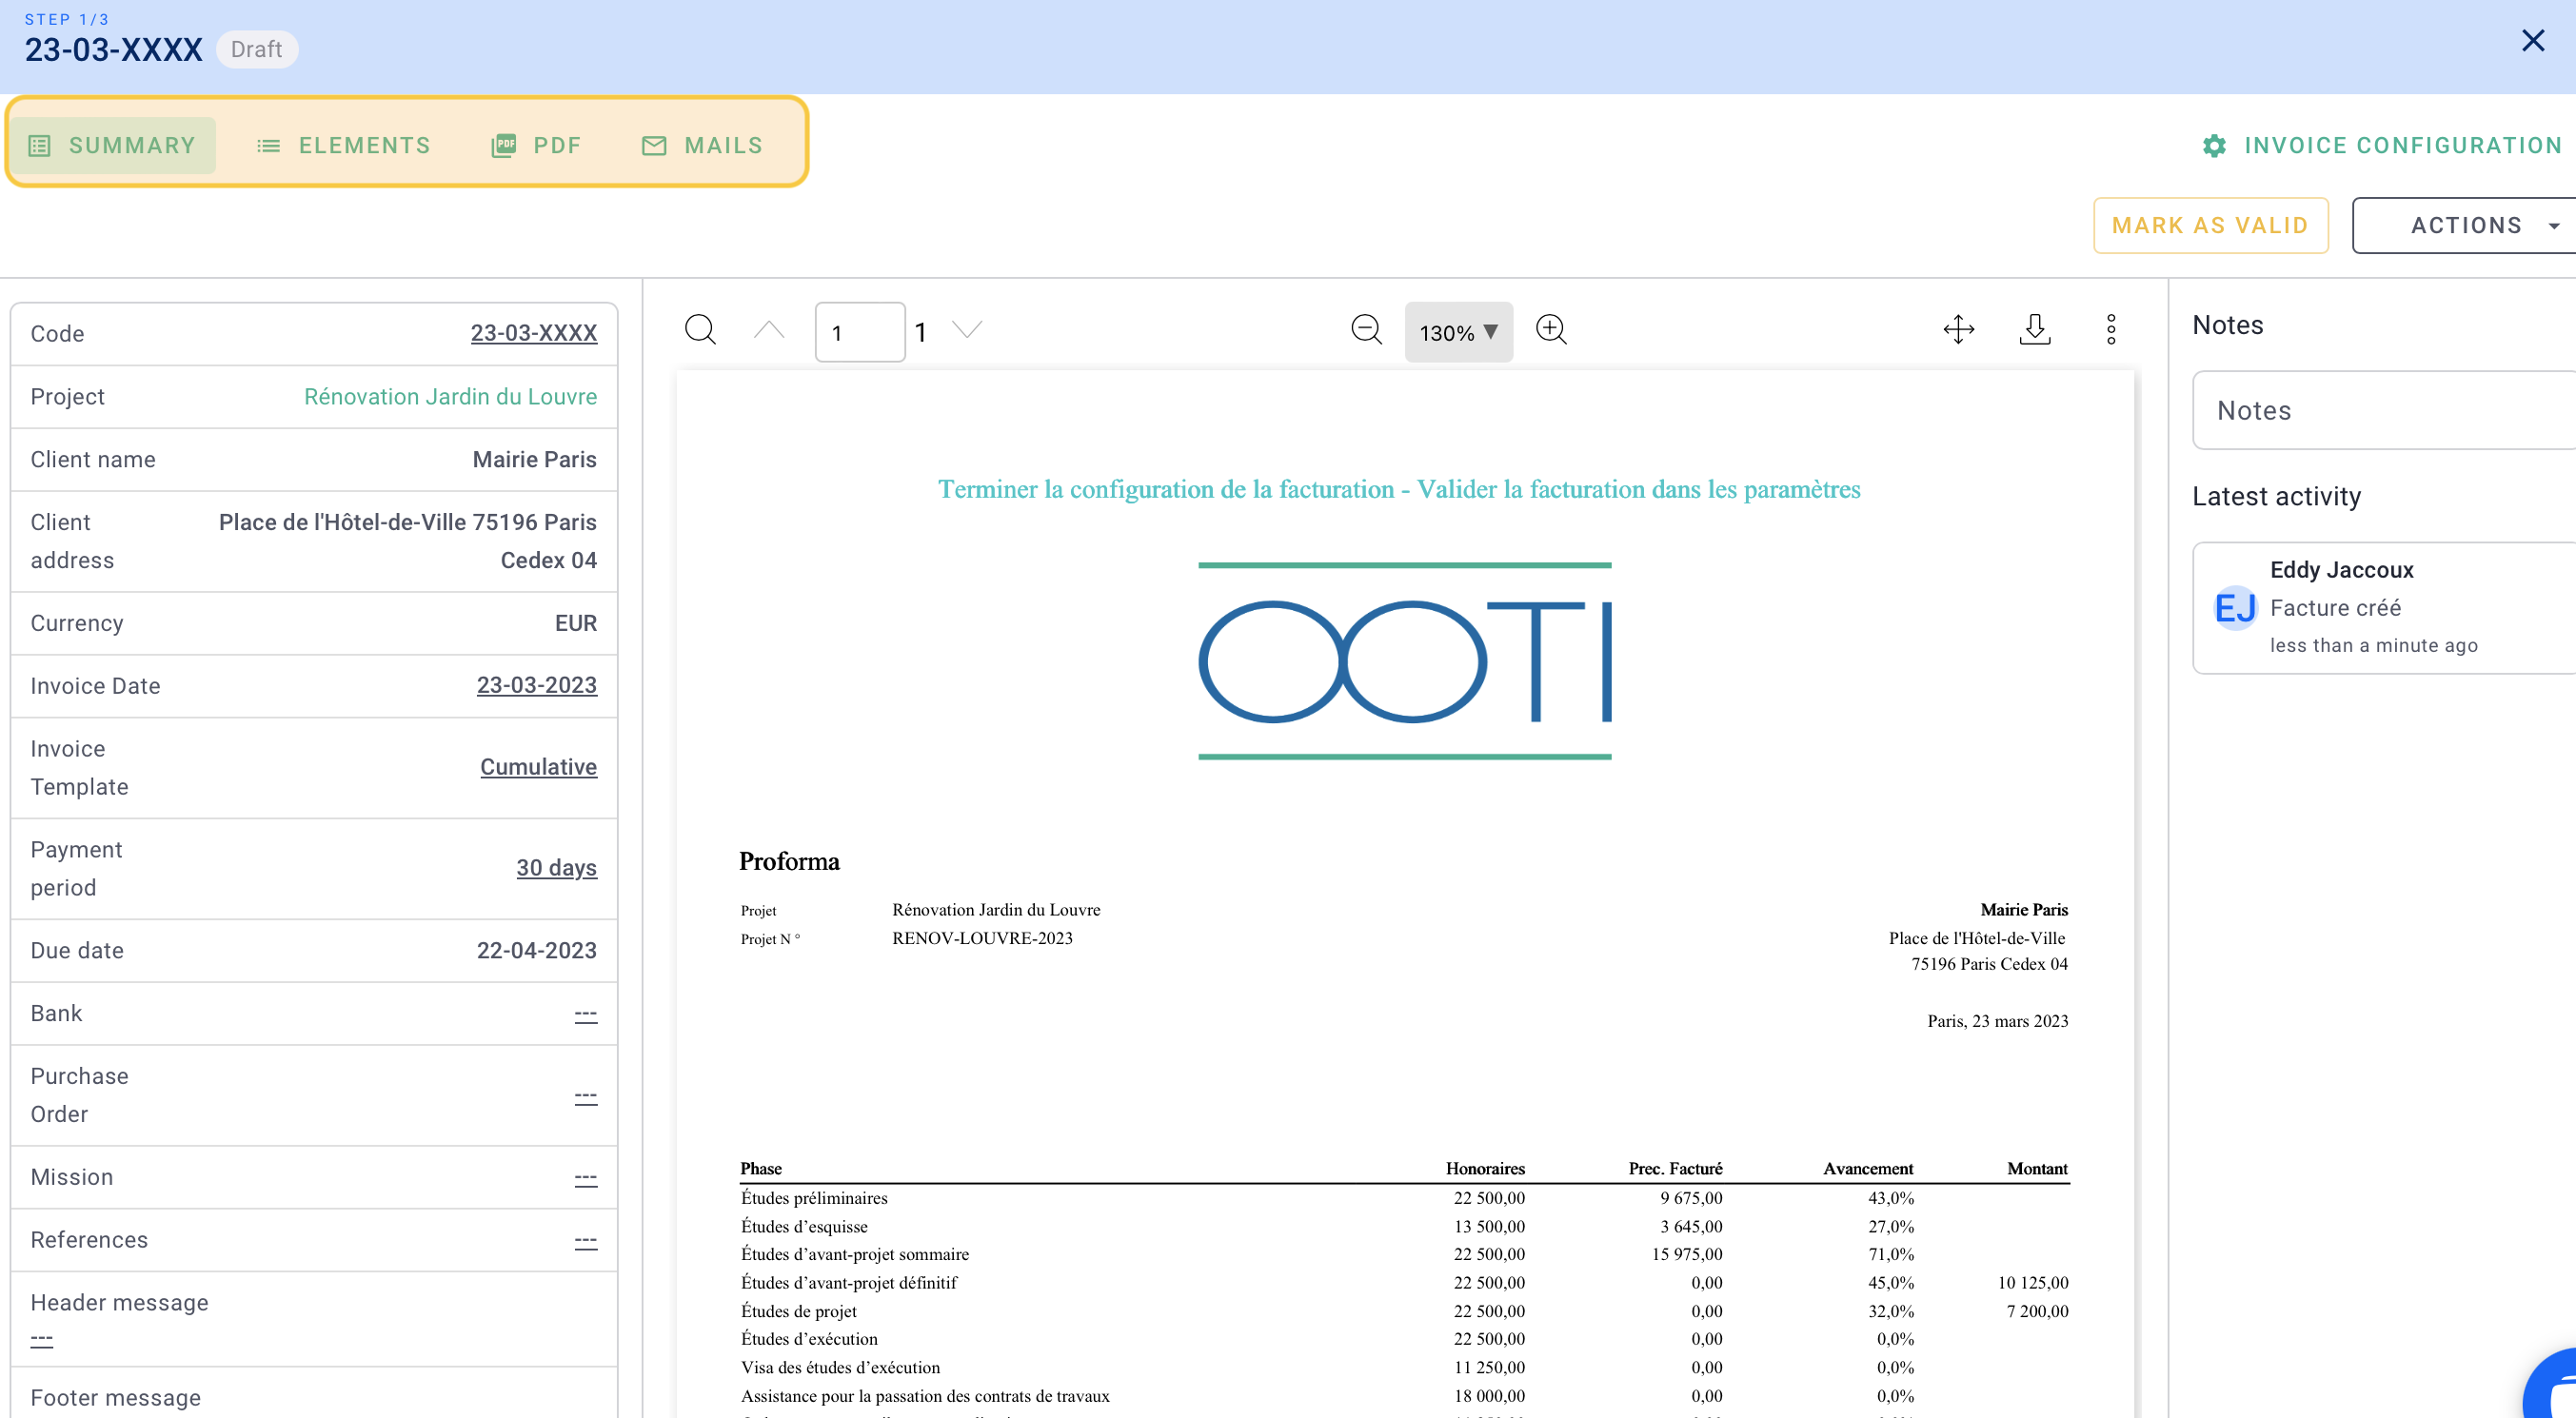
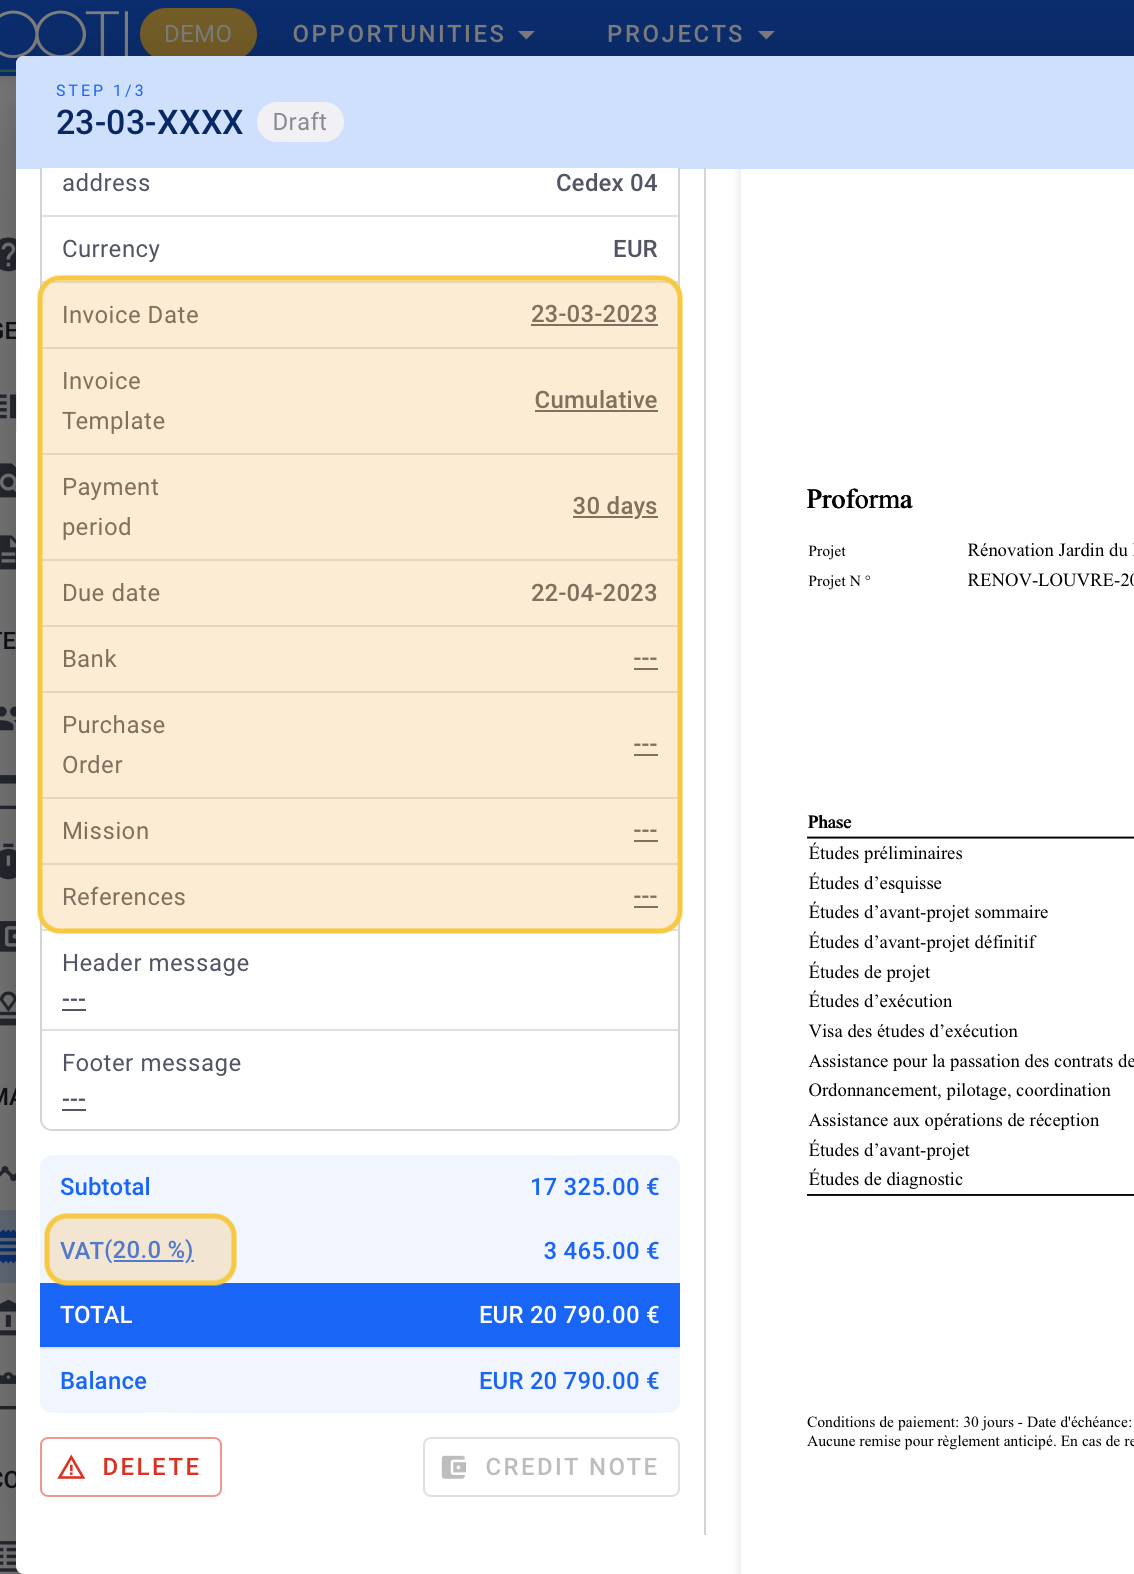
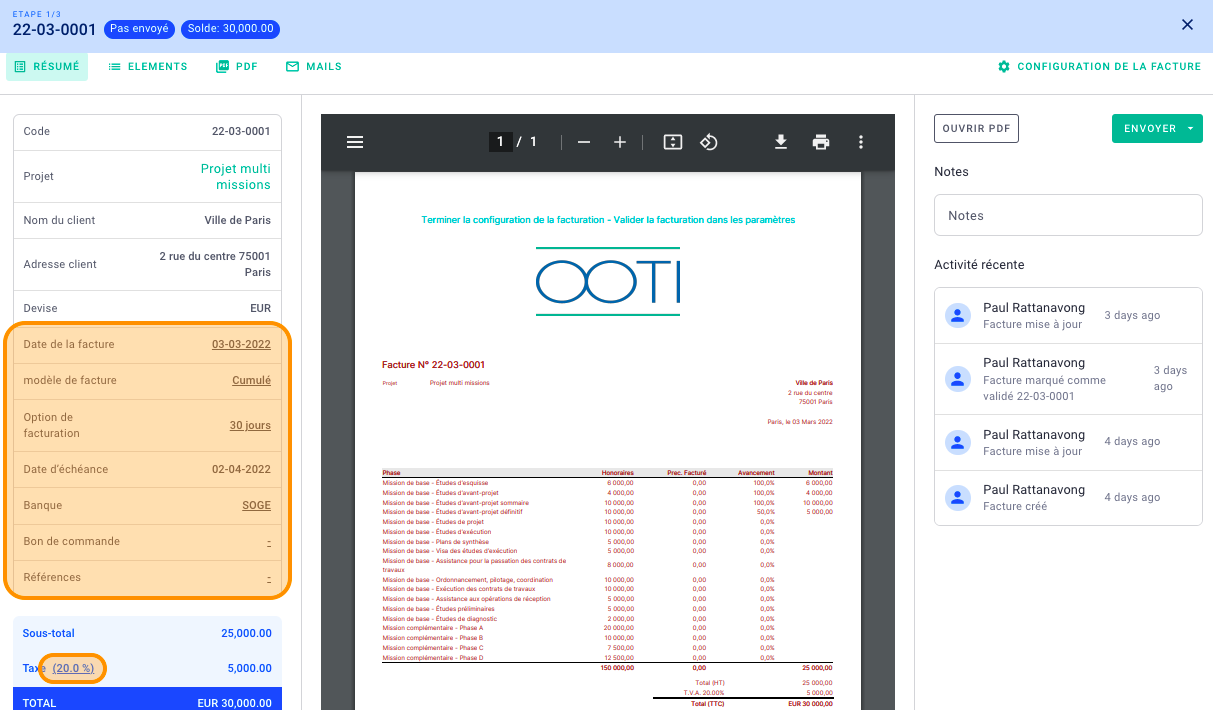
Certain underlined fields will be editable, such as the Invoice Date, adding text to the invoice, the invoice template, VAT, etc. You can make changes to these fields as needed.
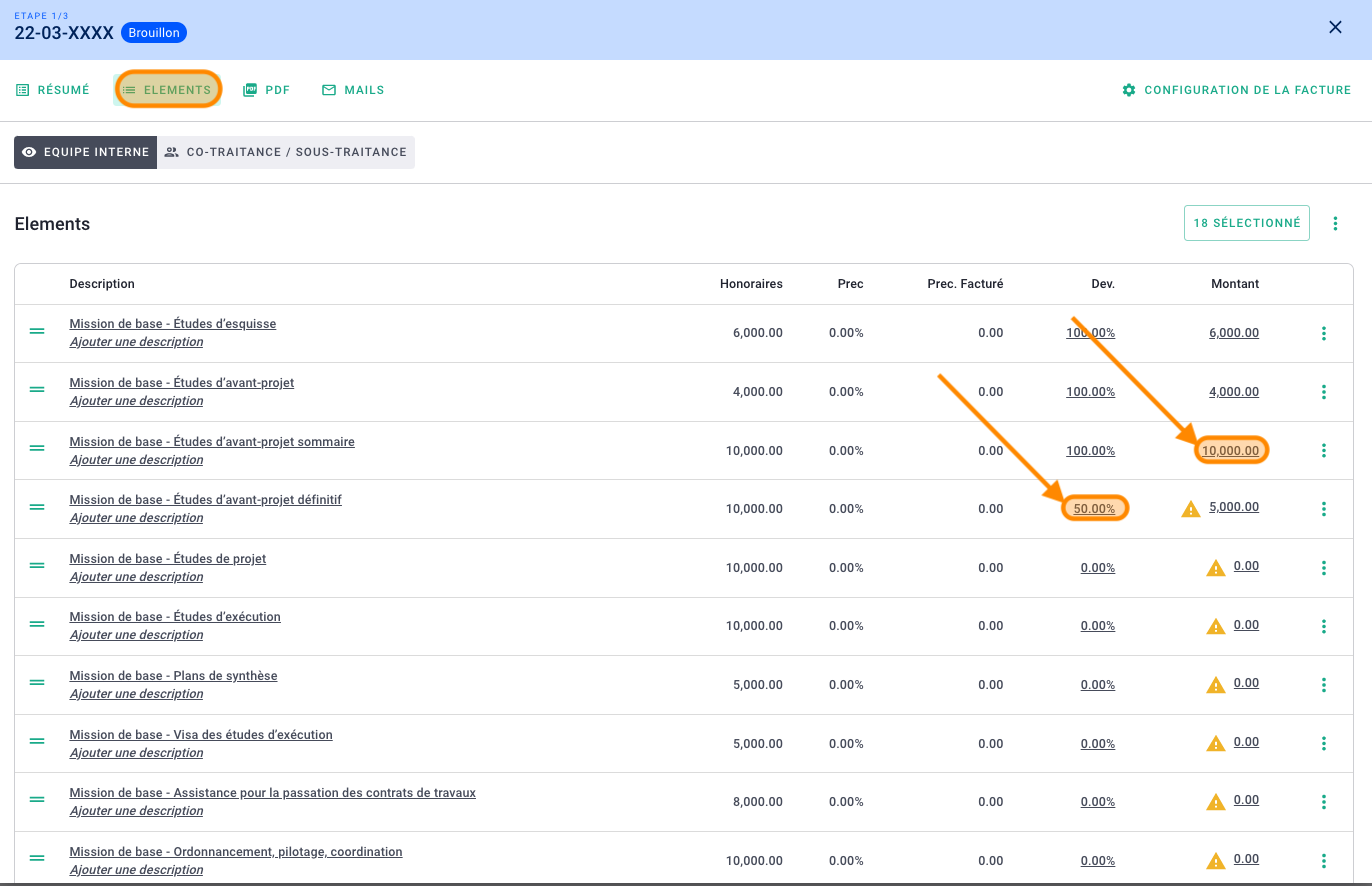
III/ Phases and amounts to be invoiced
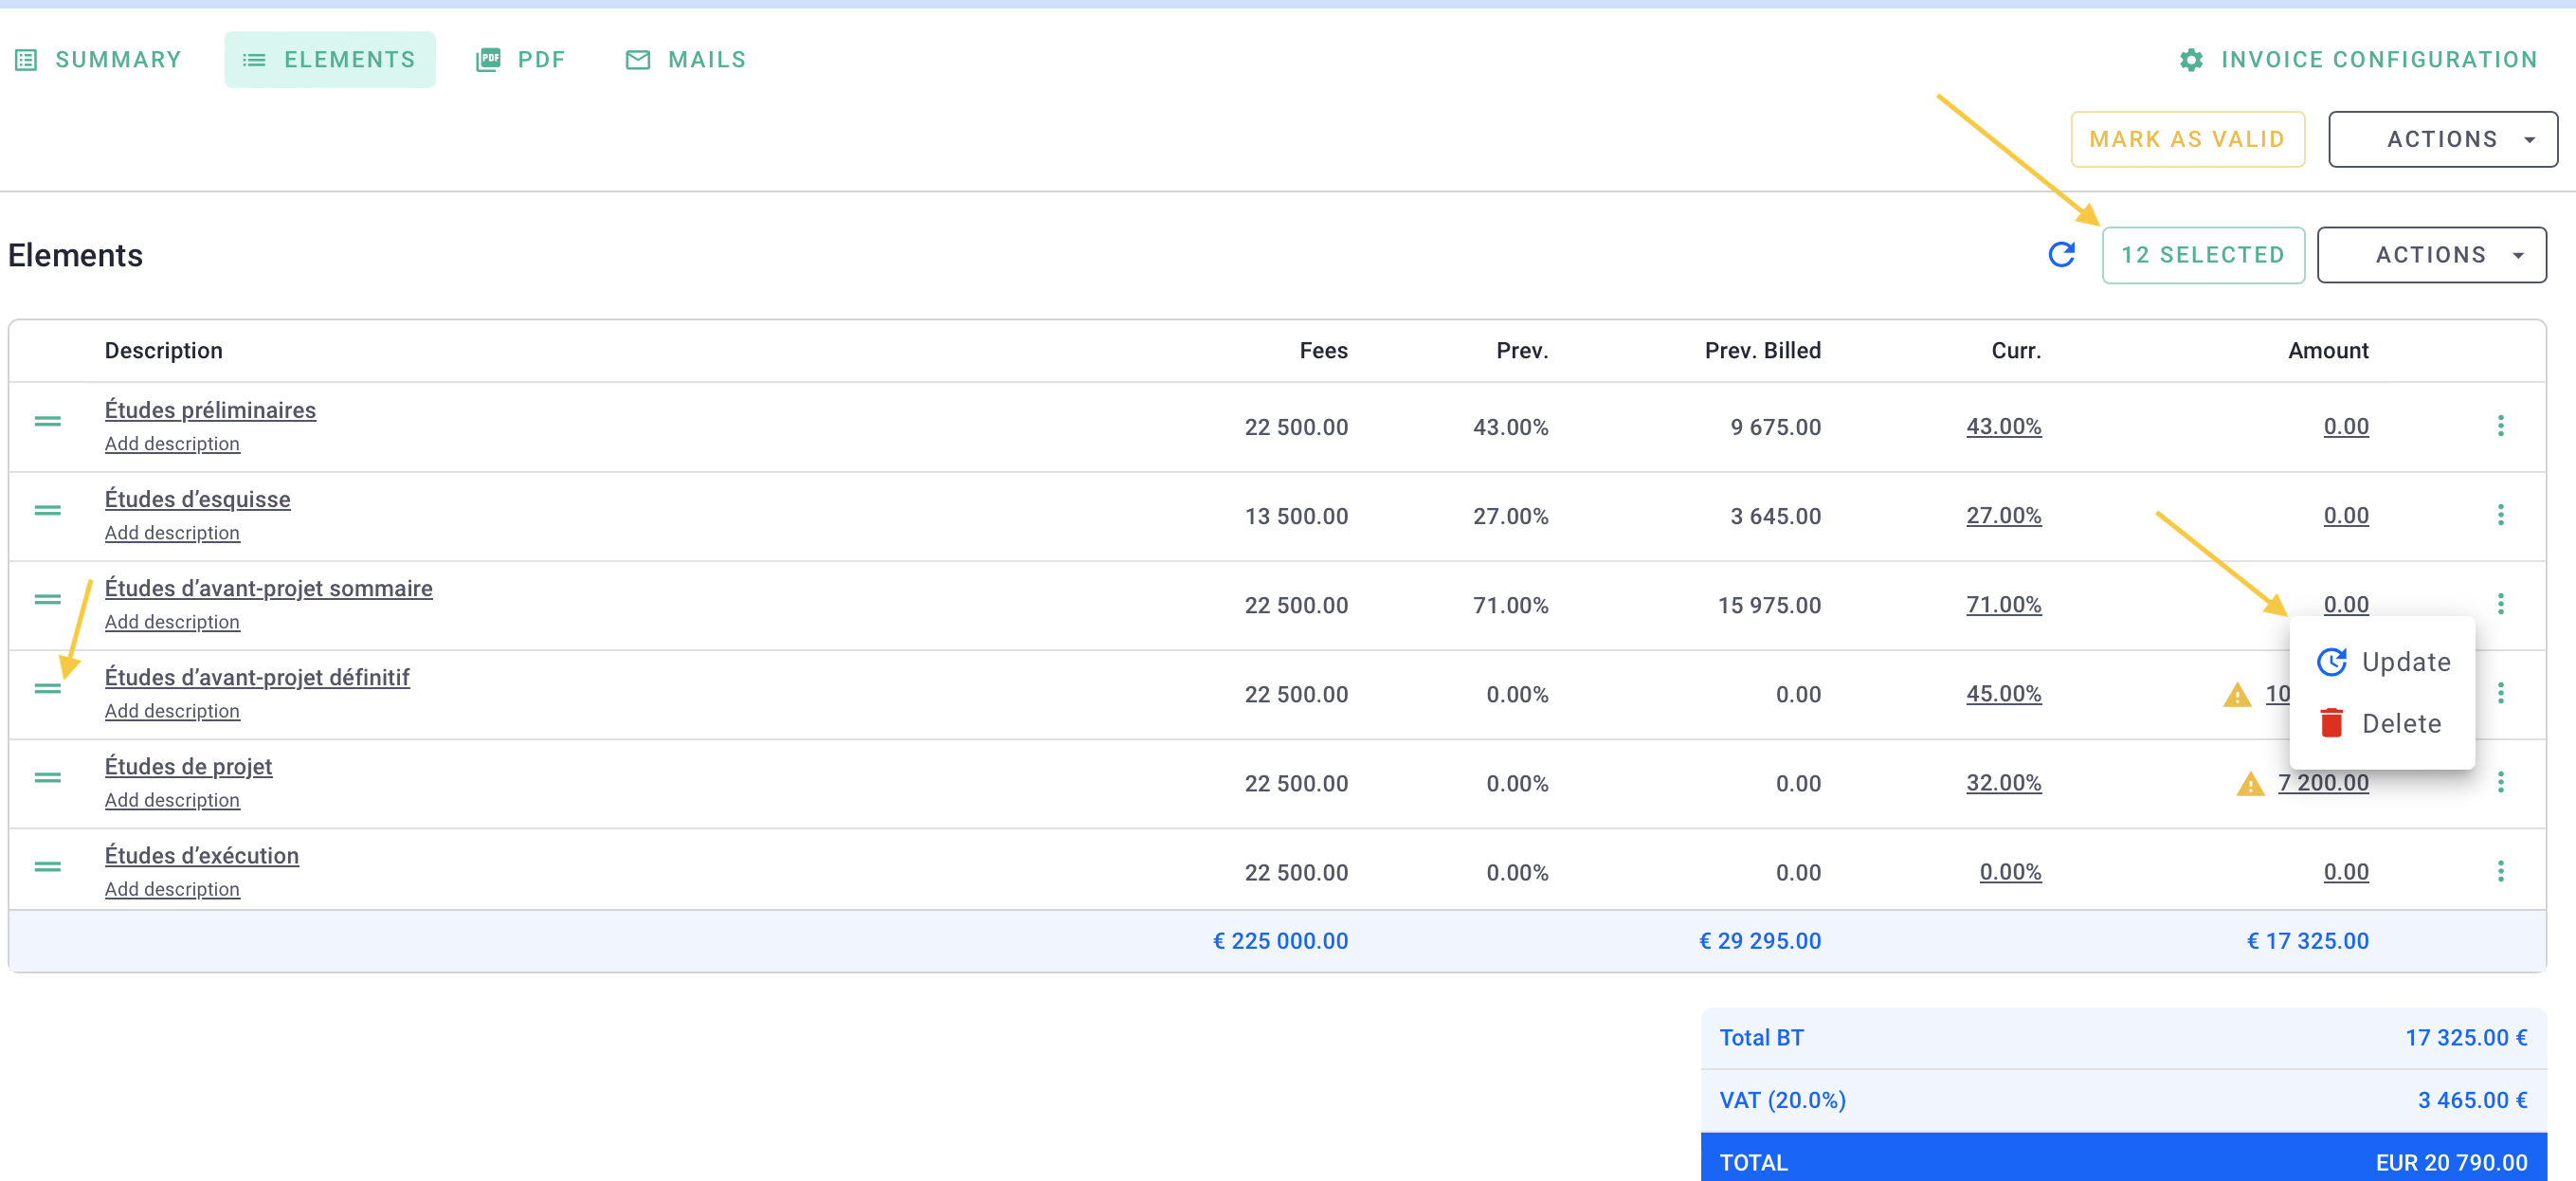
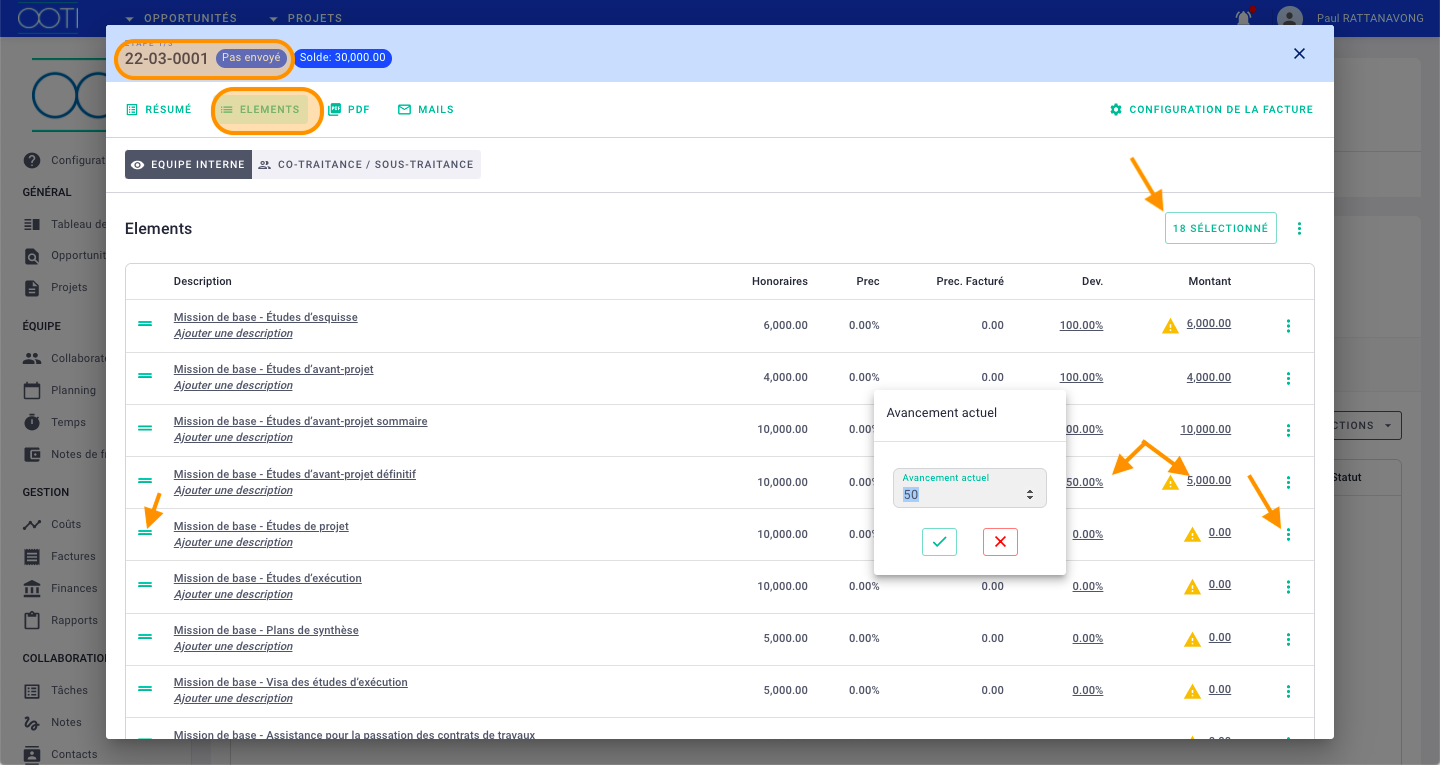
Go to the Elements tab where you can modify the percentage or the amount of the phases to be invoiced.
By default, if the progress of the phases is up-to-date in the Progress tab > Project Progress, it will be reflected in the % column of the invoice.
You can modify the percentage to be invoiced or the amount accordingly.
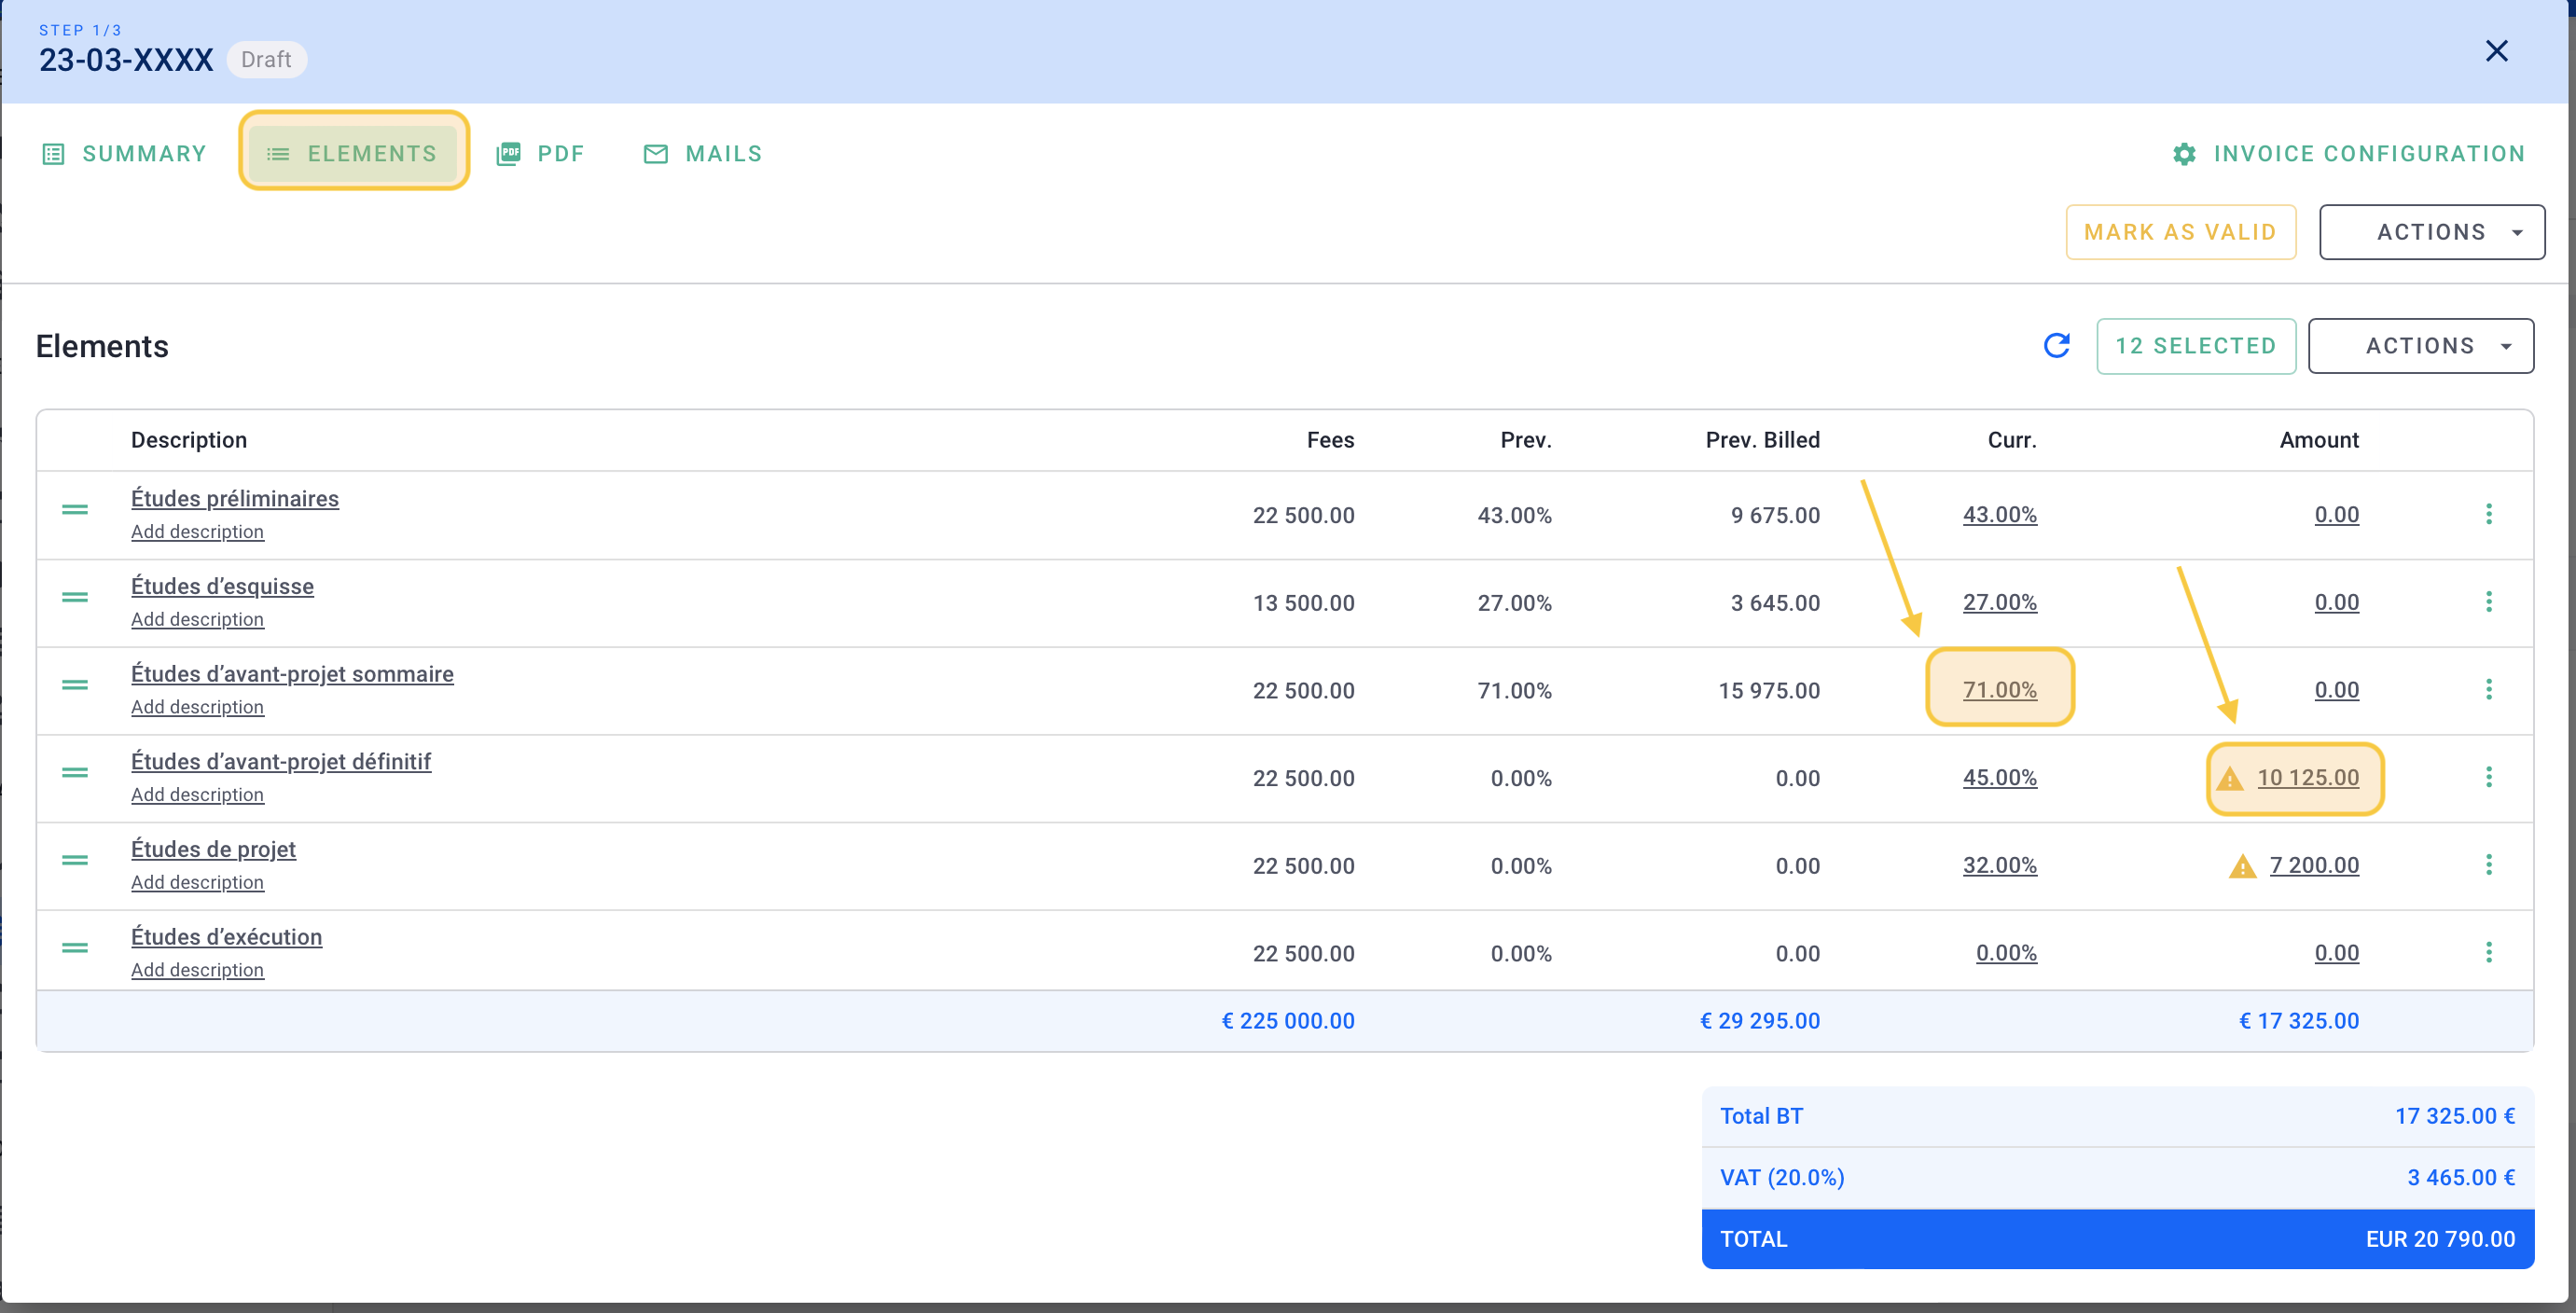
Click on the "X SELECTED" button at the top right to choose the phases to display in the invoice.
You can also remove a phase by clicking on the options "..." > Delete and change the order of the phases using the icon on the left.
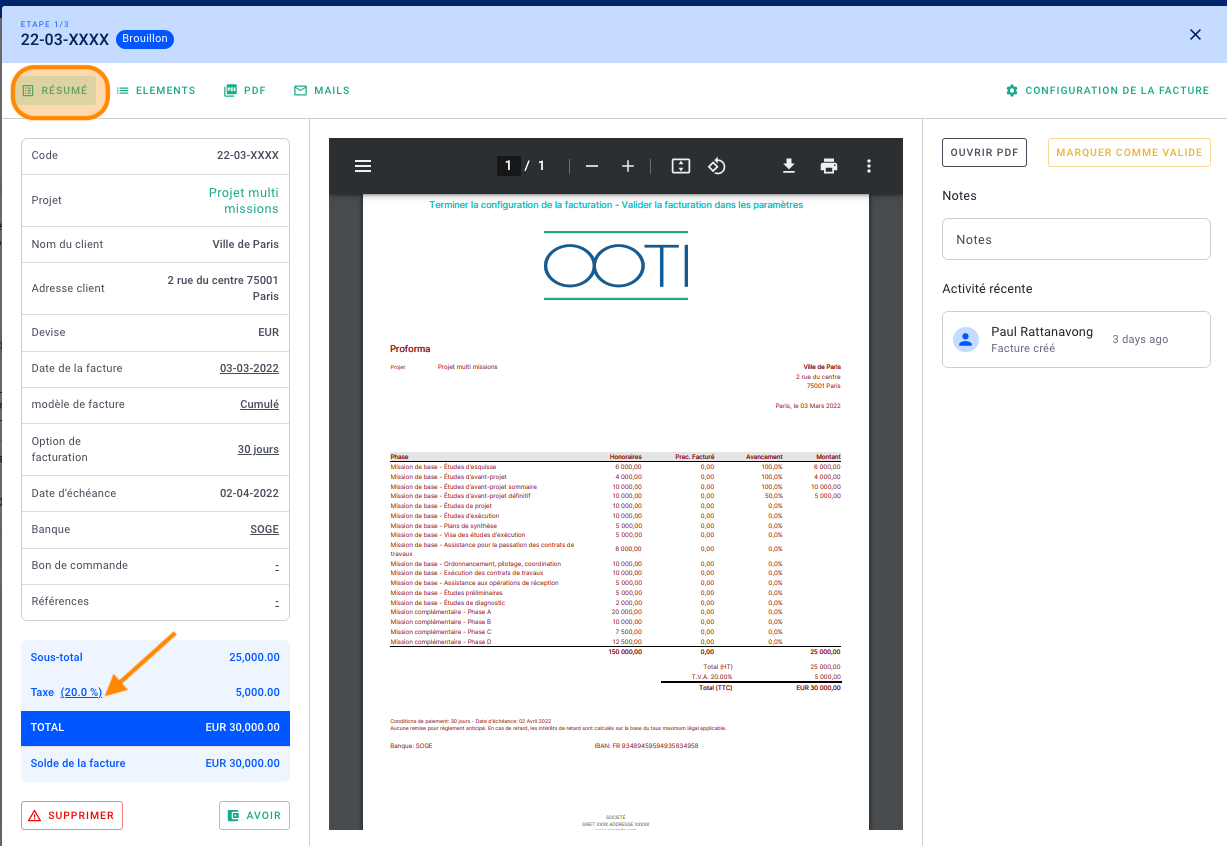
Go back to the SUMMARY tab to view the preview of the invoice and verify the VAT amount on the invoice.
IV/ Invoice status changes and their impact
1) Status 1: Draft
When you create an invoice, it is technically not an actual invoice but a draft invoice. A draft invoice has no financial value, and it can be modified or deleted at any time. It is, therefore, not considered as part of the company's revenue (CA).
The "Draft" status is indicated at the top left, denoted by the term "XXXX," which is a placeholder or code representing the draft status.
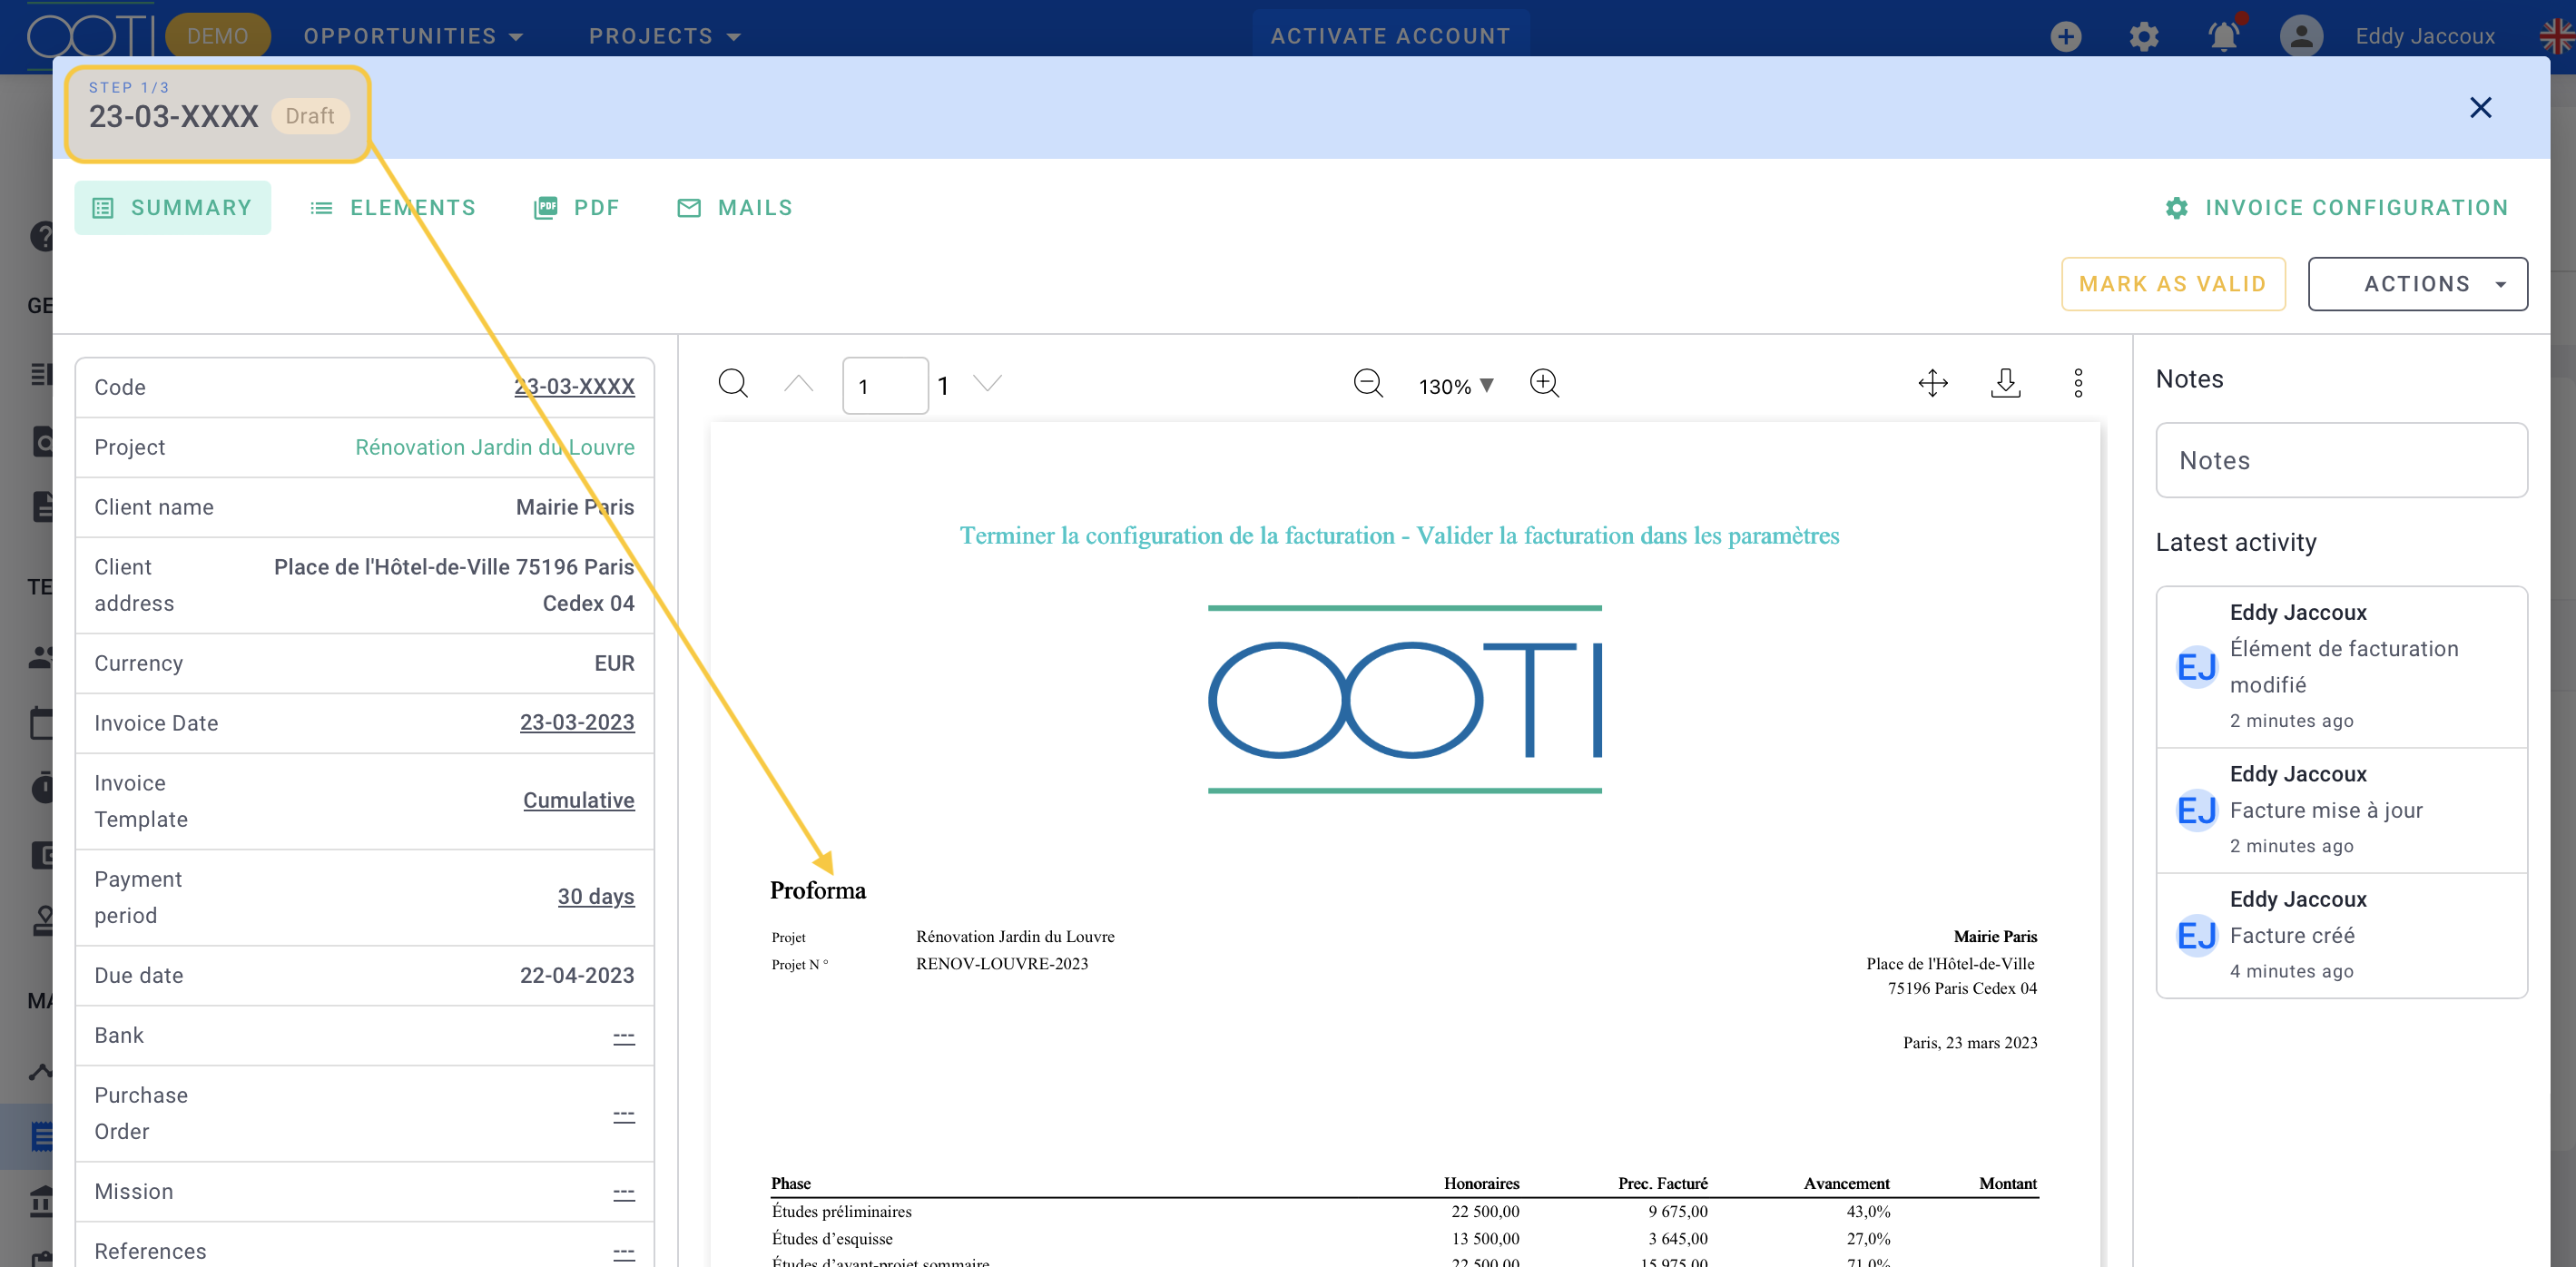
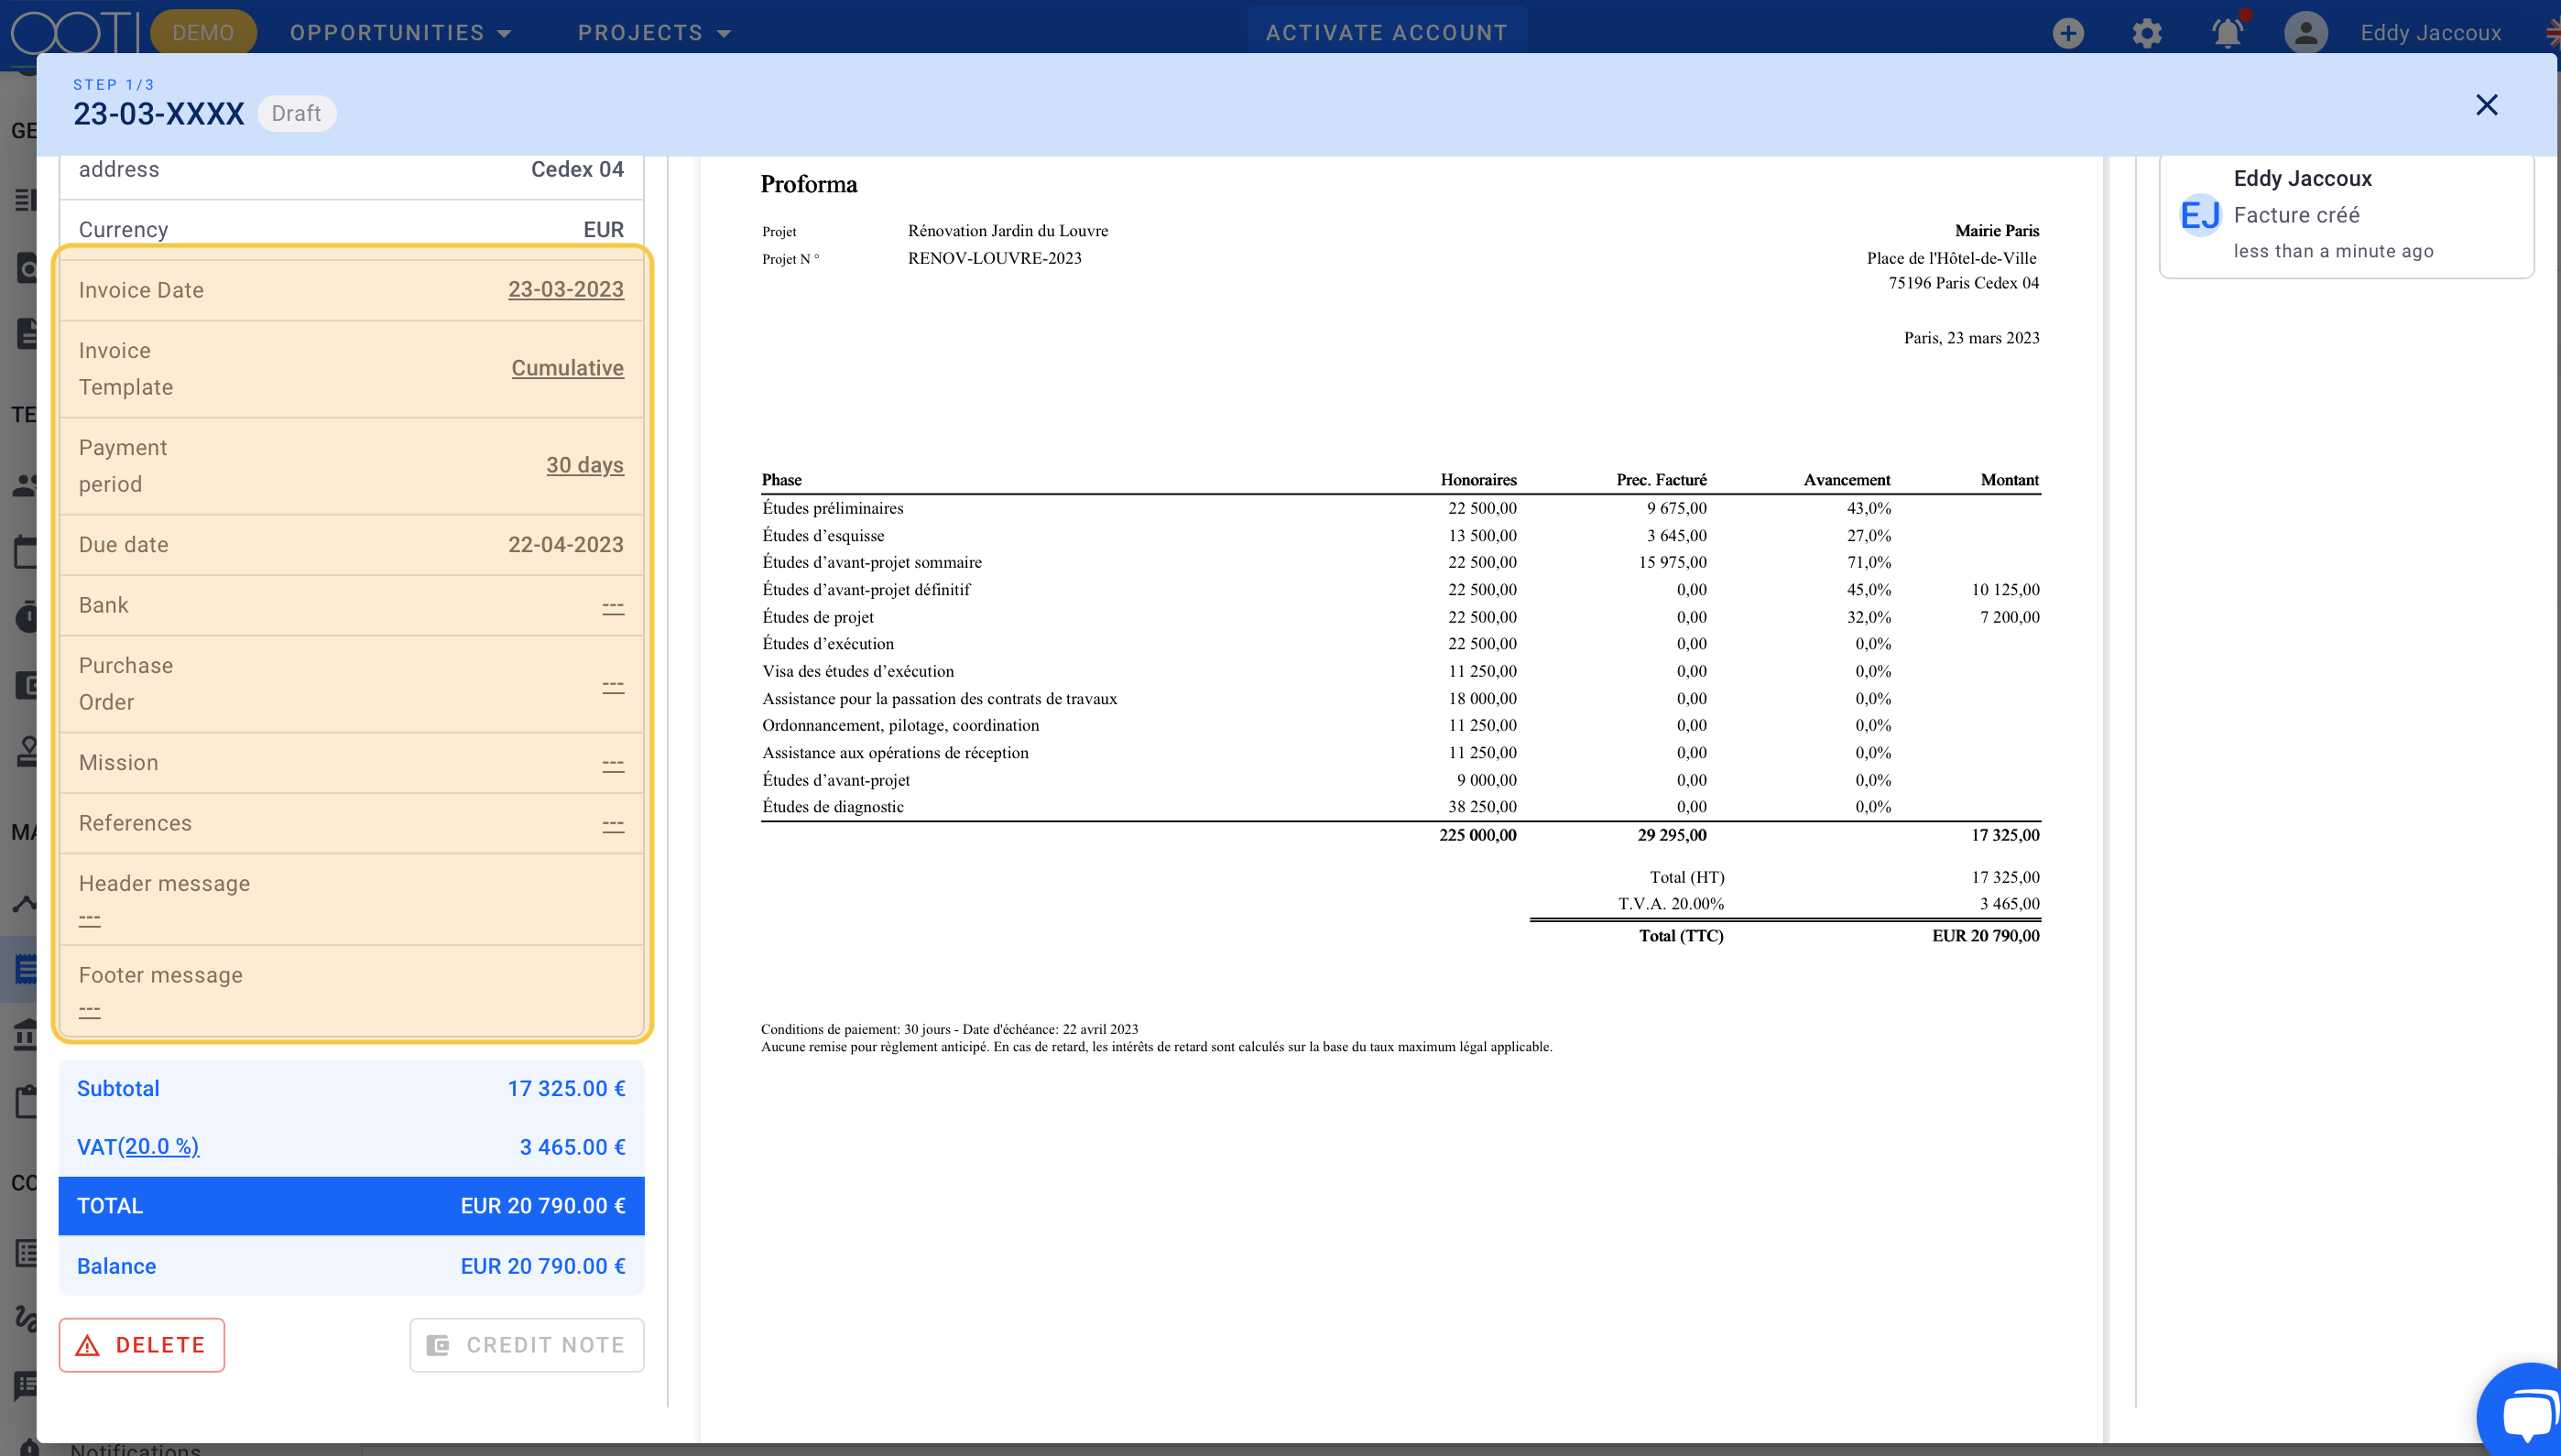
In the SUMMARY tab, you can edit various fields, just like in the Elements tab. Some underlined fields will be editable, such as the Invoice Date, adding text to the invoice, choosing the invoice template, handling VAT, and more. This allows you to customise the draft invoice according to your specific requirements before finalising it.
In the Elements tab, you can modify the phases and their amounts.
You can download your draft and submit it to your client for validation.
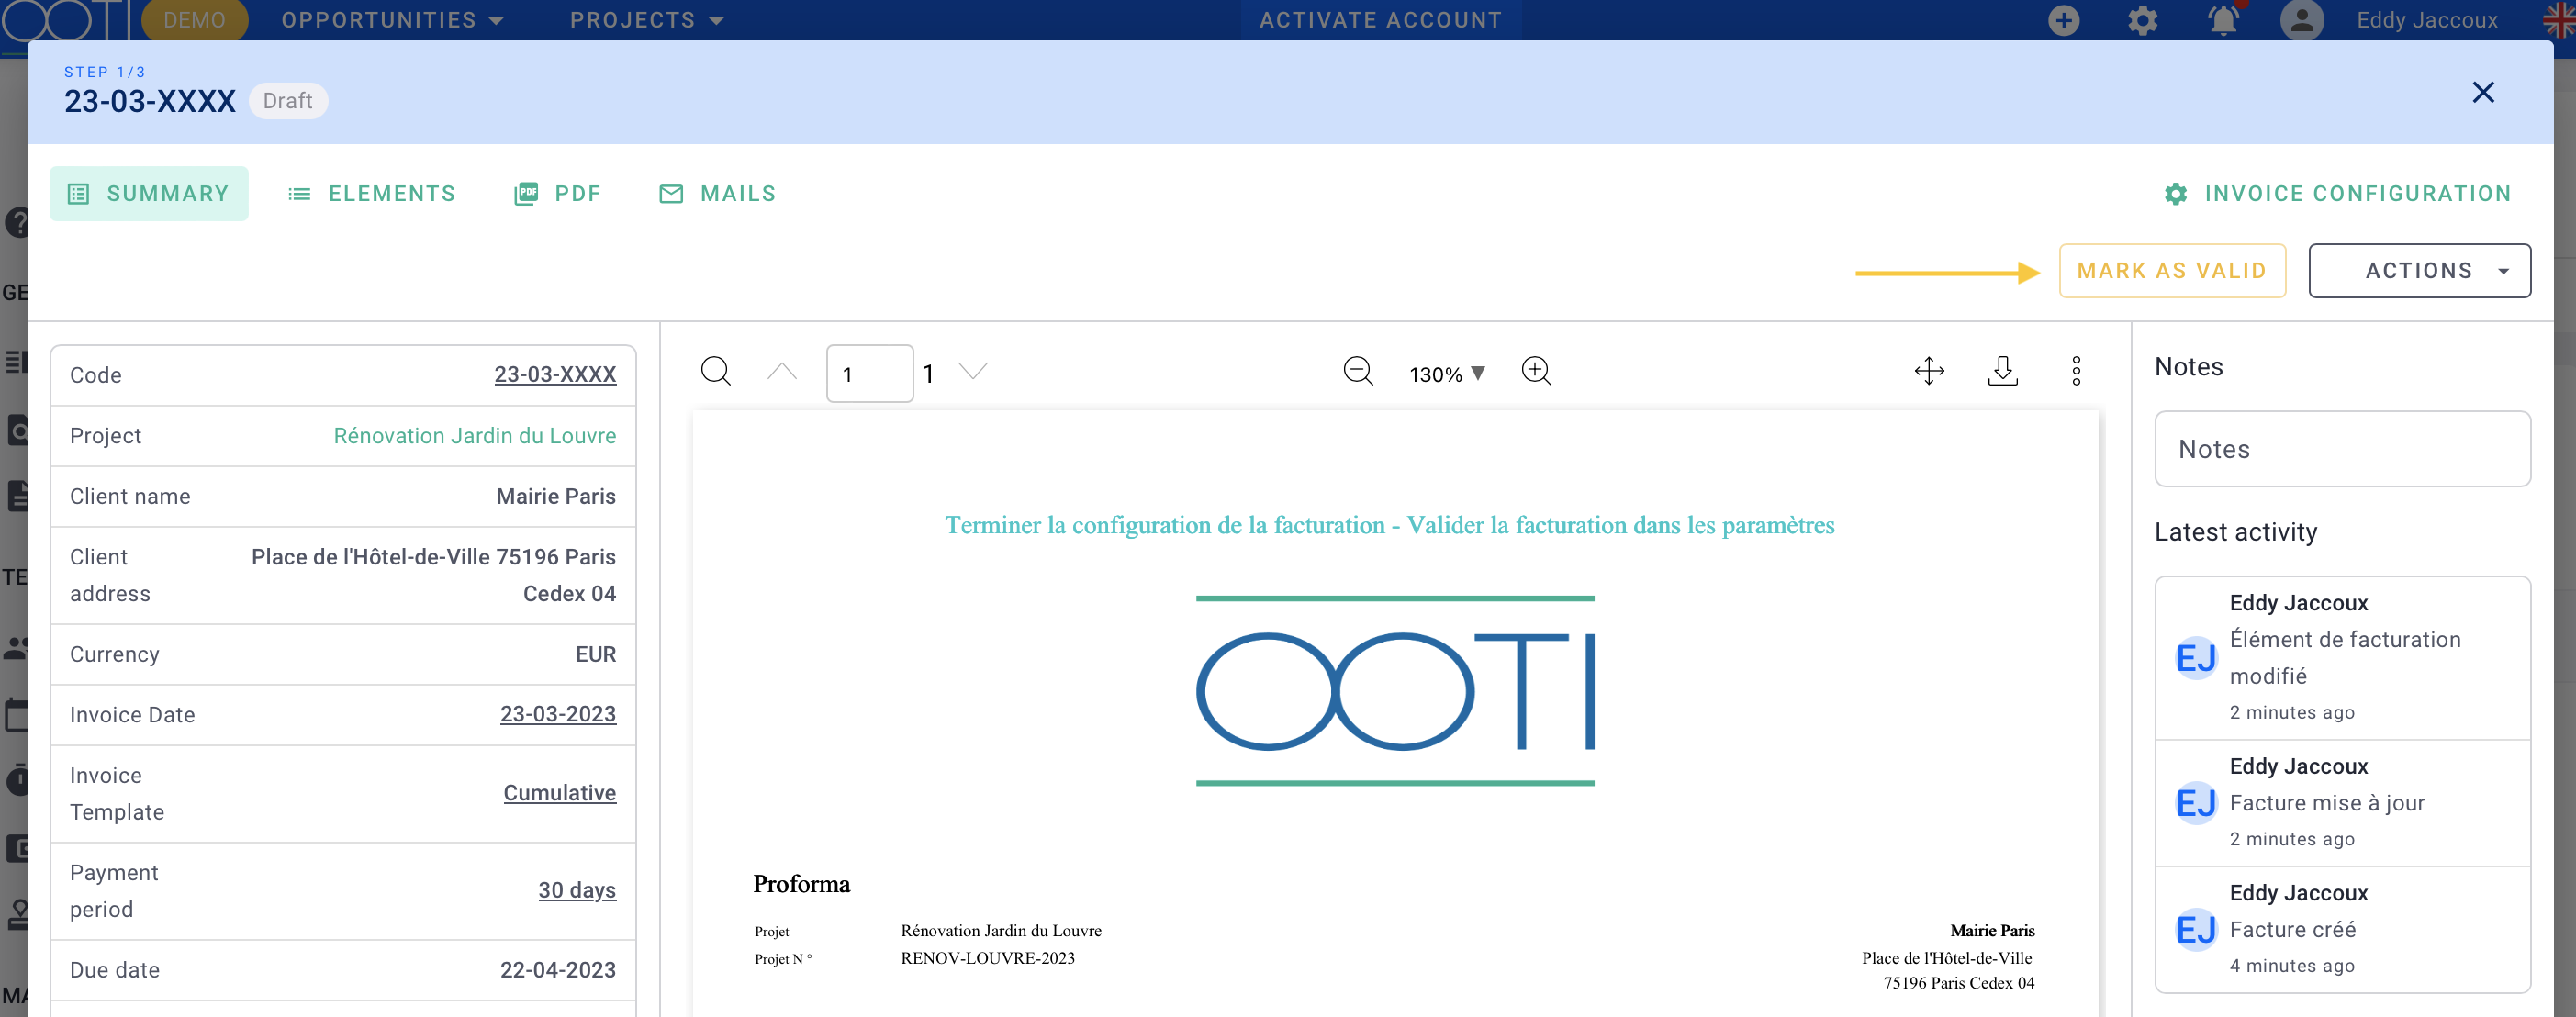
2) Status 2: Not Sent
If the draft is approved by the client, you will need to convert it into an actual invoice with a specific code.
This invoice will not be counted in the actual revenue of the agency; instead, only an invoice code is generated for reference.
Click on "Mark as Valid." This will generate a unique invoice code.
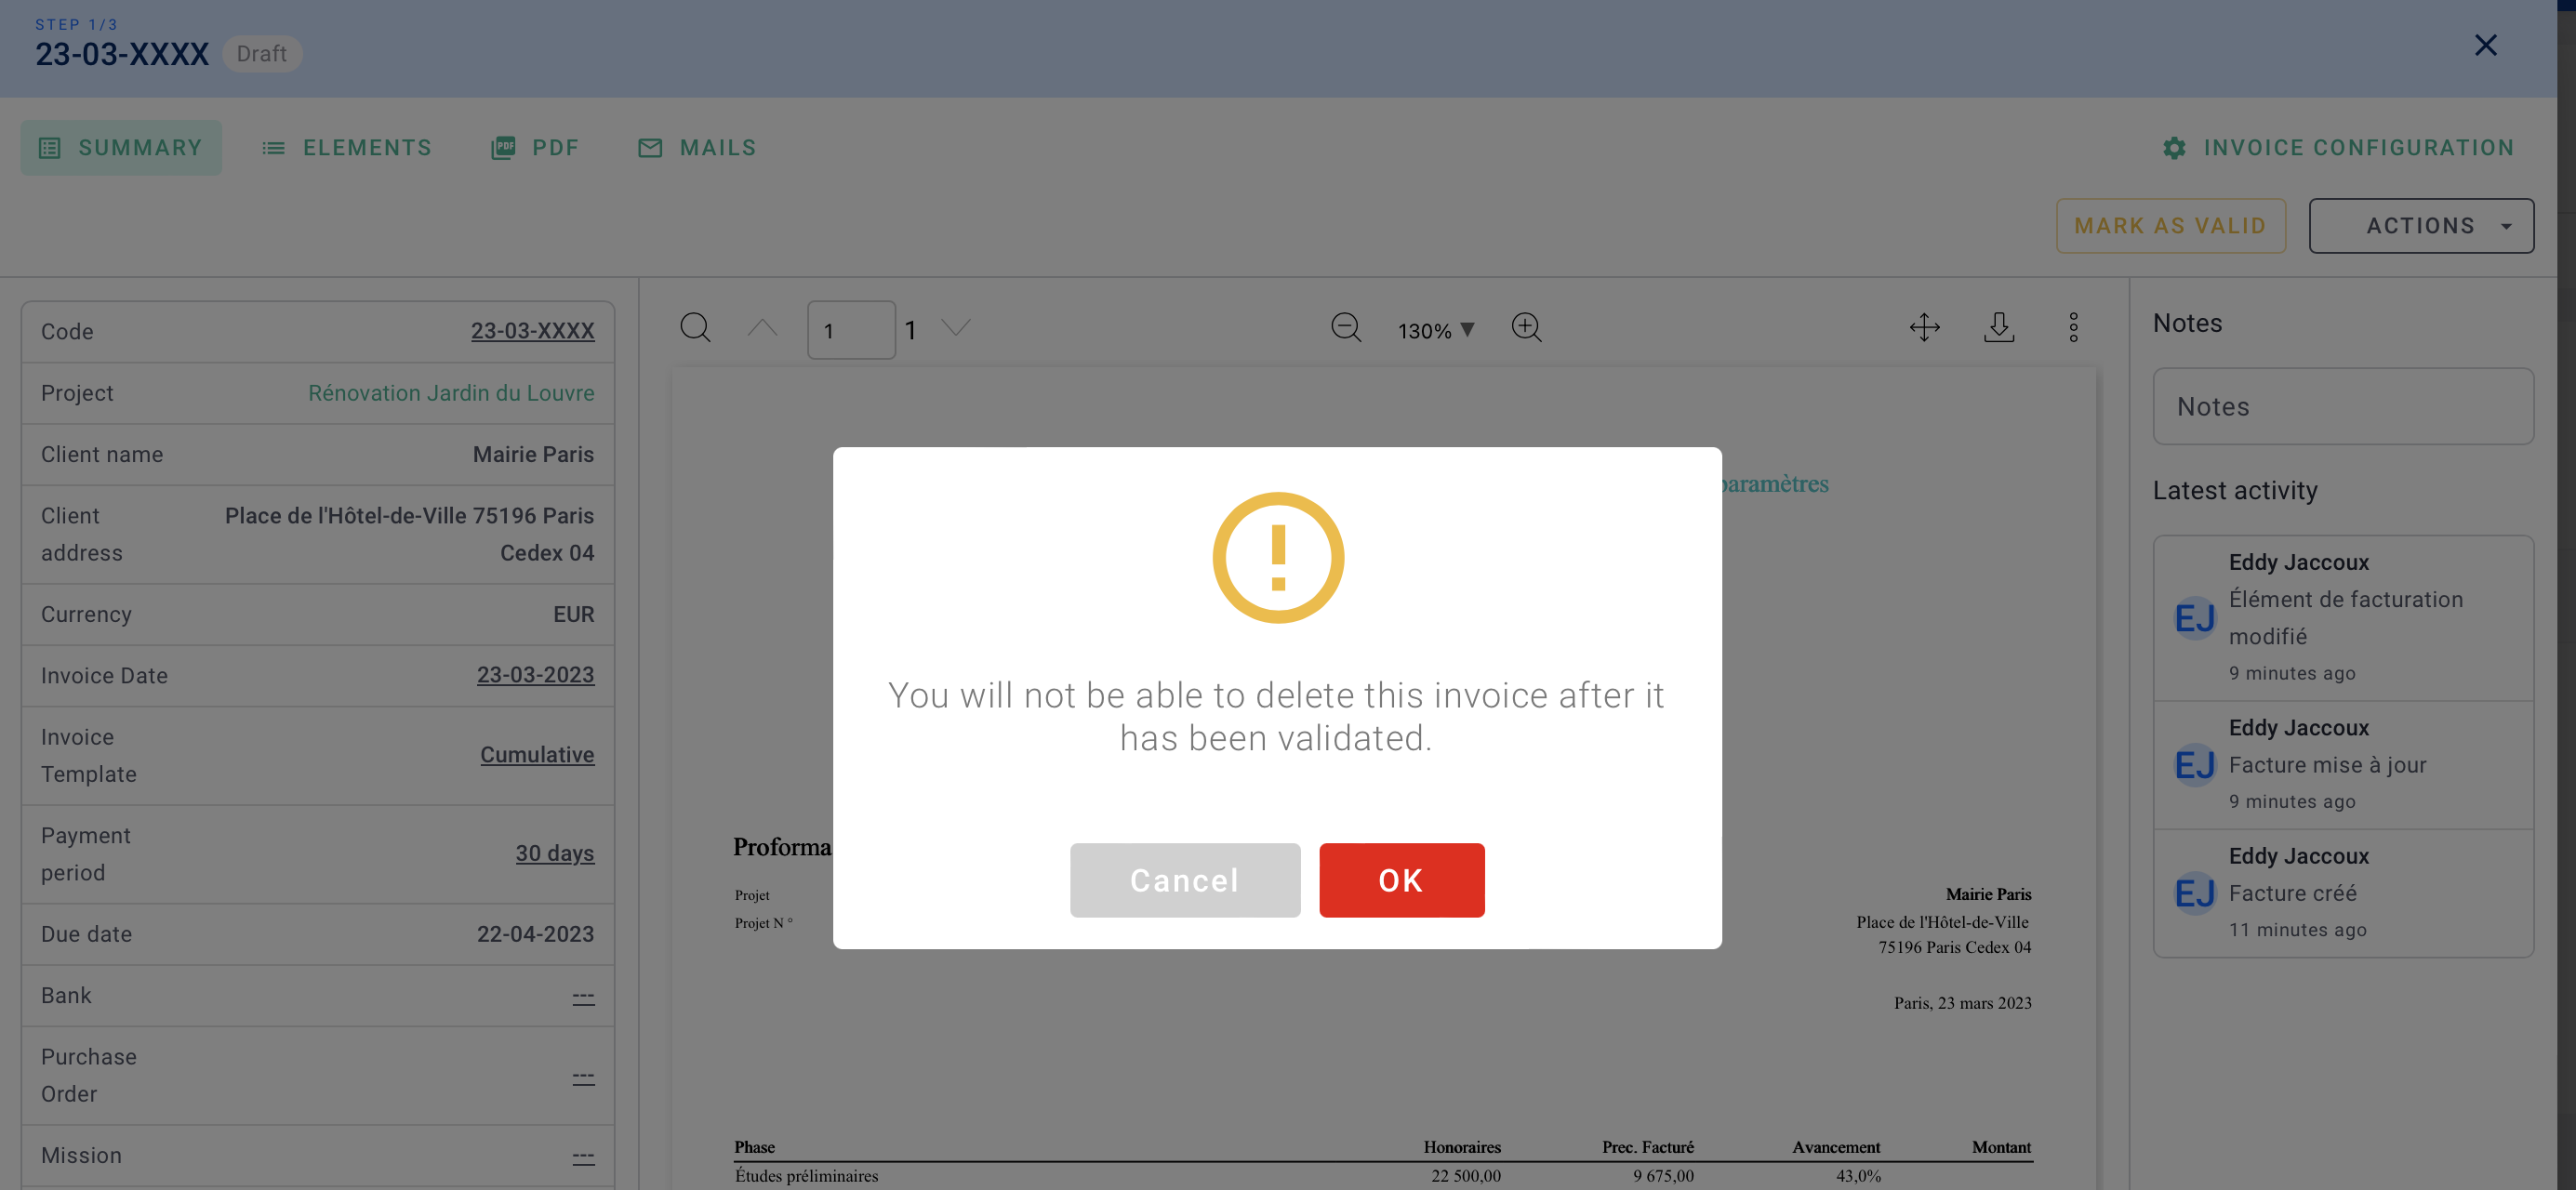
Once you mark the draft as valid and generate the unique invoice code, you will no longer be able to delete this invoice. Click on "OK" to confirm and proceed with the validation.
A code is automatically generated, and it is visible in the invoice console and in the PDF of the invoice.
As long as the invoice is in the "Not Sent" status, you can still edit it: phases, amounts, references, etc.
You cannot delete the invoice or modify the code, ensuring the invoice remains compliant.
In the SUMMARY tab, you can edit certain underlined fields that are customizable, such as the Invoice Date, adding text to the invoice, selecting the invoice template, handling VAT, and more.
In the Elements tab, you can modify the phases and the amounts.
3) Status 3: Unpaid/Delayed
Mark the invoice as "Sent" to include the net fees amount in the revenue. Please verify the invoice date and elements as the inclusion in the revenue will depend on the elements (phases and amounts) and the invoice date.
Click on SEND > Mark as Sent.
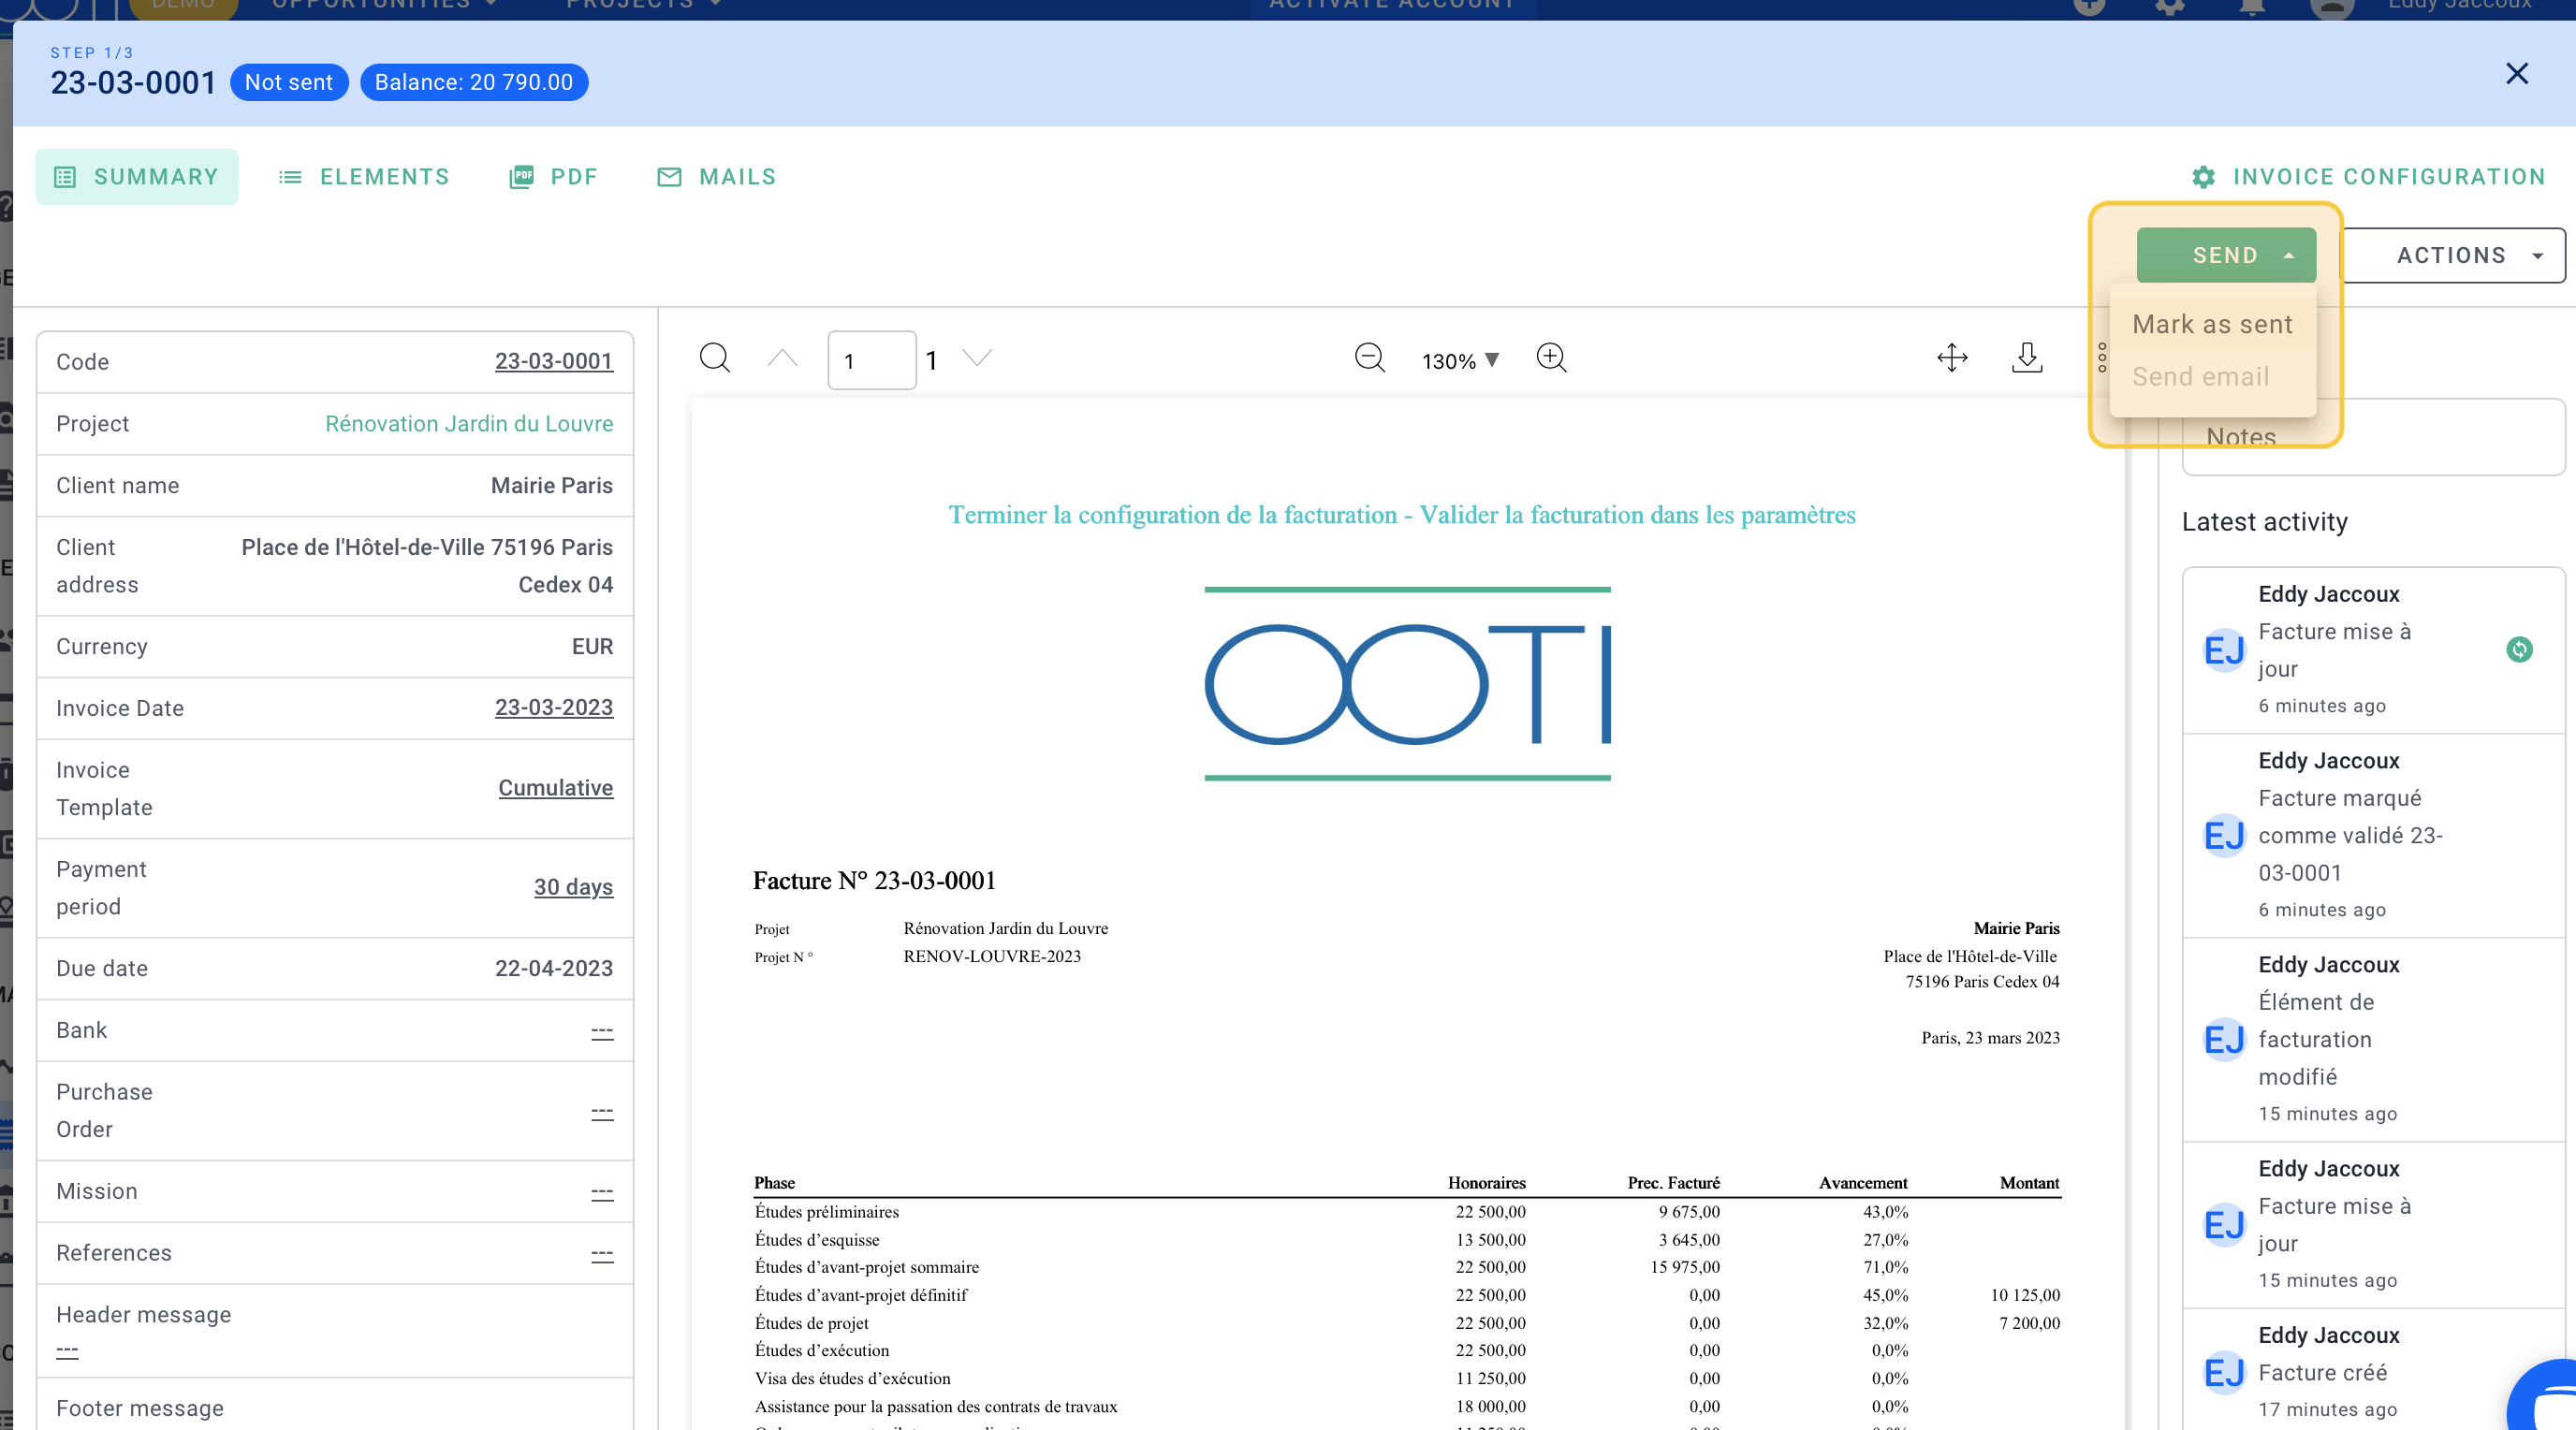
You will no longer be able to modify the invoice, especially regarding the phases and amounts. Click on OK to confirm.
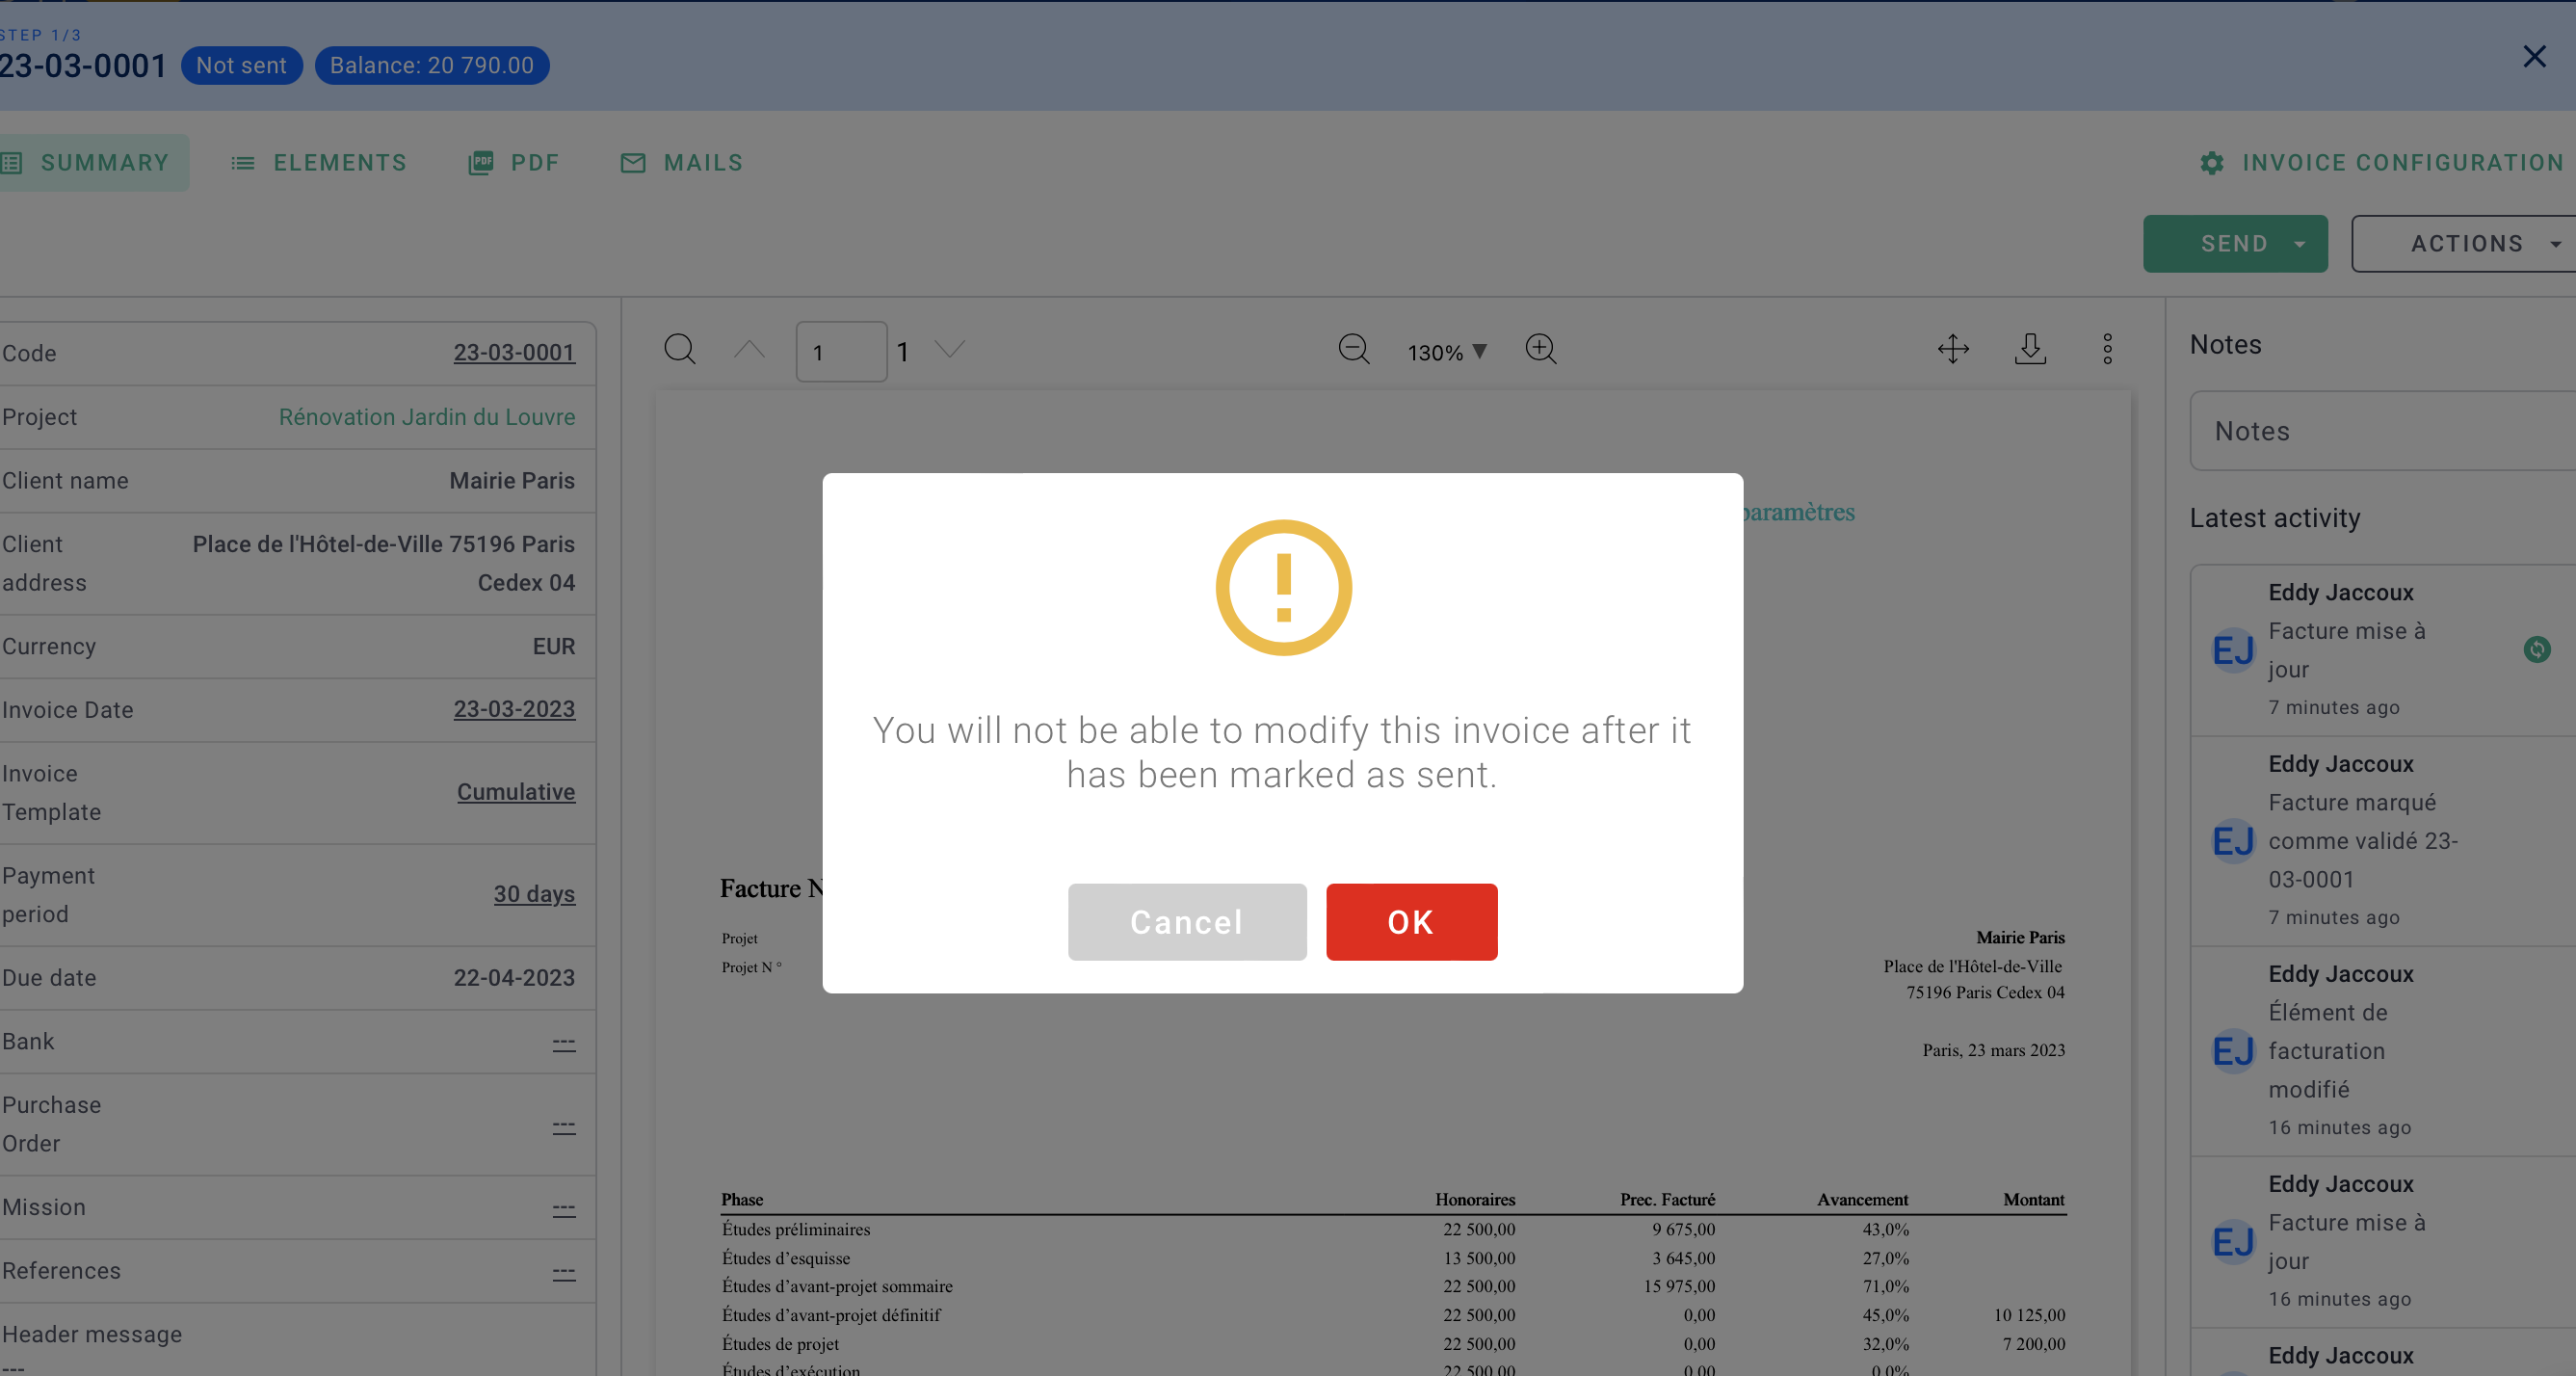
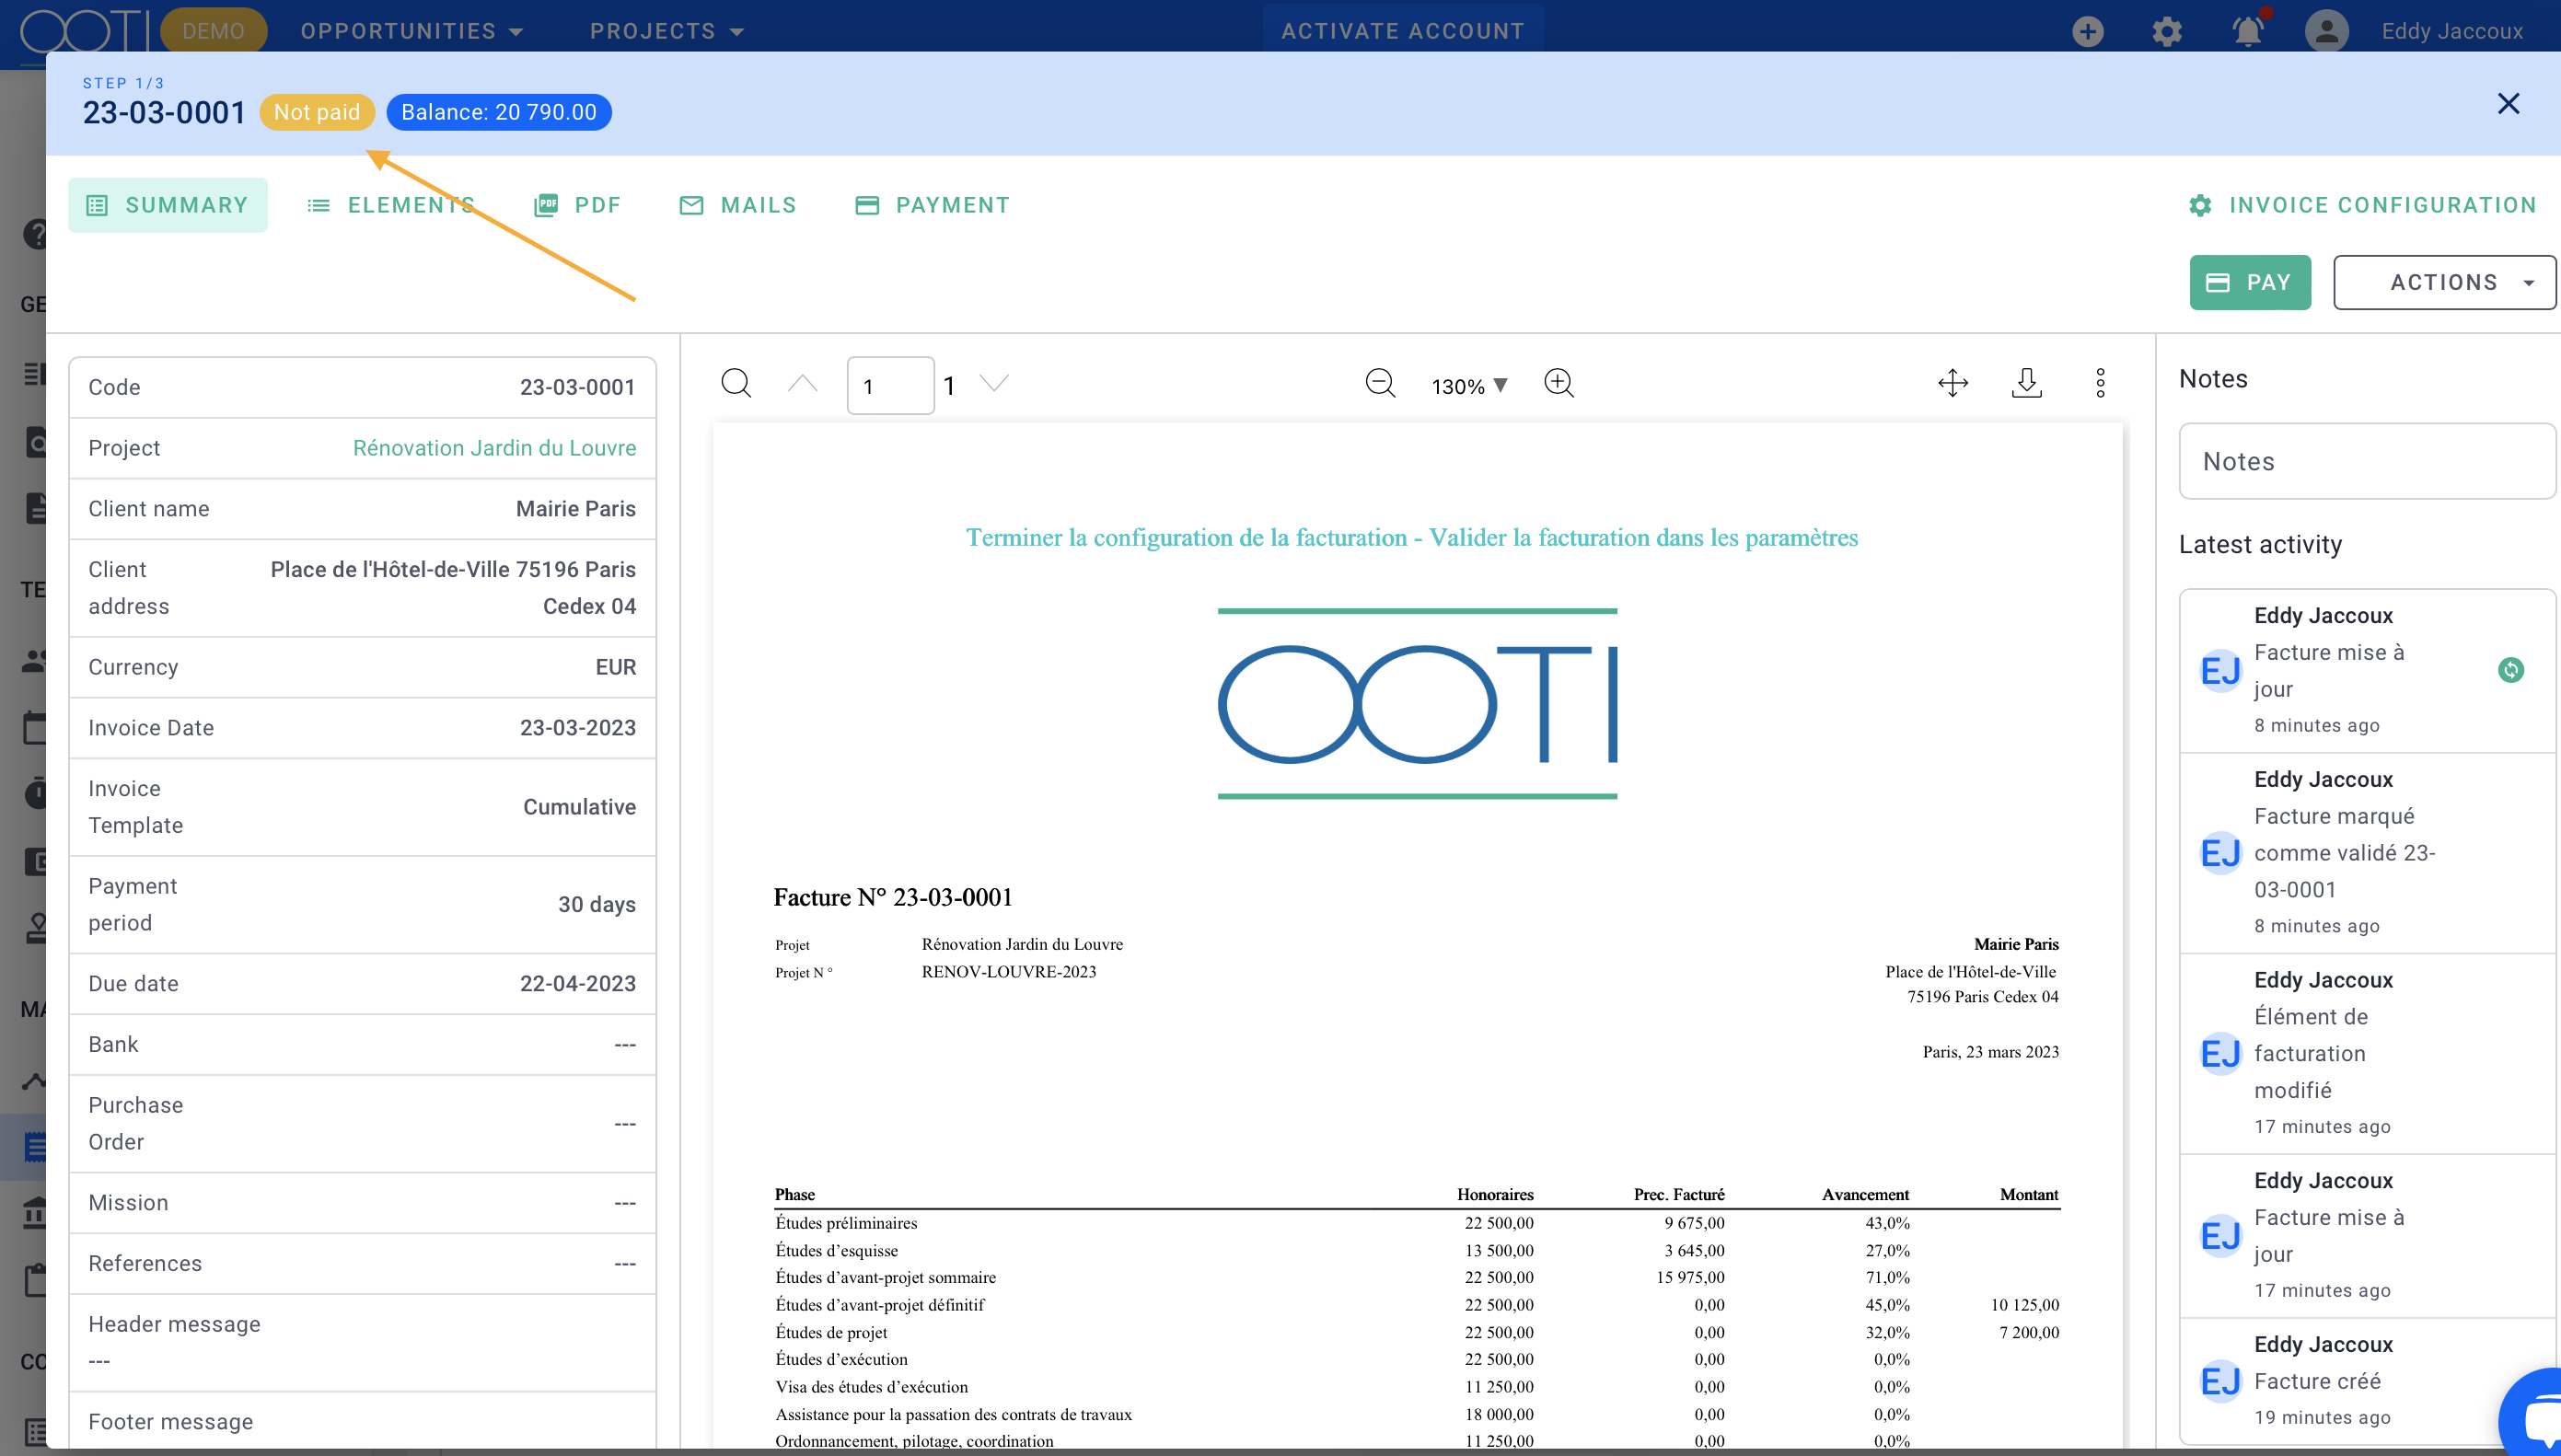
The invoice is now marked as "Unpaid." The total amount of the invoice is recorded in the revenue of the project and the agency.
You can see the status in the invoice console.
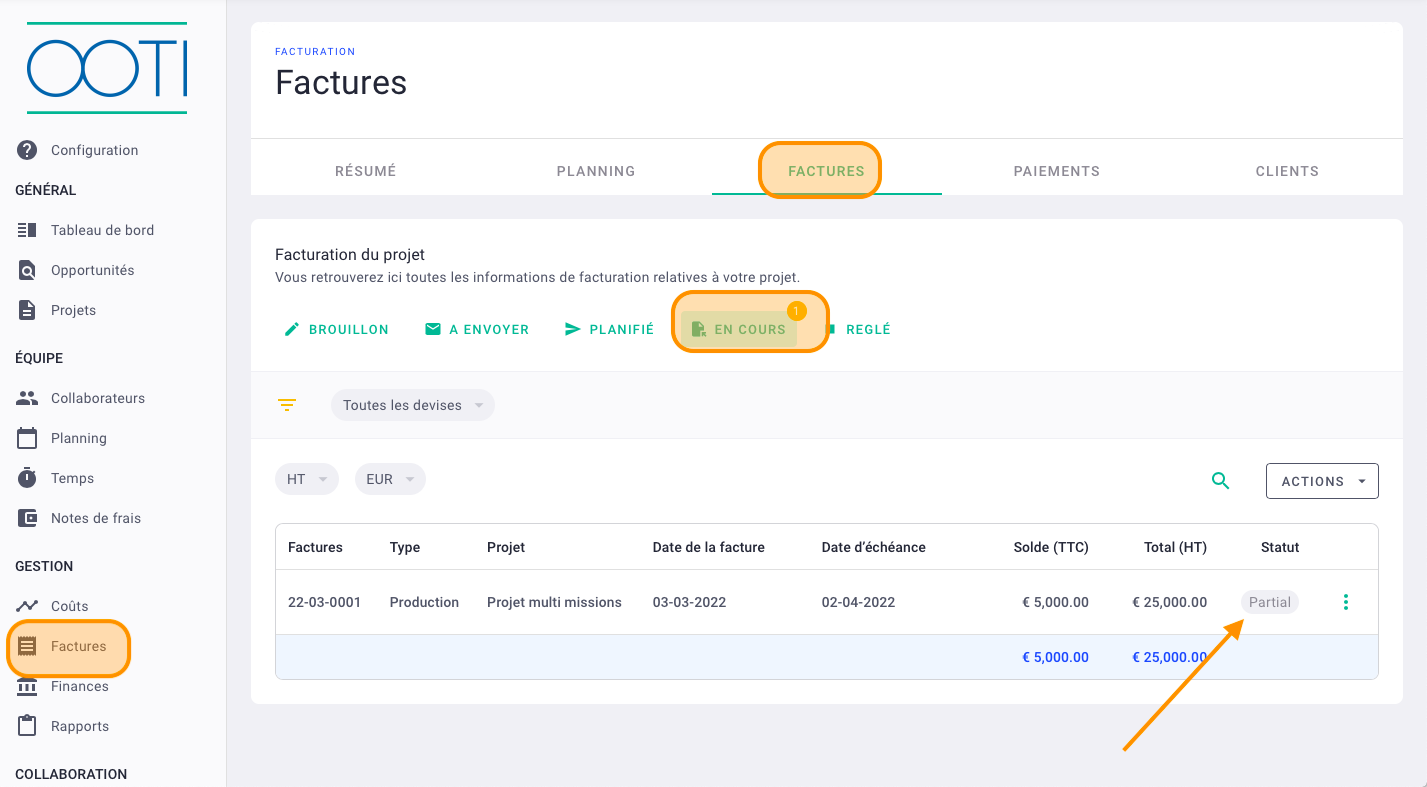
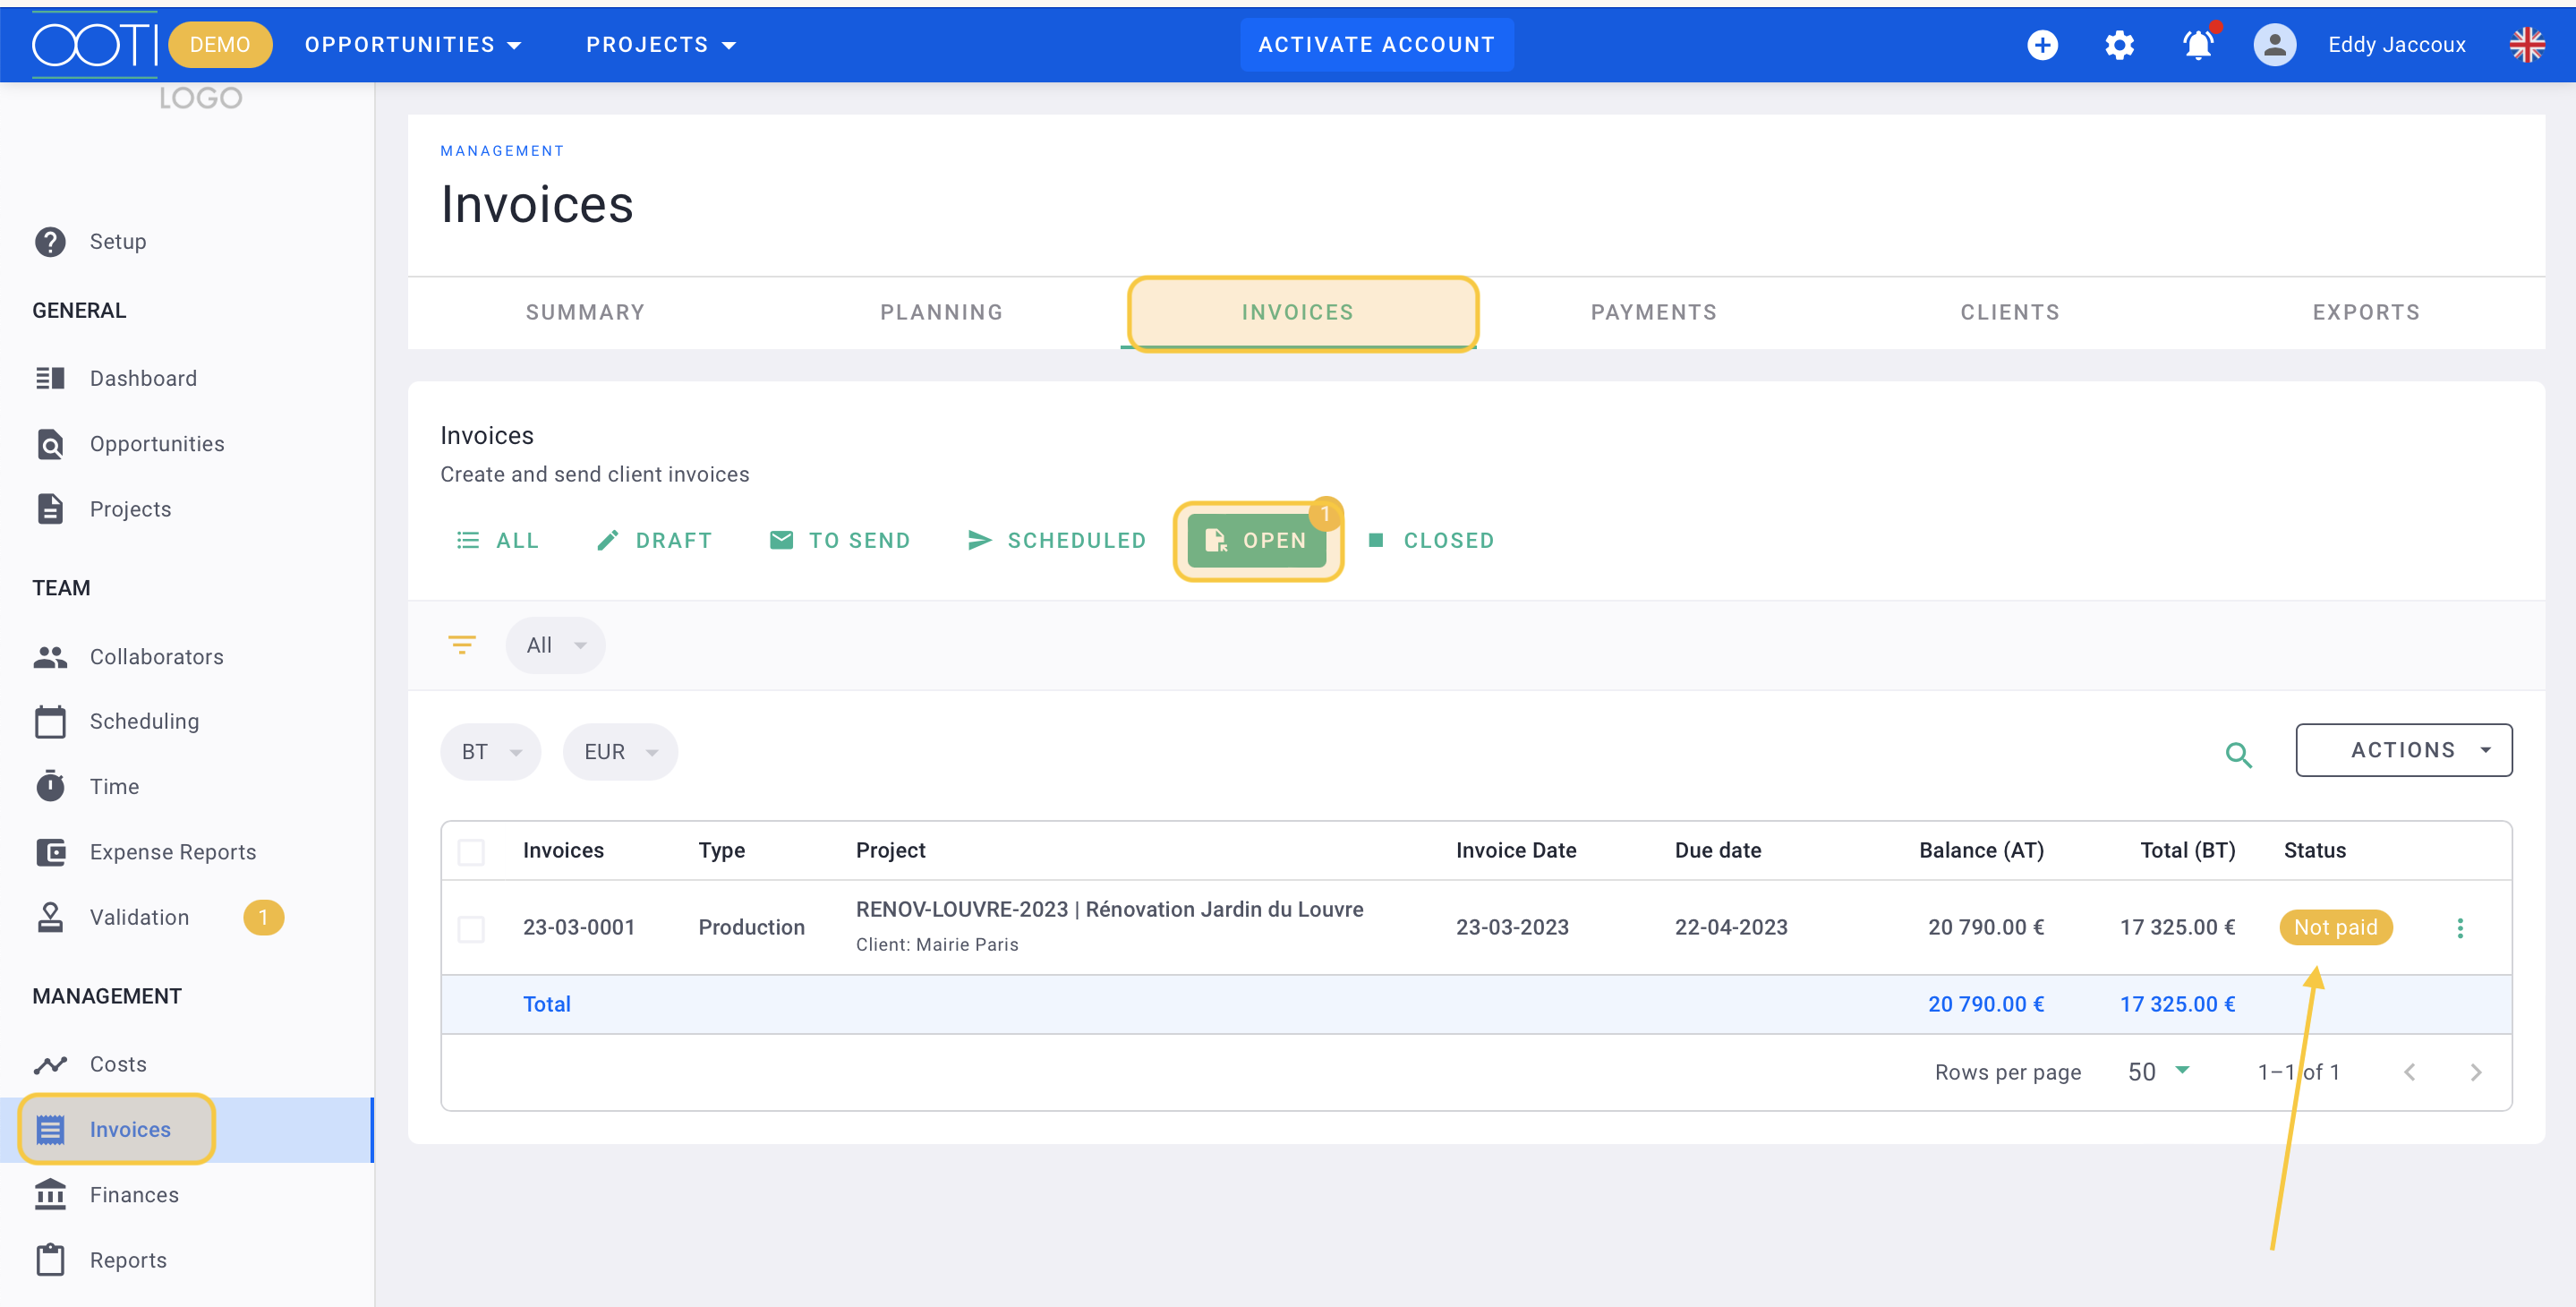
In the list of invoices under Billing > Invoices > In Progress, the unpaid invoices will have the status "Unpaid." This status indicates that the payment for these invoices is still pending.
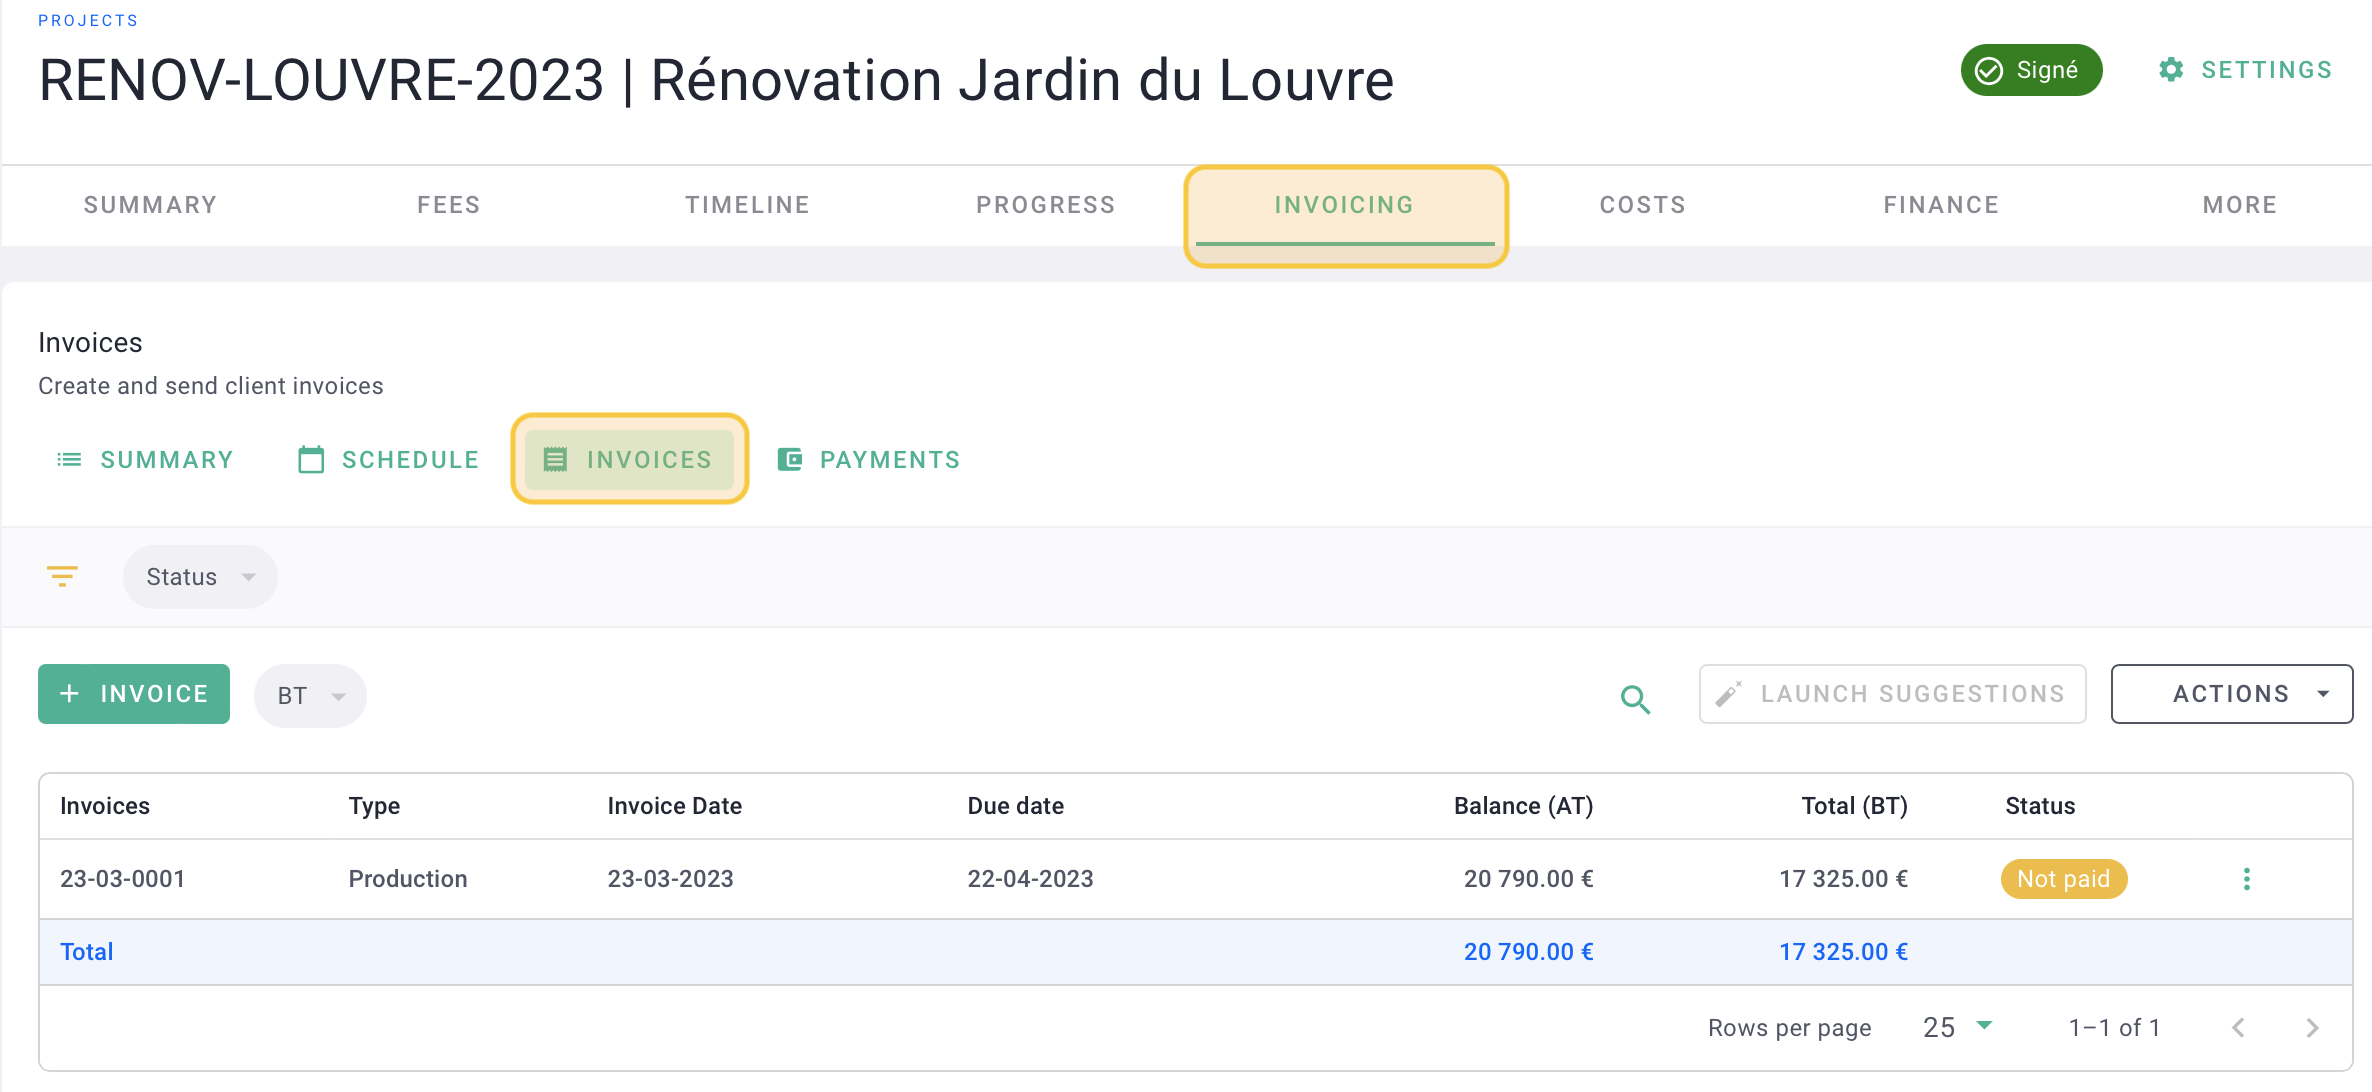
You will find the invoices related to the project by going to the project and then navigating to Billing > Invoices. This will show you a list of all the invoices associated with that particular project.
V/ Invoice payment
Your invoice is currently marked as "Unpaid," and it will automatically change to "Overdue" beyond the due date.
If the invoice is paid, you should record the payment in the system to update the status accordingly.
1) Full payment
In Invoices menu > Progress tag > Open tag, click on the options "..." > Pay the invoice.
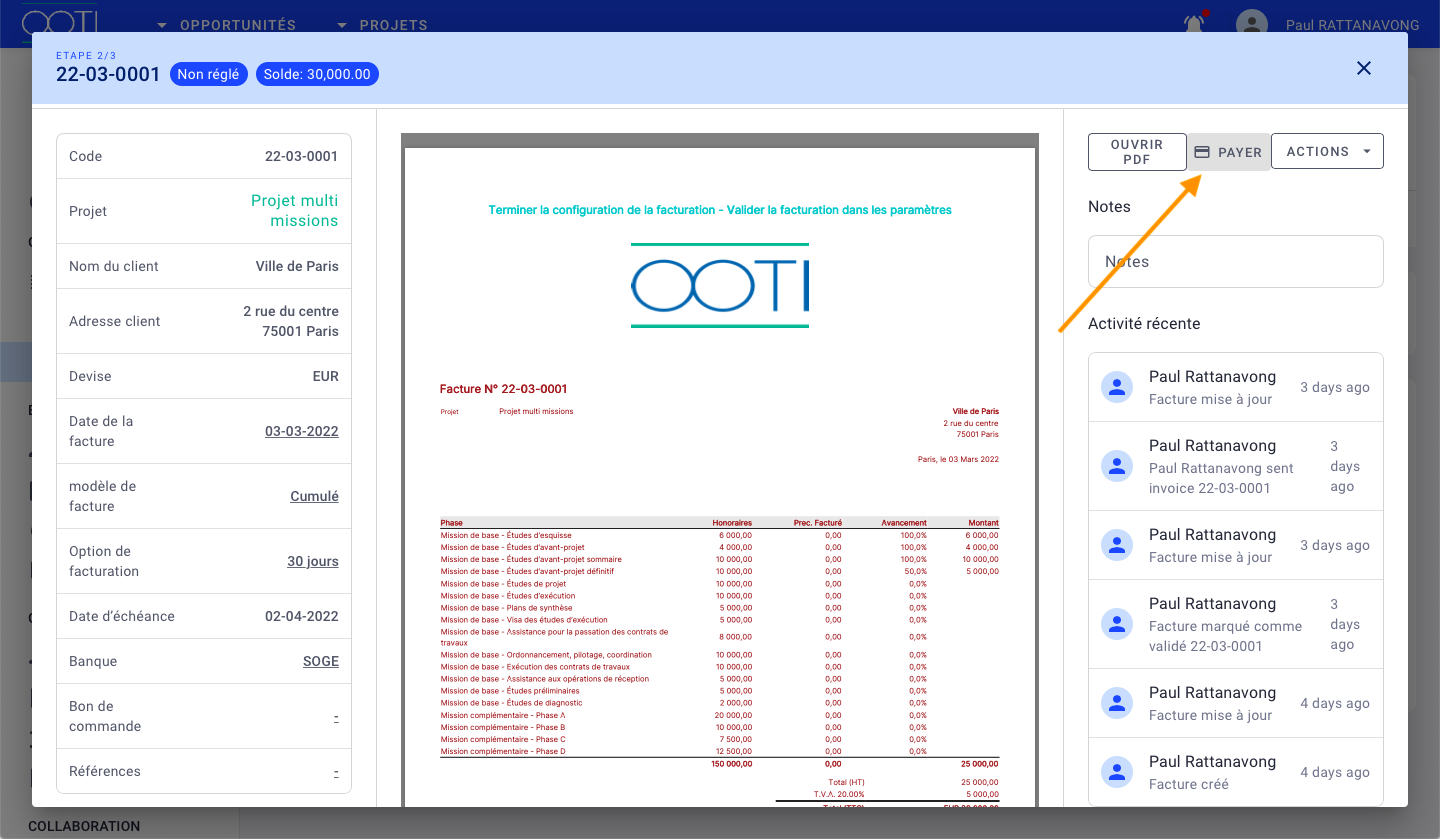
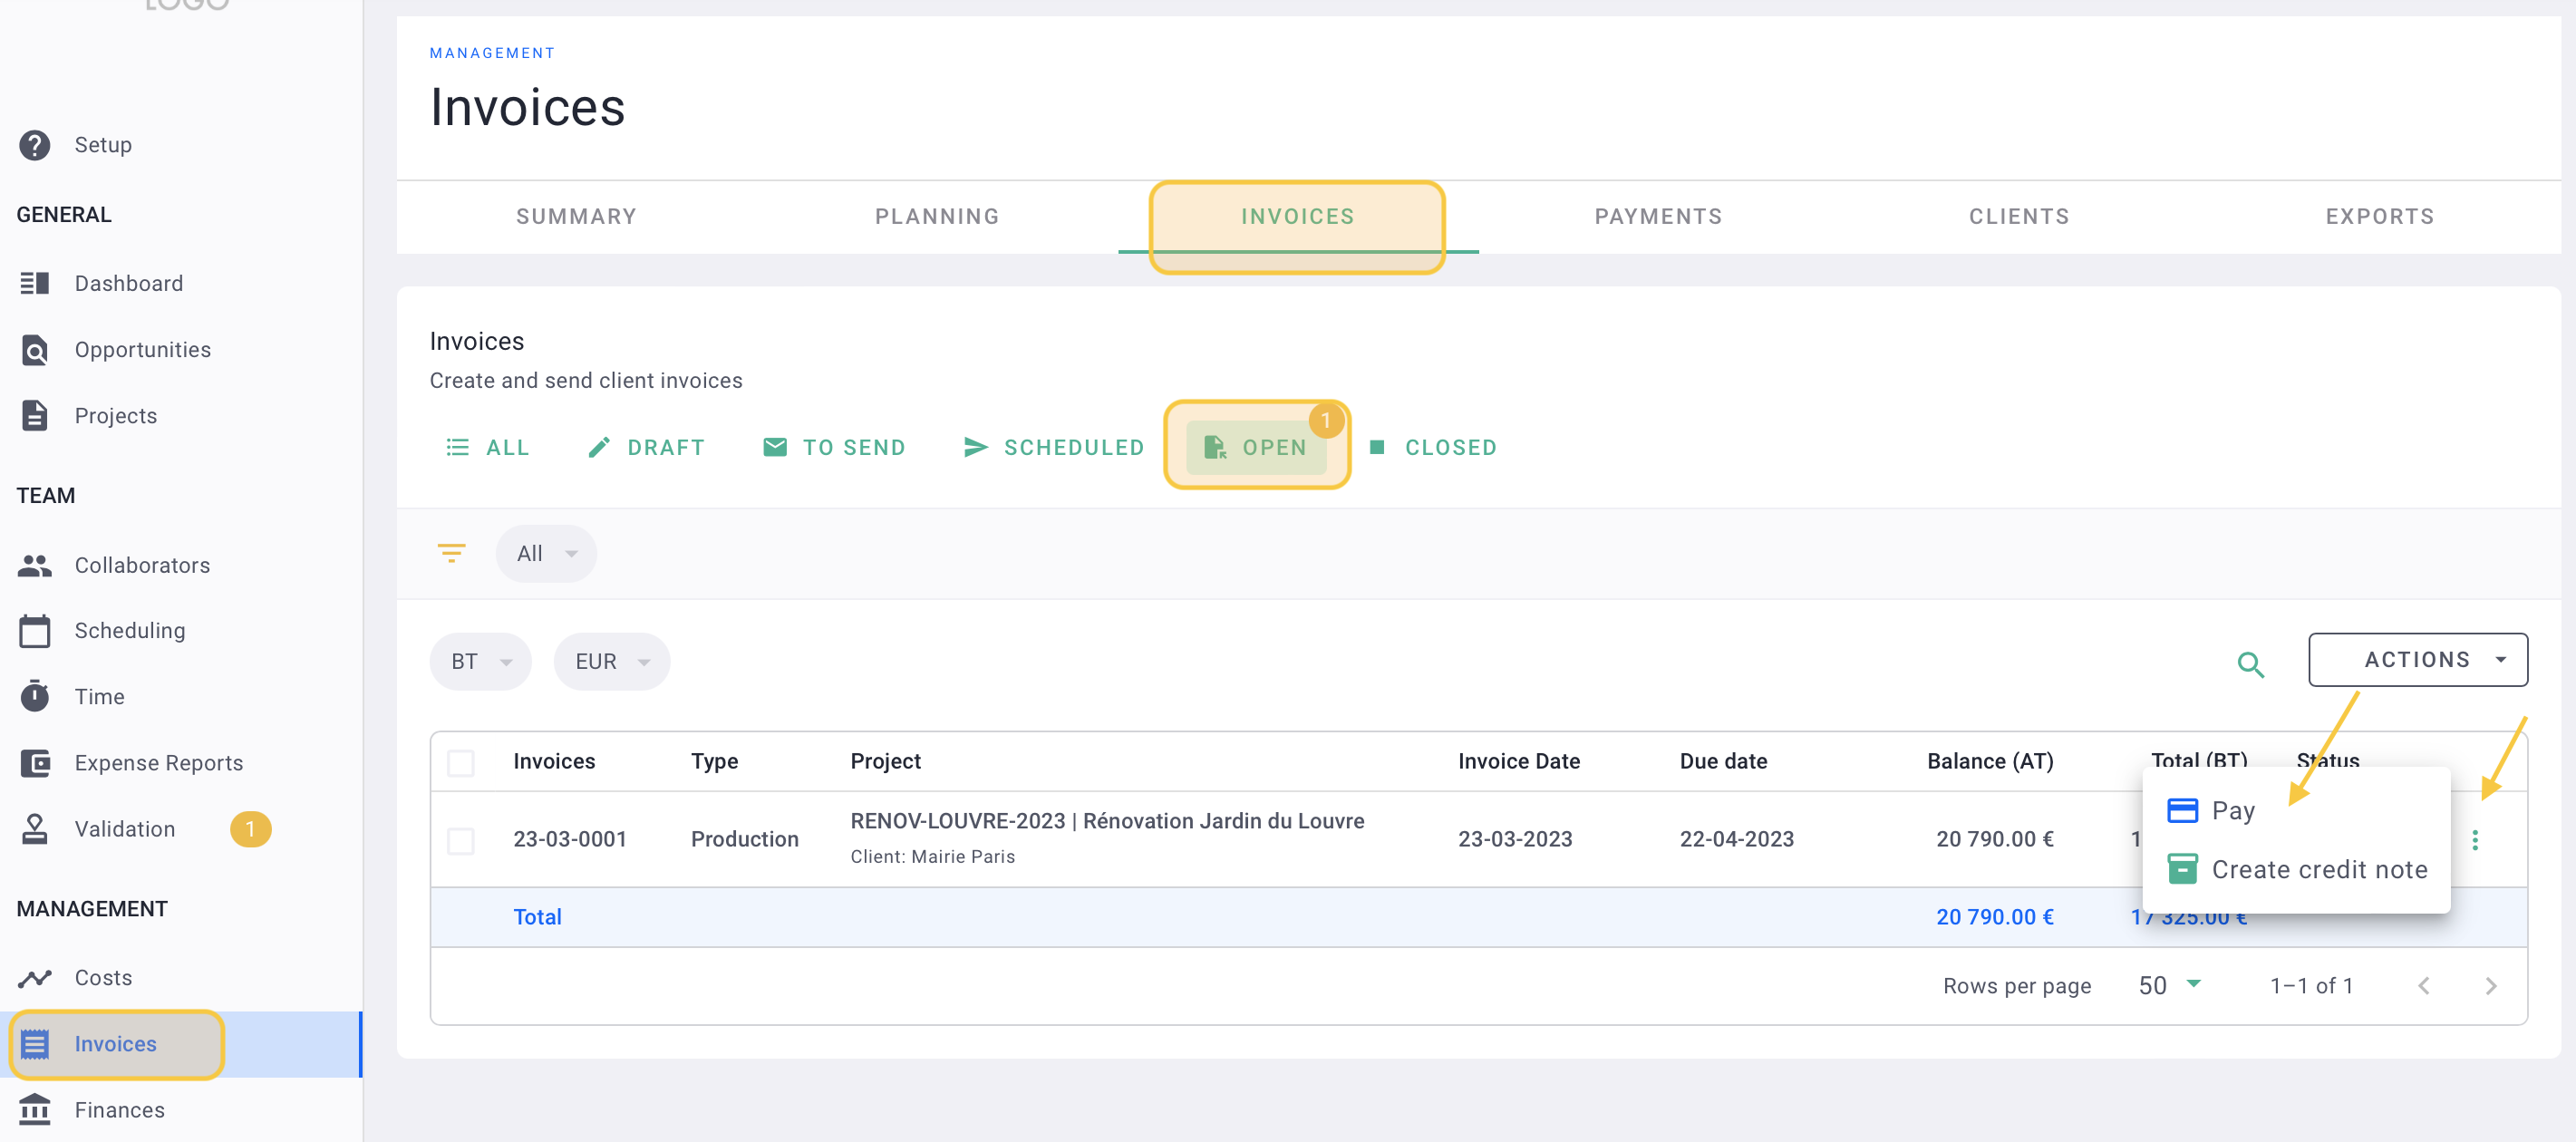 Otherwise, in the invoice details, click on "Pay." This action will allow you to record the payment for the invoice.
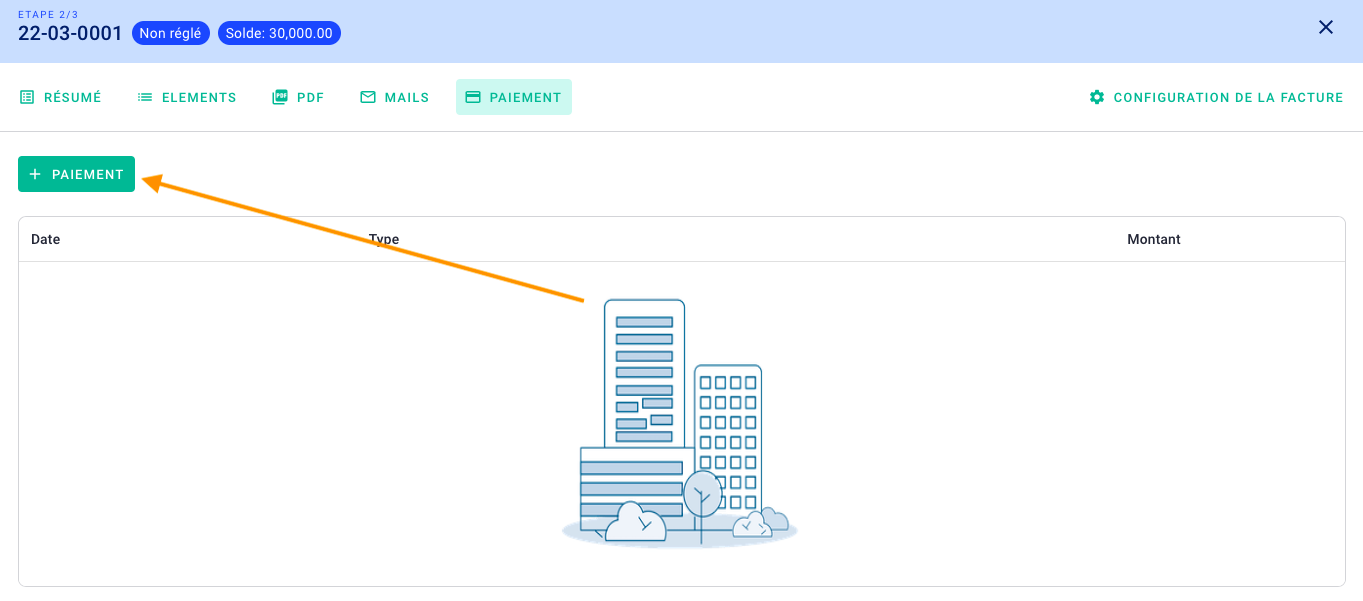
Then click on + Payment.
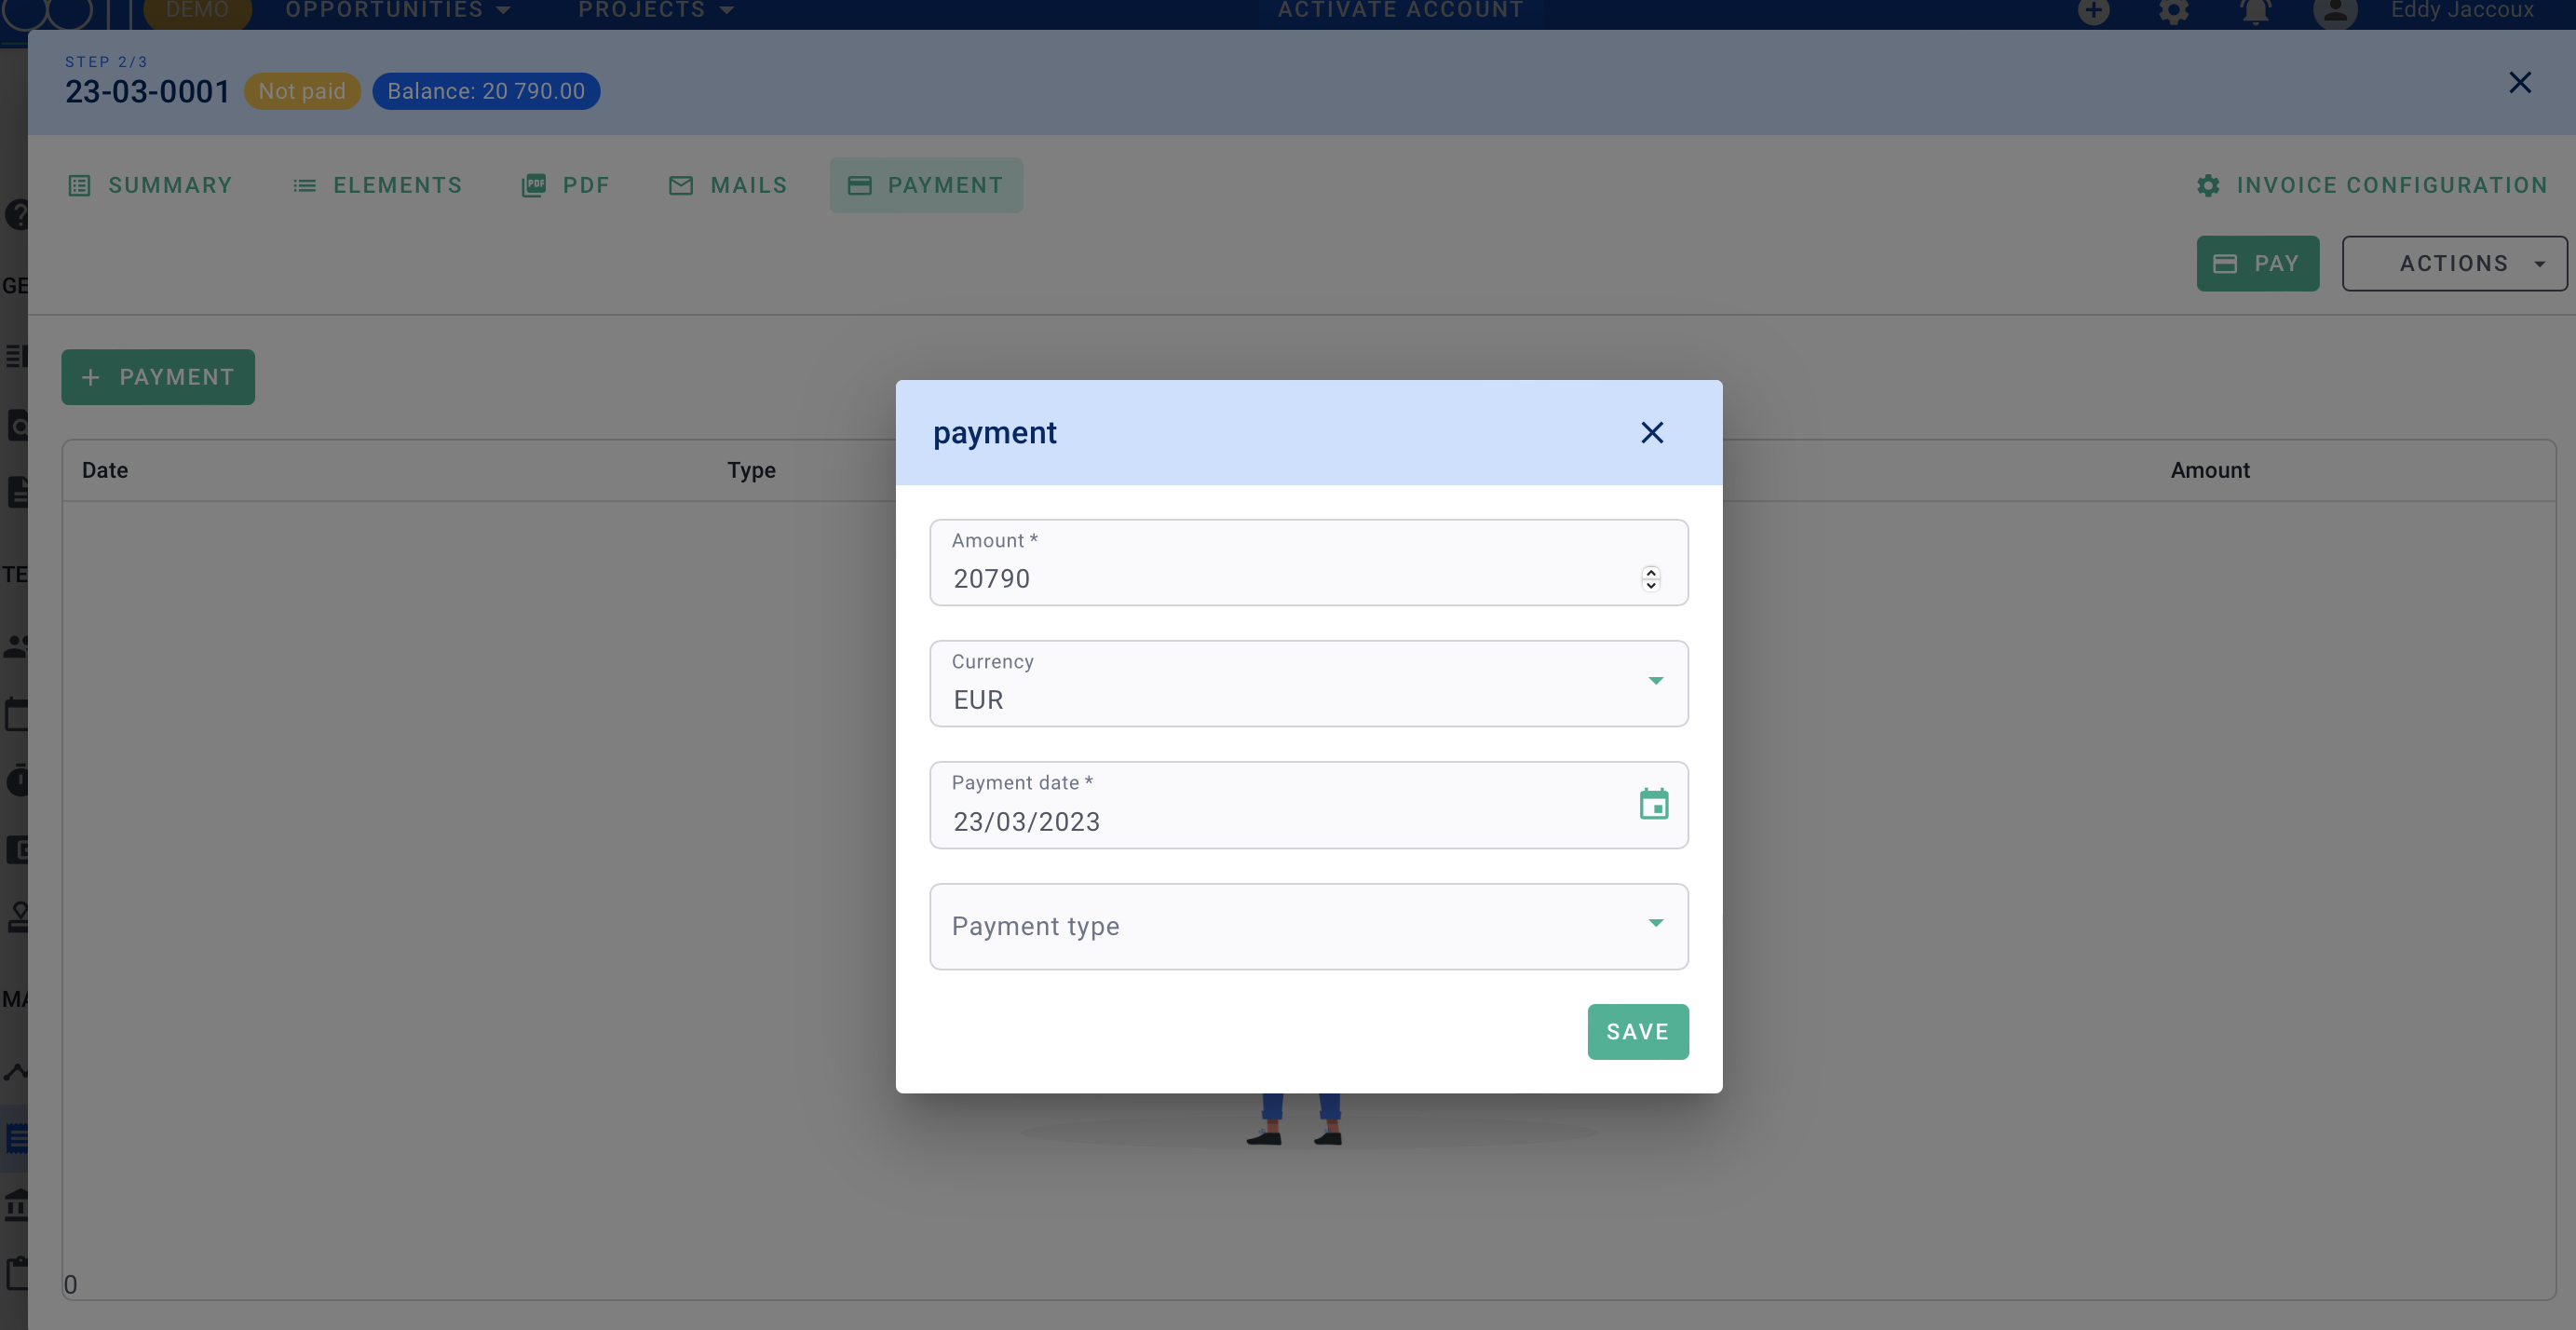
In the window, enter the amount in VAT-inclusive (TTC) value. By default, the total amount in VAT-inclusive is displayed.
Select the currency, payment date, and payment type, then click on Save to record the payment.
Great! Your invoice is now marked as paid. 🤑
You will see the payment associated with the invoice in the Payments tab.
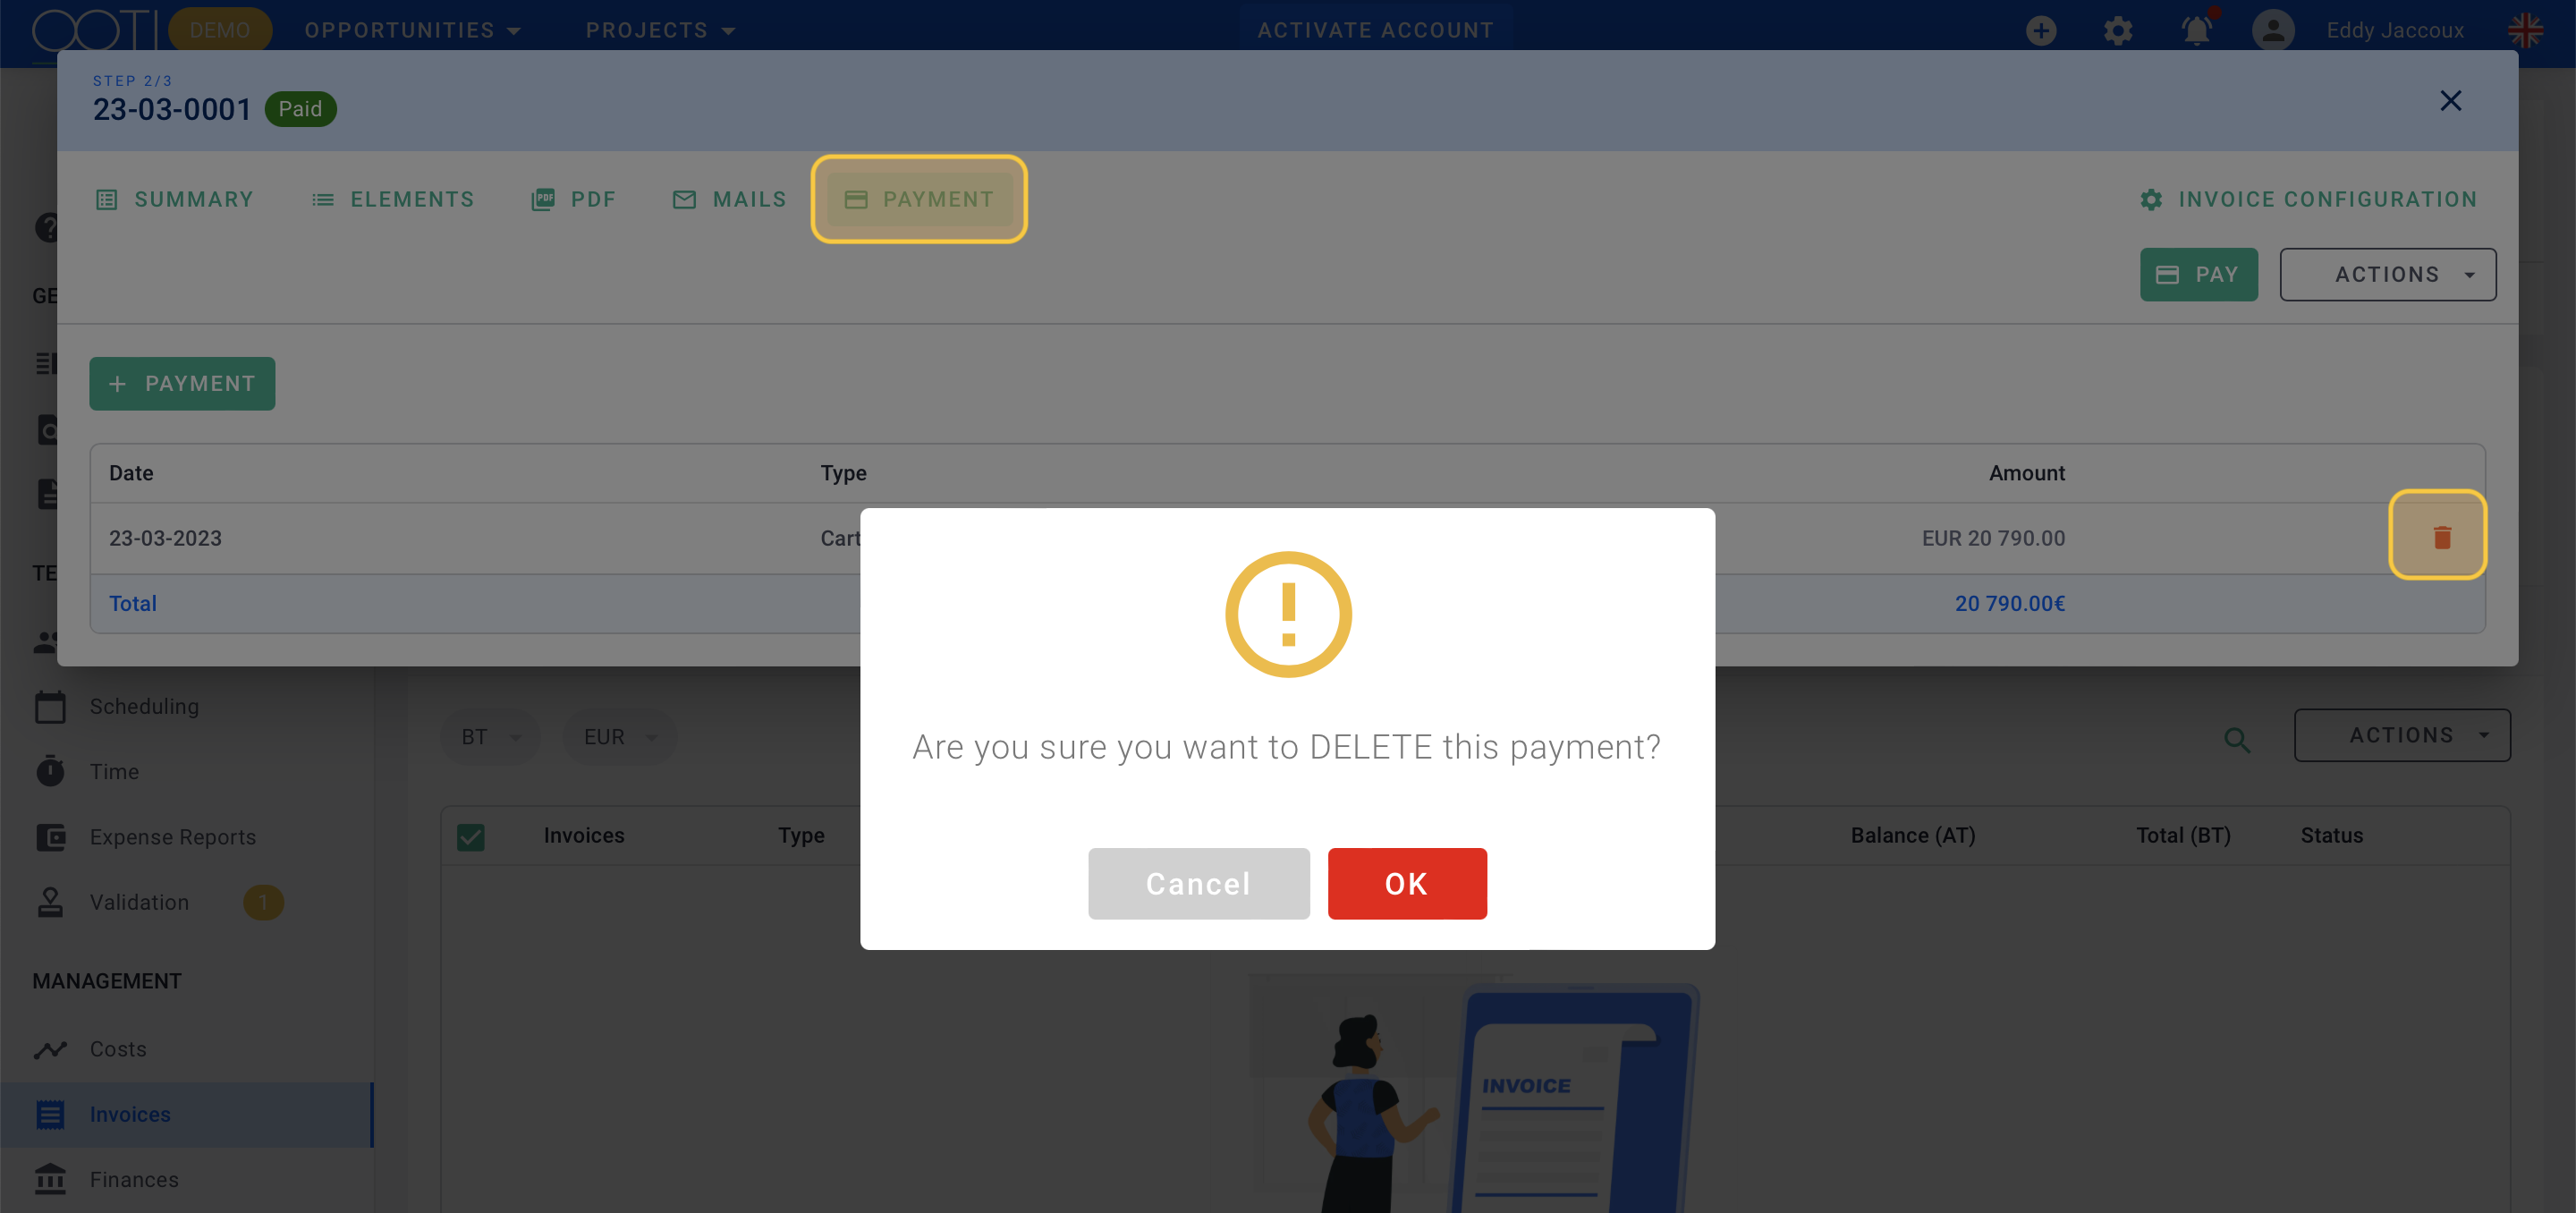
To delete a payment, click on the payment entry, and then click on the archive icon to remove it from the records.
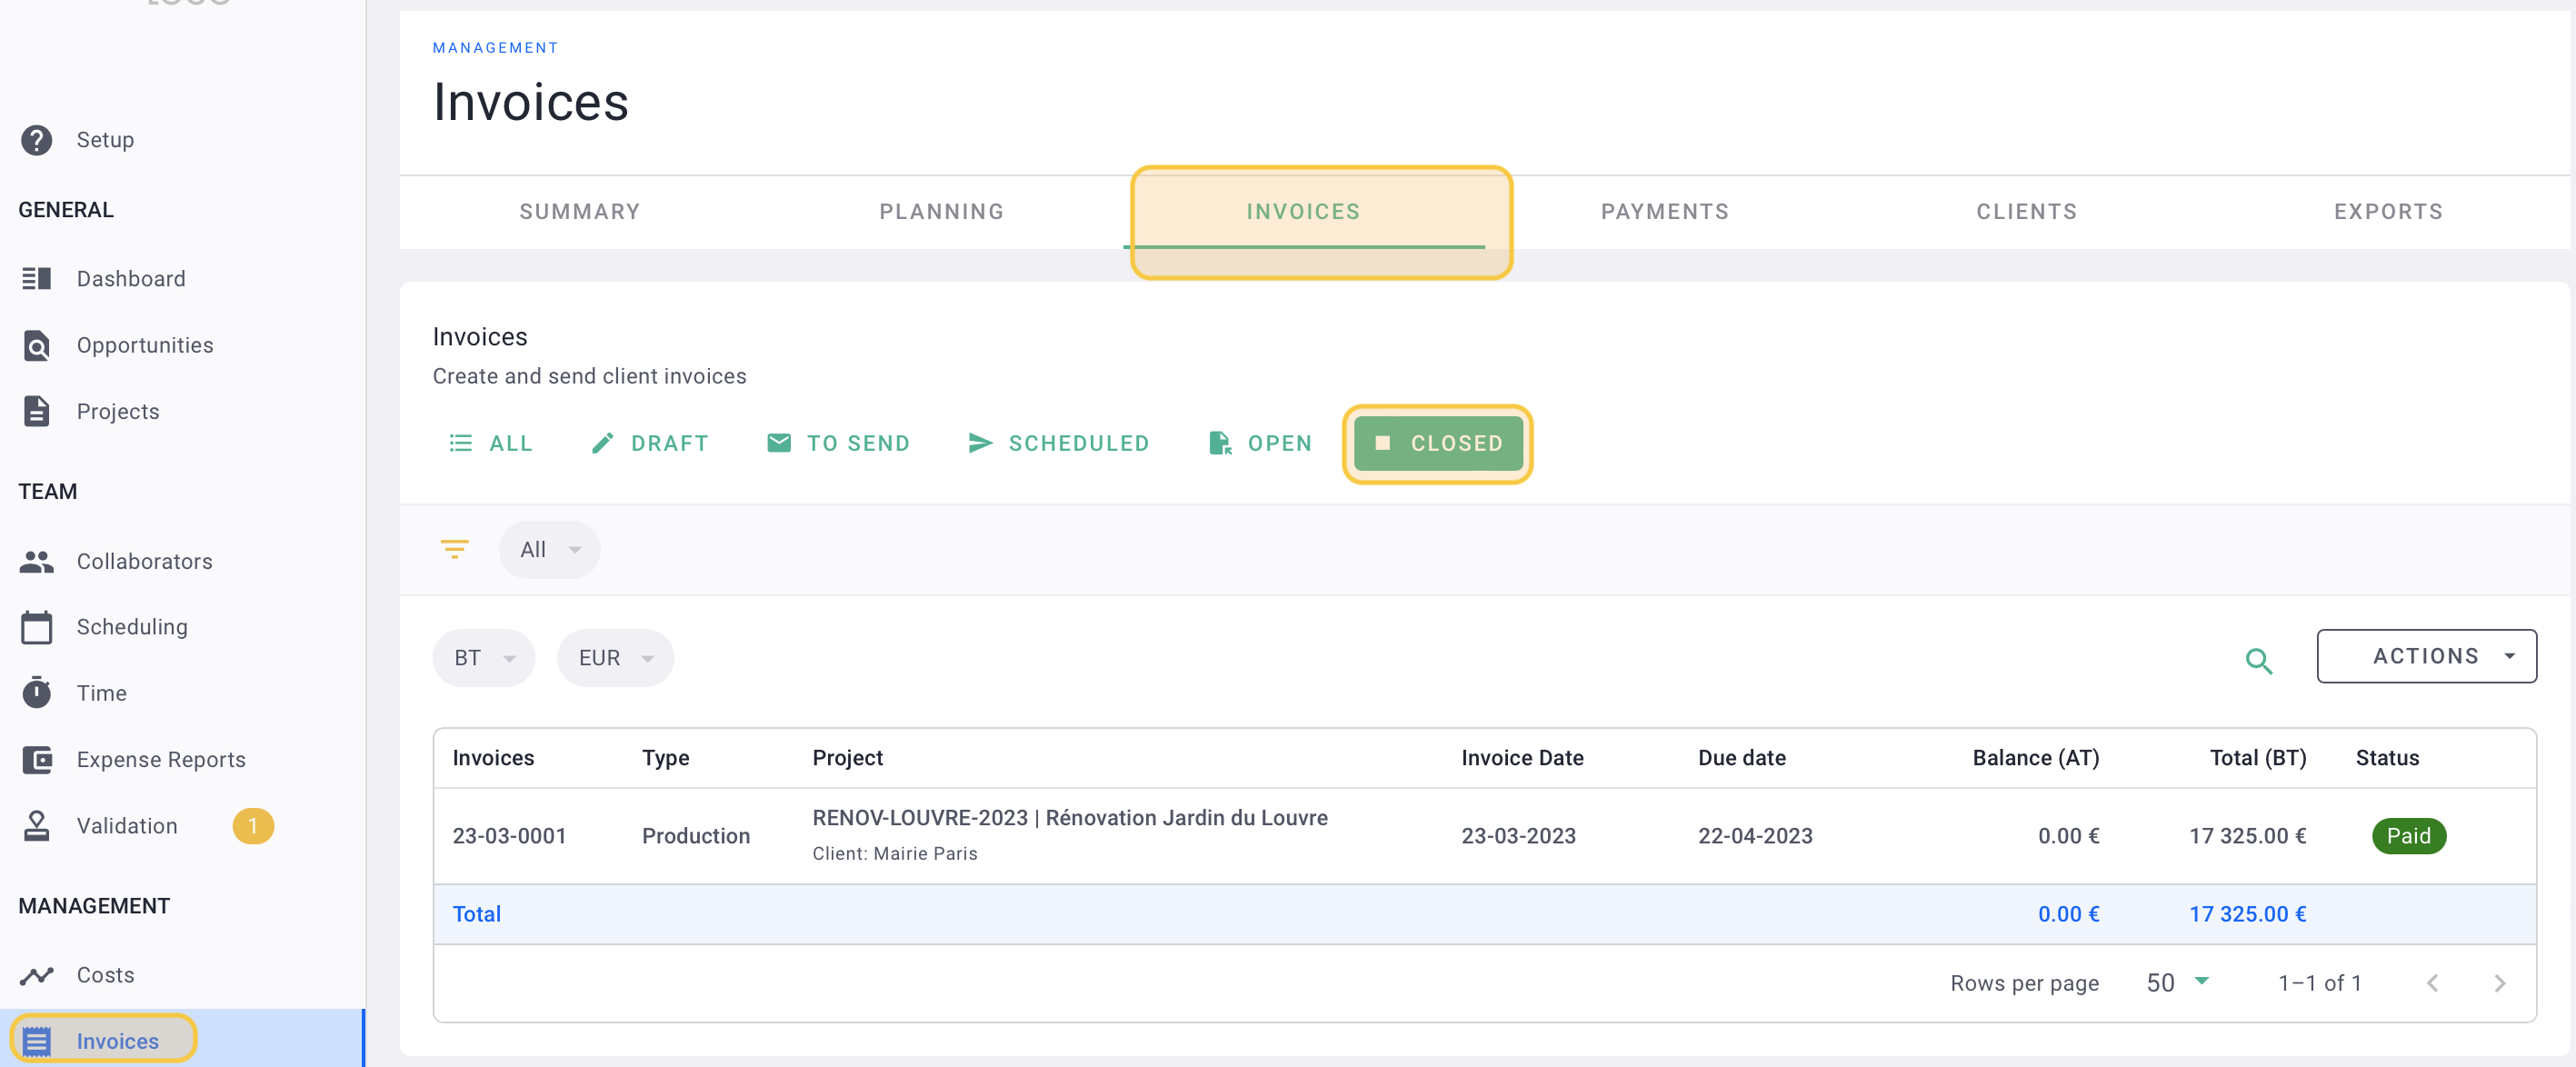
You will find all the paid invoices in Billing > Invoices > Paid.
2) Partial payment
When you make the payment for the invoice, you can modify the VAT-inclusive (TTC) amount paid by the client, for example, to 25,000€ TTC instead of the total 30,000€ TTC.
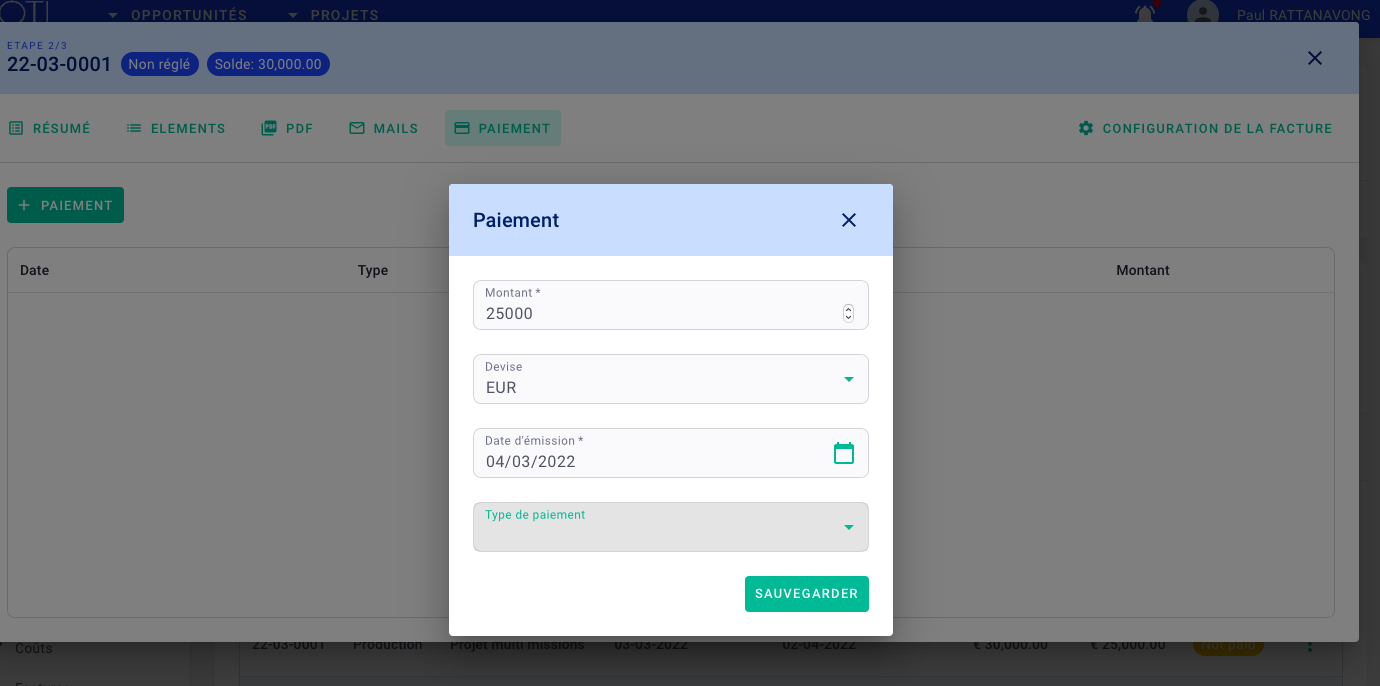
The invoice will then be in a "Partial" status.