
Here’s how to manage and customize your production schedule and track progress. Discover the new version of the production schedule!
✅ You must first create a project and phases
🔓 Required Permissions
Project: Manage phases, manage progress
| Reading time | 4 min |
| Setup length | 5 min |
| Steps | 2 |
Summary
I/ How is my timeline generated?
II/ Entering production progress
I/ How is my timeline generated?
First, enter start and end dates for the entire project.
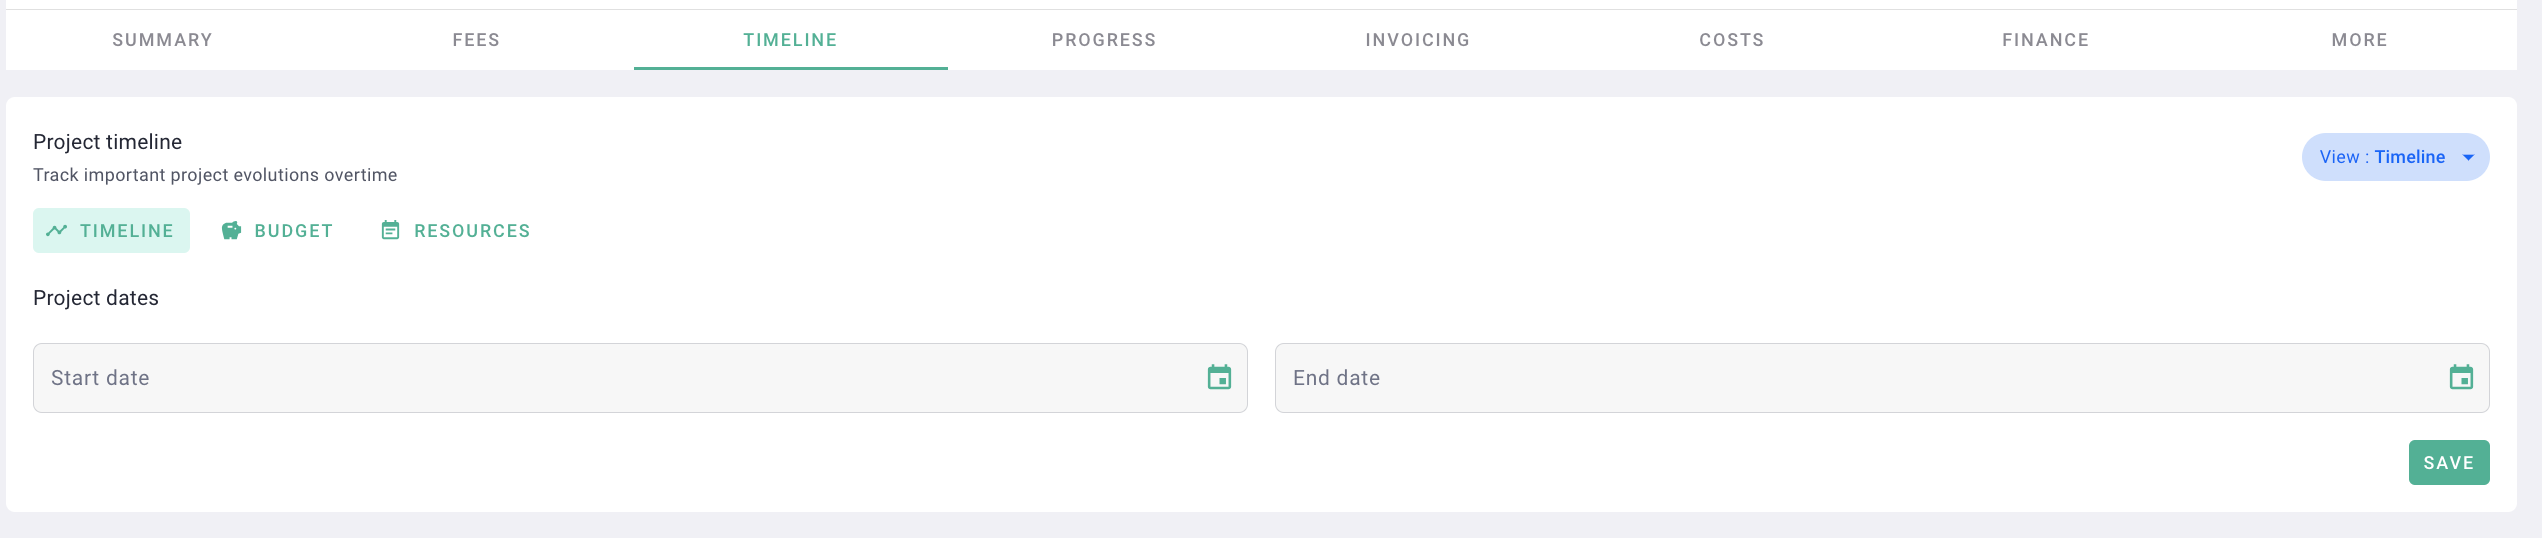
Note that the production timeline is generated by default based on the percentage of fees allocated to each phase relative to the total duration of the project.
Example: For a project with a total duration of 10 months, 14 phases, and €1,000,000 in fees, here's how we've allocated our fees across our phases:

Let's take the third phase, for example, "Preliminary Design Study." It represents 10% of the total fees, which equals €100,000. Since we've allocated it 10% of the fees, it will take up 10% of the total project time, which is one month = 30 days.
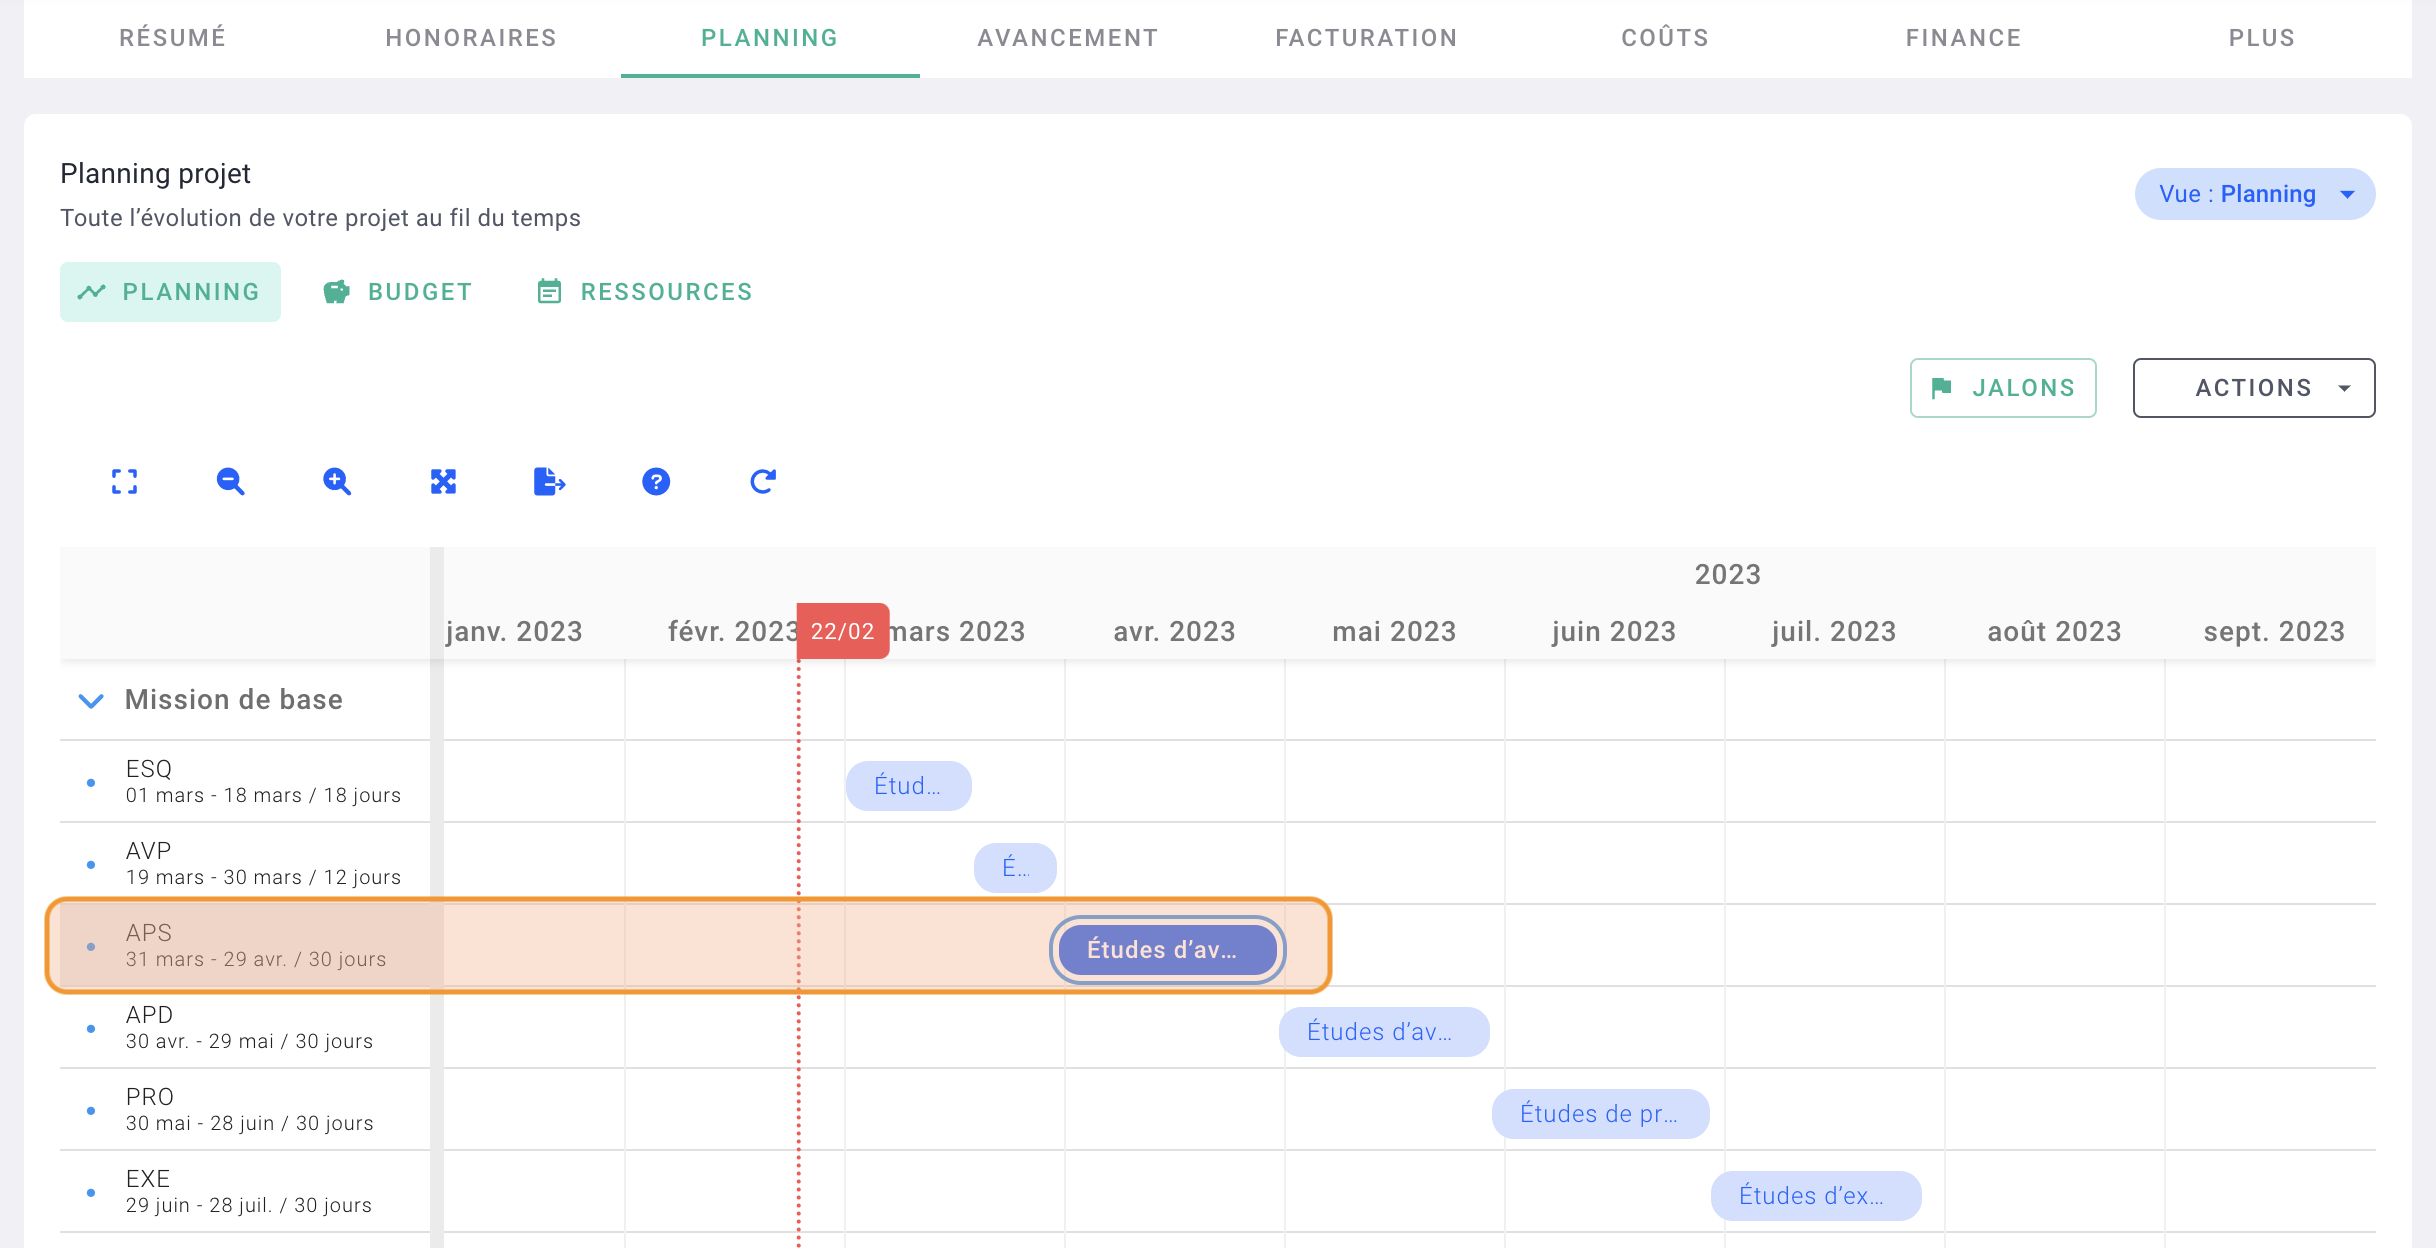
This timeline is generated by default based on the ratio of fees allocated to each phase, but it's customisable at any time.
You can click on the edges of the phase to modify its duration, or you can click and drag it to the right or left. To precisely adjust the dates, double-click on the phase.
II/ Entering production progress
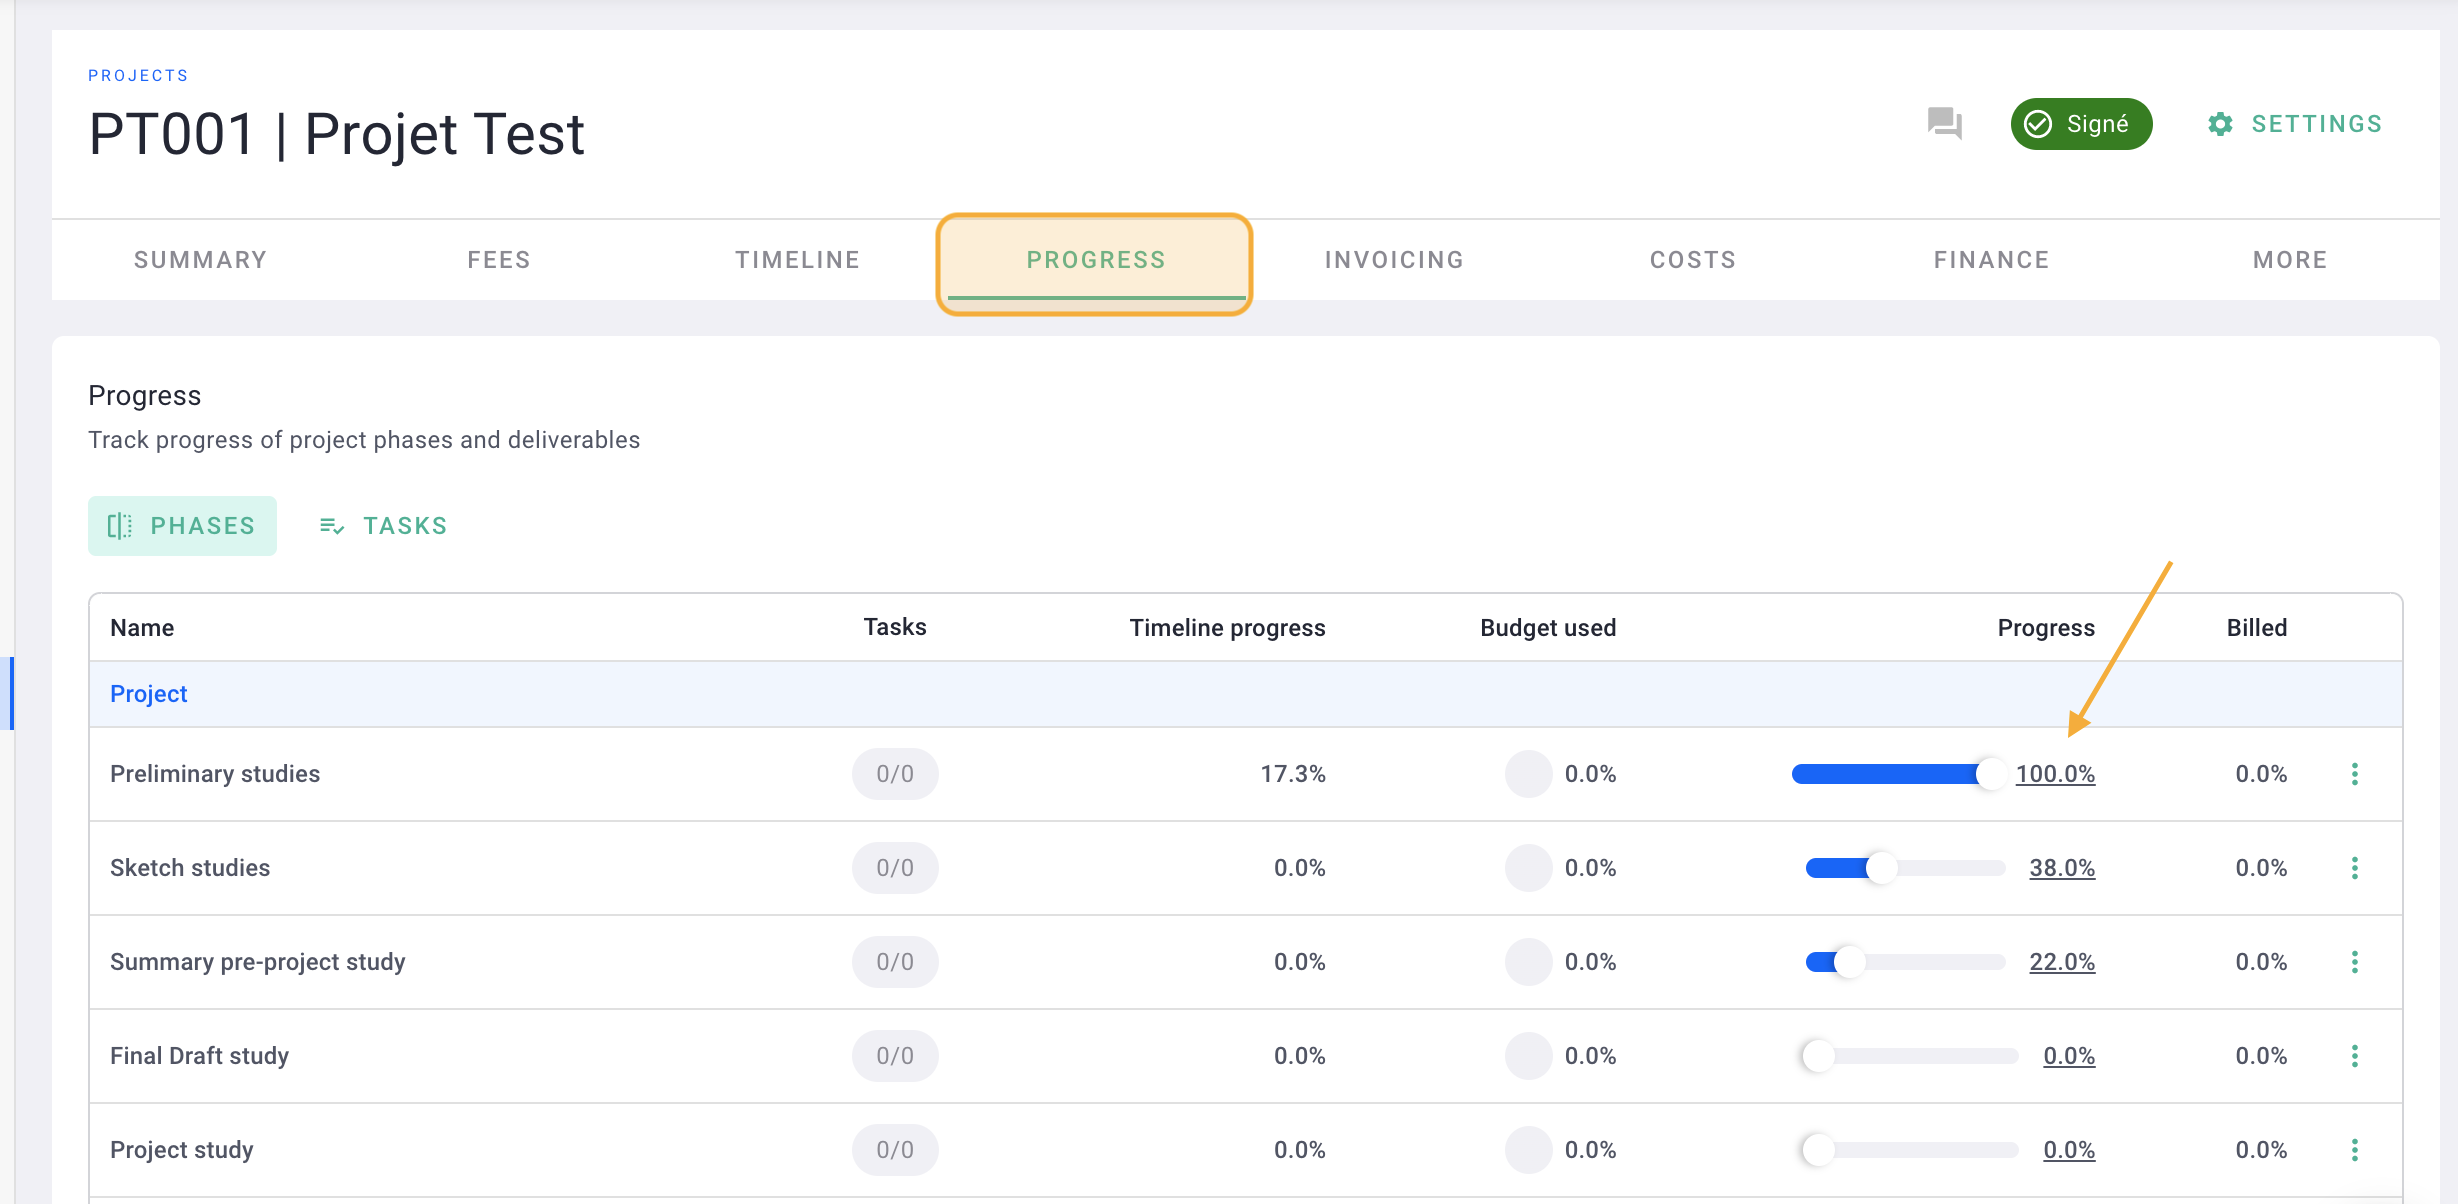
Production progress is managed using the slider, but it's worth noting that you can manually enter production progress if the slider isn't precise enough. To do this, click on the percentage.
Progress = the manufacturing/production of the project per phase = billable
If a phase is completed, you'll update the progress, which will unlock an amount that can be billed to your client.
Here's an article on the billing timeline correlated with production.
To do this, go to your project > progress.
The production progress of your phase is up to date. 🎉