
Use time budgets to generate an accurate schedule of your resources per day.
✅ Create your agency's roles, determine their billable rates, and assign collaborators to those roles.
🔓 Permissions required
Team: View Resource Schedule + View Billable Rates + View Resource Schedule + Manage Resource Schedule
Project: View Fees + View Project Members + View Resource Schedule + Manage Resource Schedule + View Budgets + Manage Budgets + Manage Planned Costs
| Reading time | 5 min |
| Setup length | 2 min |
| Steps | 2 |
Summary
I/ GENERATE A SCHEDULE BASED ON THE BUDGET
II/ NAVIGATE ON THE PLANNING
III/ CREATE AND MANAGE PERIODS
I/ GENERATE A SCHEDULE BASED ON THE BUDGET
In this article, we will see how to generate a resource schedule according to the budget (see the article to create your budget)
⚠️ Conversely, if you want to generate your budget from your resource schedule, see this article.
In the project tab "planning" > "resources", click on "actions" > "calculate the resource schedule according to the budget".
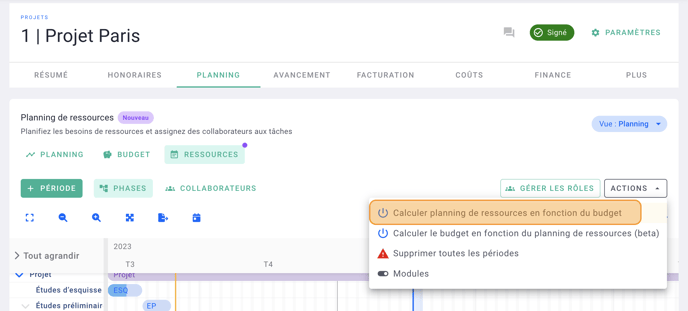
Your resource schedule is generated according to the budget.
II/ NAVIGATE ON THE PLANNING
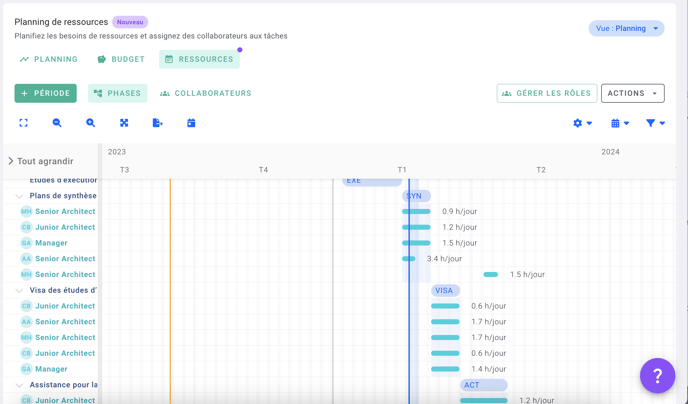
Once on the schedule, you will have the opportunity to zoom in on a specific period. To do this, drag and drop your mouse on the desired calendar duration.
Periods automatically generated by budget synchronization appear in blue. This indicates that the allocations for each period is in the budget, which is normal in this case of resource planning creation.
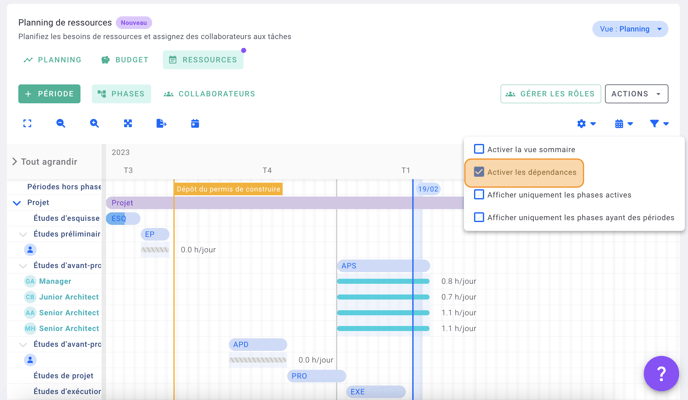
Different views will be available once on the schedule. To access it, you can click on the blue gear at the top right of the schedule and tick the view you want to display :
- A brief view (a summary view of all periods on the project)
- Show only the active phases
- Display only phases with periods
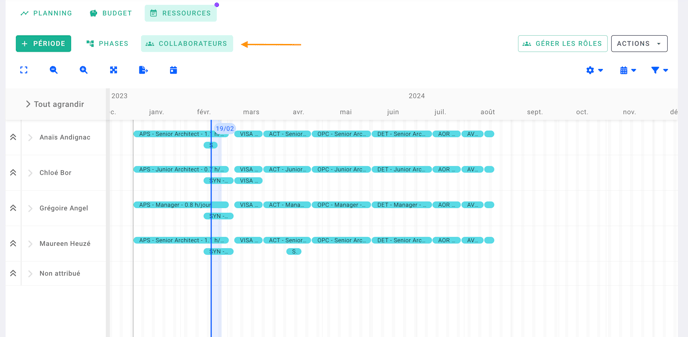
You will also have the opportunity to have a view of this resource schedule by employee and not by phase. To do this, click on the "collaborators" tab.
The resource schedule is also available in 4 different views :
- Planning
This view is the default view of the resource schedule
- Table
This view contains the same data as the planning view but as rows
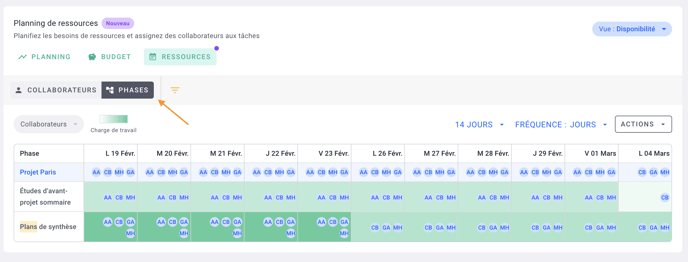
- Availability
Allows you to indicate the workload of your employees and identify their availability.
You can change the unit filter to pass from hour to day. Also, you can have the details of the availability of each employee by clicking on the amount of hour or day on a line.
You can view the workload of your employees by phase by clicking on the "phases" tab.
- Stats
On this view, you have access to data about budget consumption by entering time of your employees.
To make it more visible to you, you can also change the filter of the units to pass them in hours, days or EUR.
III/ CREATE AND MANAGE PERIODS
1/ Create a period
If you generate your resource schedule based on a budget, it is not recommended to create periods and remove synchronization by the budget on your periods.
However, it is possible to do so to add an unscheduled period to the original budget. There are four ways to do so :
- By clicking on «+ period» : to create a period without any pre-populated information in the modal.
- By double clicking directly on the fee phase or project : the dates and other information related to these elements will pre-populate the period to save time.
- By using the «drap and drop» in the schedule: the period will resume the information entered.
- By right-clicking on the phase in the left menu and then clicking on “add a period”, this method will create an unassigned period with the start and end dates of the phase in question.
If you add a period manually, it will be out of sync with the budget.
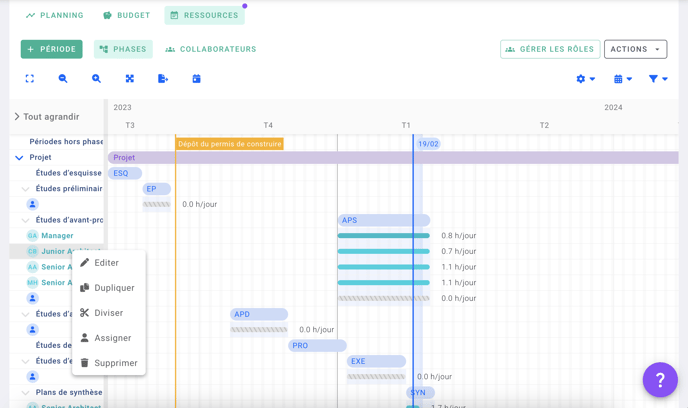
2/ Manage periods
There are several ways to manage your periods. By right-clicking on your period, you can :
- edit it : to access all the information of the period,
- duplicate it,
- delete it,
- divide it,
- reassign to another collaborator.
It is also possible to double click on a period to perform all these actions, or to right click on the role in the left menu.
💡 If one of the work periods is not assigned, it will appear greyed out. To assign it to an employee, double-click the period and select the employee concerned.
Attention, the collaborators that will appear in the dropdown menu will be those assigned to the role assigned to the work period. To assign the collaborator to the right role, go to the project settings > members and add the collaborator to the role.
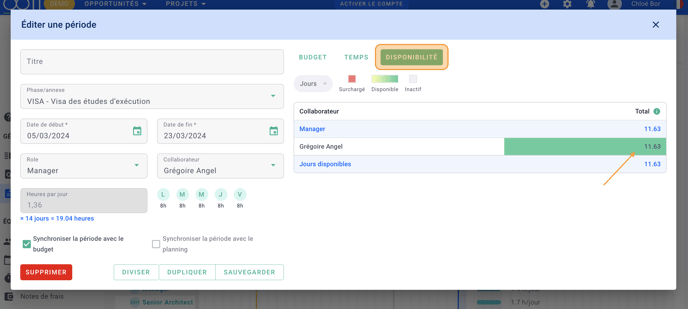
3/ Understand a period
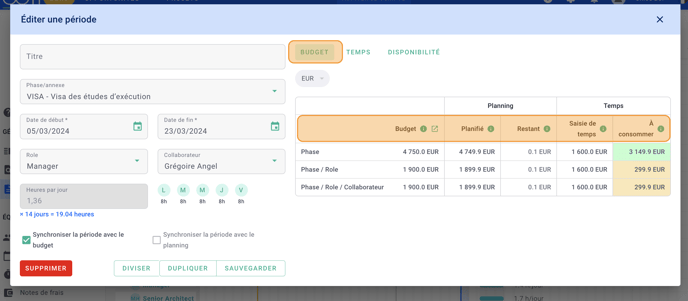
On the record of creation or edition of a period, you have access to many fields that you can modify (the role and the assigned member, the dates, the related phase and the time that the collaborator must spend over this period to remain in the budget) but you also have visibility on several read-only indicators, which are summaries of a lot of information gathered.
From the "budget" tab, you have a table that indicates the total amount of the phase, the budget allocated to the role and planned, the budget remaining to plan, the time entered by the employee over this period and the budget available in real time, that updates with time entry. When you generate periods from the budget, the entire budget is planned.
From the "time" tab, you see the progress of the phase (entered in the "progress" tab of your project), the budget consumption (which is updated with the timesheets entered) and the timesheets entered by the employee over this period.
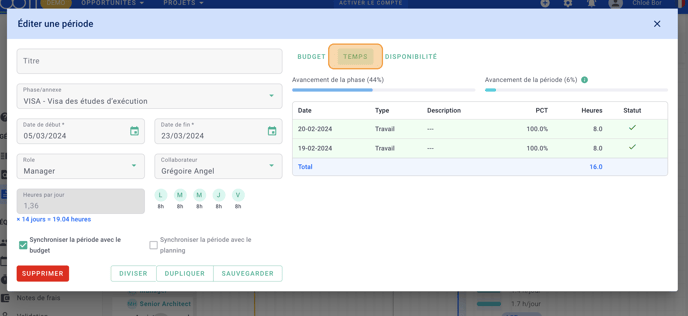
⚠️ For the «budget consumption» indicator to be updated according to the hours entered, the module "synchronize the progress of the resource schedule with the time spent" in your settings must be activated.
Finally, from the "availability" tab, you have visibility on the availability of the role and the employee according to the projects on which it is planned, its contract, the working days and the absences expected over the period filled.
Well done ! 🎉
You have generated your expense schedule according to your budget.