You can invoice between your entities within the same OOTI account by creating an Insourcing type invoice.
🔓 Required permissions
Team: View invoices and Manage invoices
Project: View invoices and Manage invoices
| Reading time | 2 min |
| Setup length | 2 min |
| Steps | 2 |
It's possible to create multiple entities within the same OOTI account.
💡 Click here to read the article on creating a new entity.
Having multiple entities allows for separate teams, different projects, and separate invoicing within each entity.
You can also invoice between your entities within the same OOTI account.
Select the entity from which you want to invoice by clicking on the entity in the blue banner.
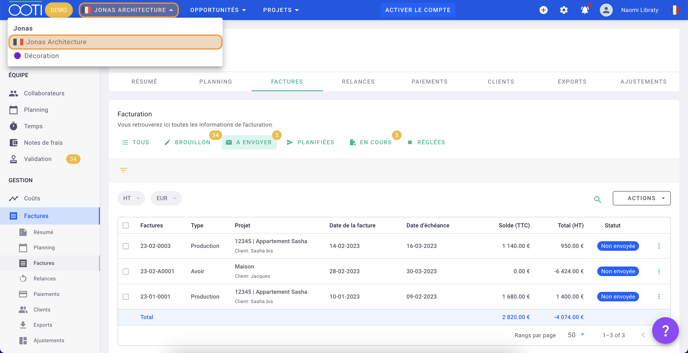
Go to the Invoices menu on the left > Invoices tab > Draft tab > then click on the + Invoice button.
Select the Team that is invoicing > Invoice Type: insourcing > Invoice Date and the Invoiced Team. Click on Save.
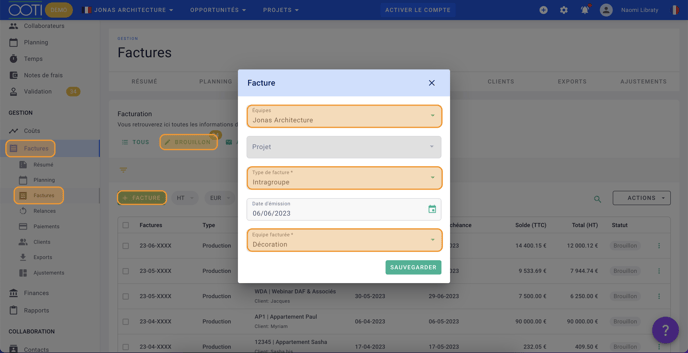
⚠️ Insourcing invoices are not associated with projects. Therefore, you cannot select a project.
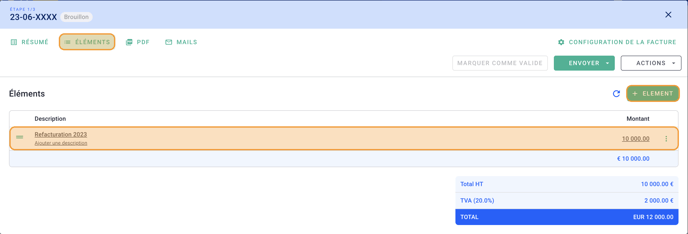
You will now be in the Invoice Elements tab.
Click on the + Element button at the top right to add an element. Click on the underlined information to add a Title, Description and Amount to be invoiced.
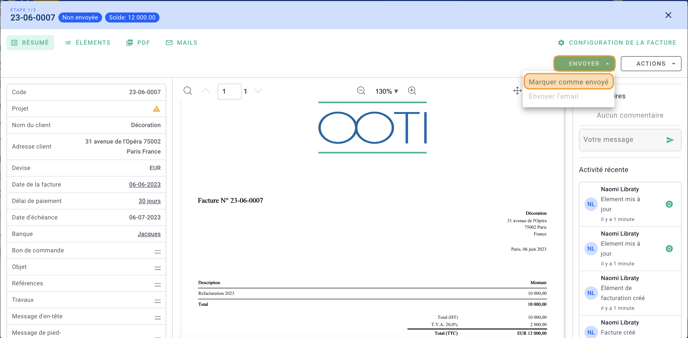
Go to the Summary tab and verify that the Bank is correctly selected.
Once you have completed this, you can Mark as Valid and then Mark as Sent for your invoice.
You will find your invoice in the Open tab.
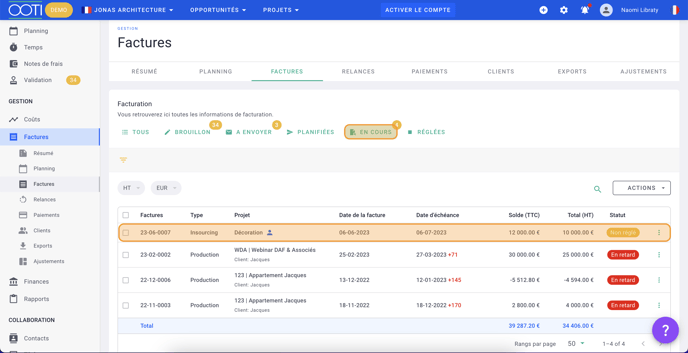
The amount will then be added to the billing entity.
Once paid, you can add the payment to the invoice in the "Payment" tab or by clicking on the "..." options on the right of the invoice > Pay.
You can check the cost in the other entity by selecting the entity from the blue banner.
You will find a line in the Finances menu on the left > Costs tab.
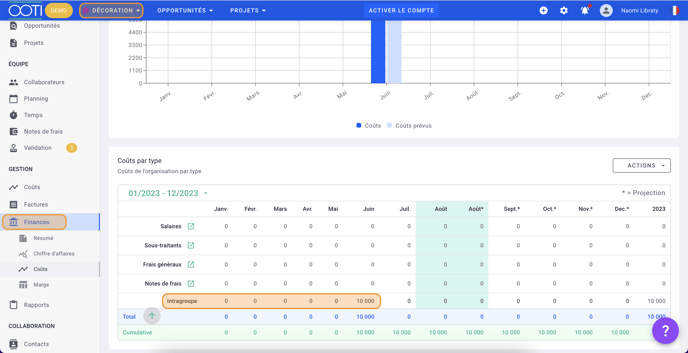
Tip 💡: if the cost doesn't appear yet, refresh the page.
You now know how to internal re-bill! 🎉
