
Opportunities represent any unsigned project: call for tenders, competitions, feasibility studies... but with project management.
🔓 Required permissions
Team: View Pipelines and Manage Pipelines
| Reading time | 5 min |
| Setup length | 5 min |
| Steps | 3 |
Summary
I/ Creation of an opportunity
II/ Complete the opportunity
III/ Complete sheet of the opportunity
I/ Creation of an opportunity
Go to opportunities > summary then click on the + Create an opportunity button.
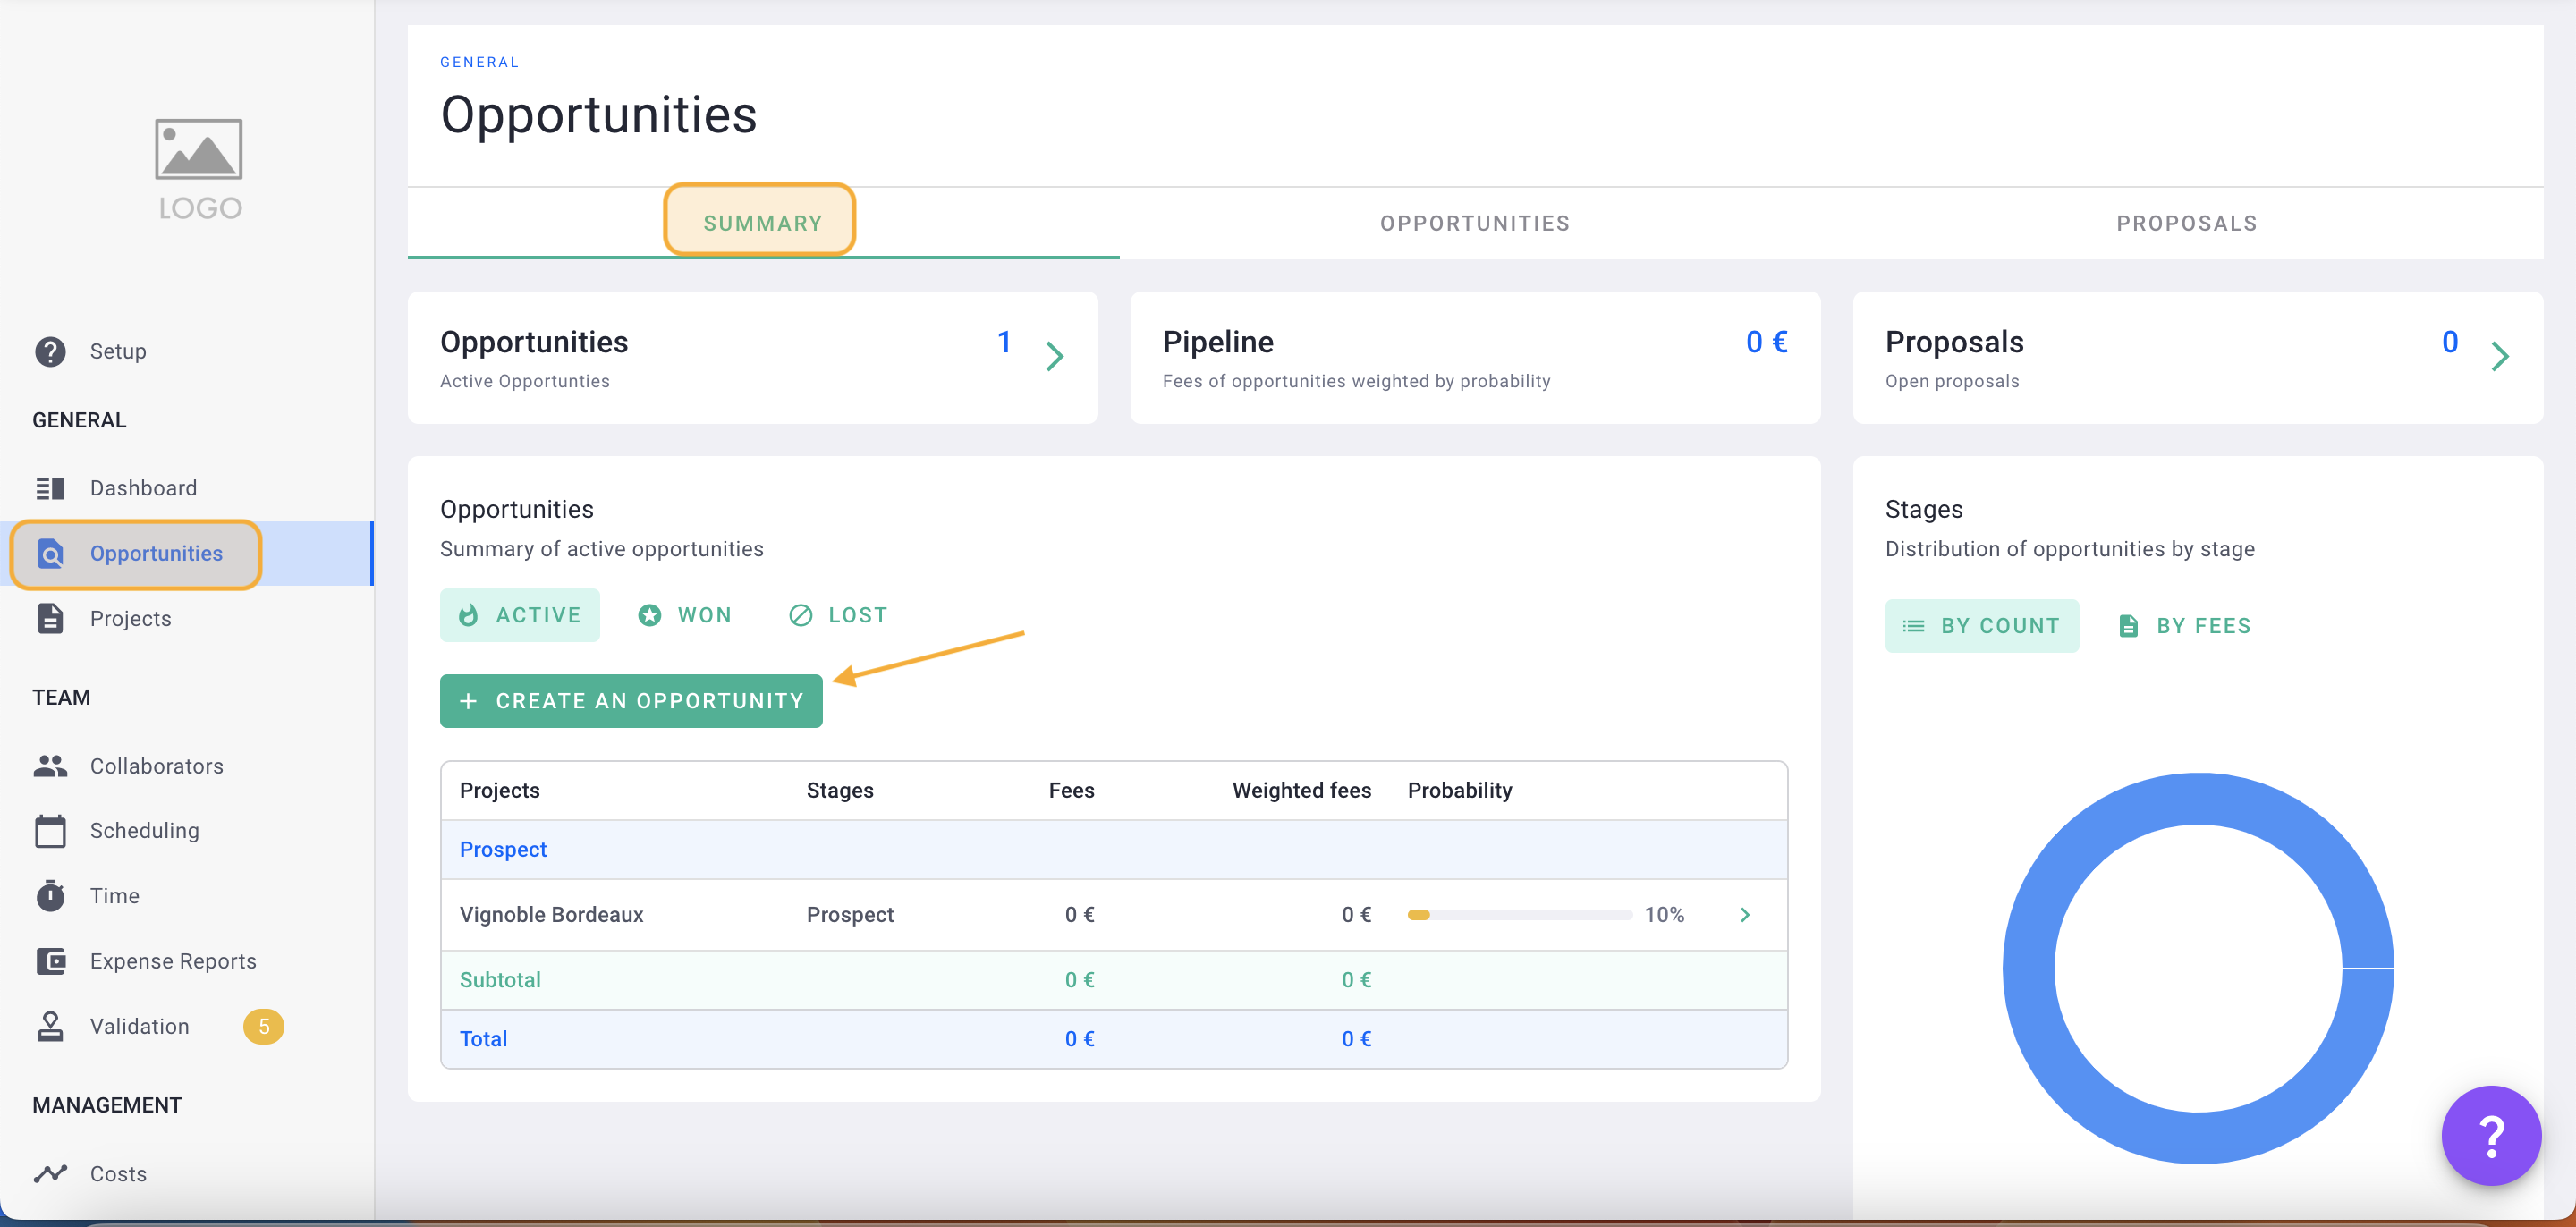
Fill out the form with all the information available: the more information, the better.
💡 All the information filled in is not final, you can always complete or modify all of this.
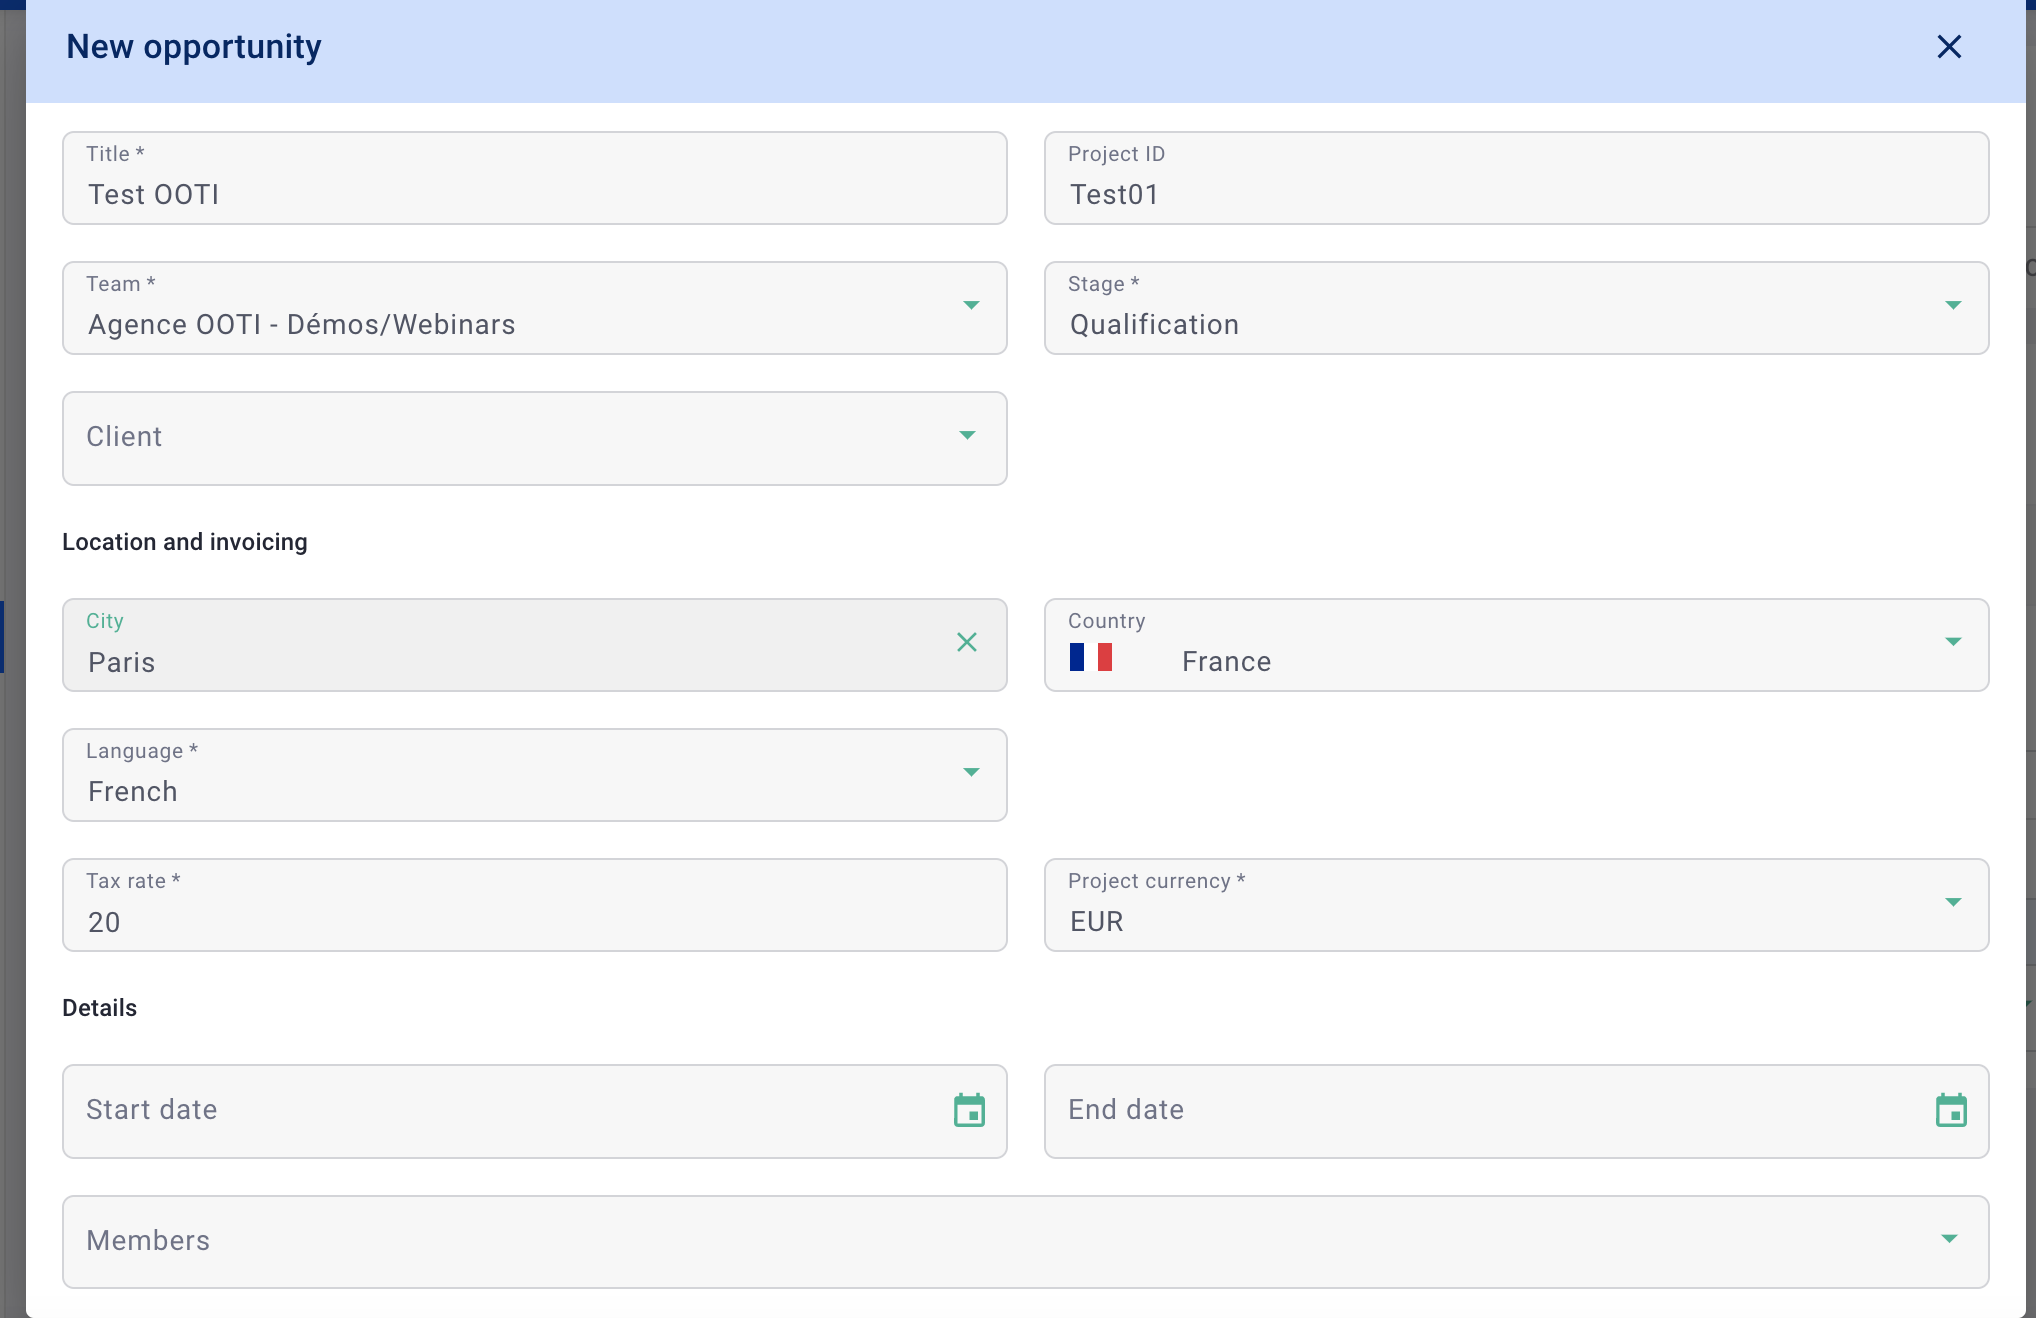
You can enter a Title, select the Team (entity), Stage, Client, Language, VAT Rate, and Project Currency. Click on Save.
💡 Click here to read the article on opportunity stages.
You have created your opportunity! 🎉
II/ Complete the opportunity
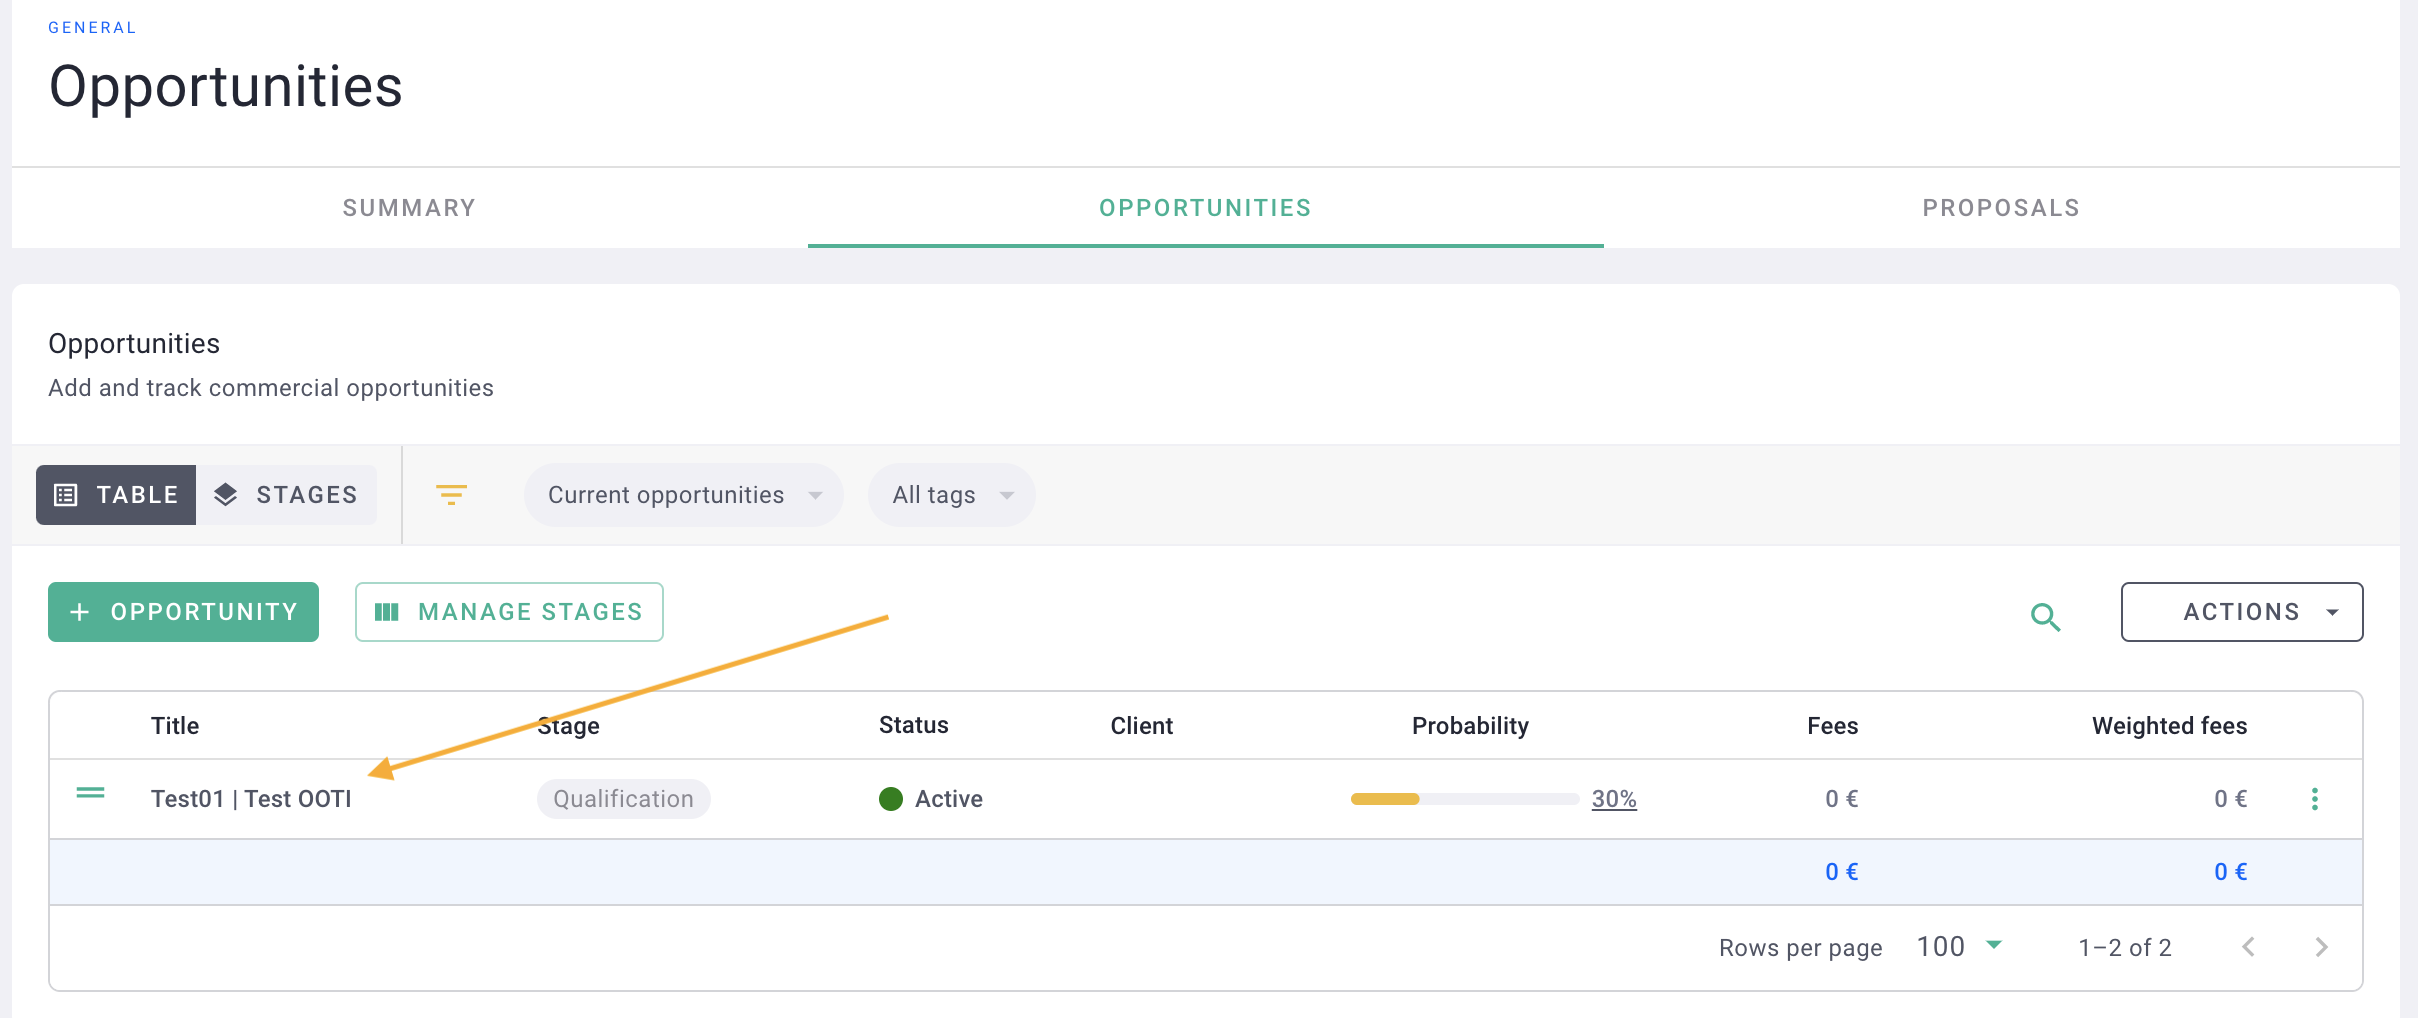
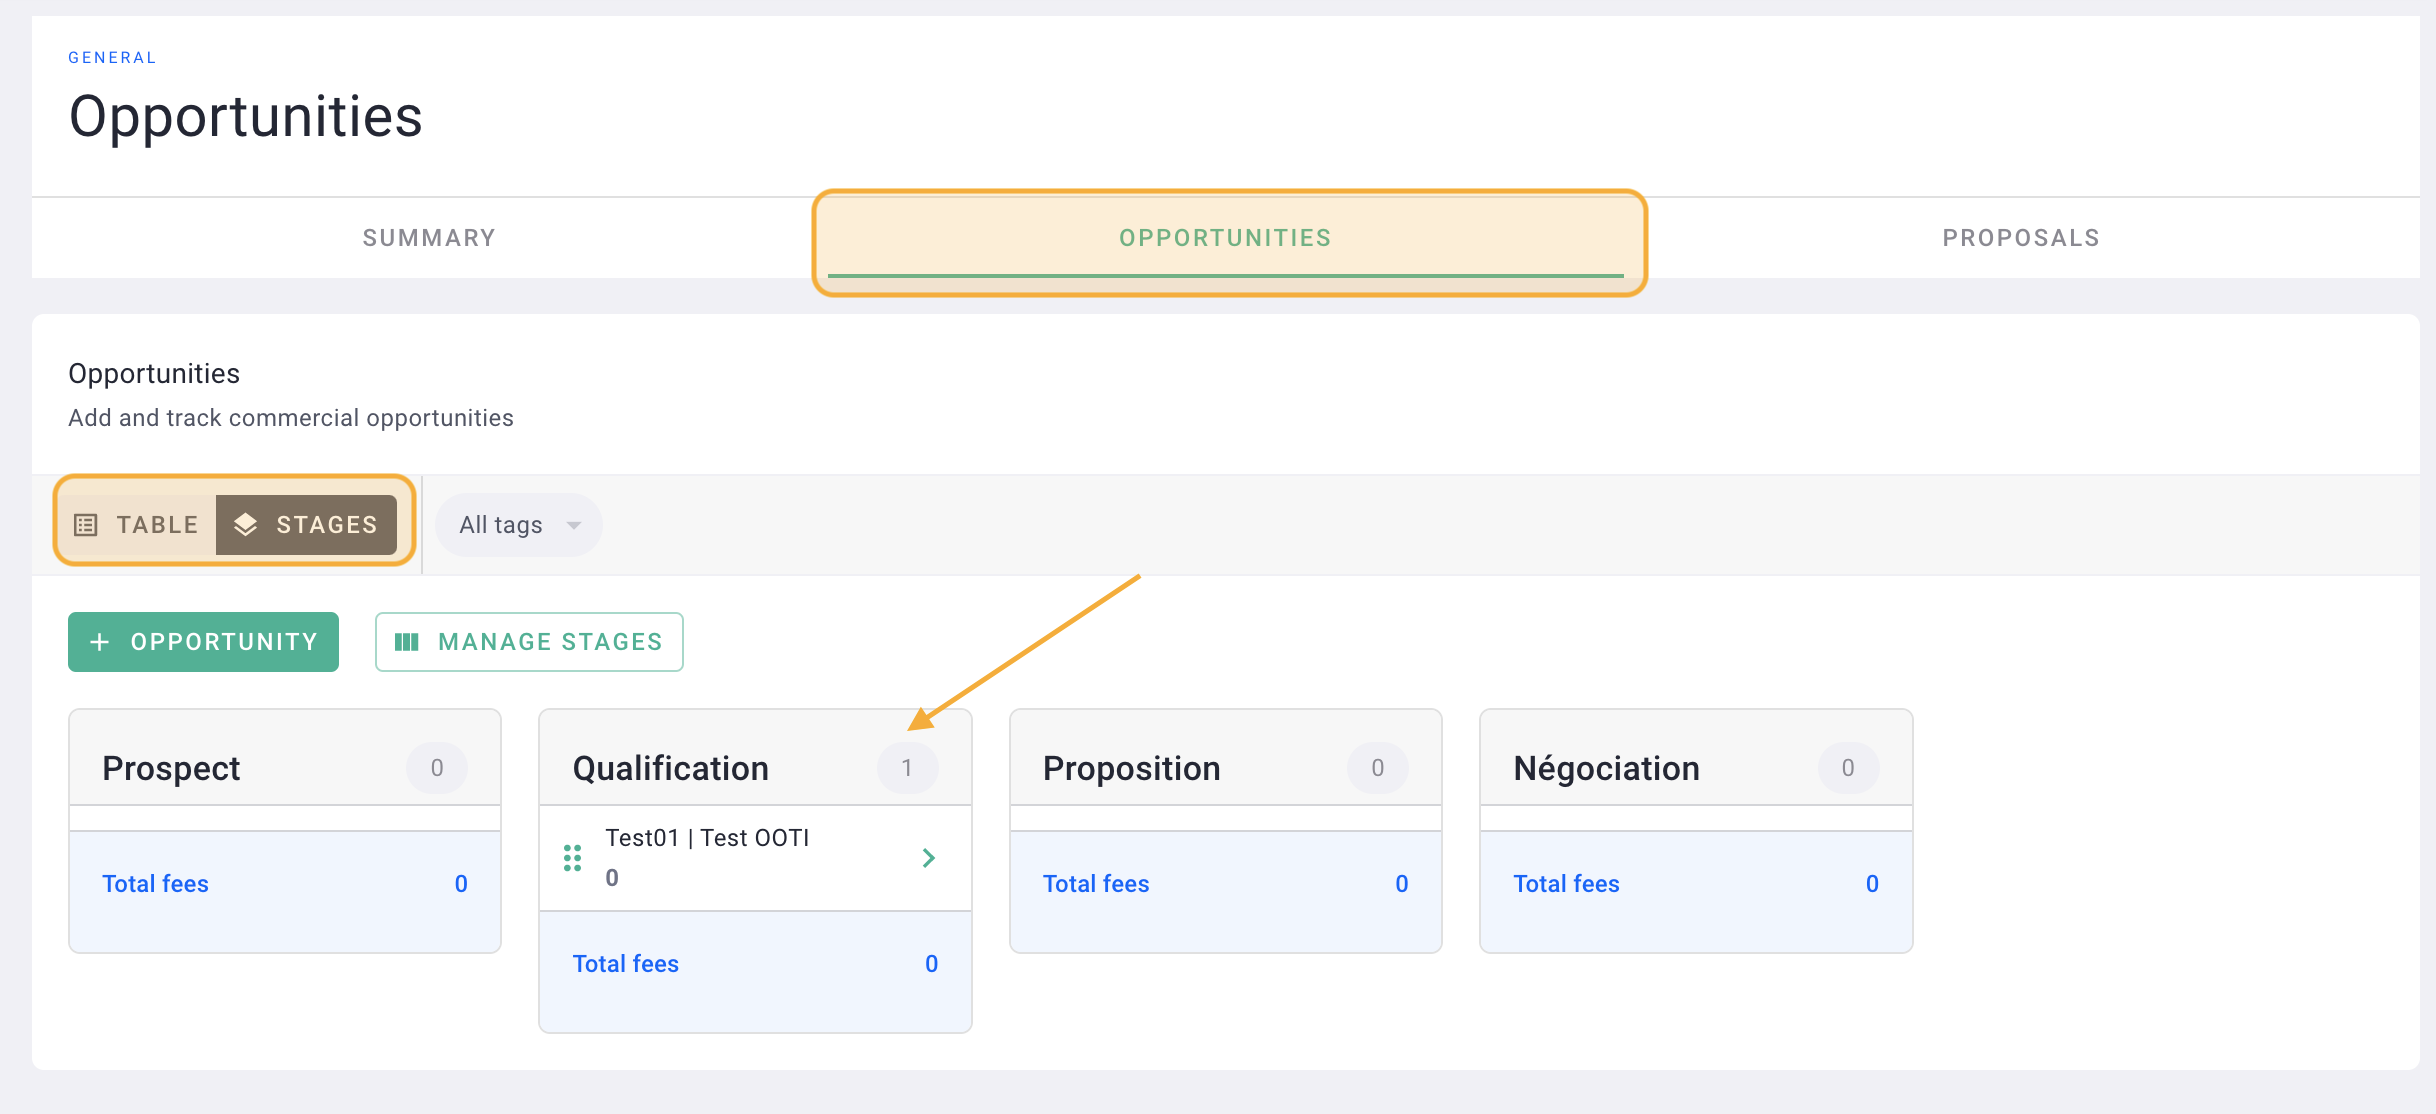
Click on your opportunity from opportunities > opportunities > Table or Stages tabs to access more details.
You will find several tabs, to be completed if necessary to bring your opportunity to life, such as information, notes, tasks, etc.
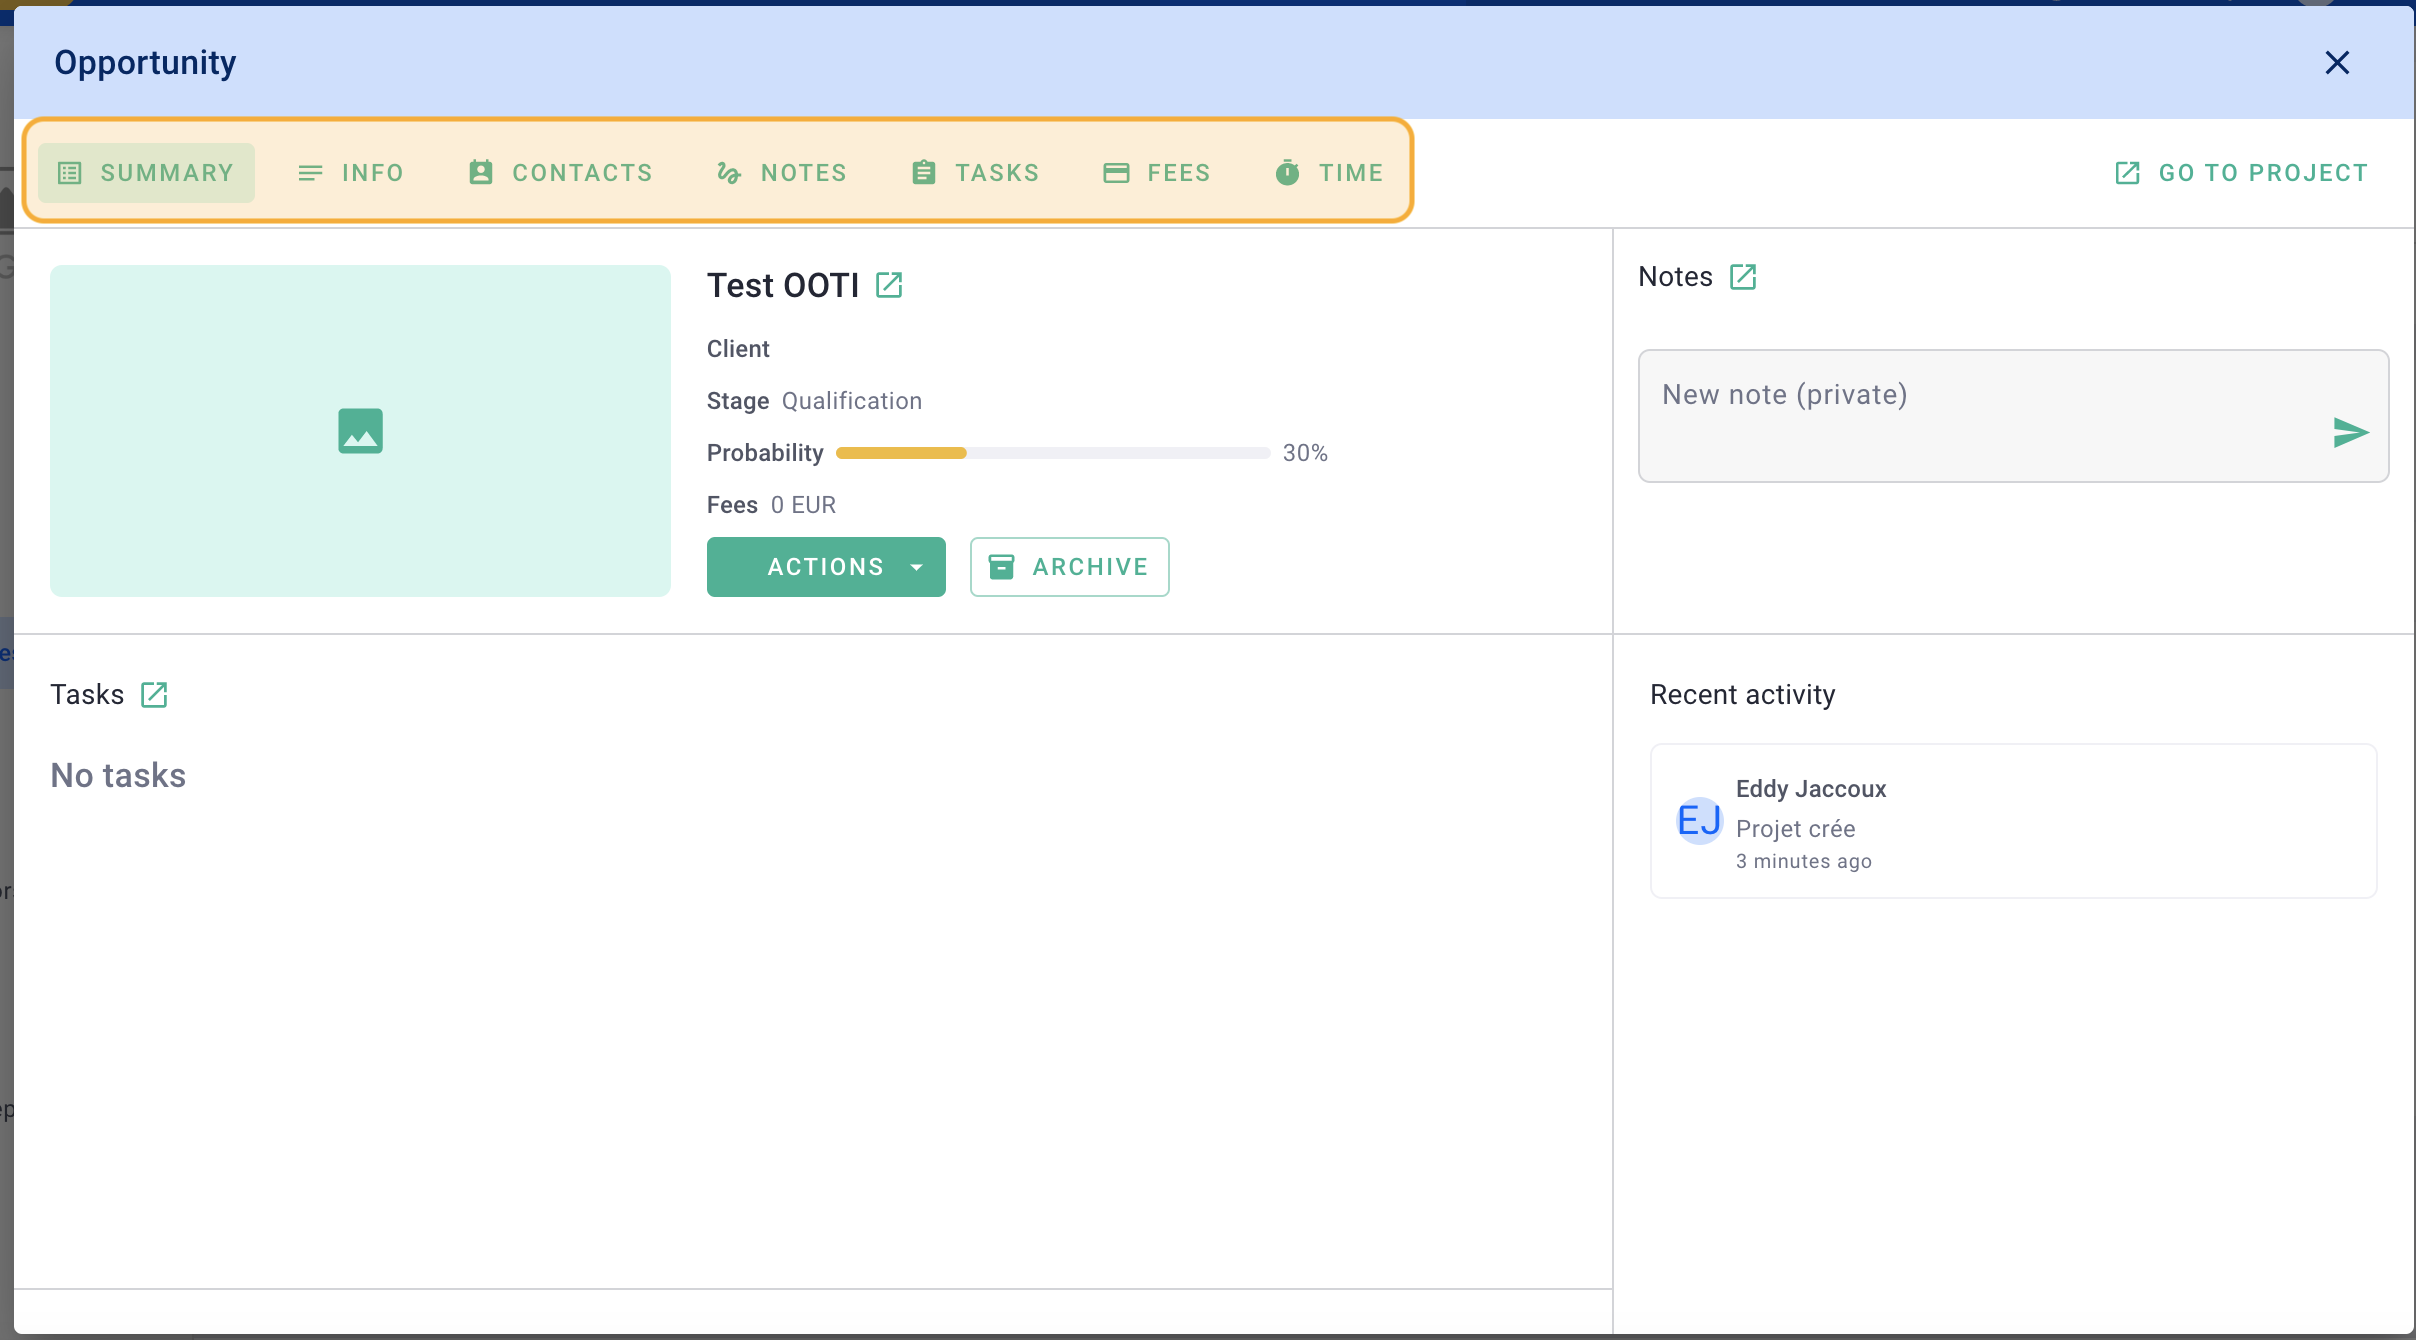
1) Informations tab
The more info, the better! Enter the Project ID, City, select the Country, the Opportunity Members, and Tags. Click on Save.
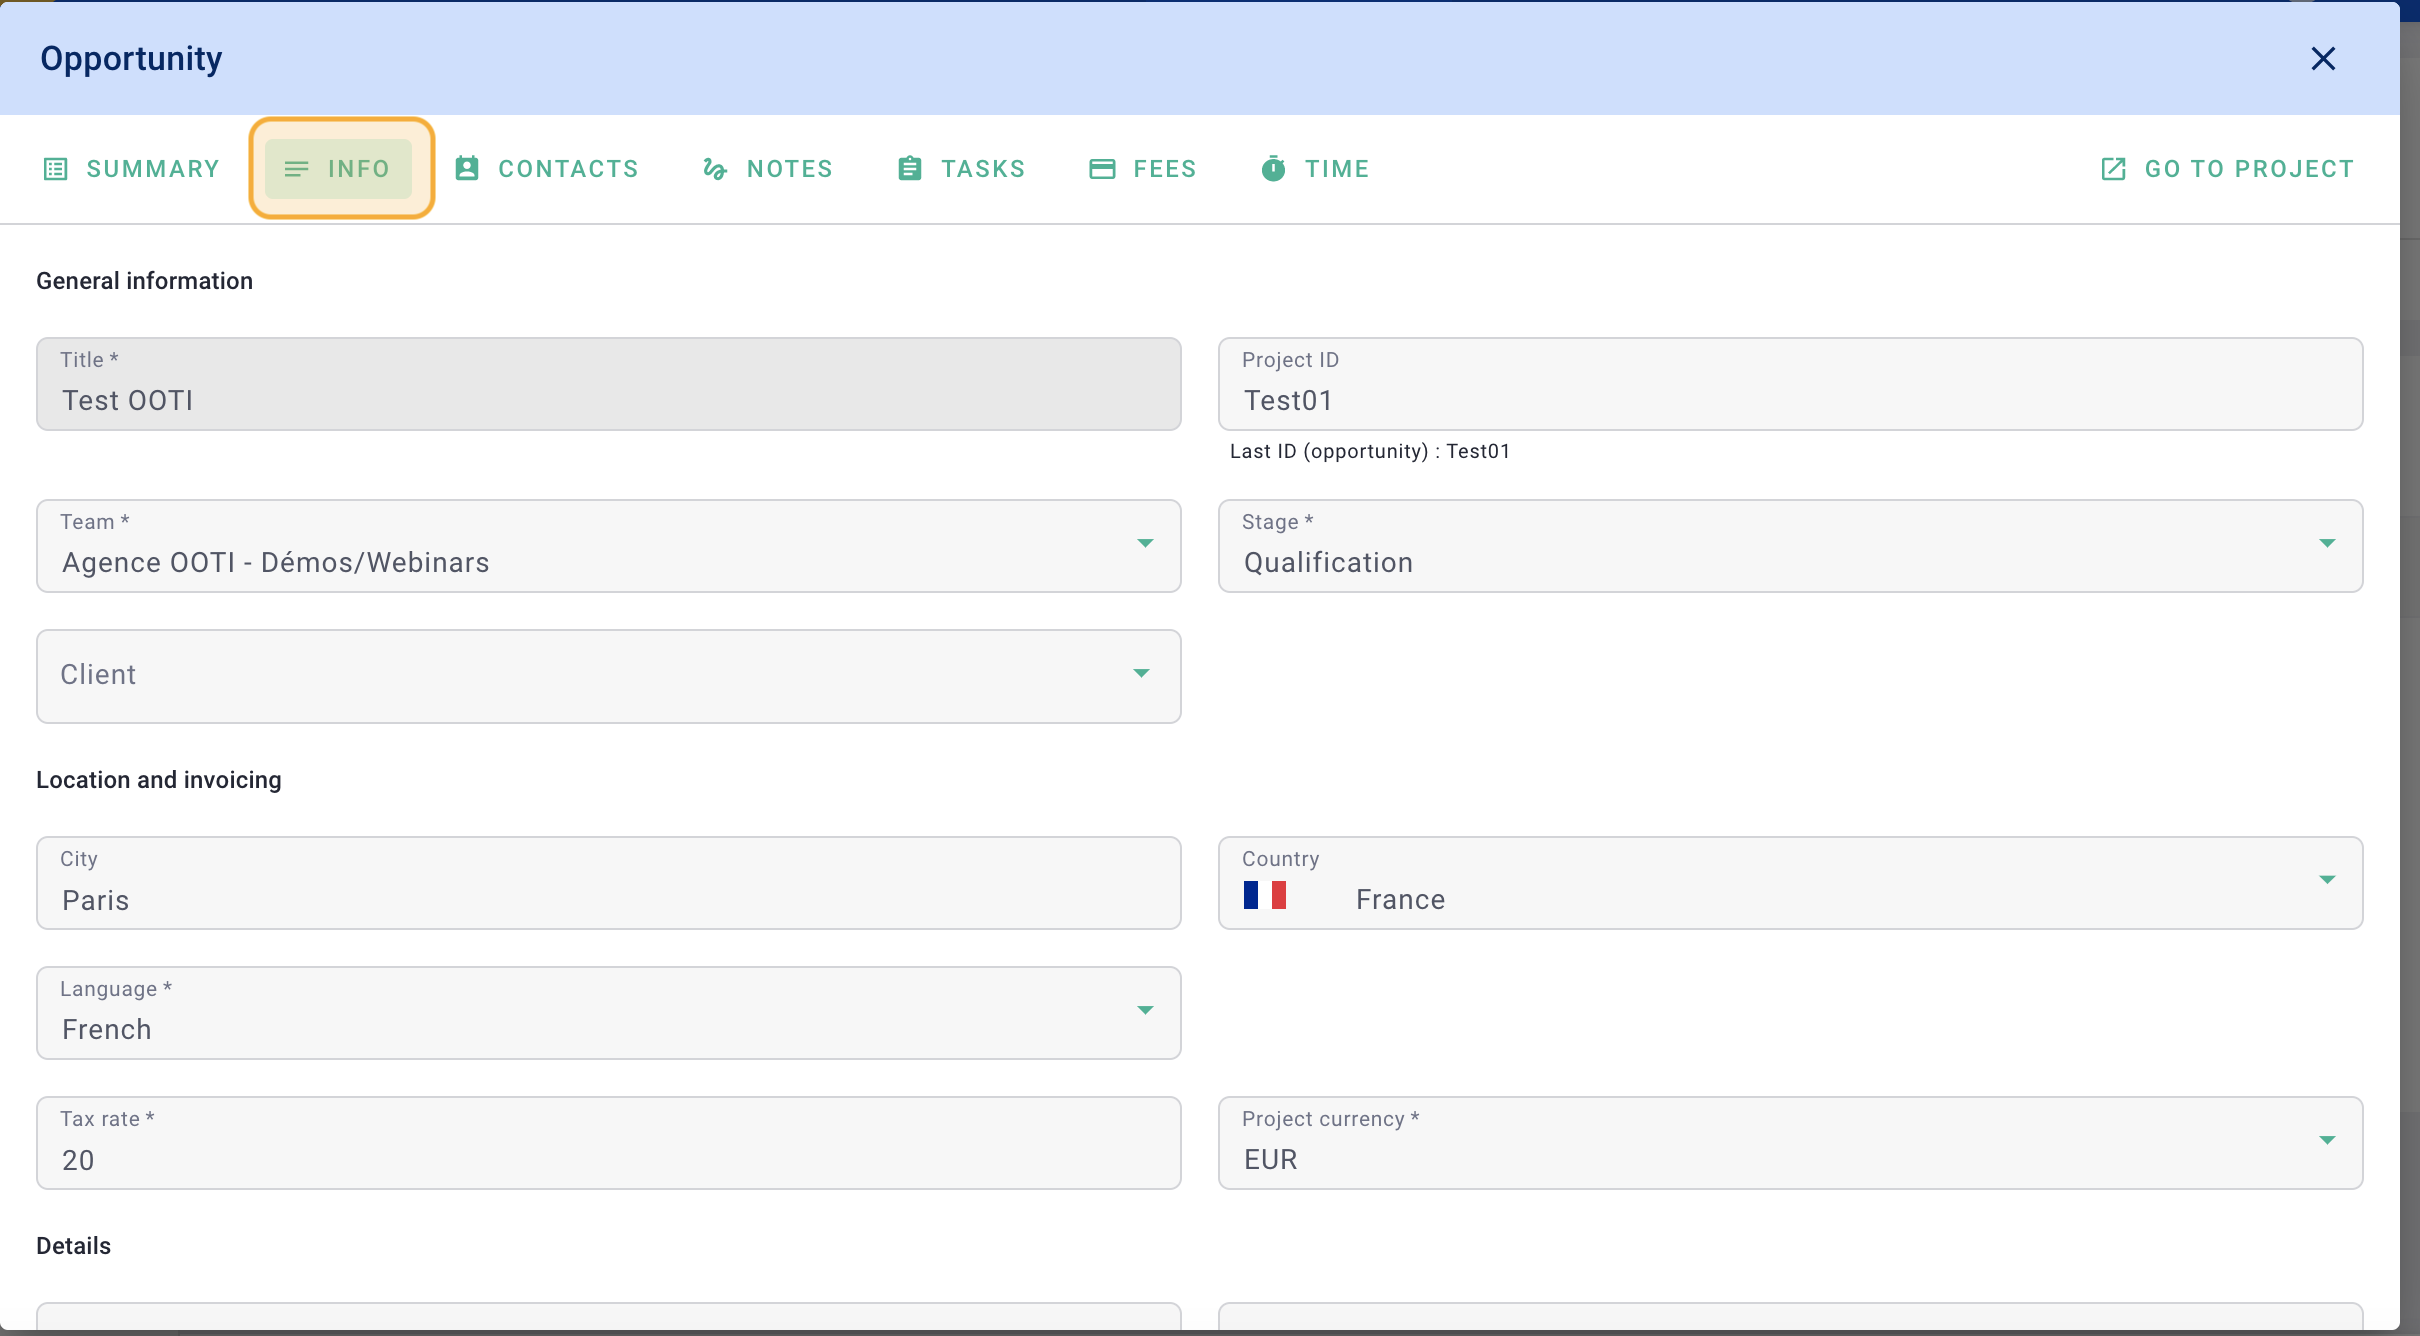
💡 Add members to your opportunity so that they have access to the project and can log time against it.
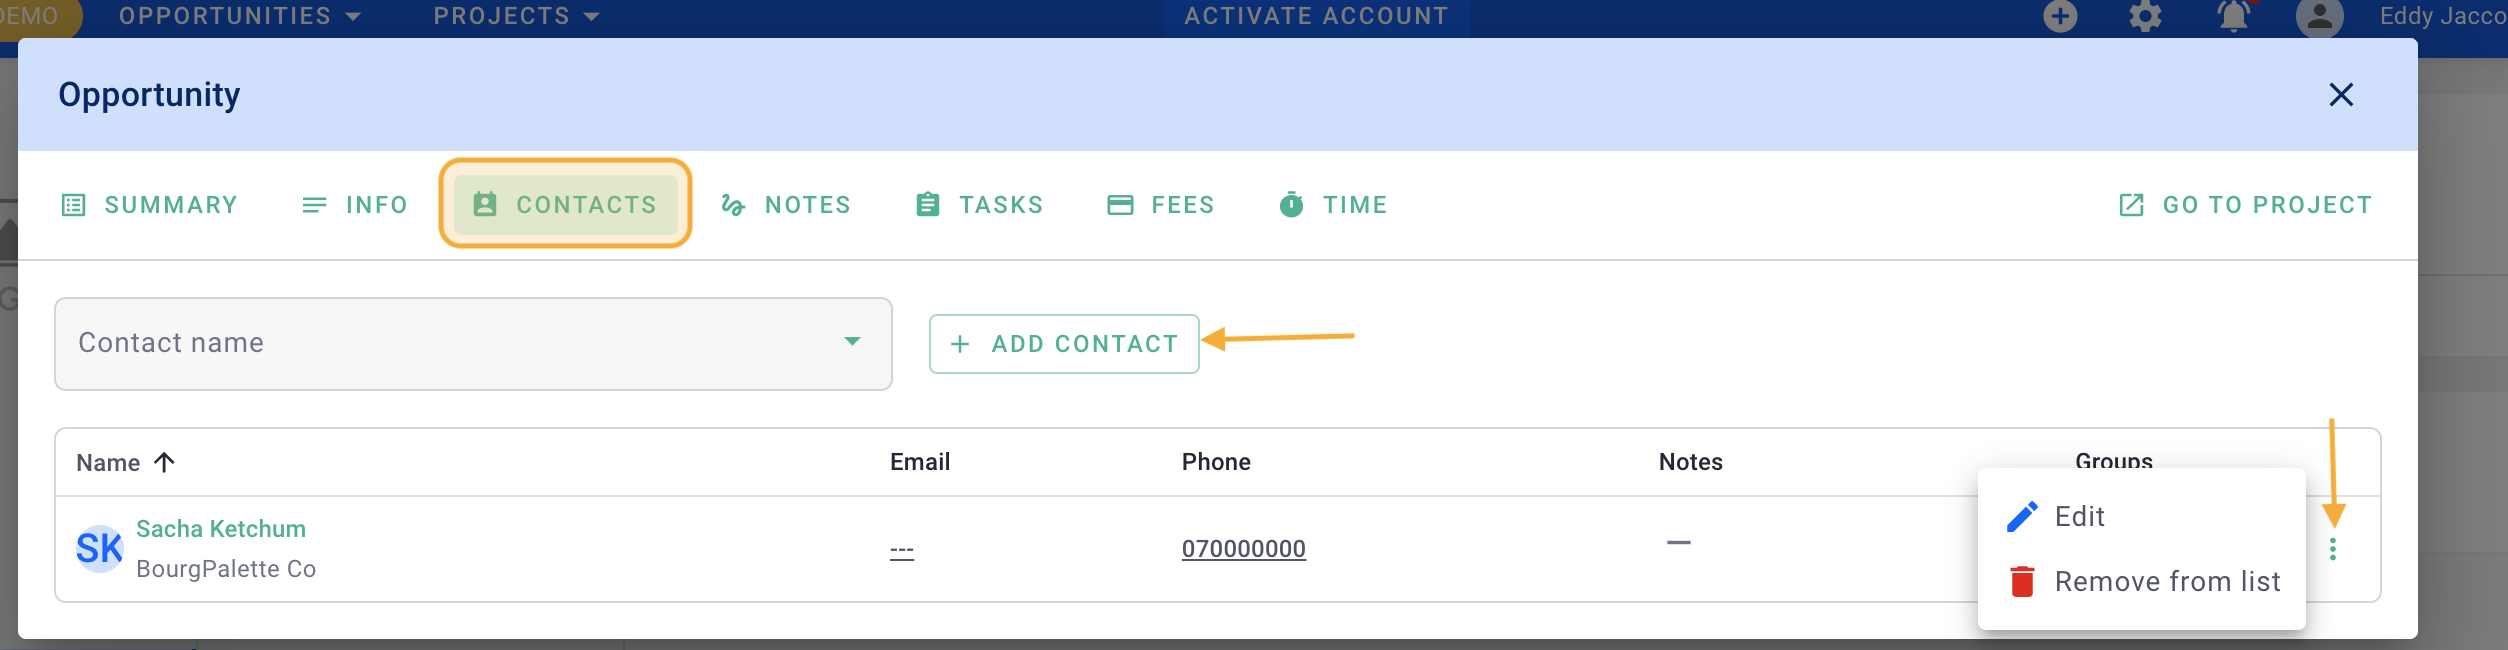
2) Contacts tab
Add all the contacts from the opportunity to ensure that you can easily reach out via phone, email, lunch, etc., and increase your chances of closing the deal. This will also populate your CRM.
Click on the + Add contact button to build your contacts database.
You can add as many contacts as you want. To edit them, click on the options "..."> Edit. To remove them, click on the options "..."> Remove from list.
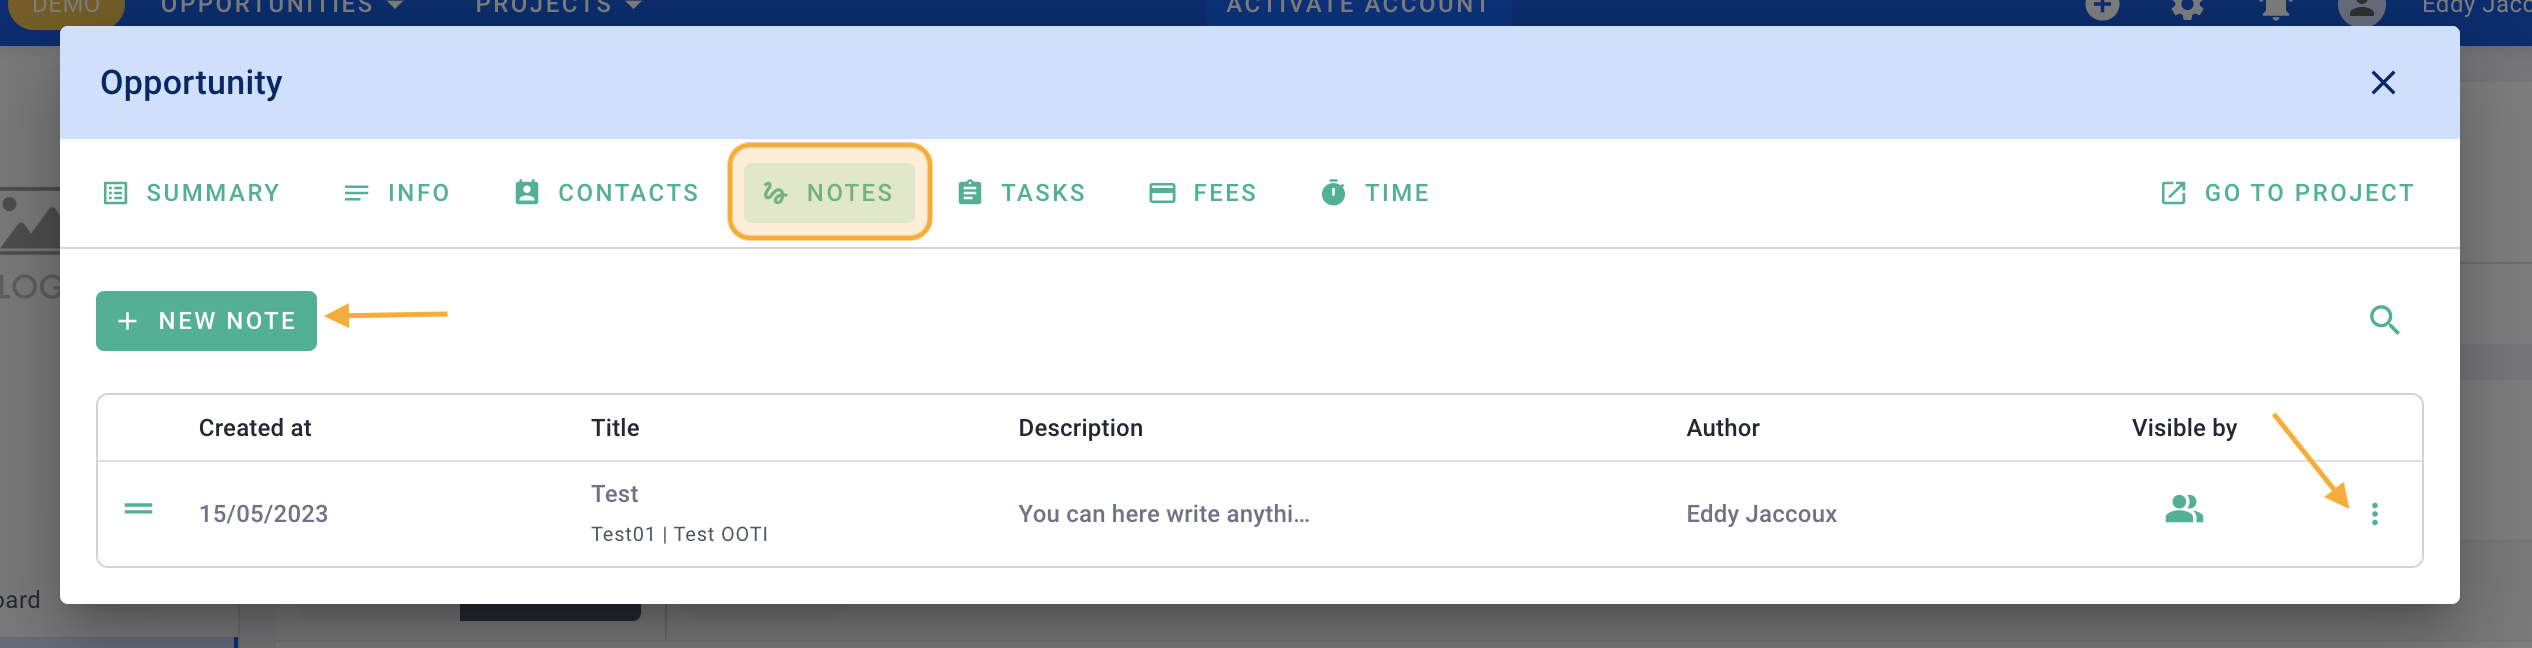
3) Notes tab
Add notes to the opportunity or share additional details.
Click on the + New note button to add one. Choose whether this note should be visible to everyone, kept private, etc. Click on Save.
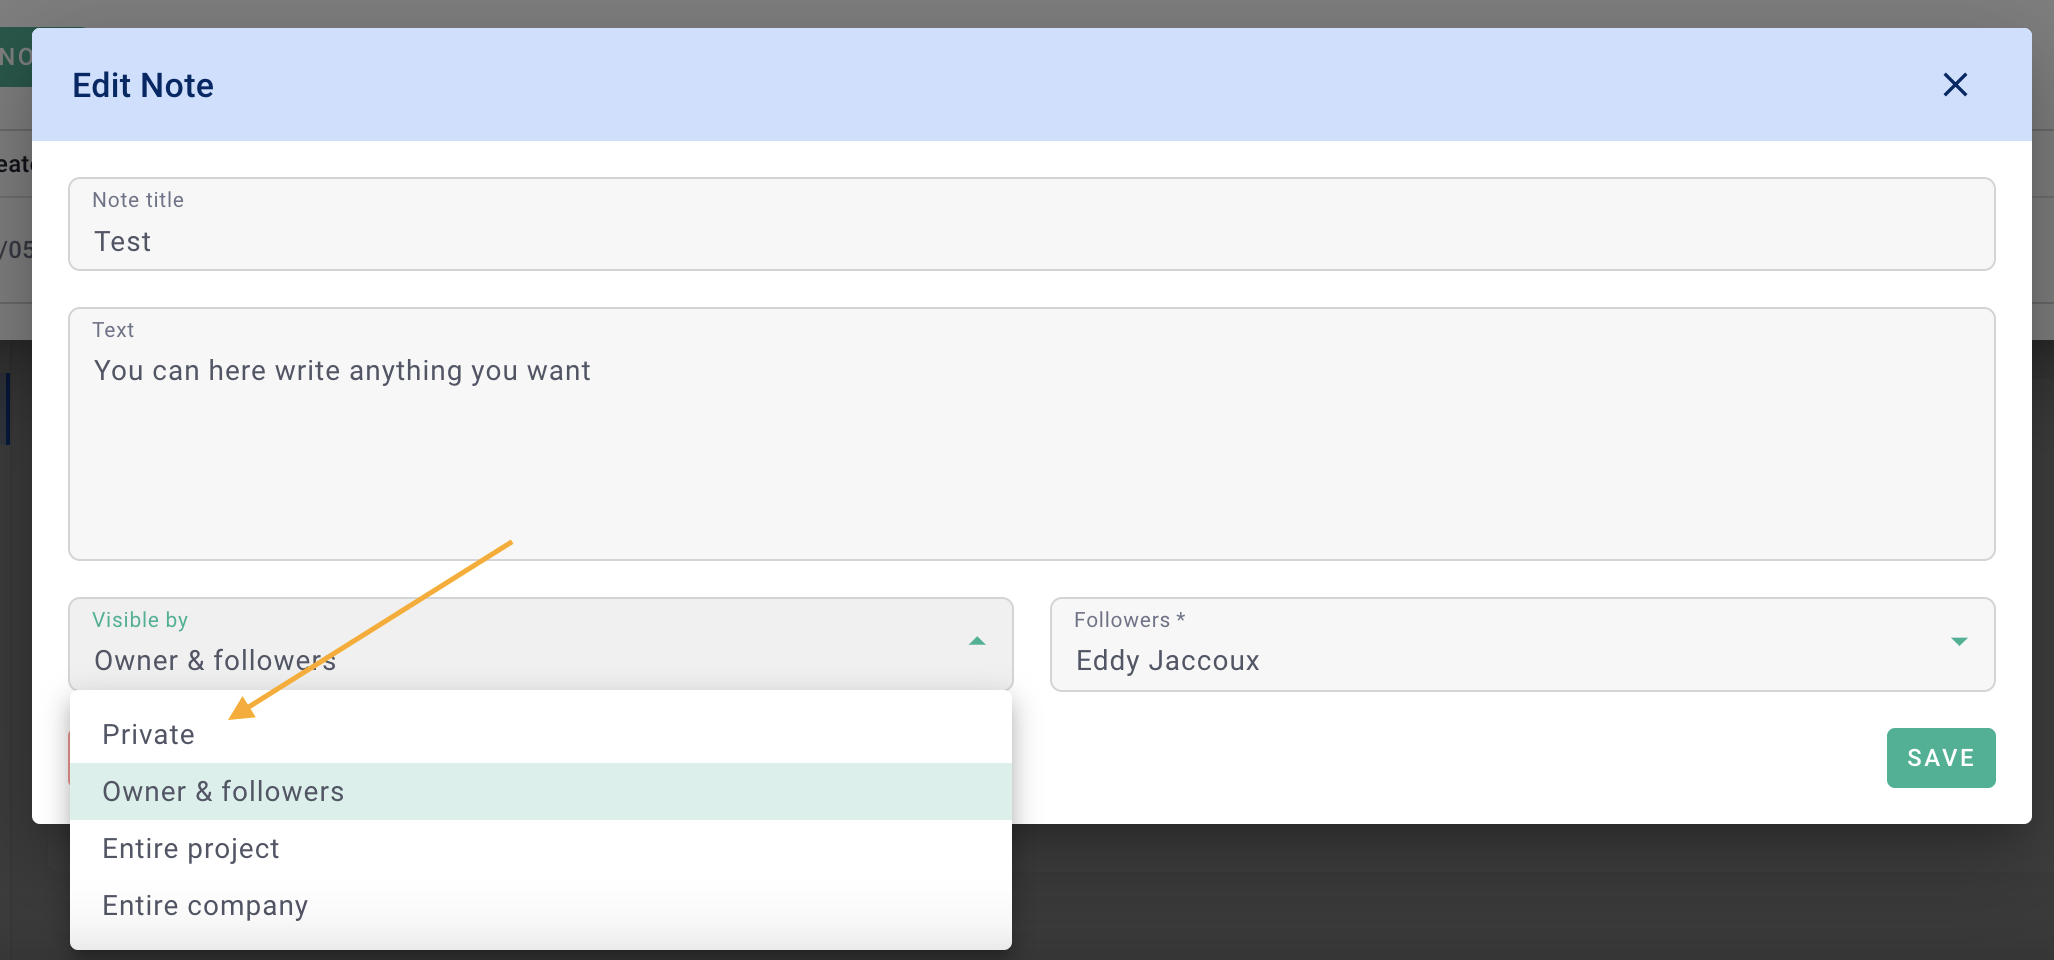
To edit it, click on the options "..." > Edit. To delete it, click on the options "..." > Delete.
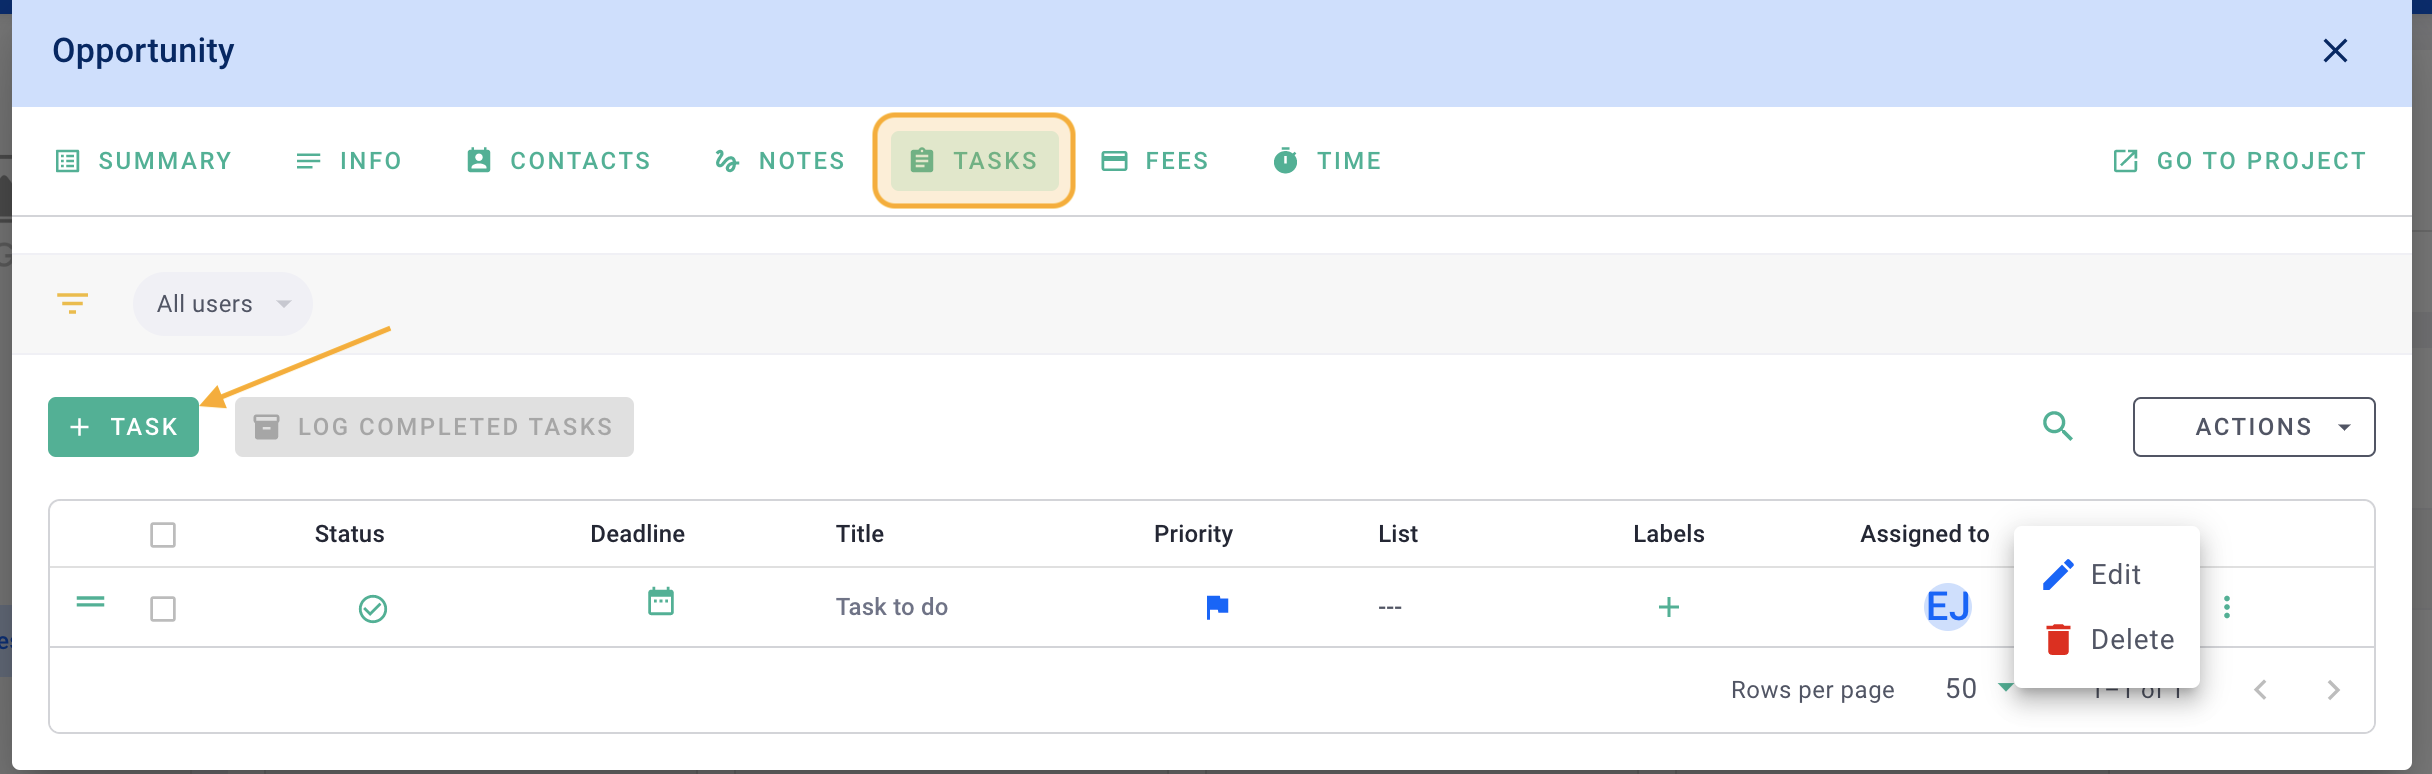
4) Tasks tab
Add to-do lists.
Click the + Task button.
To edit it, click on the options "..." > Edit. To delete it, click on the options "..." > Delete.
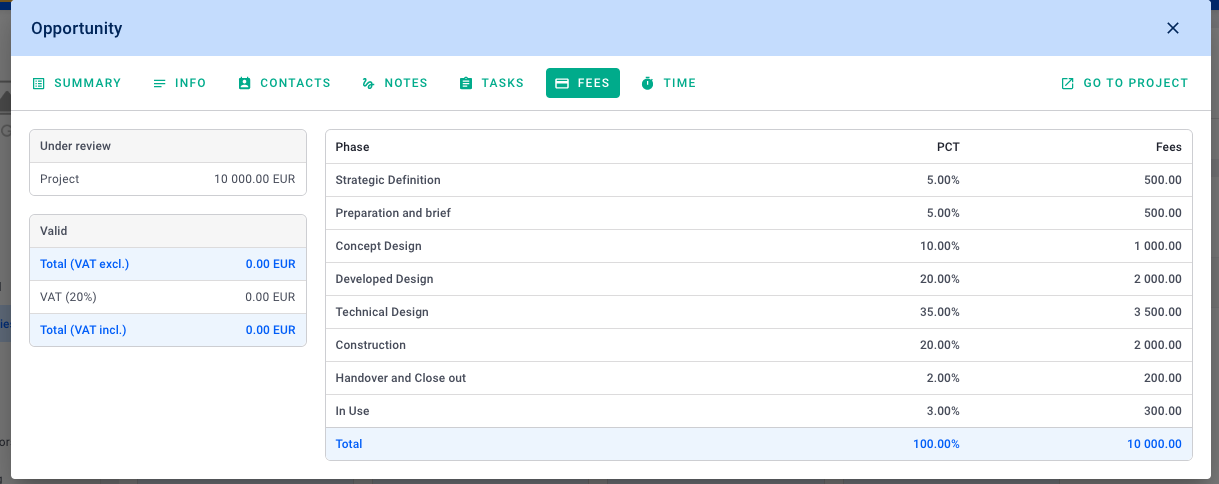
5) Fees tab
Click on the Add Fee button to add fees and phases to your opportunity.
💡 Click here to read the article on adding fees and phases to your deals.
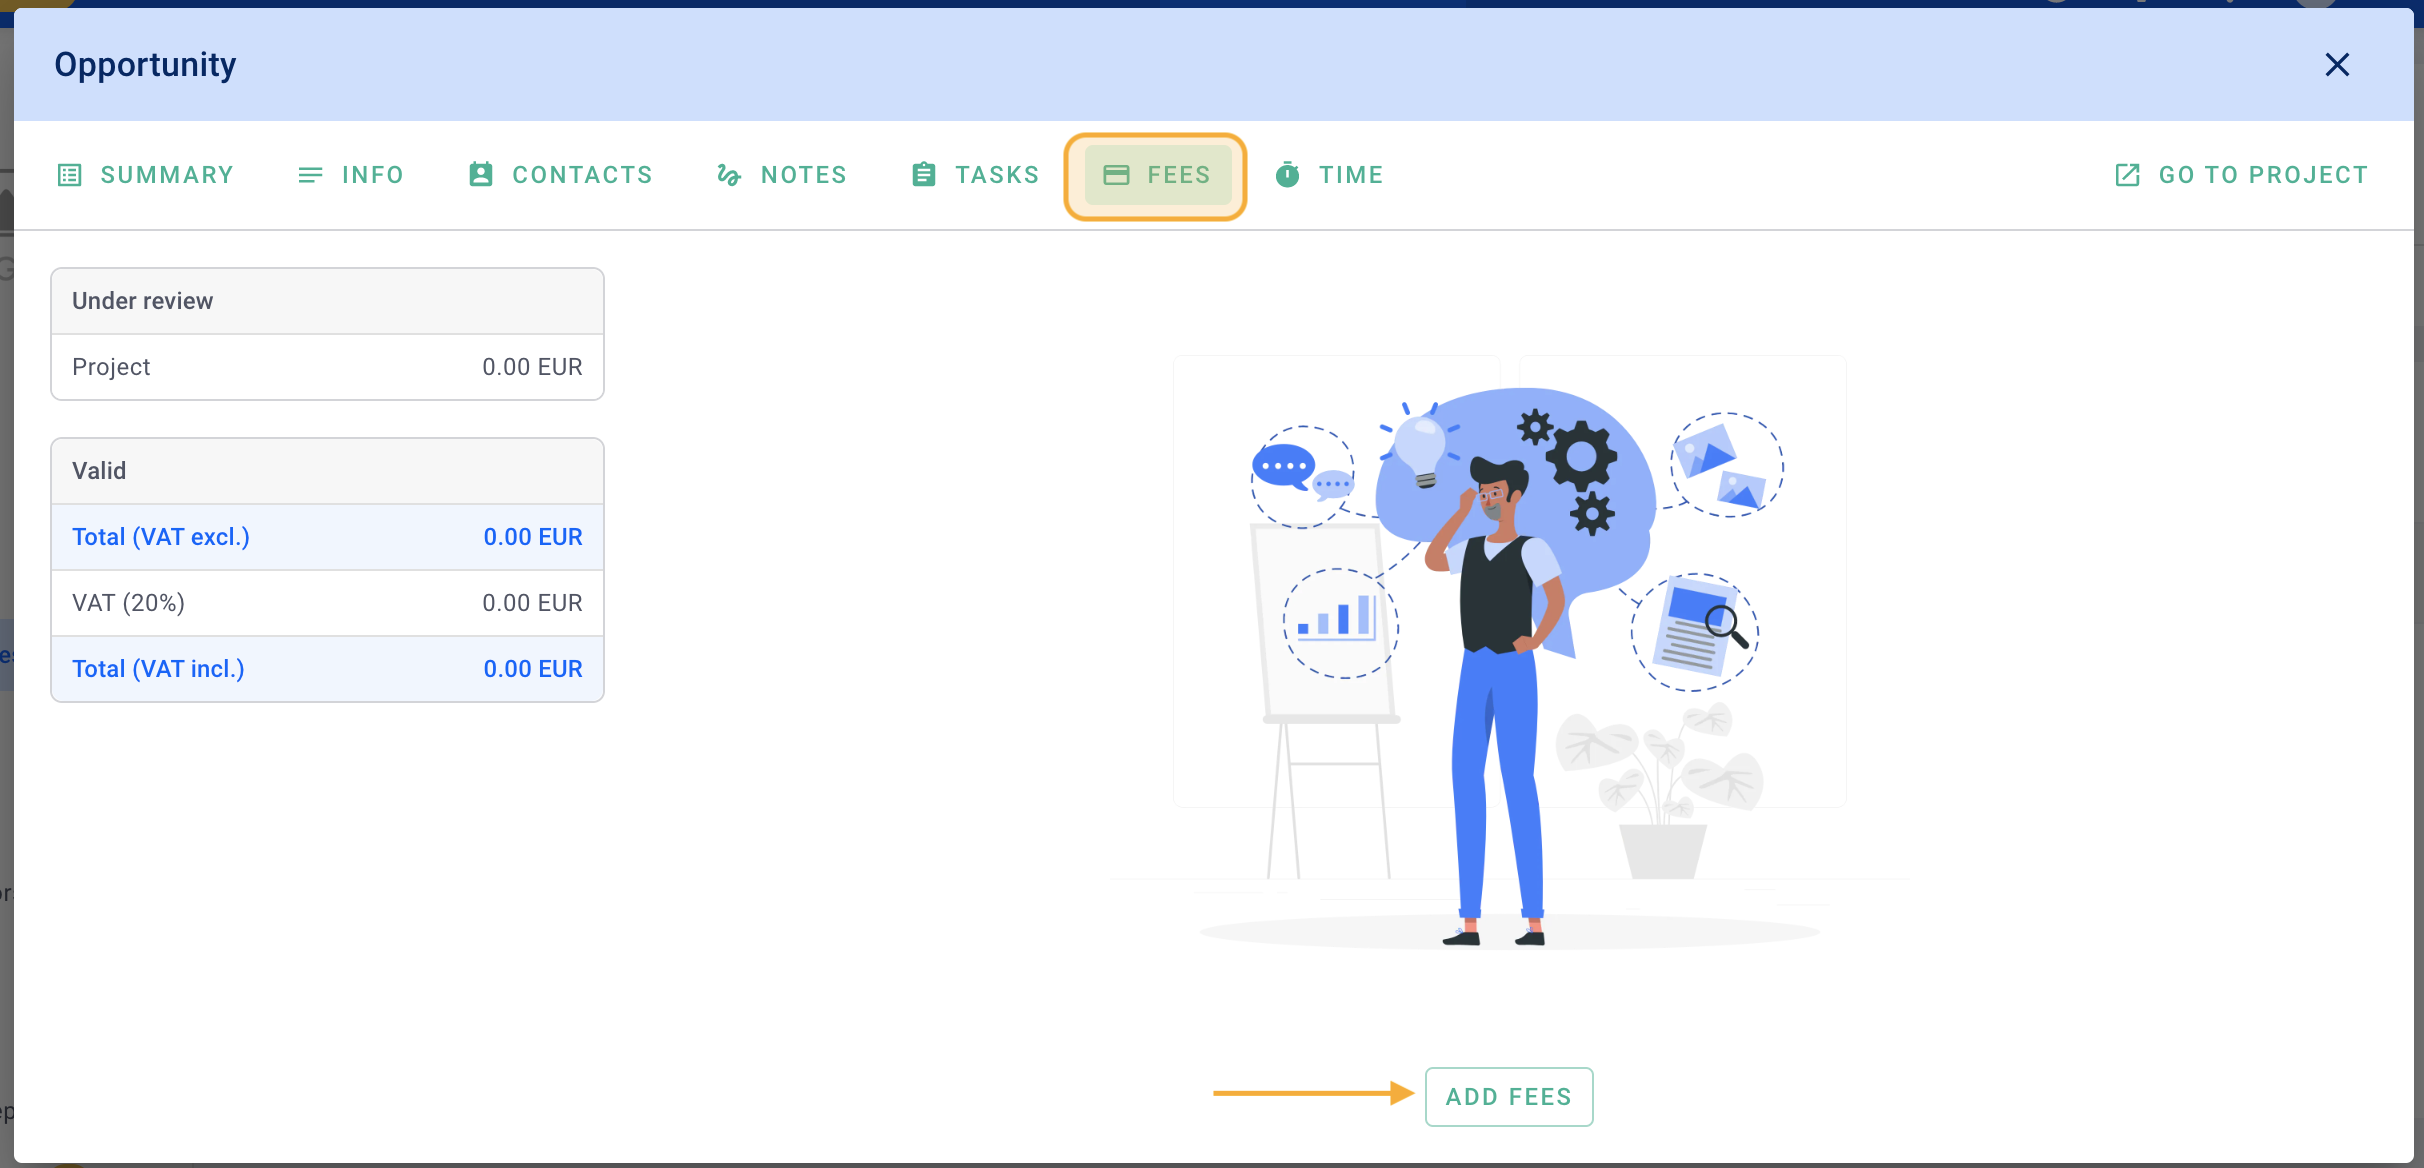
Add fees and phases in advance that can be used in your fee proposals.
We invite you to create a fictitious phase, for example, "competition" or "feasibility," where team members can allocate hours.
If your opportunity is lost, you can assign an amount to this phase, which will represent the competition fees that you can then invoice.
💡 Click here to read the article on actions to take if an opportunity is won or lost.
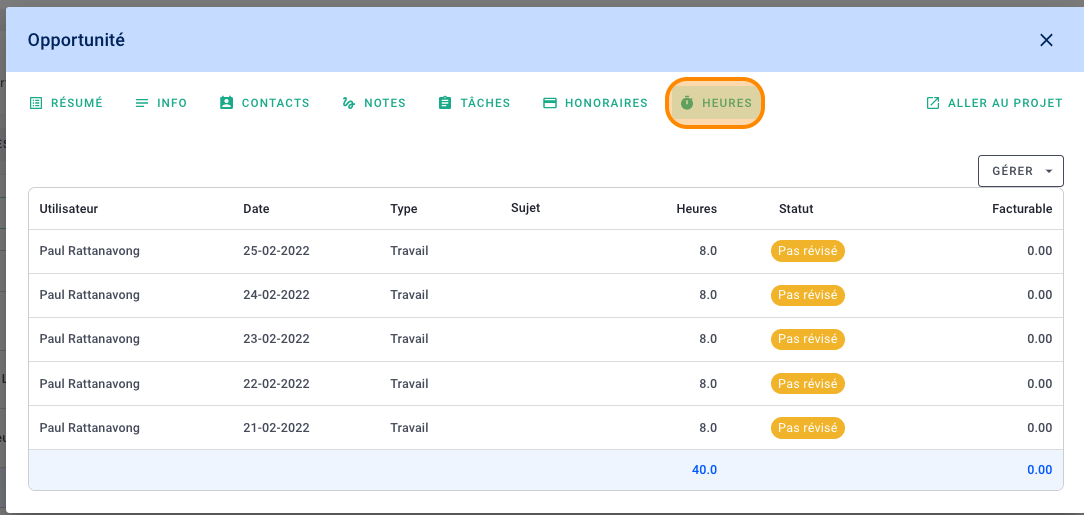
6) Time tab
Follow the time spent on this opportunity.
Opportunity members can already log time on it.
III/ Complete sheet of the opportunity
Access the full view of your opportunity. This complete sheet allows you to better manage your business with all the elements available.
Click the go to project button.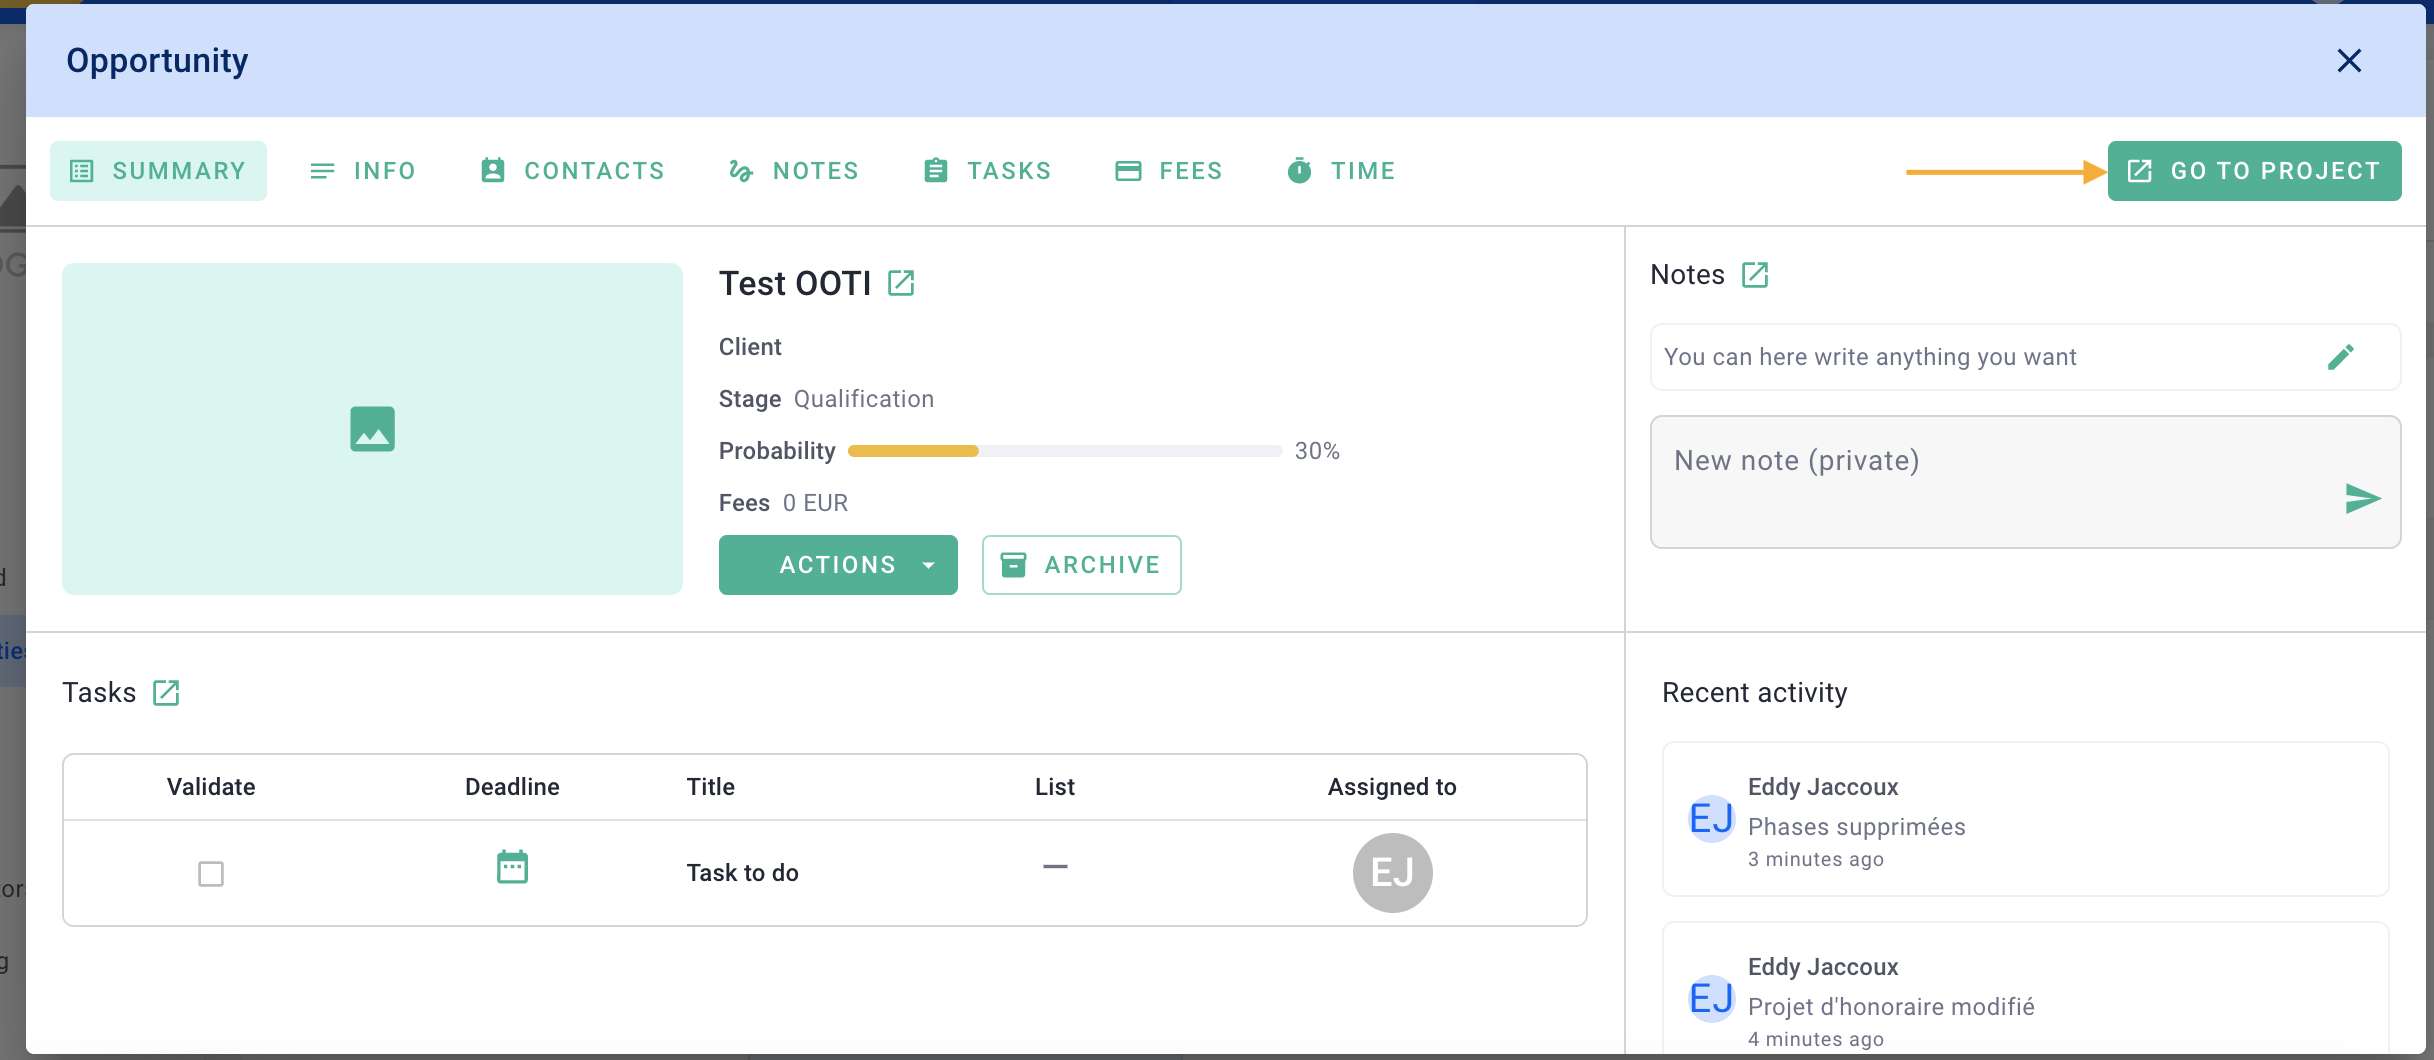
And here you are in the complete file of your opportunity.
Navigate through the fees, schedule, progress etc tabs to bring your opportunity to life and manage it as if it were a signed project.