
Create the workload schedule, the tasks of your teams on the projects. Manage your resources precisely and regularly.
✅ Invite your collaborators on OOTI and create the roles of your agency.
🔓 Permissions required
Team: View Resource Schedule + View Billable Rates + View Resource Schedule + Manage Resource Schedule
Project: View Fees + View Project Members + View Resource Schedule + Manage Resource Schedule + View Budgets + Manage Budgets + Manage Planned Costs
| Reading time | 10min |
| Setup length | 20min/project |
| Steps | 3 |
Summary
I/ Conditions
II/ Plan resources
III/ Work schedule and availability
IV/ Analysis
I/ Conditions
Make sure collaborators are added to the project. Go to settings > members and add your project team.
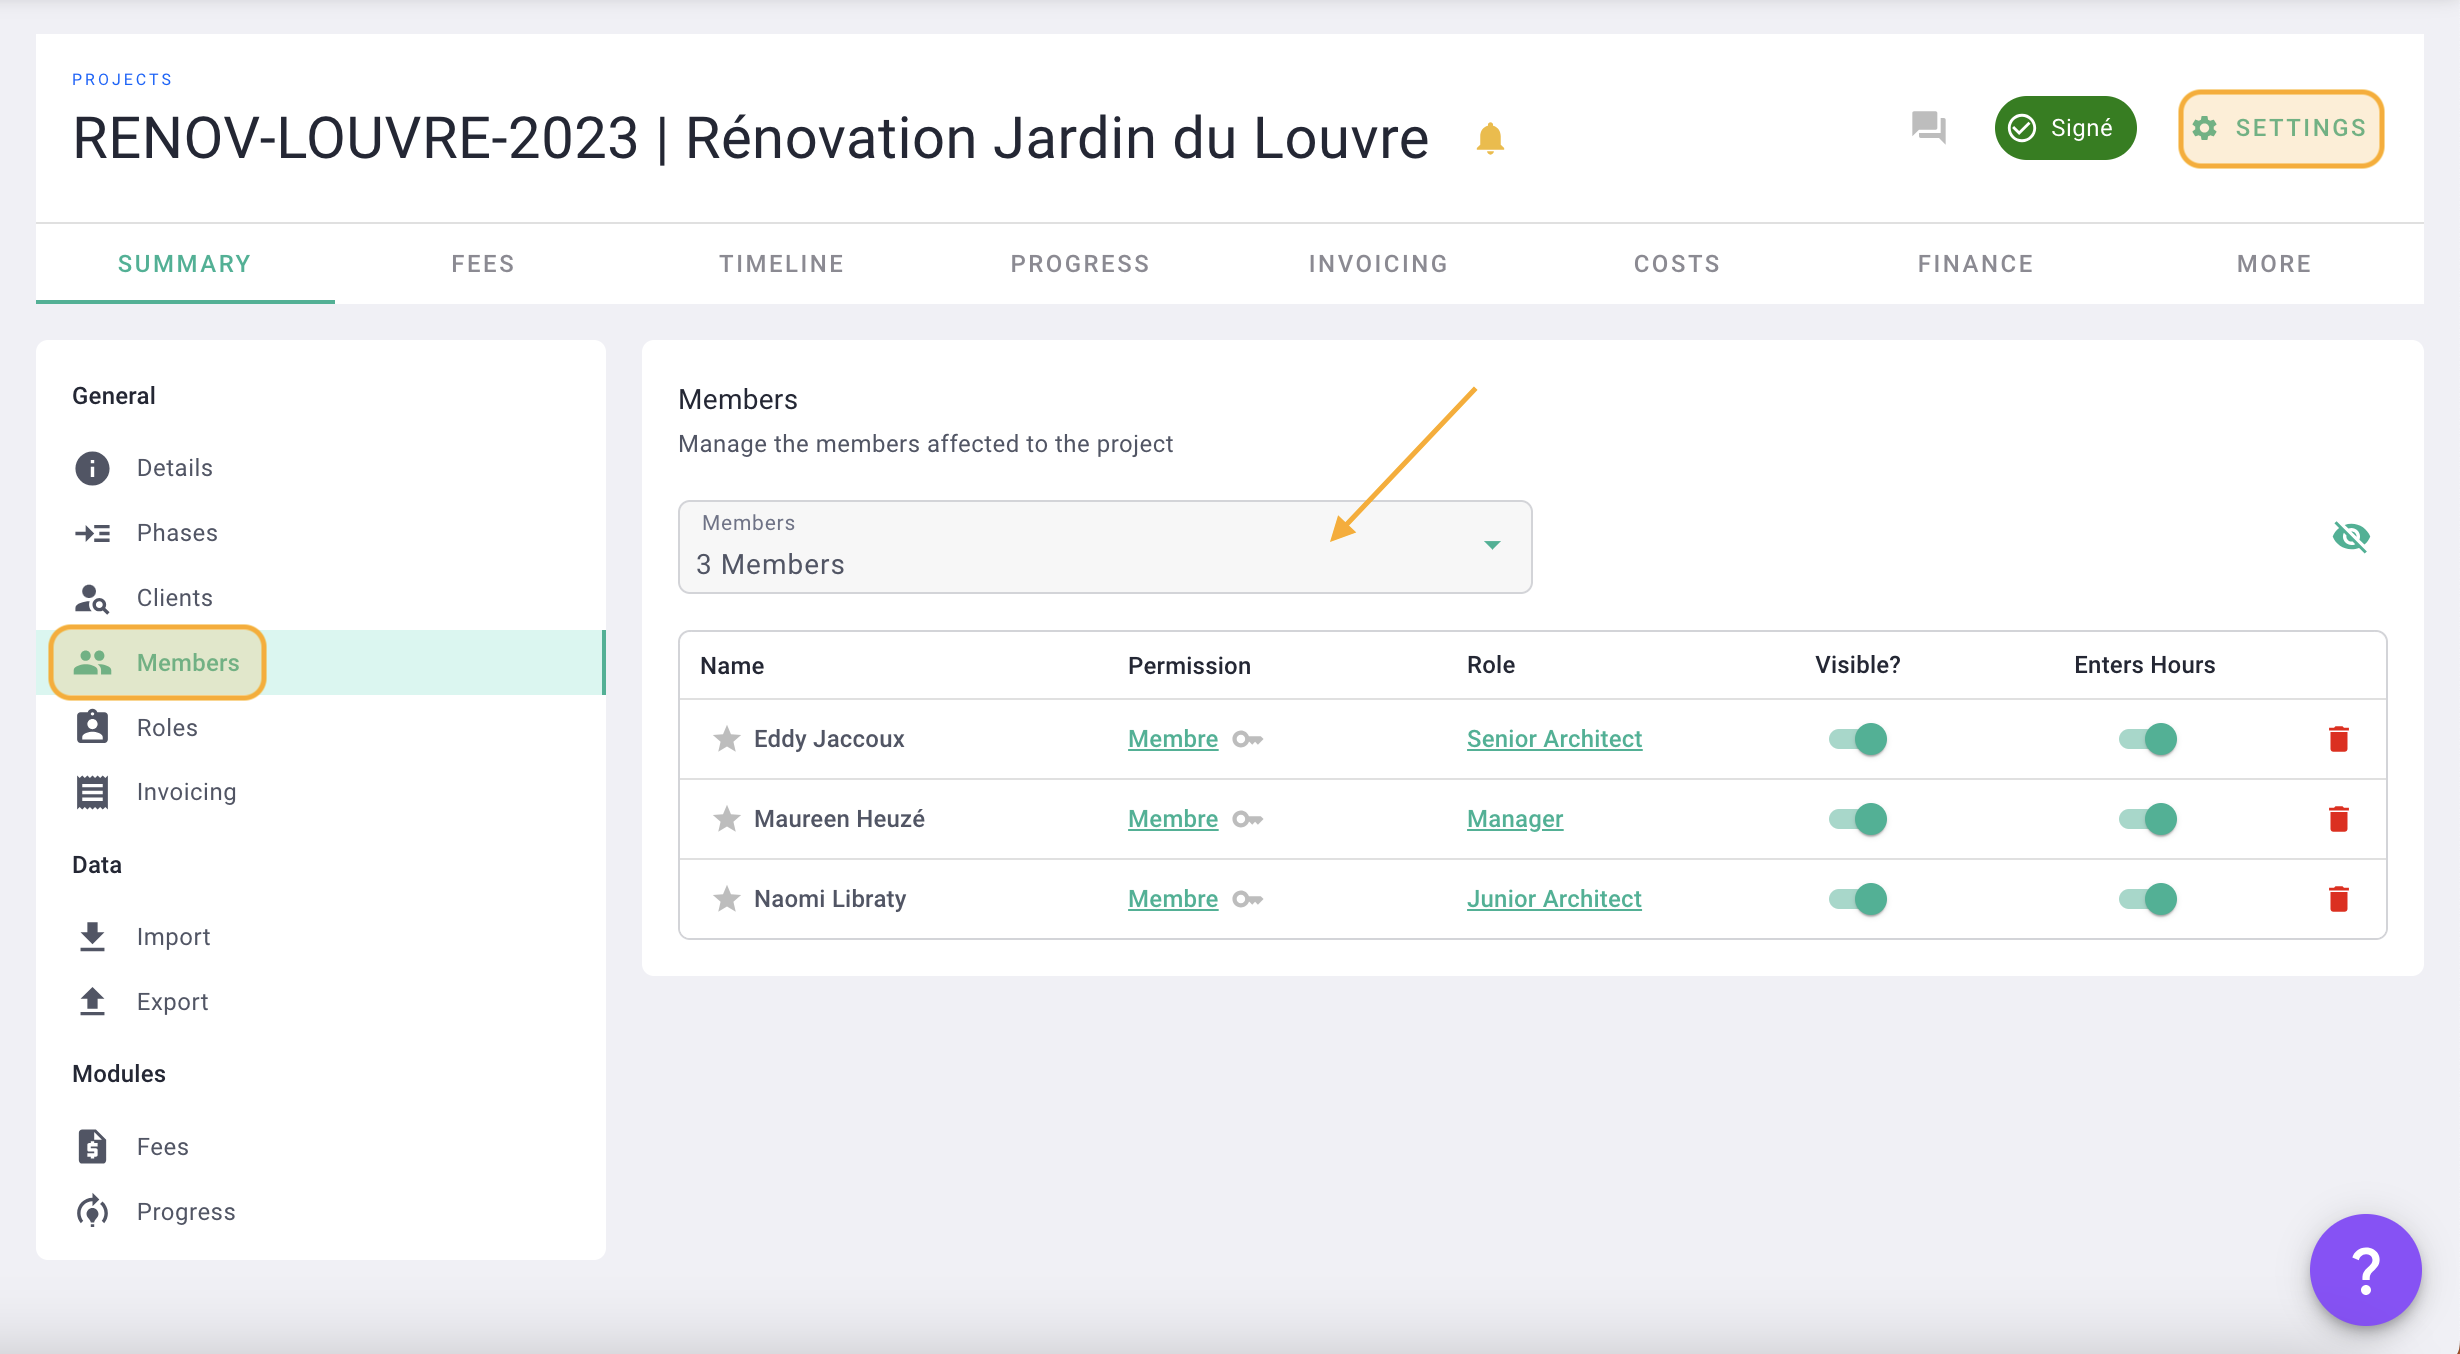
b) roles
The roles are in fact the positions of your collaborators in your agency: project manager, graphic designer, engineer, partner, agency director, junior architect, senior architect etc etc... You are free to create these roles with for each a billable rate (selling price)
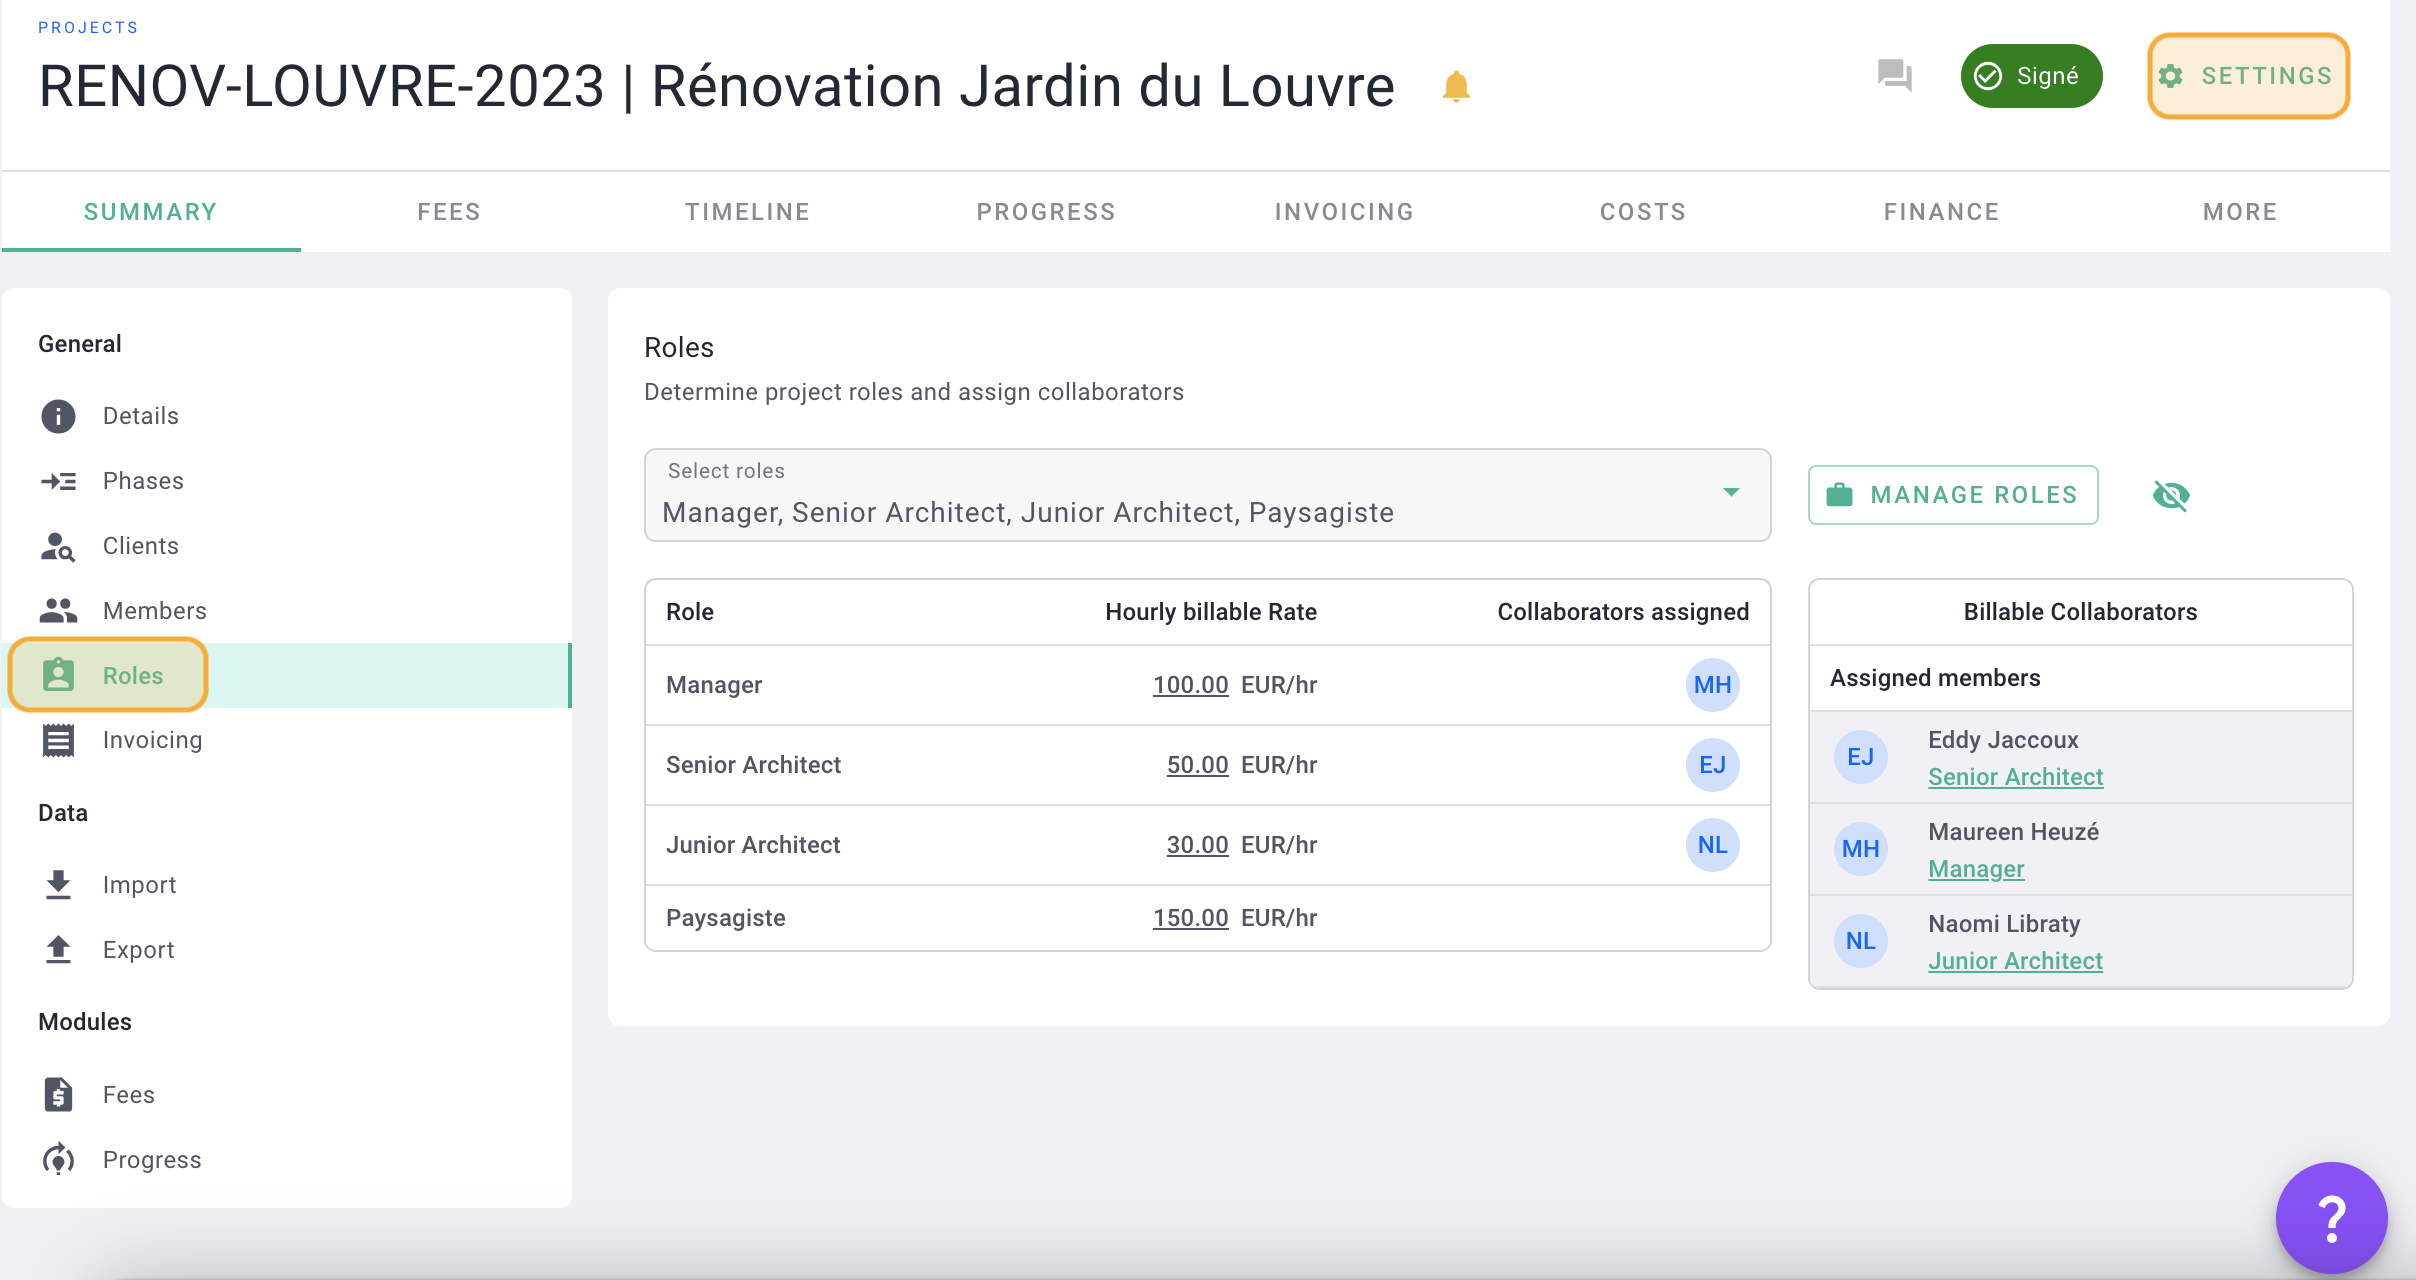
To create roles, go to People > Roles > Manage Roles > + Roles or Account Settings > Teams > Roles > + Role.
In the project, go to project settings > roles to add the project's productive posts.
Select your roles from the drop-down menu or create your roles by clicking manage roles.
Add members to roles by dragging their icons into the roles or clicking the underlined title under each collaborator's name. Finally, modify the billable hourly rate of each role by clicking on it.
II/ Plan resources
1) Manual periods
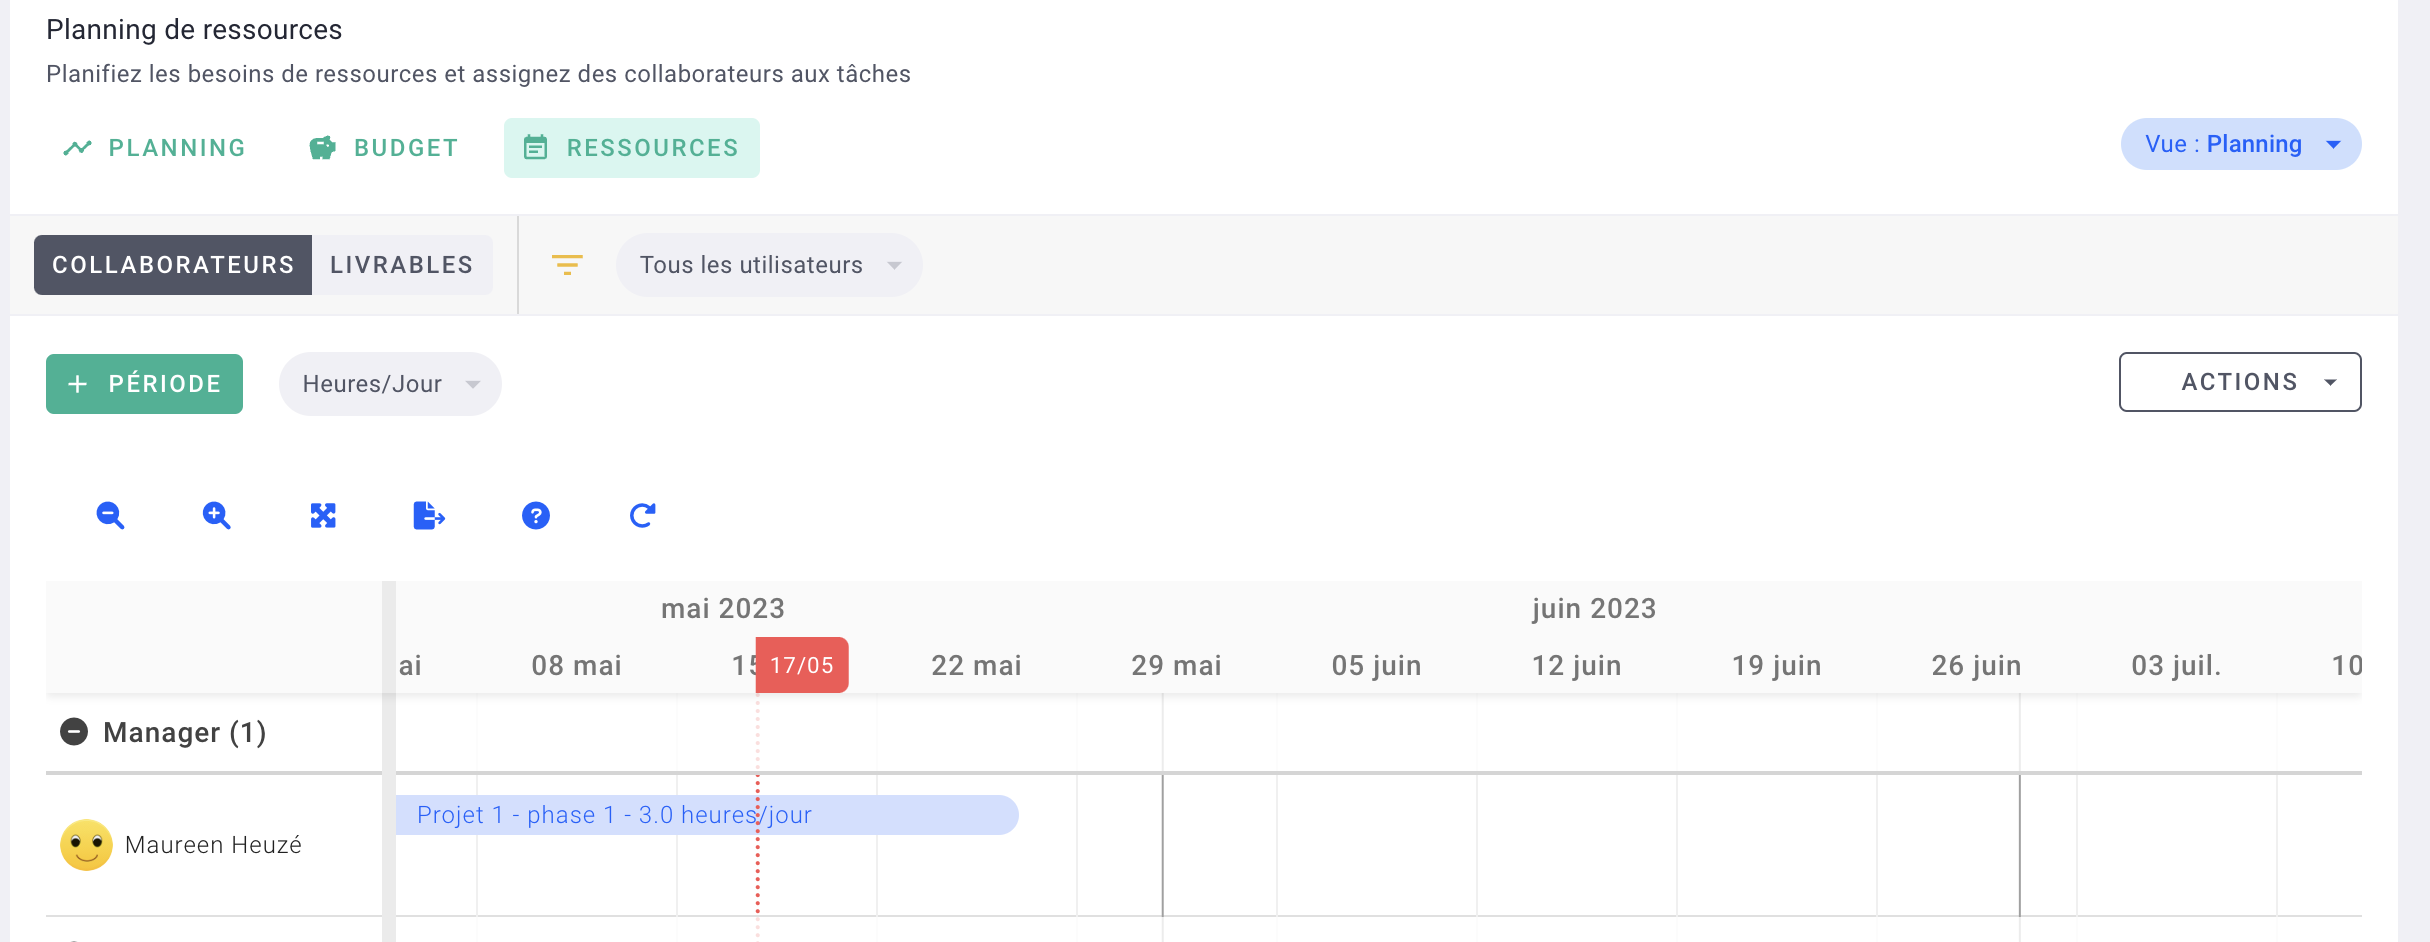
Go to your project > planning > resources. Here, you will be able to manually establish your resource schedule.

To add a period, click + Period and complete the form:
- the phase of the project
- the start and end dates of the work period
- the role and the employee who will be assigned to this work period
- the number of hours per day that the employee must work (or % depending on the settings)
- activate "synchronize the task with the budget" if you have established a budget on this project before
- synchronize or not the task with the schedule so that it is linked to the production schedule
- select the days of the week during which the collaborator will have to work on it.

There you go 🎉 I created a work period manually in the resource schedule.
💡 To modify it, I can double click on the phase to change the form, or I can move it by dragging it right or left or expand it by clicking on the edges.
2) Periods via the budget
Here are the two articles to create periods via the budget:
- How to create a time budget on a project and analyze the times?
- How do I create a resource schedule based on the budget?
III/ Work schedule and availability
Here is the article to create periods via the budget:
- How can I consult the workload schedule and availability of my teams?
IV/ Analysis
On the workload schedule of your project, click on the blue button on the right "Schedule view" and choose the Stats view.
The graph shows several indicators.
- The green curve: budgeted hours. That is, the hours you established when allocating the budget, based on agency fees and roles
- The orange curve: the scheduled hours, which correspond to the periods in the resource schedule
- The blue curve: the actual hours entered by all the collaborators on the project.
💡 Hover over the graph to see the details of budgeted, planned and current hours appear month by month.
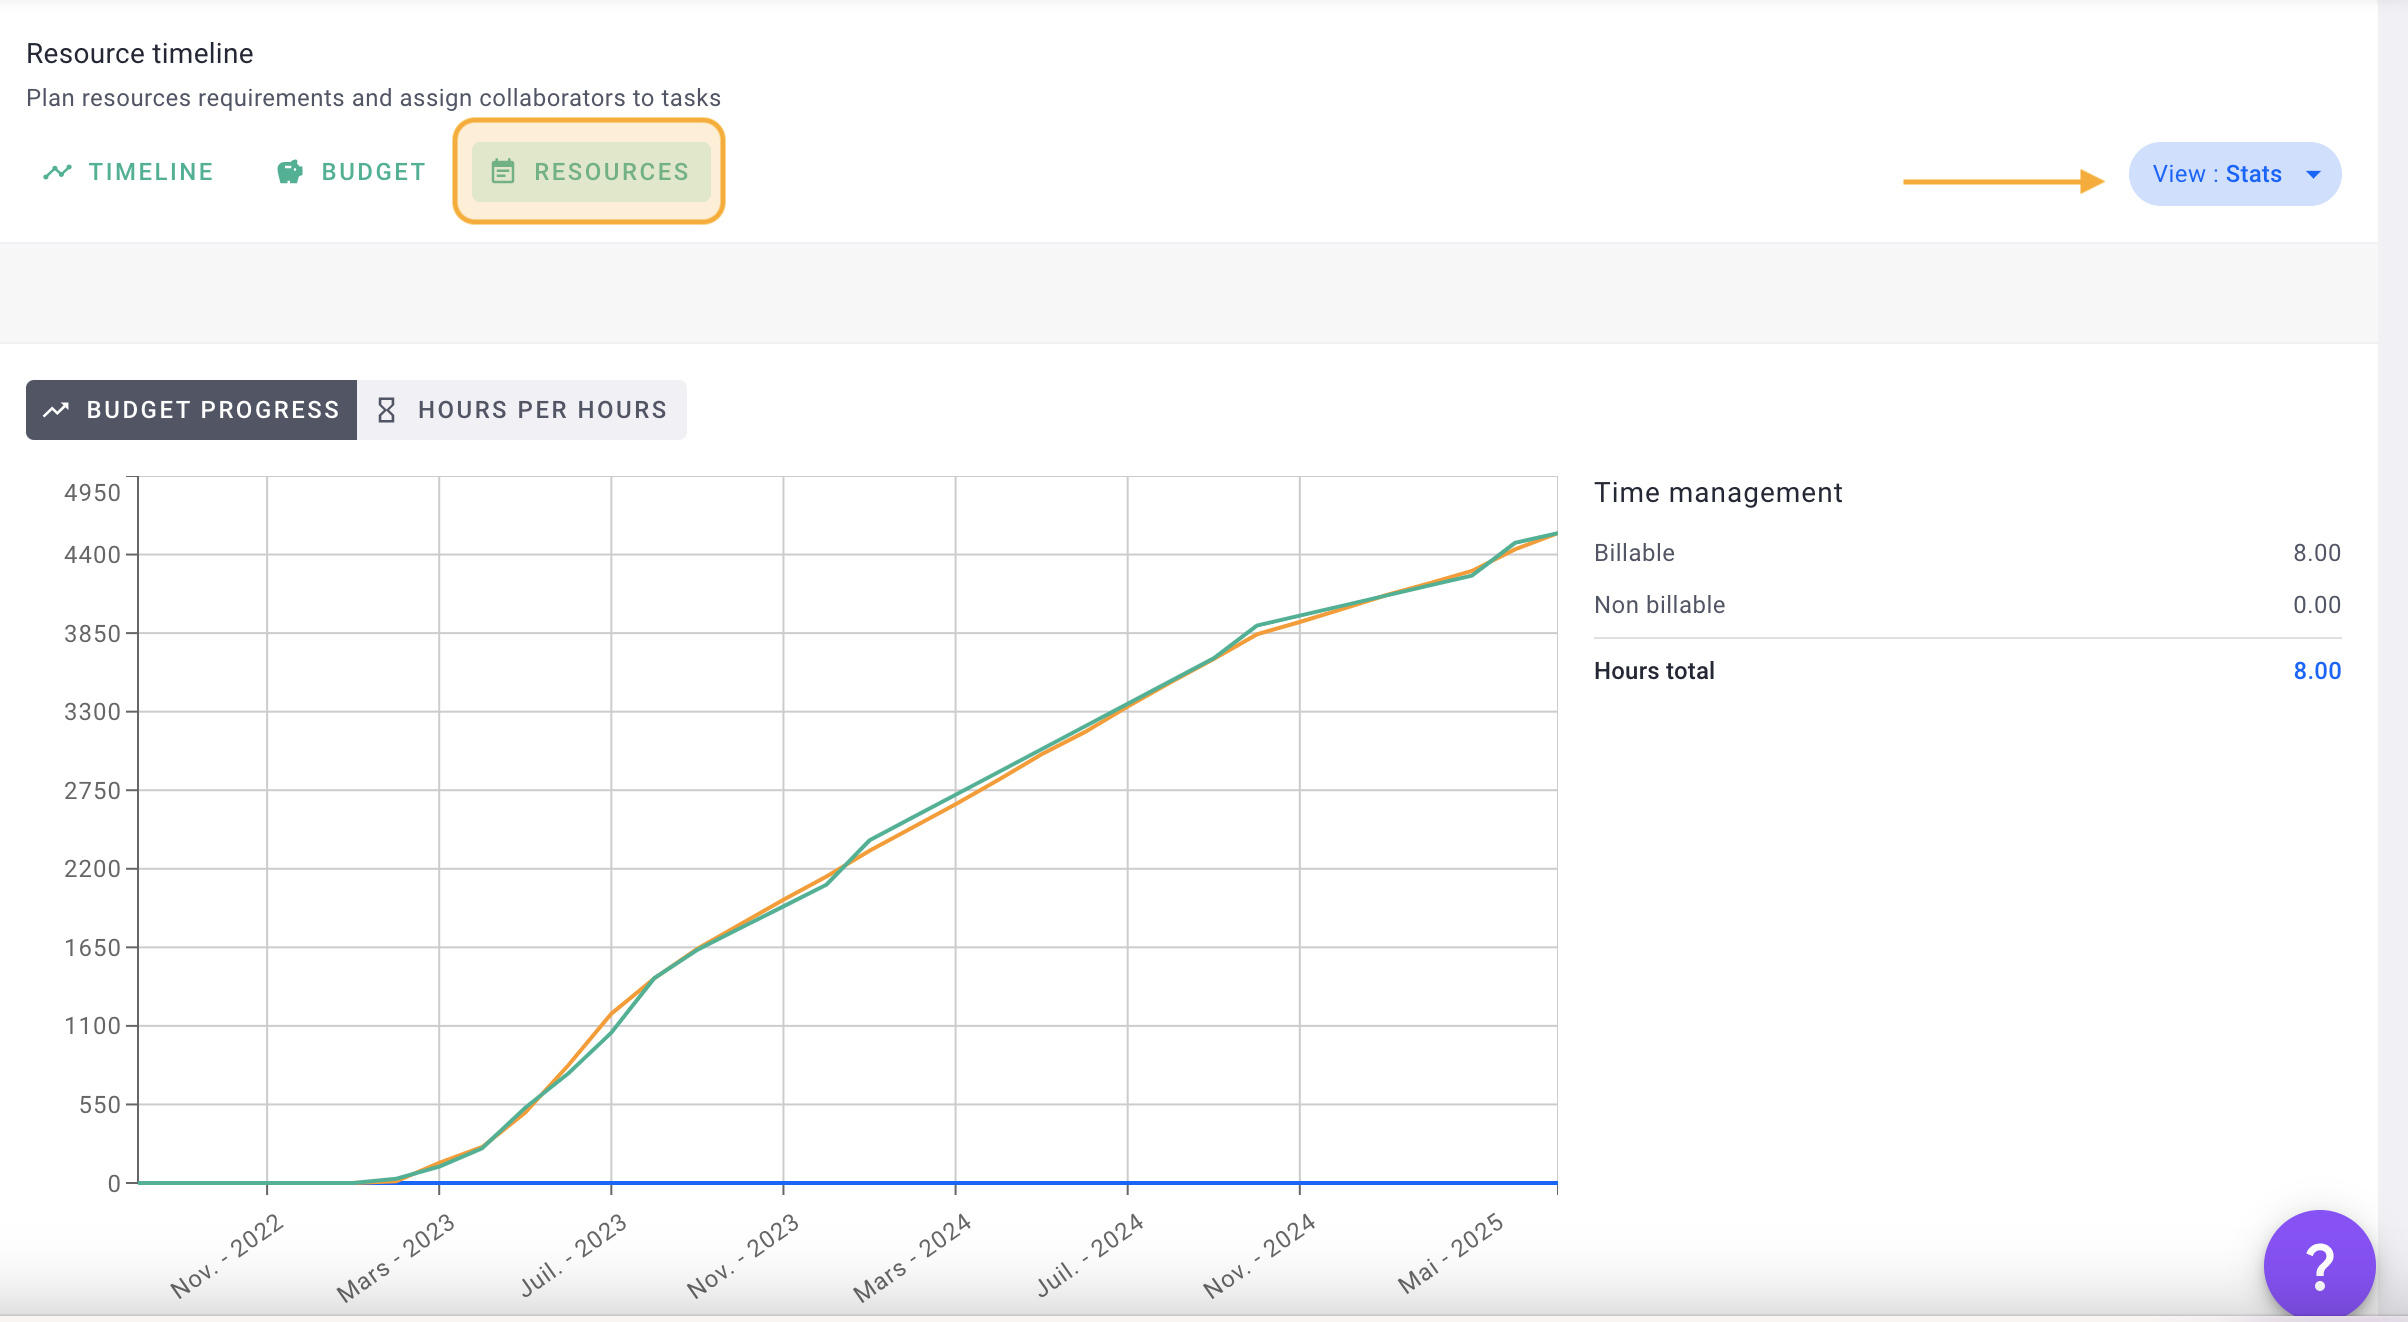
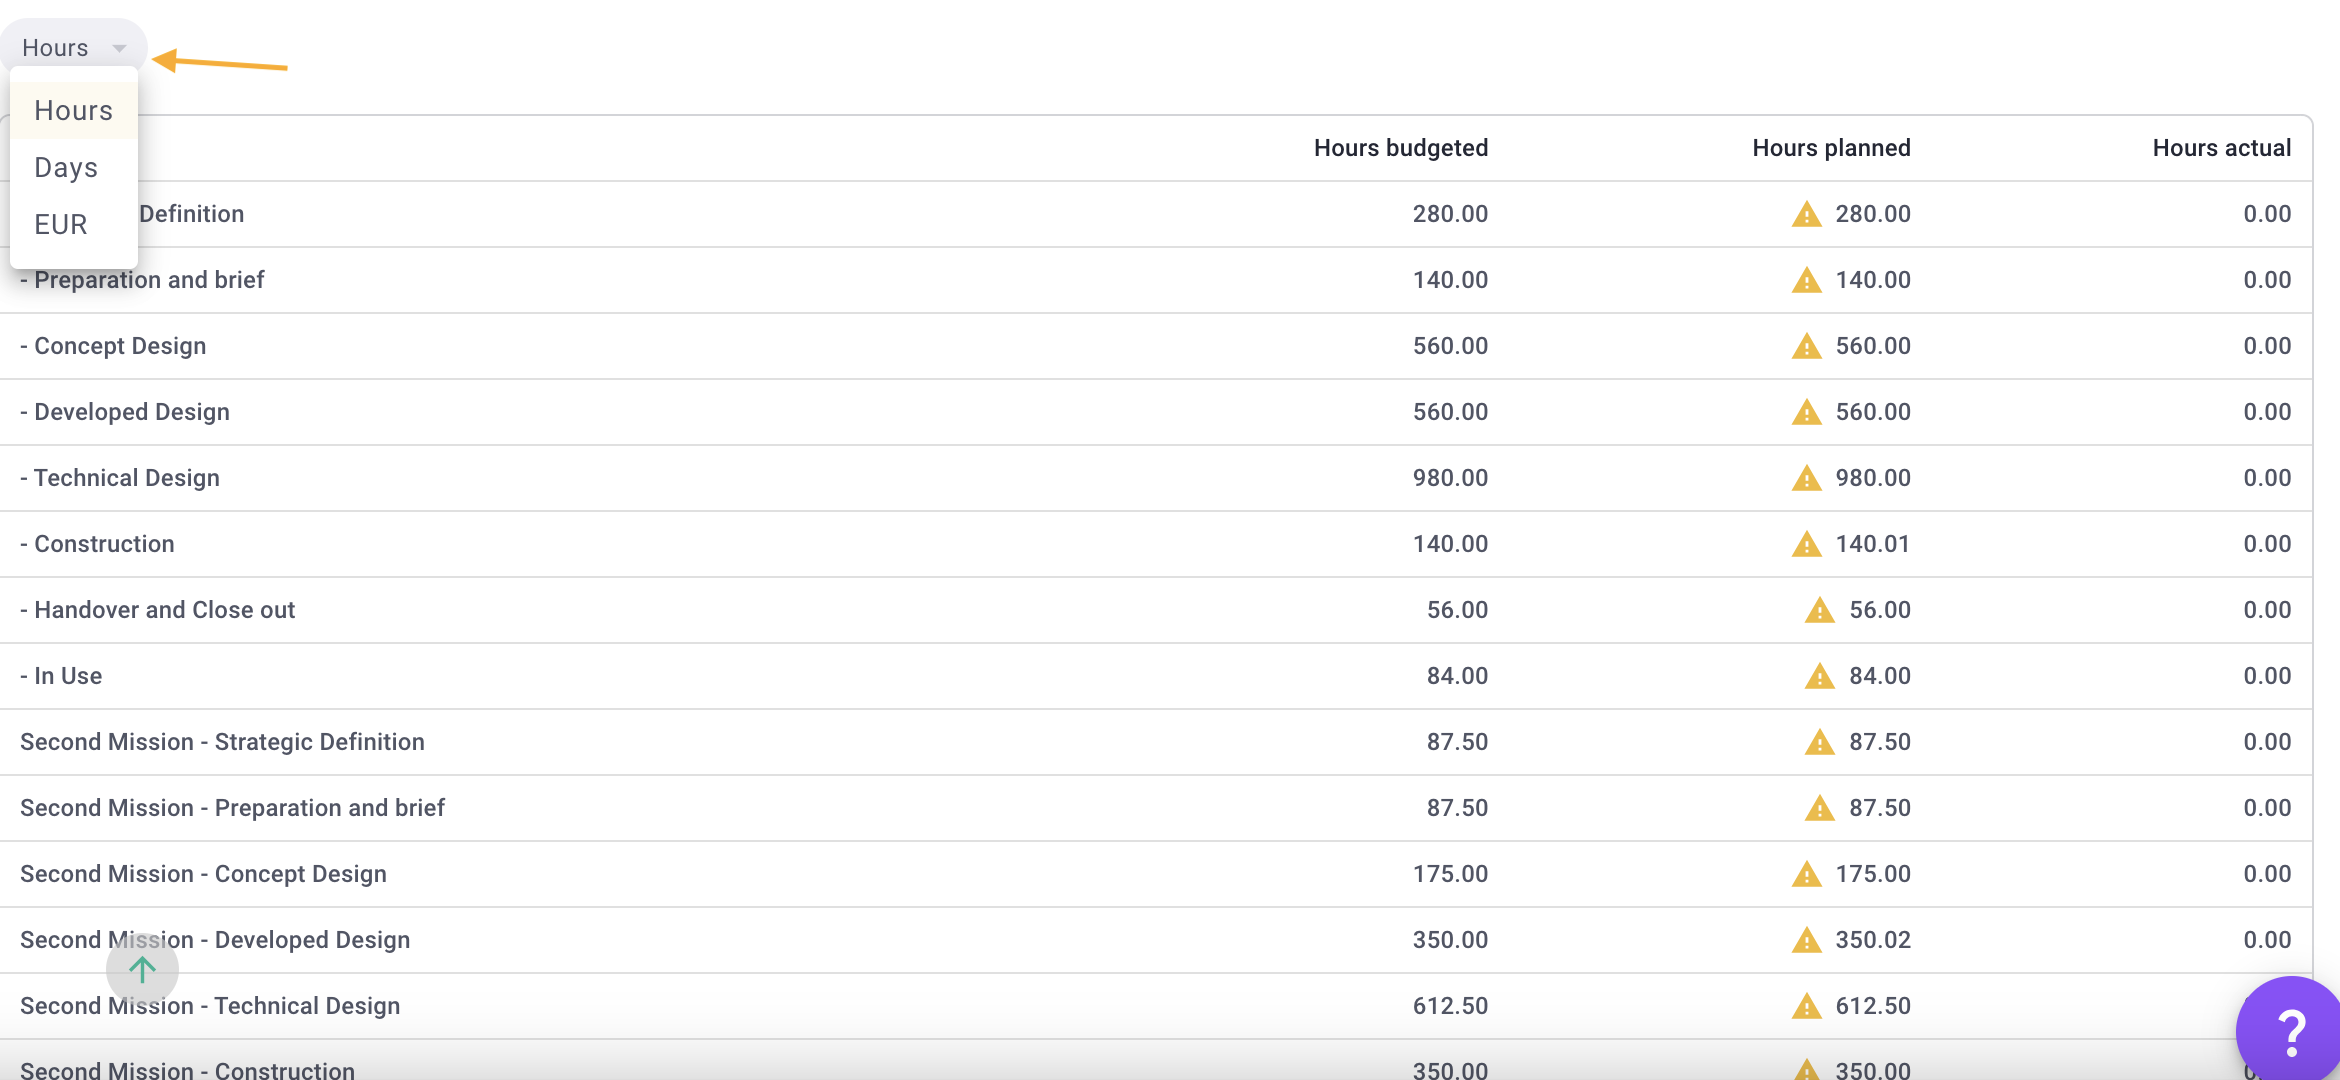
Below the chart, you'll see the summary, based on budgeted, planned, and actual hours/days or amounts.
It's done ! 🎉
You know how to follow and analyze your project precisely!
💡 Also find these indicators on the Summary tab of your projects, at the bottom of the page.
