Managing a project from start to finish: project creation, fee calculation, scheduling, progress monitoring, invoicing, and configuration on OOTI.
🔓 Required permissions
Super admin
| Reading time | 10 min |
| Setup length | 20 min |
| Steps | 6 |
Summary
I/ Creating a Project
II/ Fees
3) Fee Status: Validated and Signed
4) Adding a Complementary Mission or Project Amendment
III/ Production Schedule
IV/ Progress
V/ Invoicing
VI/ Project Settings
I/ Creating a Project
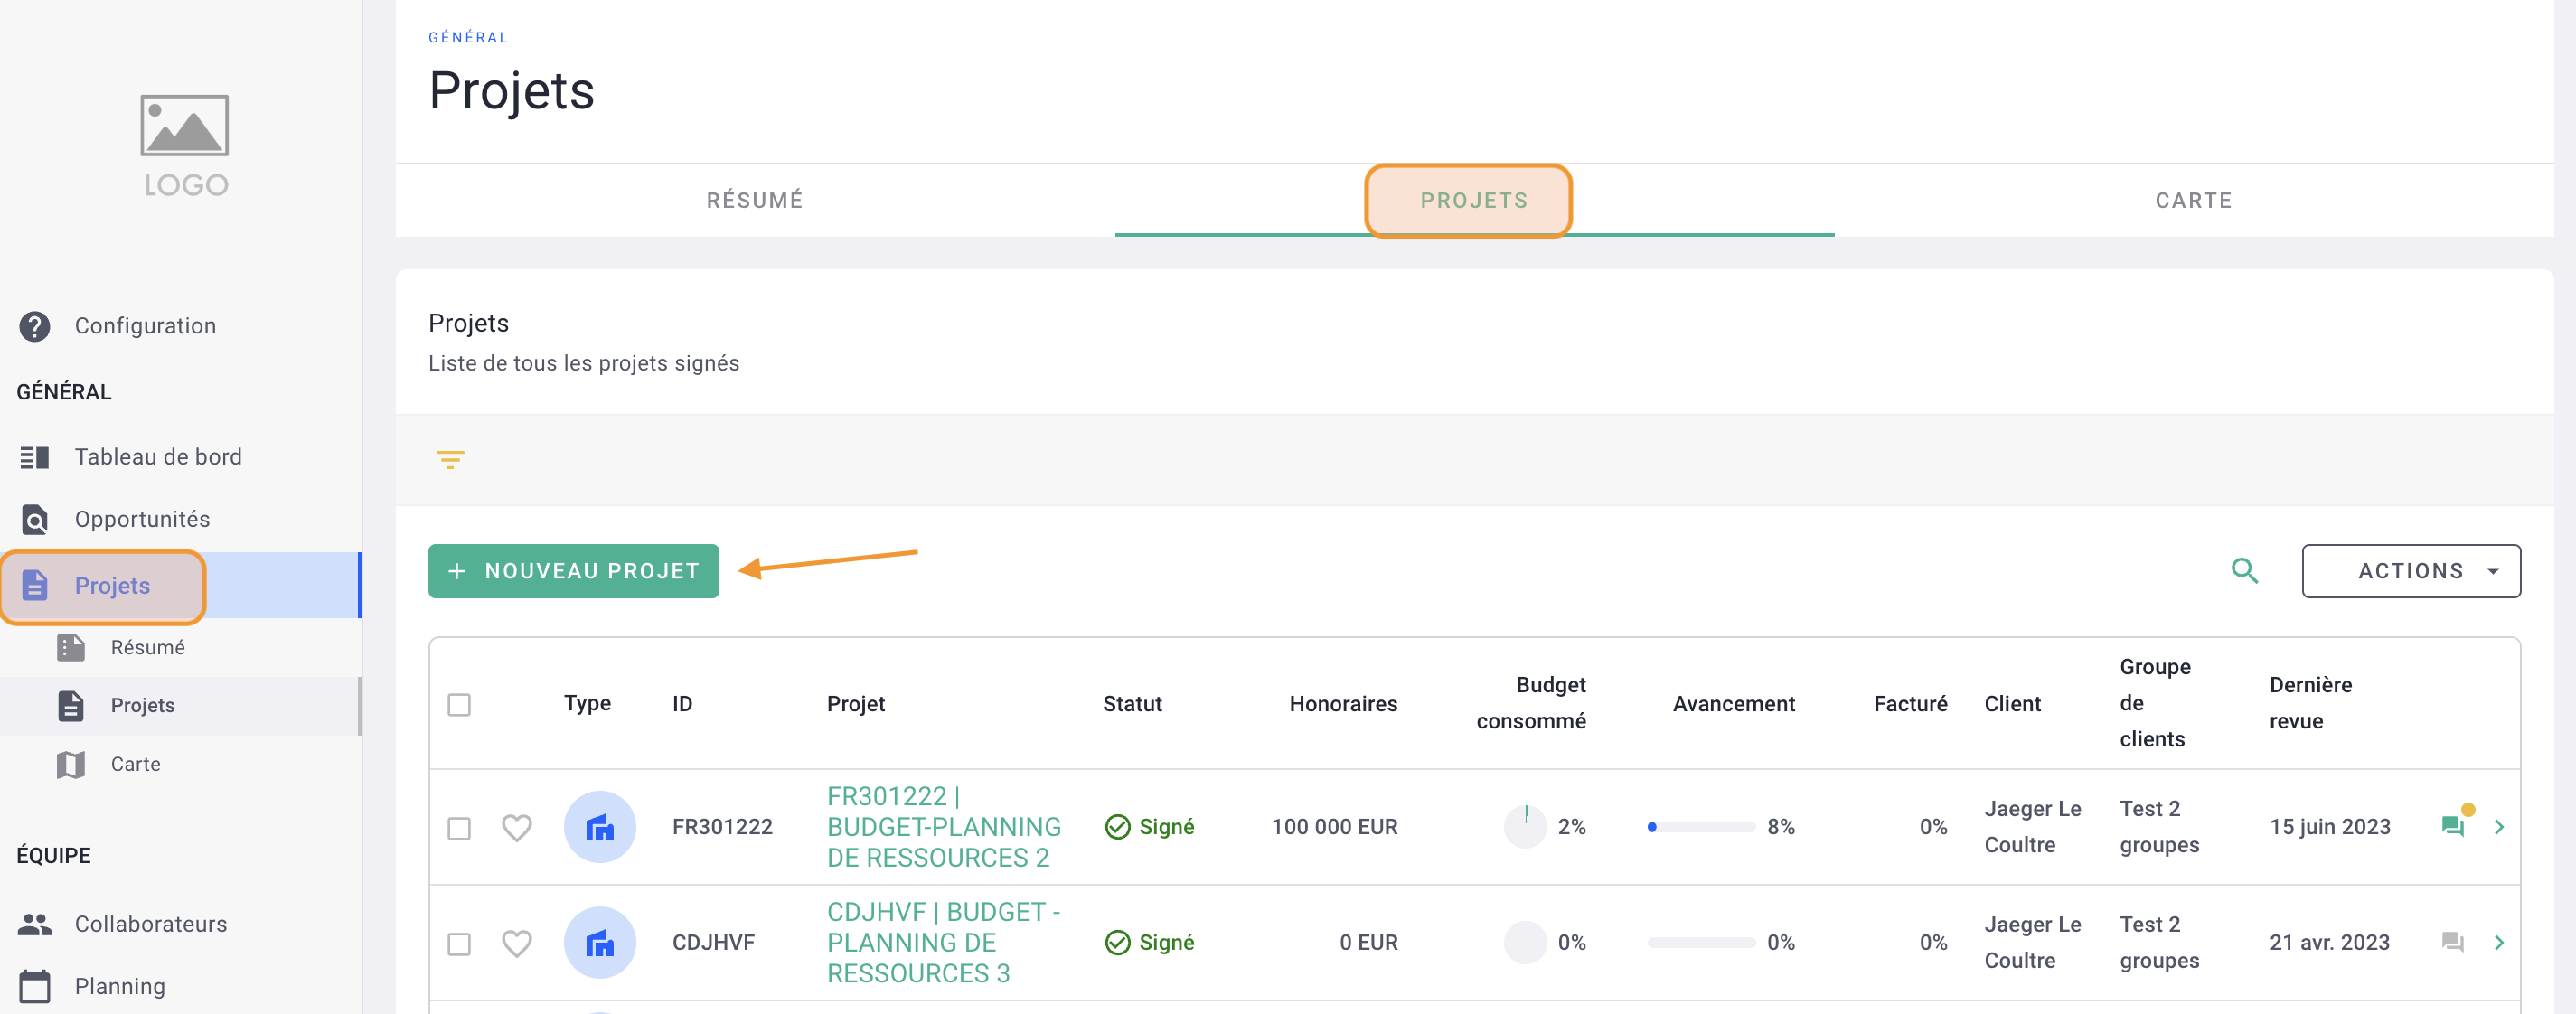
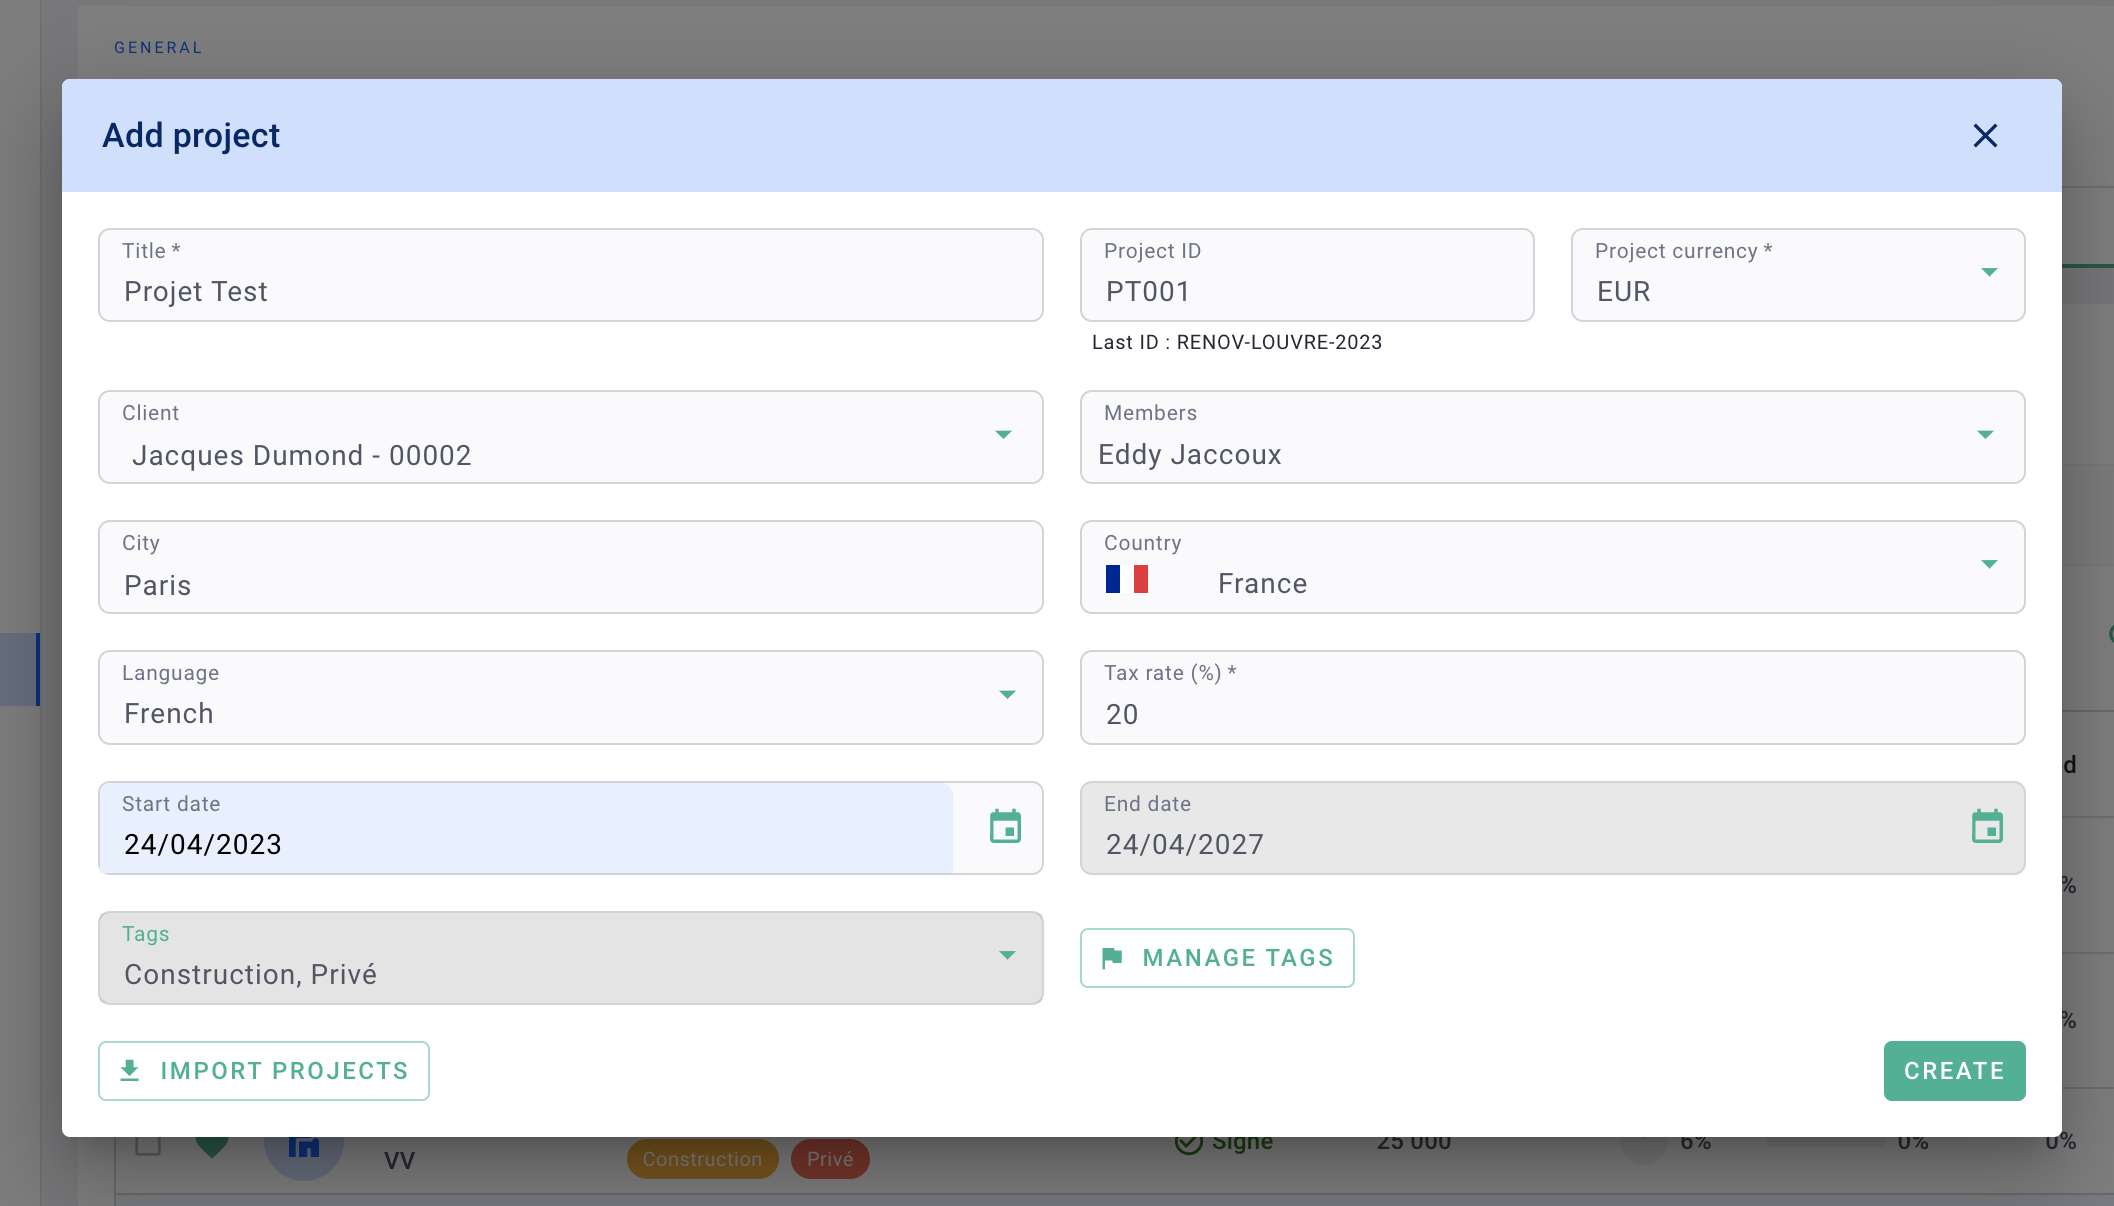
Go to Project > Project then + New project.
Fill out the form with the following details:
- Project title, visible to all your teams.
- Project ID, the project number or code, i.e., the nomenclature you assigned to your project. The choice of ID is up to you.
- Project currency, the currency of the contract. Select the correct currency if the project contract is in $, CHF, or other currencies.
- Client, the billing client that will appear on the invoice. Select the client or click on + Client to create a new one.
- Project city and country.
- Default VAT rate for all project invoices. You can always modify this rate on individual invoices or during the project.
- Dates, used to create the projected production schedule. If you don't know the end date, enter the planned delivery date of the project, and the schedule will adjust accordingly 😌
- Members, the team members working on the project. Members can view the project and log time on it.
- Tags, project labels. You can create various project types like renovation, private, public, co-contracting, project lead by Tobias, residential, offices, etc. (click here to learn more about tags).
Once the form is filled, click on Create.
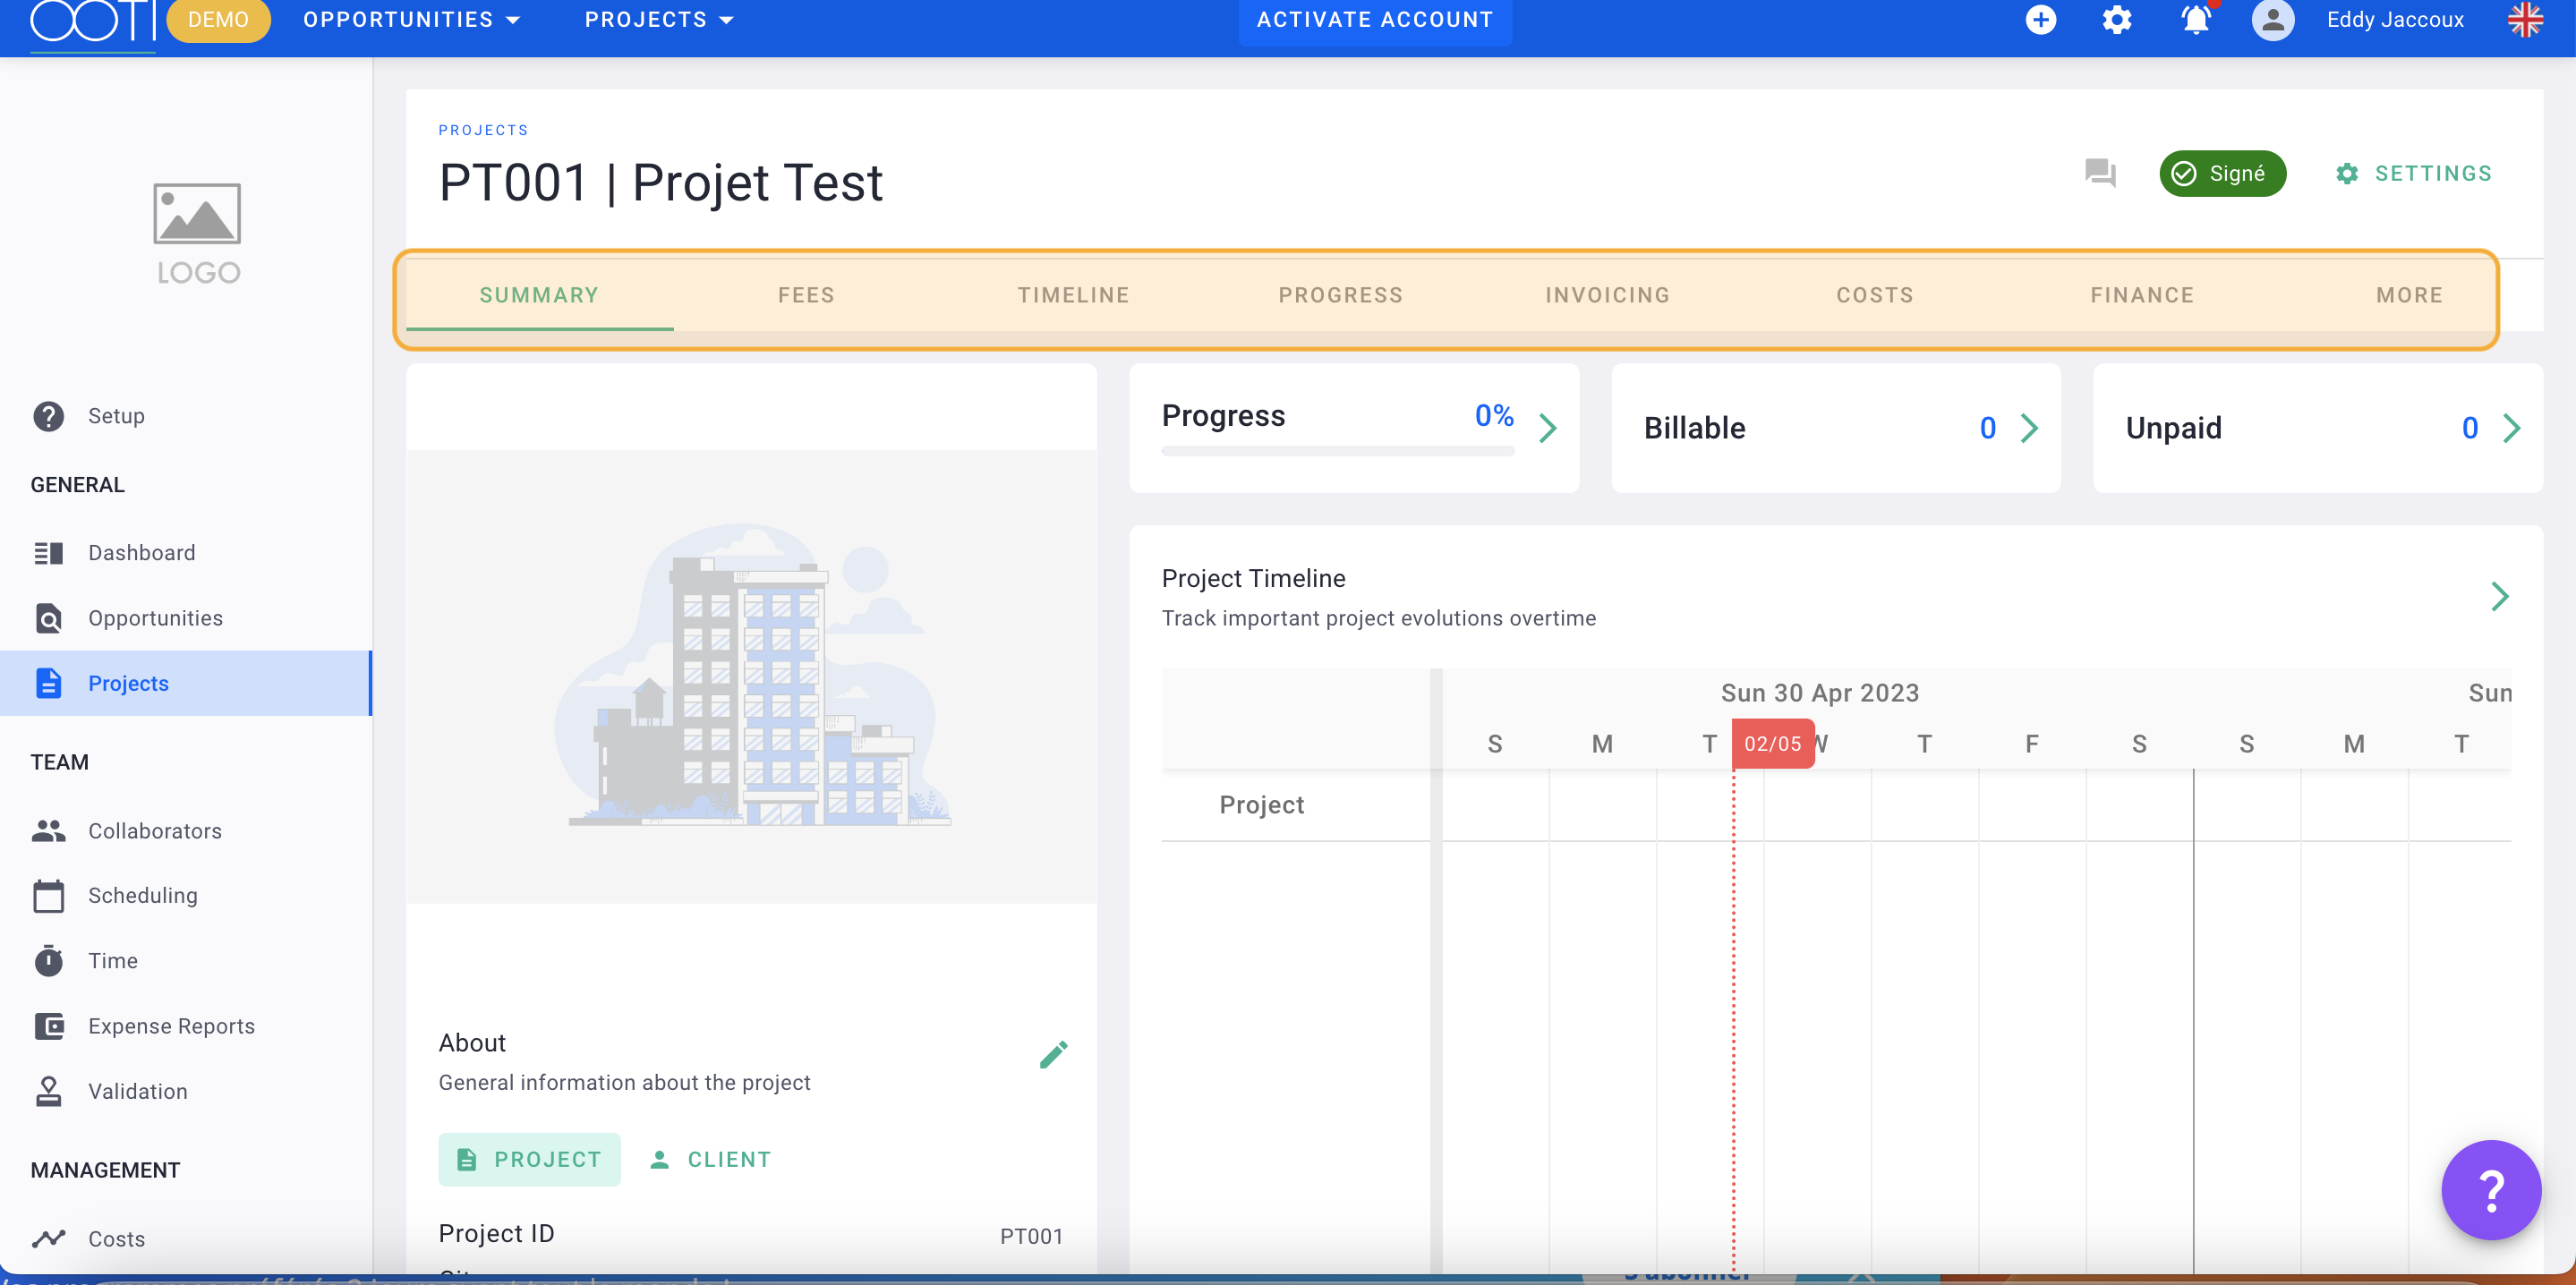
You have created your project 🎉
Navigate through the project tabs.
II/ Fees
Fees are a crucial element of your projects. They represent the contract for your project, along with billing phases and associated fees.
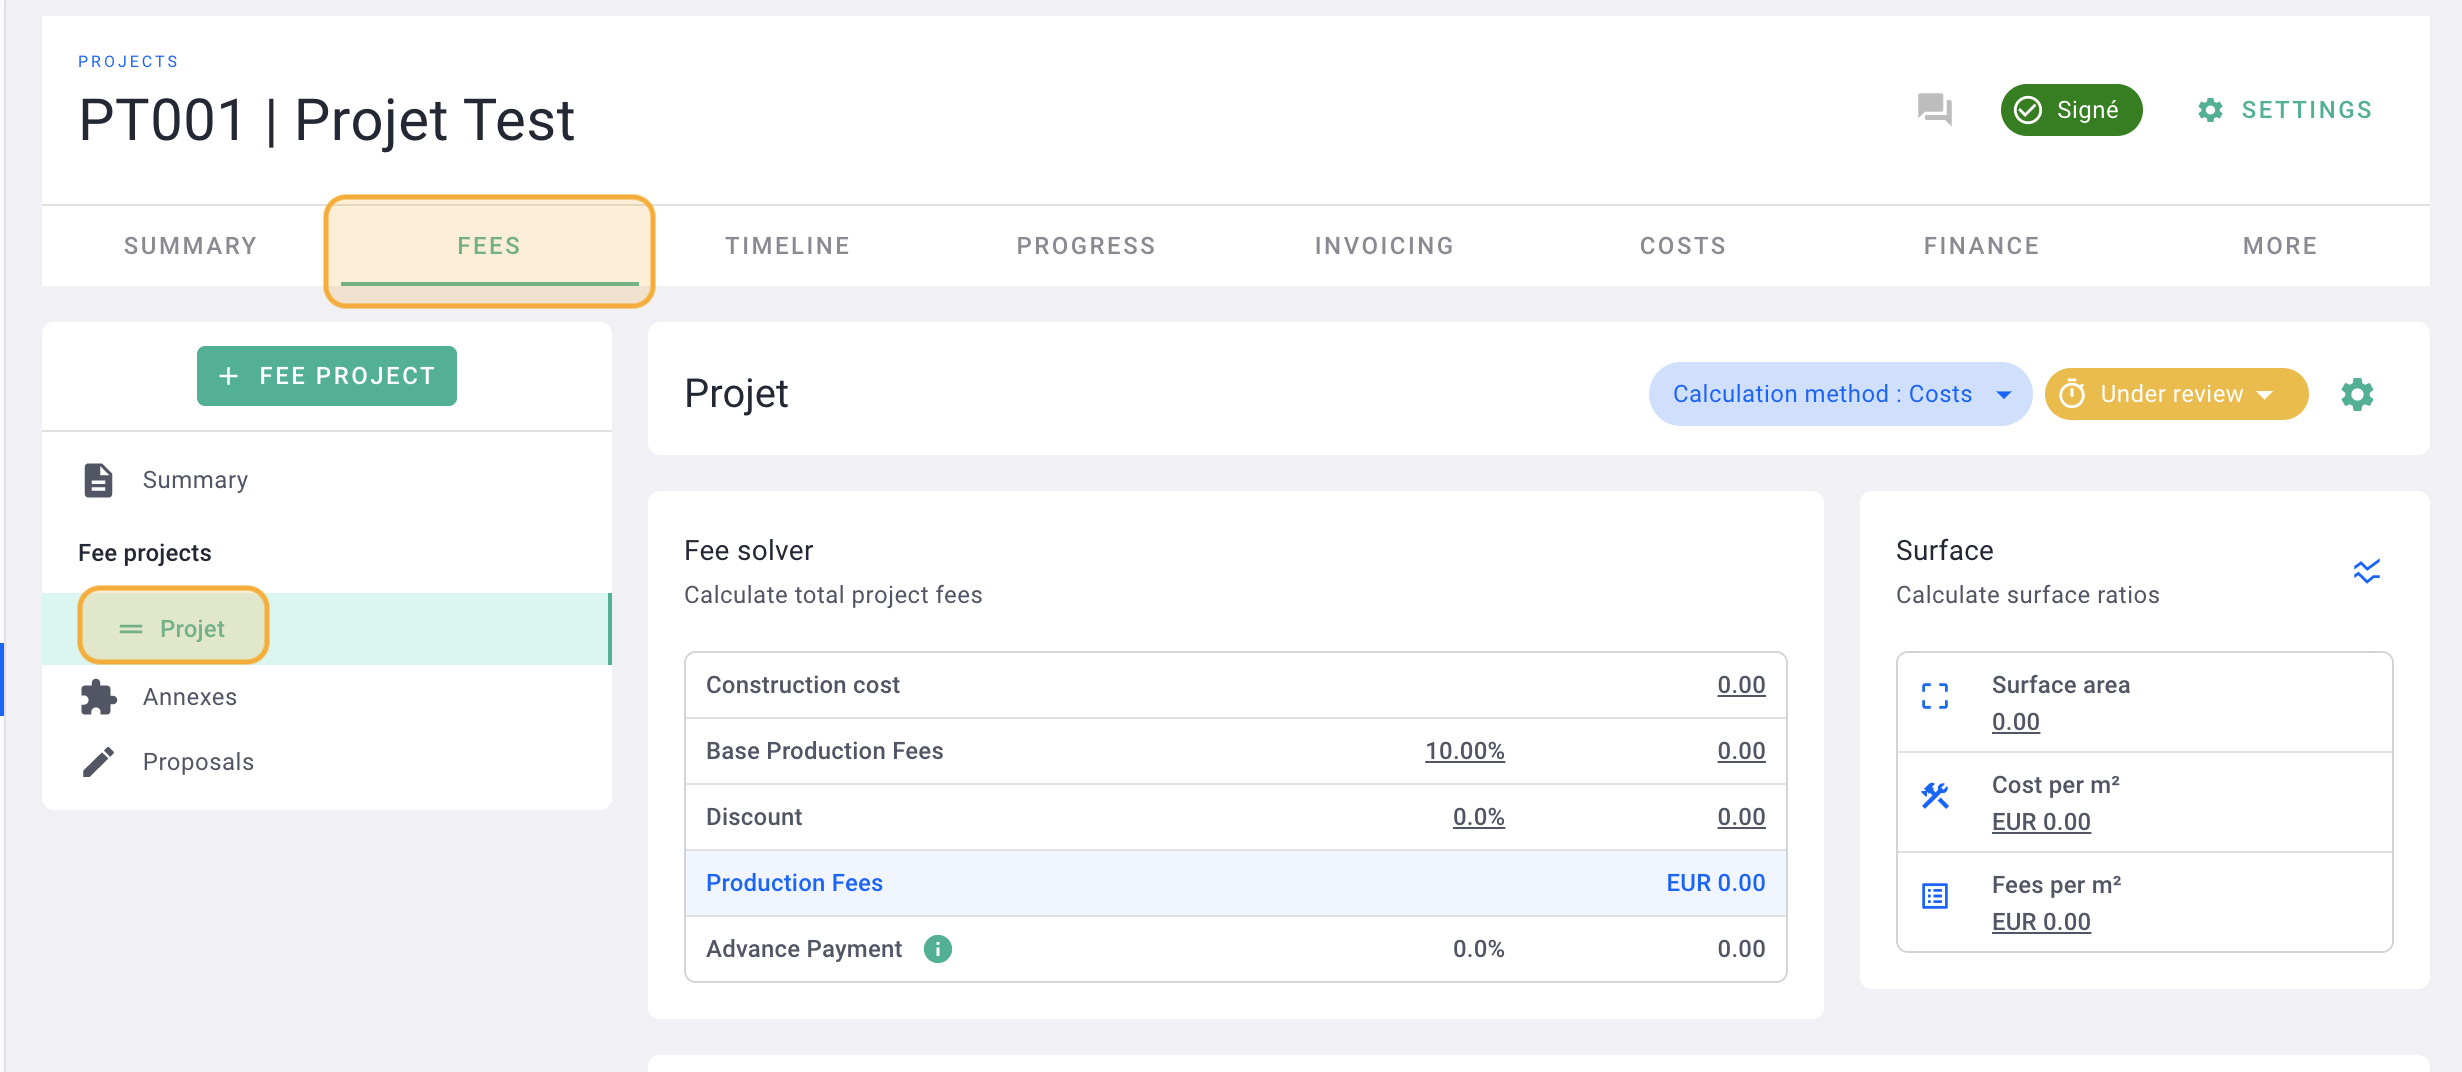
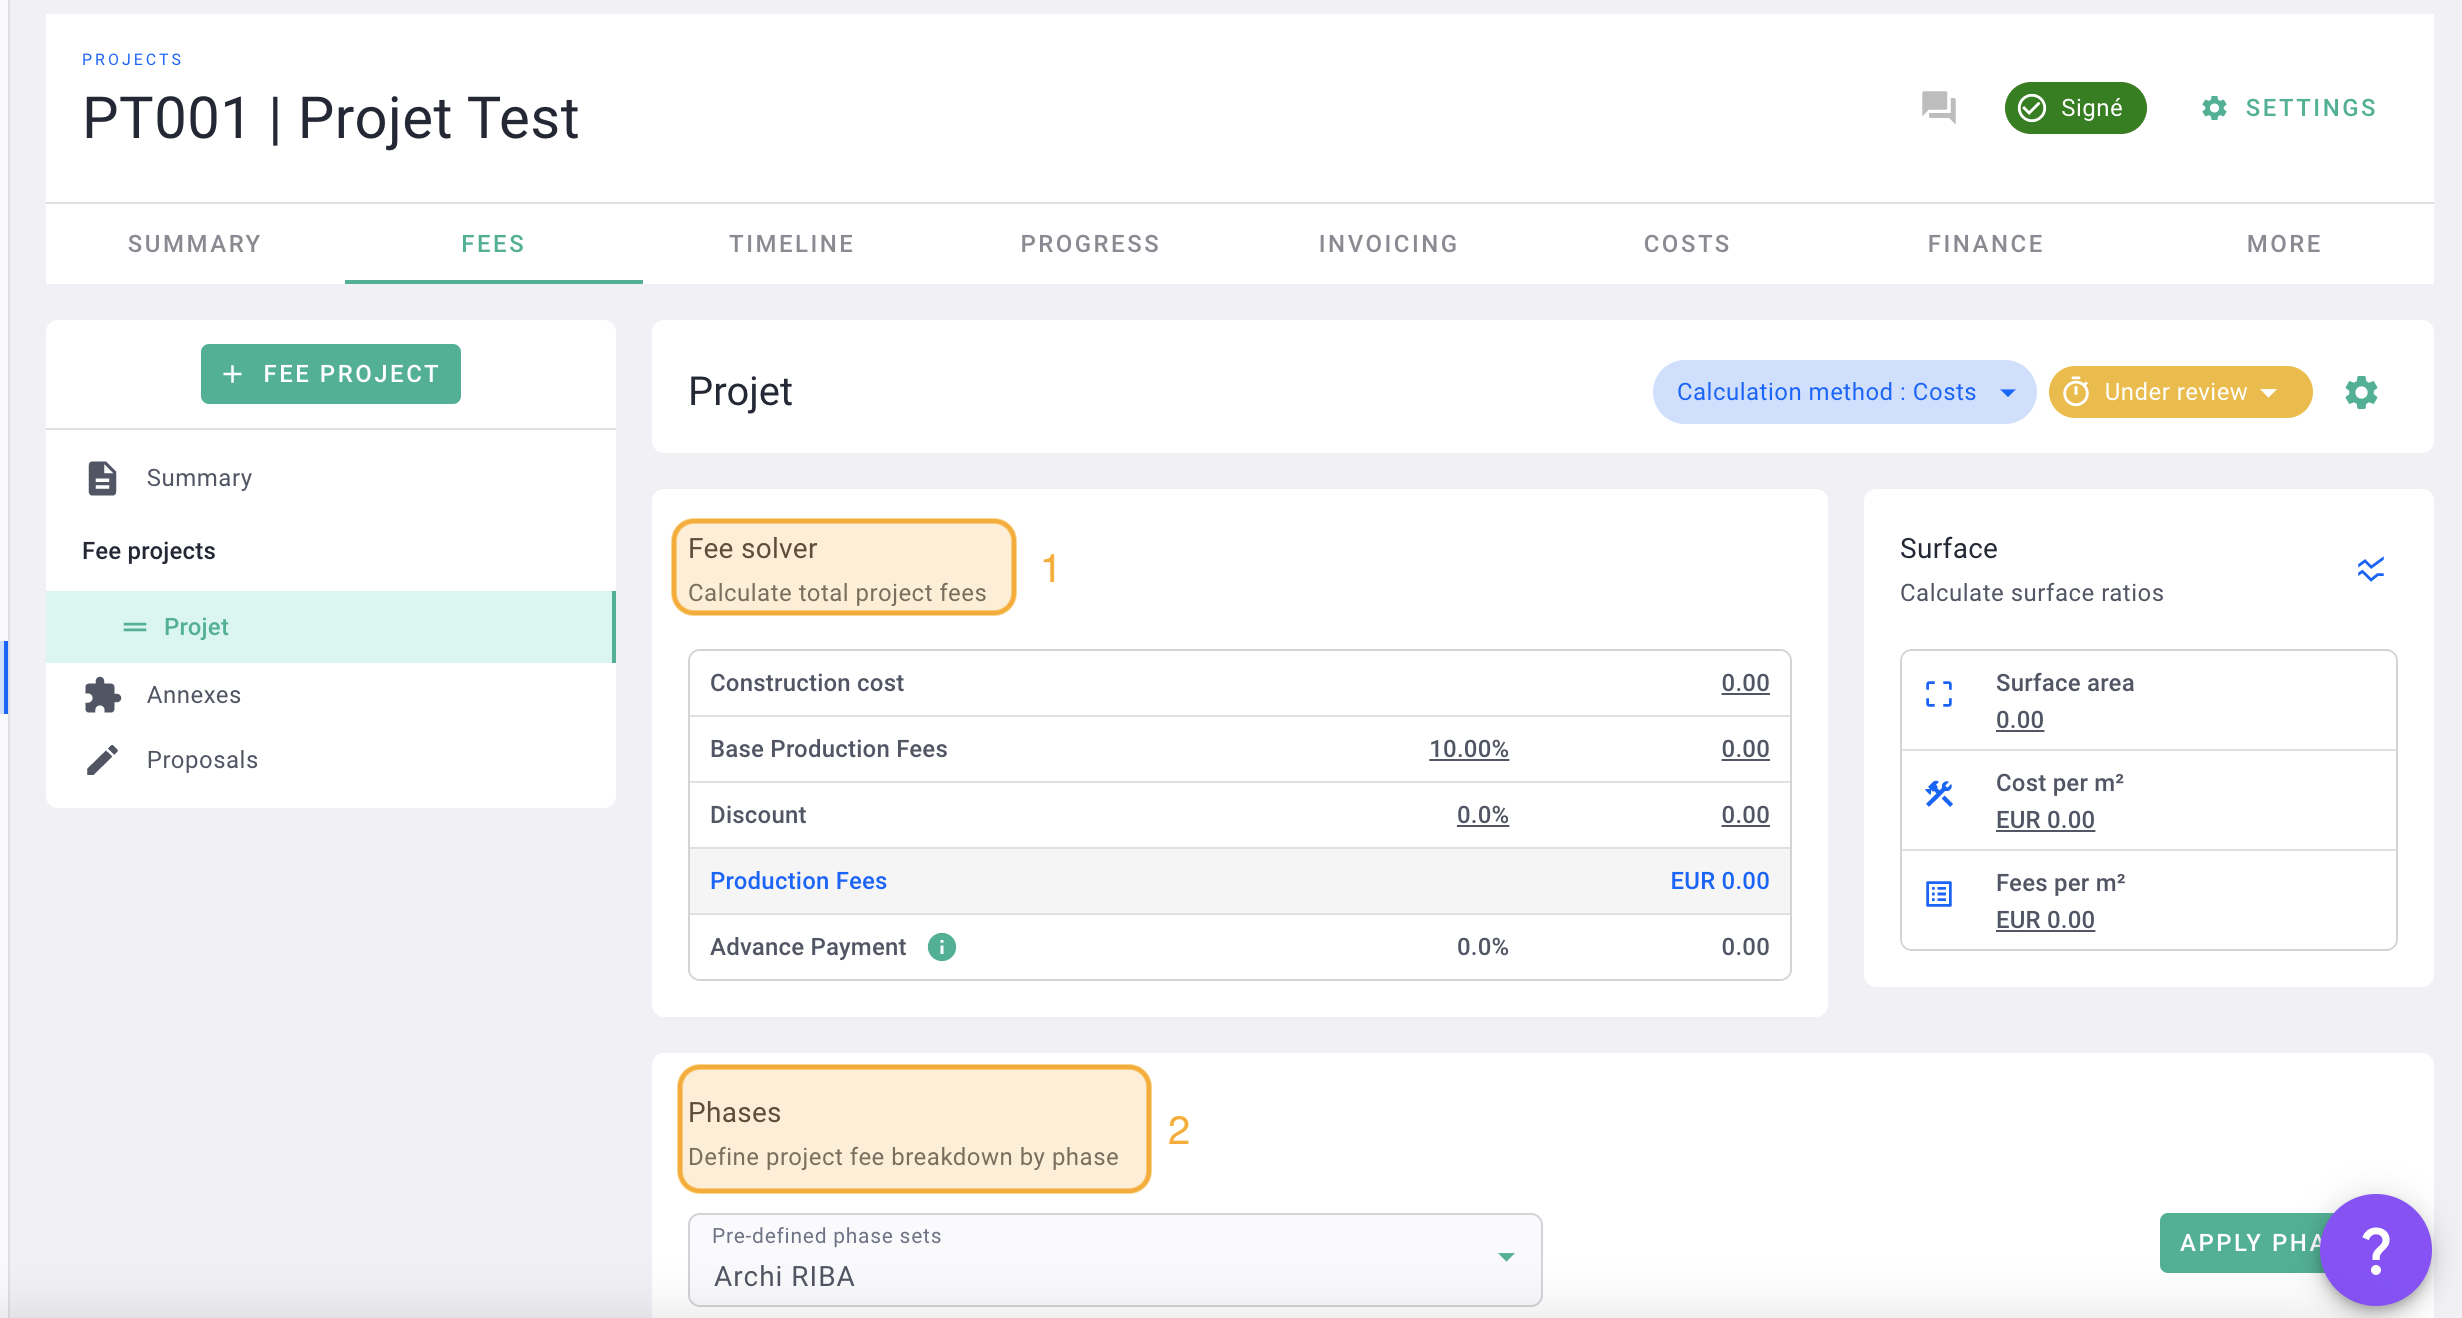
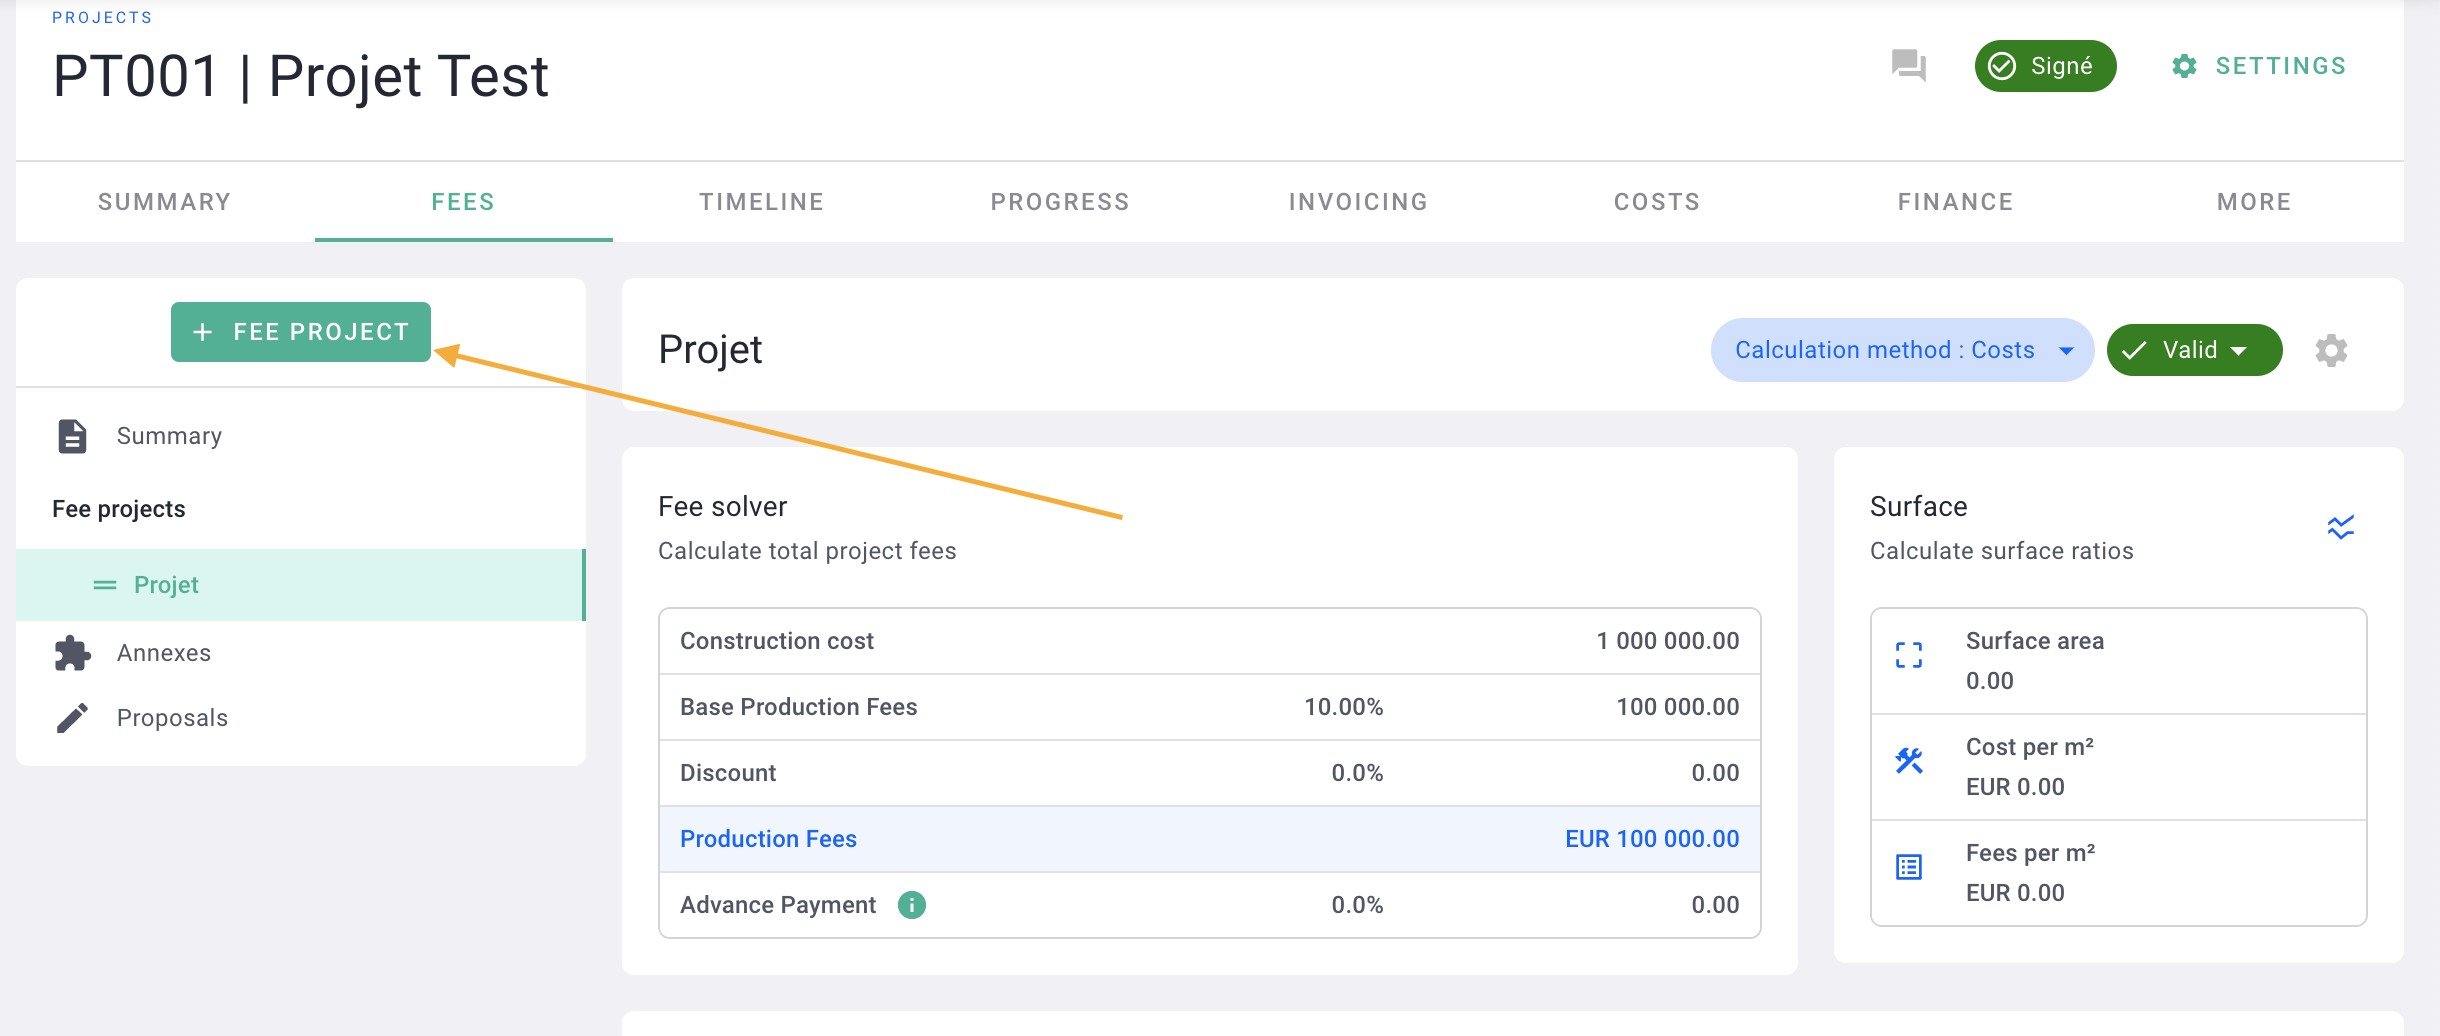
Go to the Fees tab and then to the default mission named "Project".
Here are the steps to add fees:
- Fill out the "Fee Solver" table with the total amount of the mission.
- Add billing phases for the mission.
1) The amount of fees
Enter the cost of the work in net amount (excluding taxes). Then, input the percentage of fees or the amount of fees in net amount.
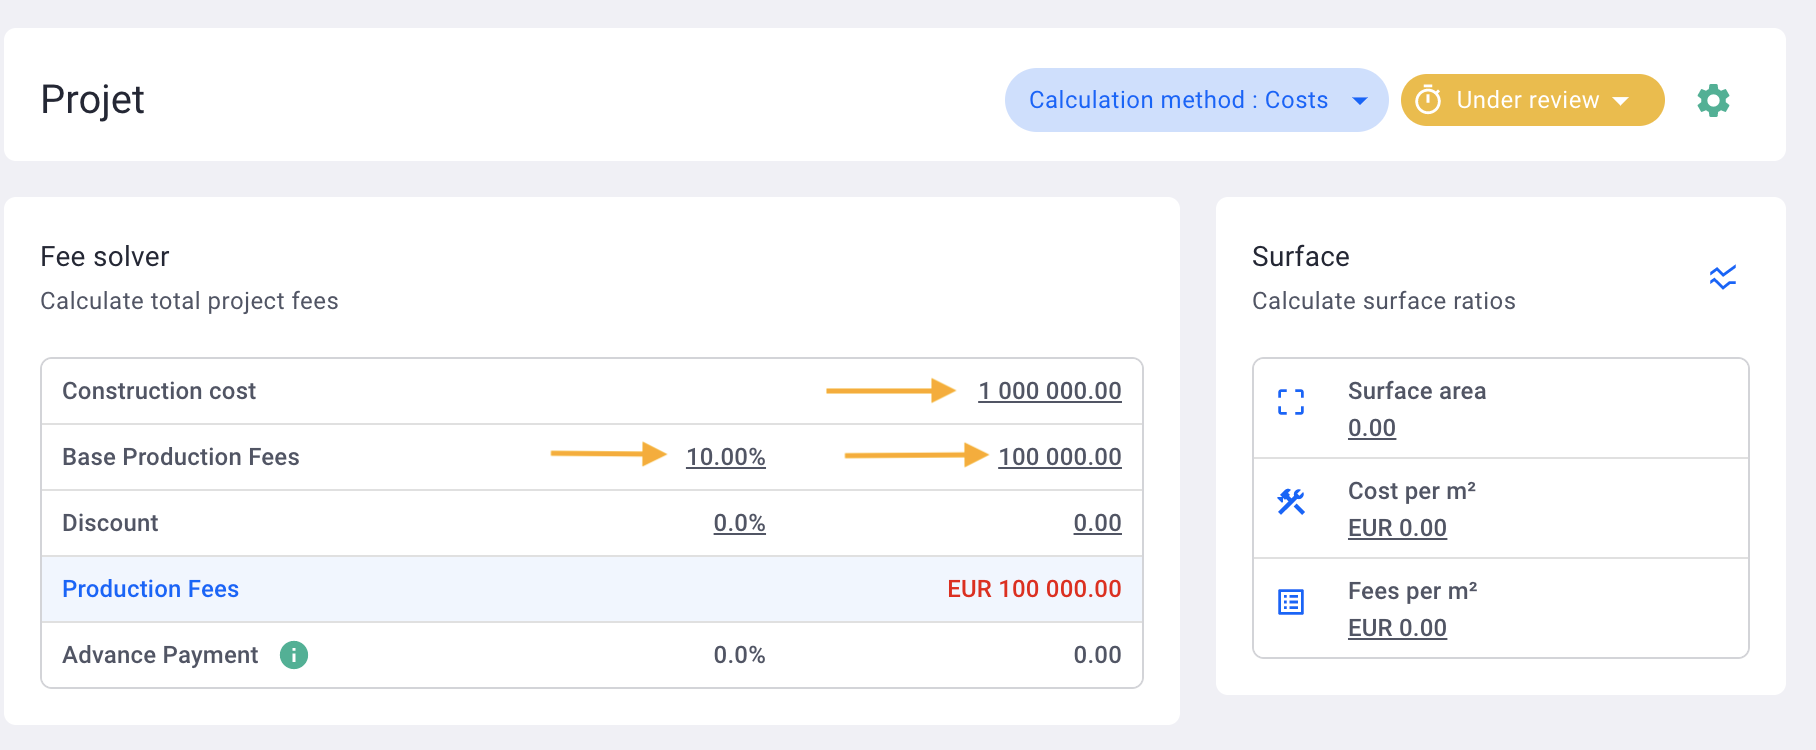
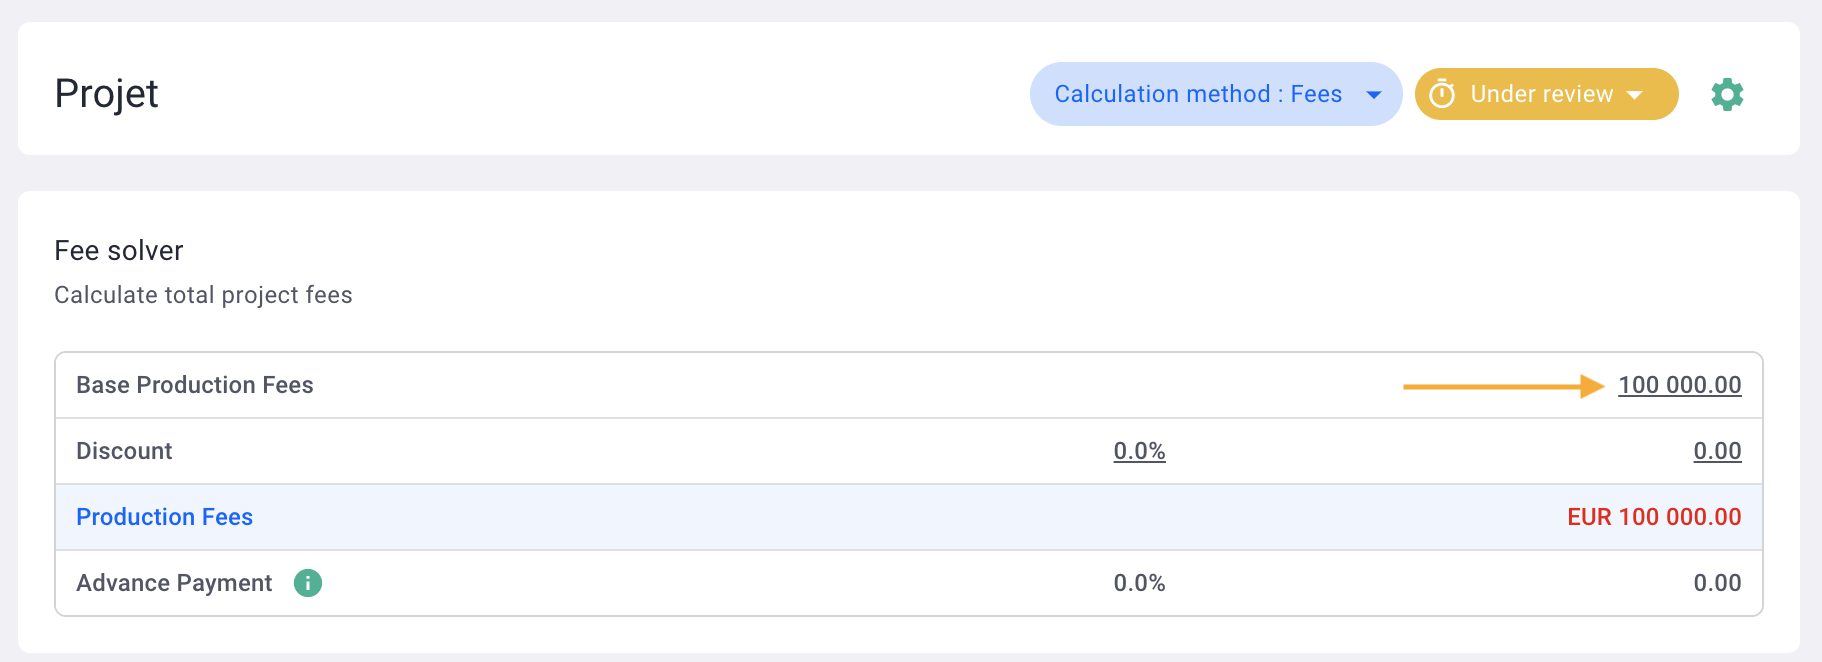
If you don't need the "Cost of work" line because your mission is a fixed-fee project, click on the "Calculation method" button and uncheck "Cost."

If your mission is on a fixed-fee basis, enter the total amount of fees for the mission in net amount.
2) The invoicing phases
Once the fees are complete, add the billing phases.
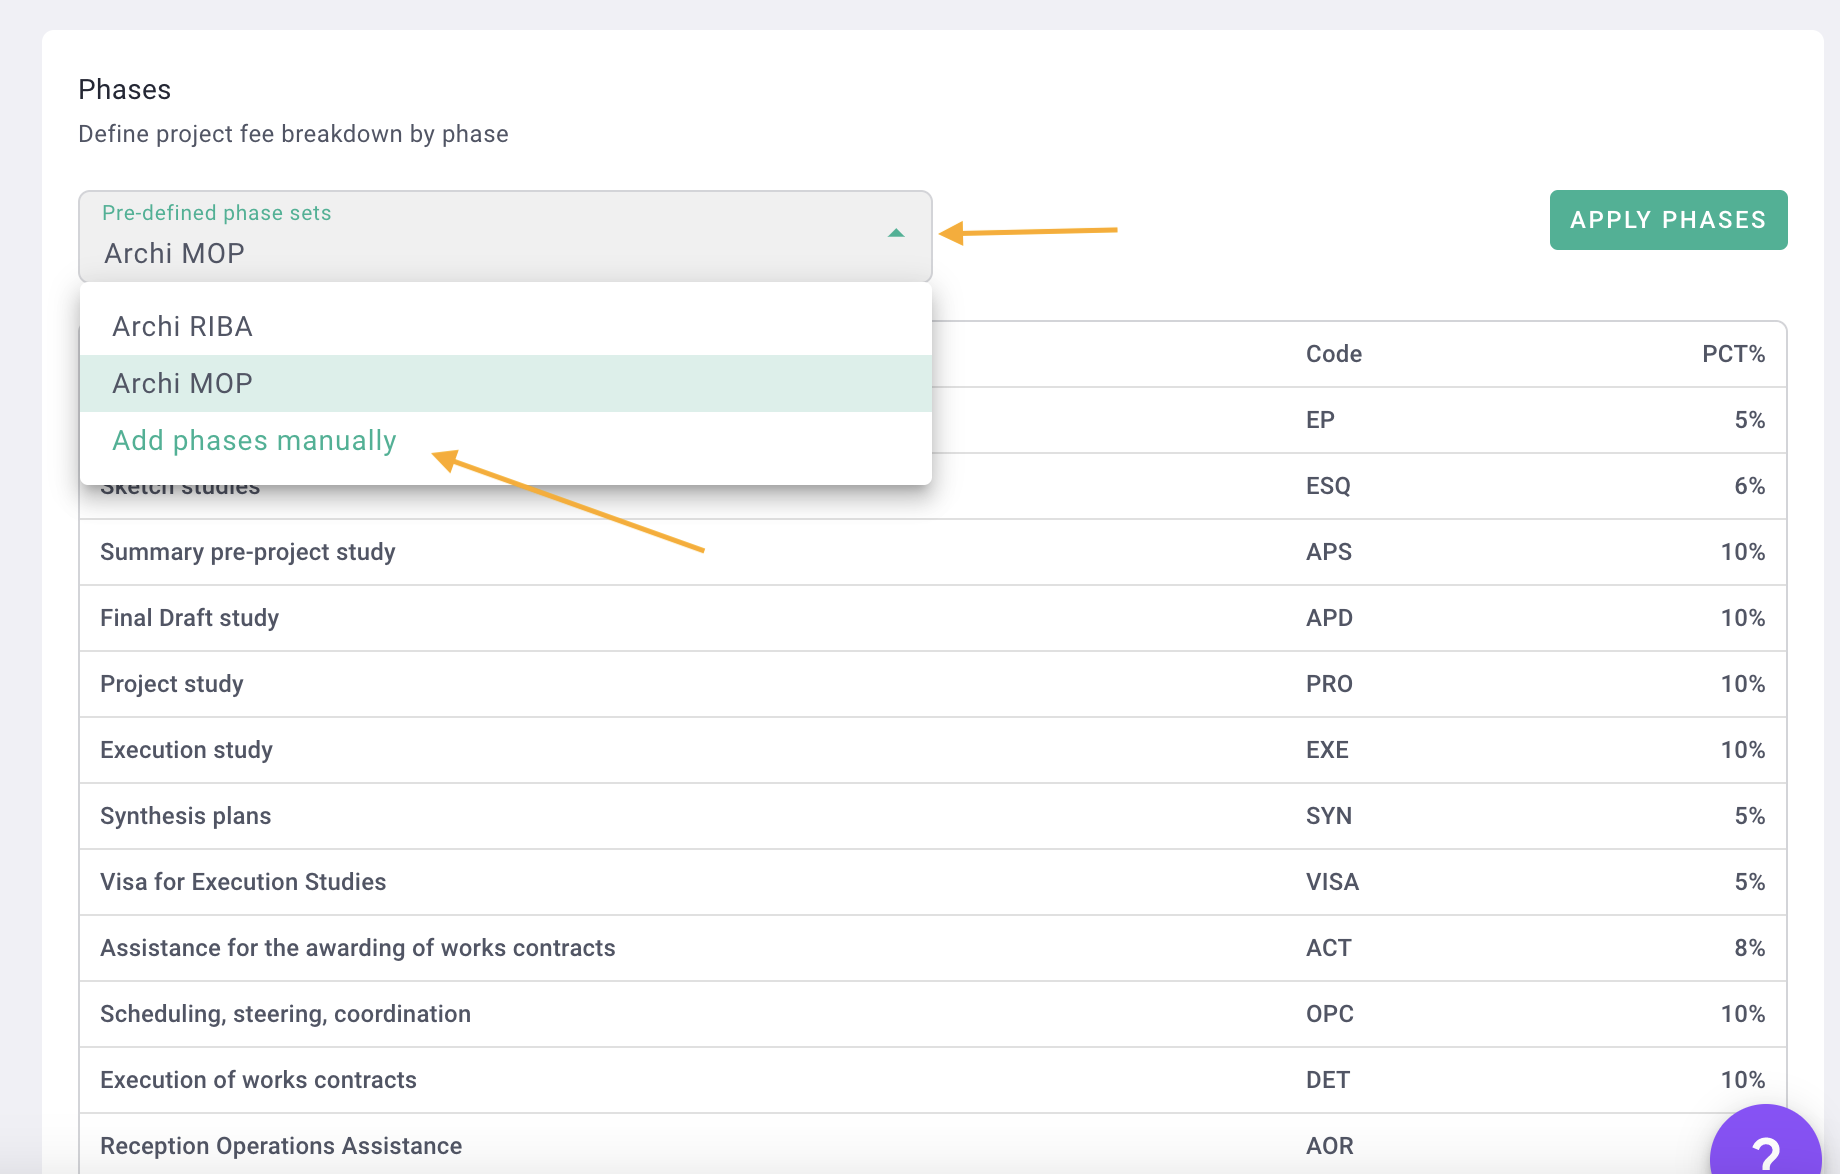
You will find default models: RIBA model (Anglo-Saxon🇬🇧 model) and MOP model.
Choose your template then click Apply phases to add them to the project.
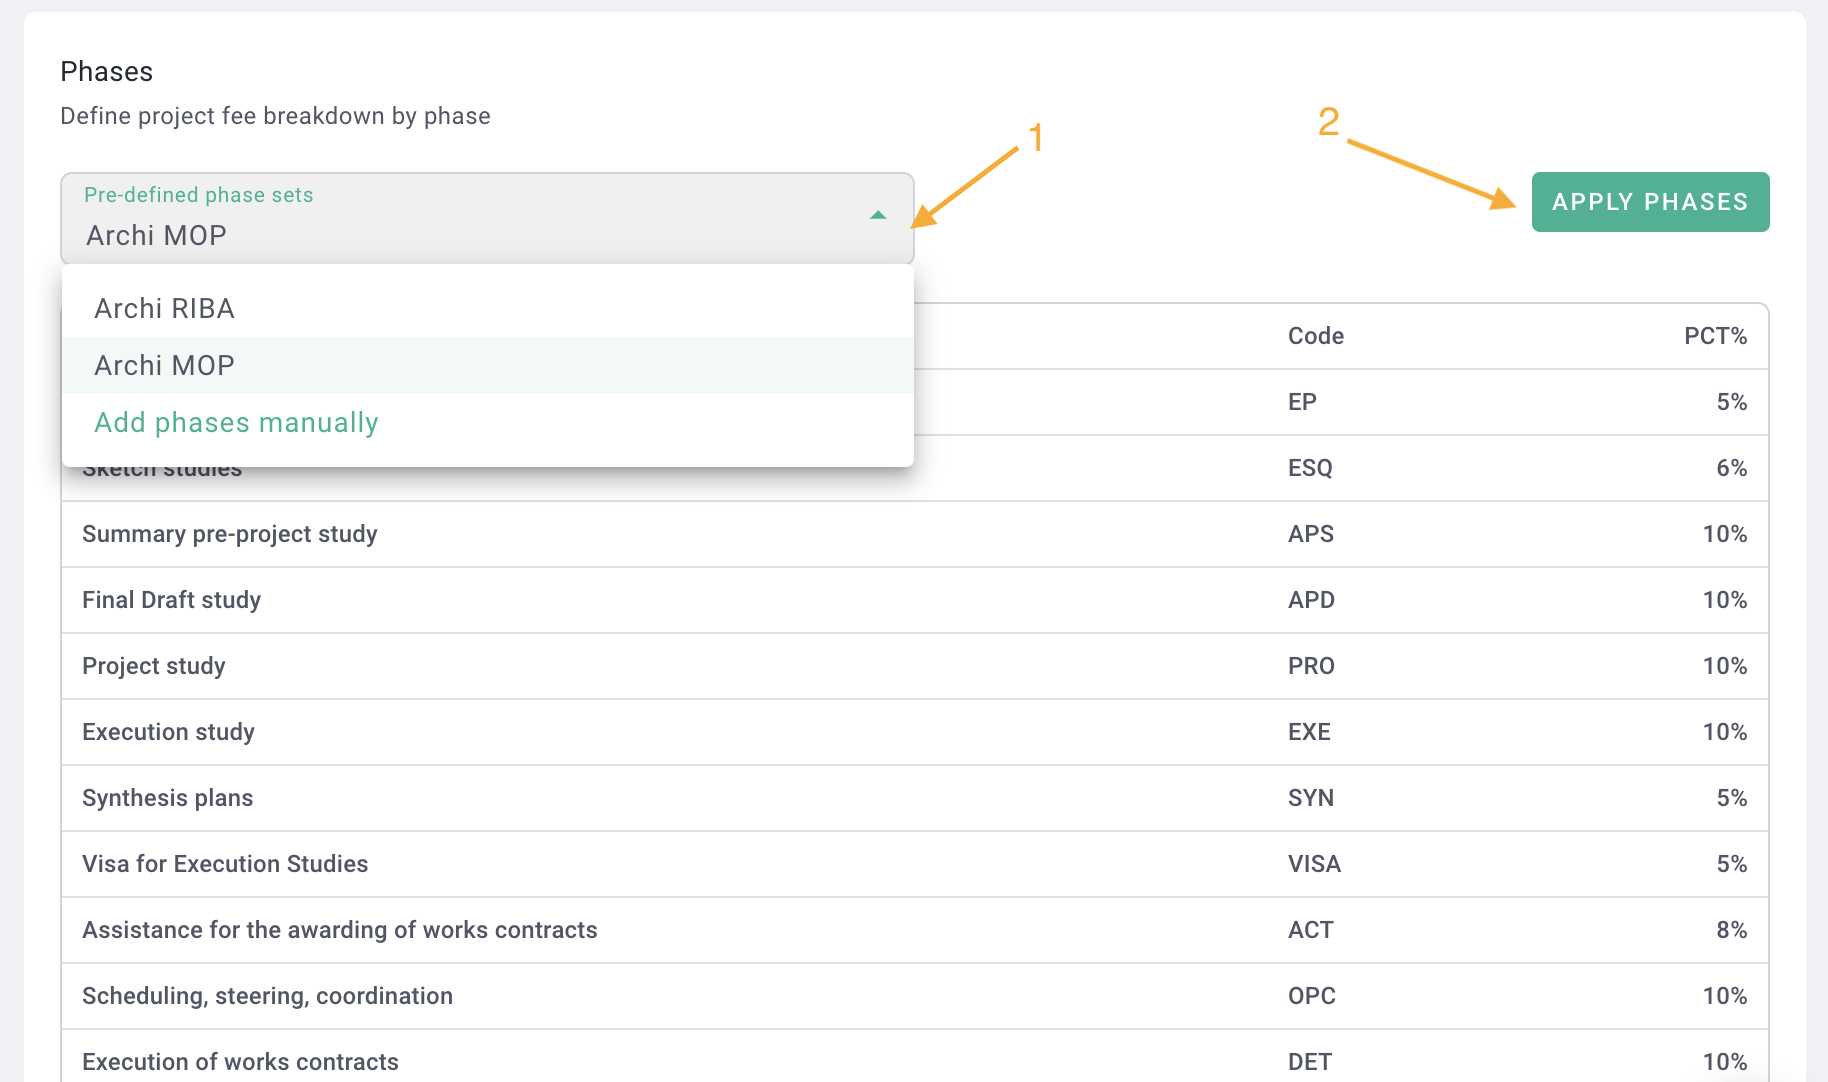
You can manually add phases by clicking on "Add phases manually."
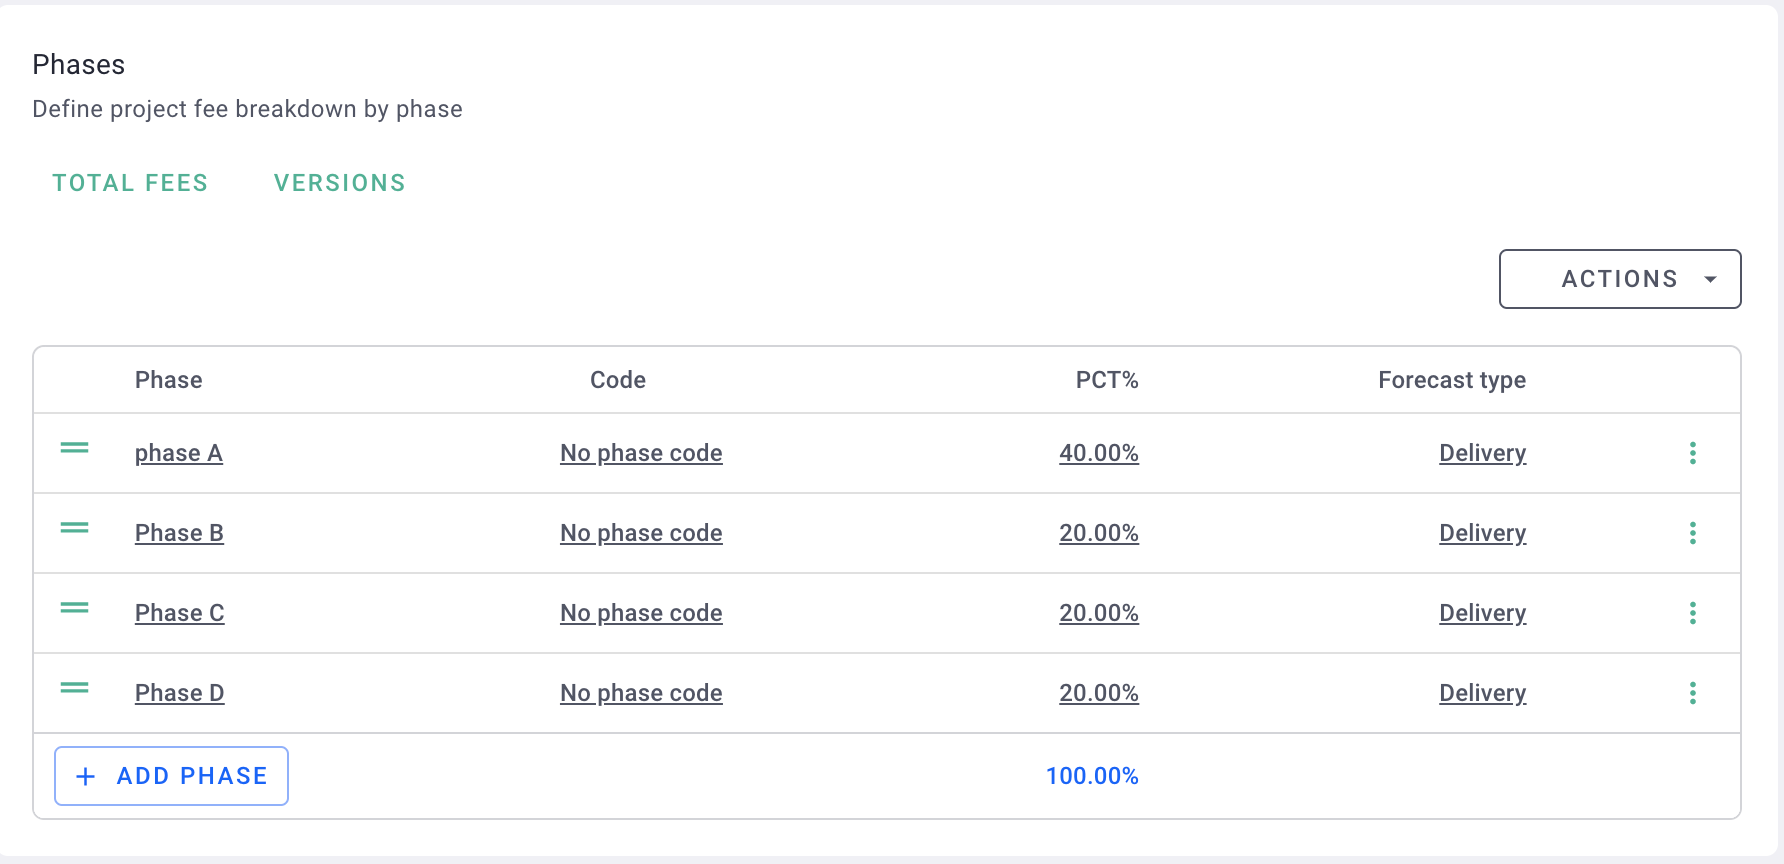
Phase names will appear on your invoices, and your team members will log time against these phases.
The "Code" column is an internal abbreviation. For example, for a phase named "Conceptual Design," you can use "CD."
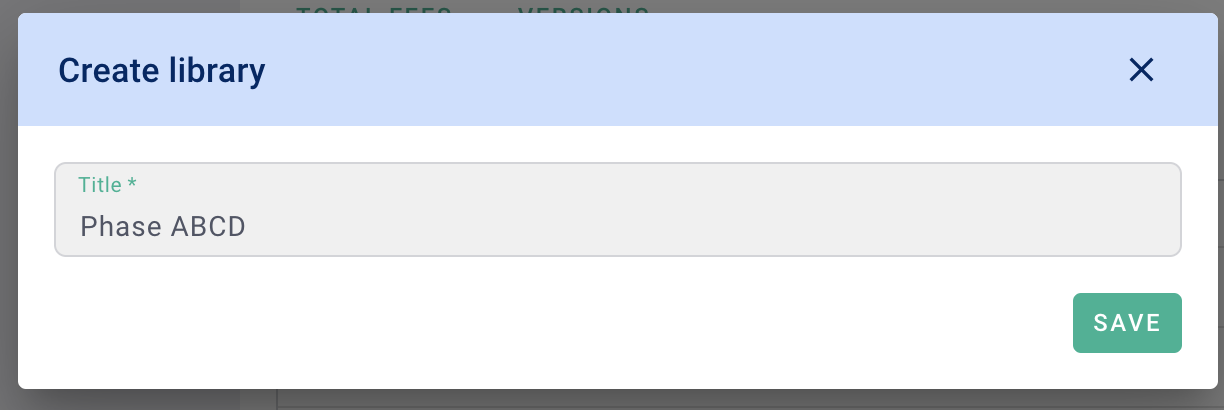
You can save your phase model to reuse it for other projects or missions. Click on Actions > Create library.
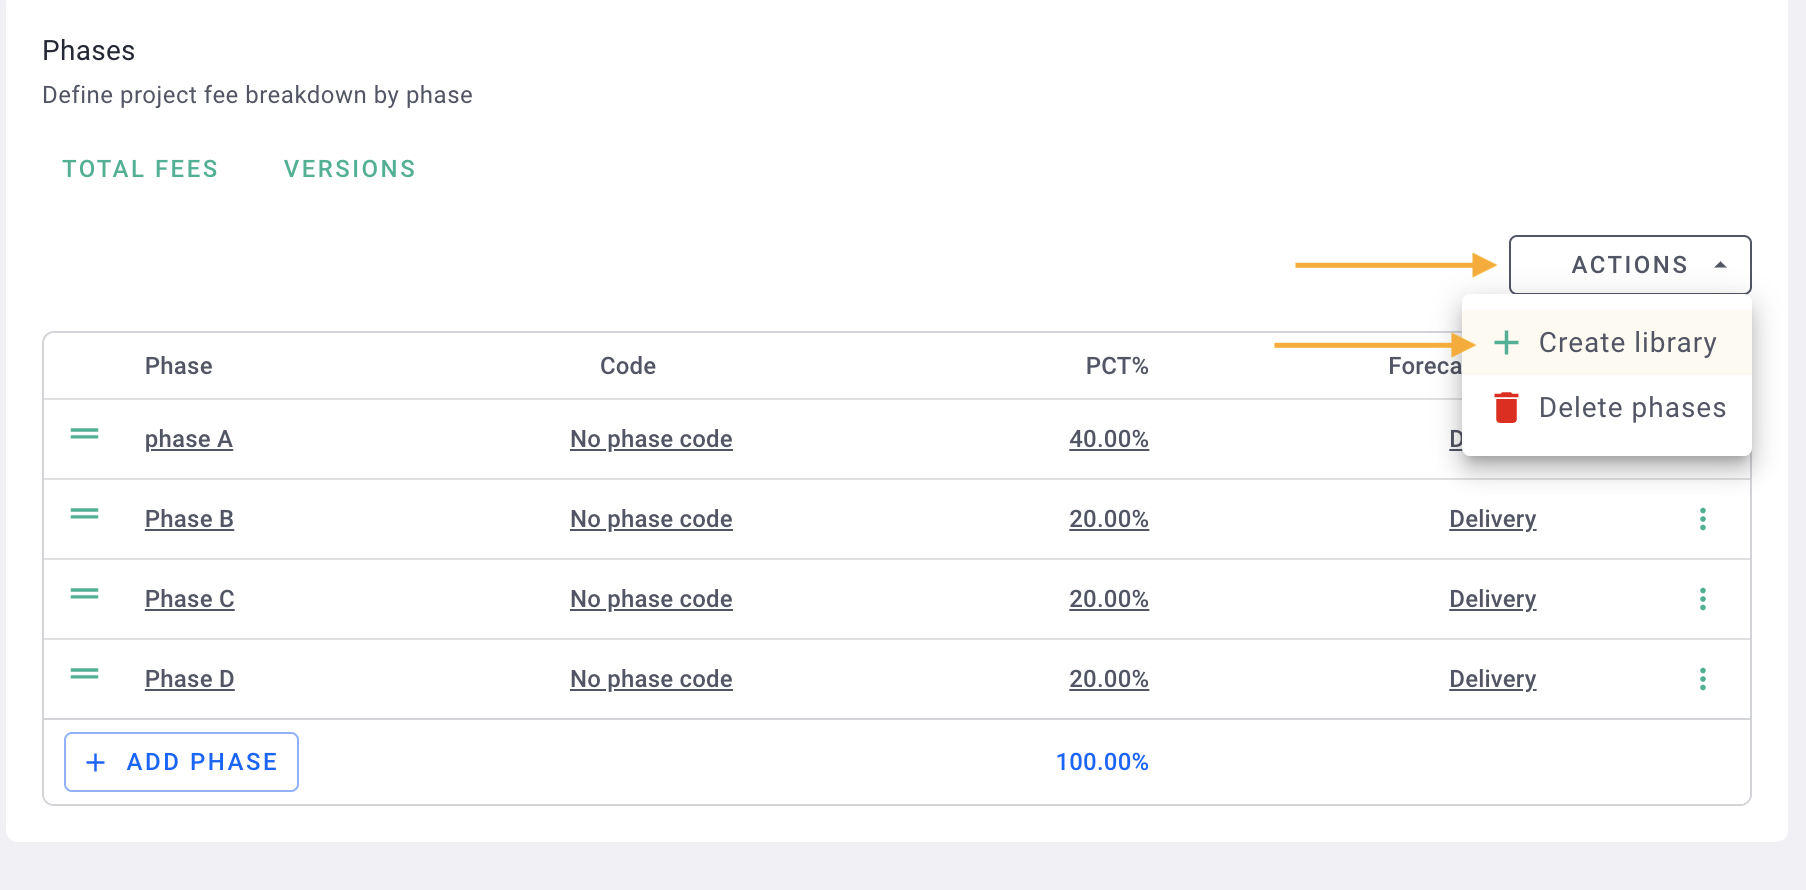 Name your model and save.
Click on Return to enter the amounts in € for your phases.
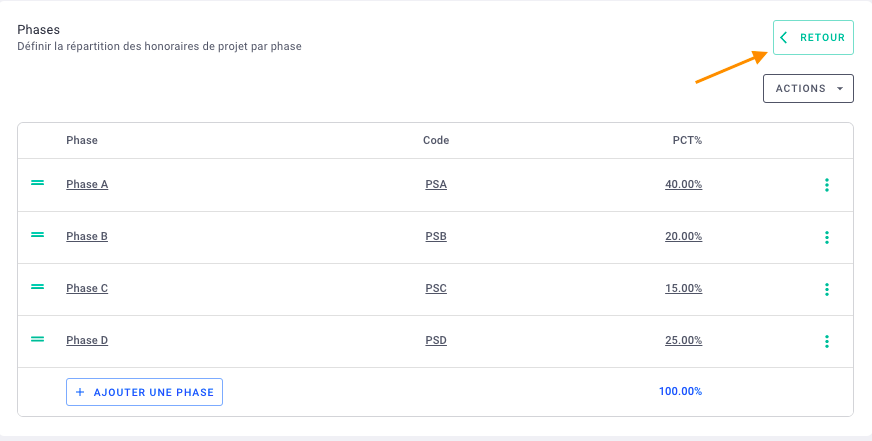
The phases have been added to the project.
You can modify the % or the amounts of each phase.
To edit, delete, or add phases, click on Manage Phases.
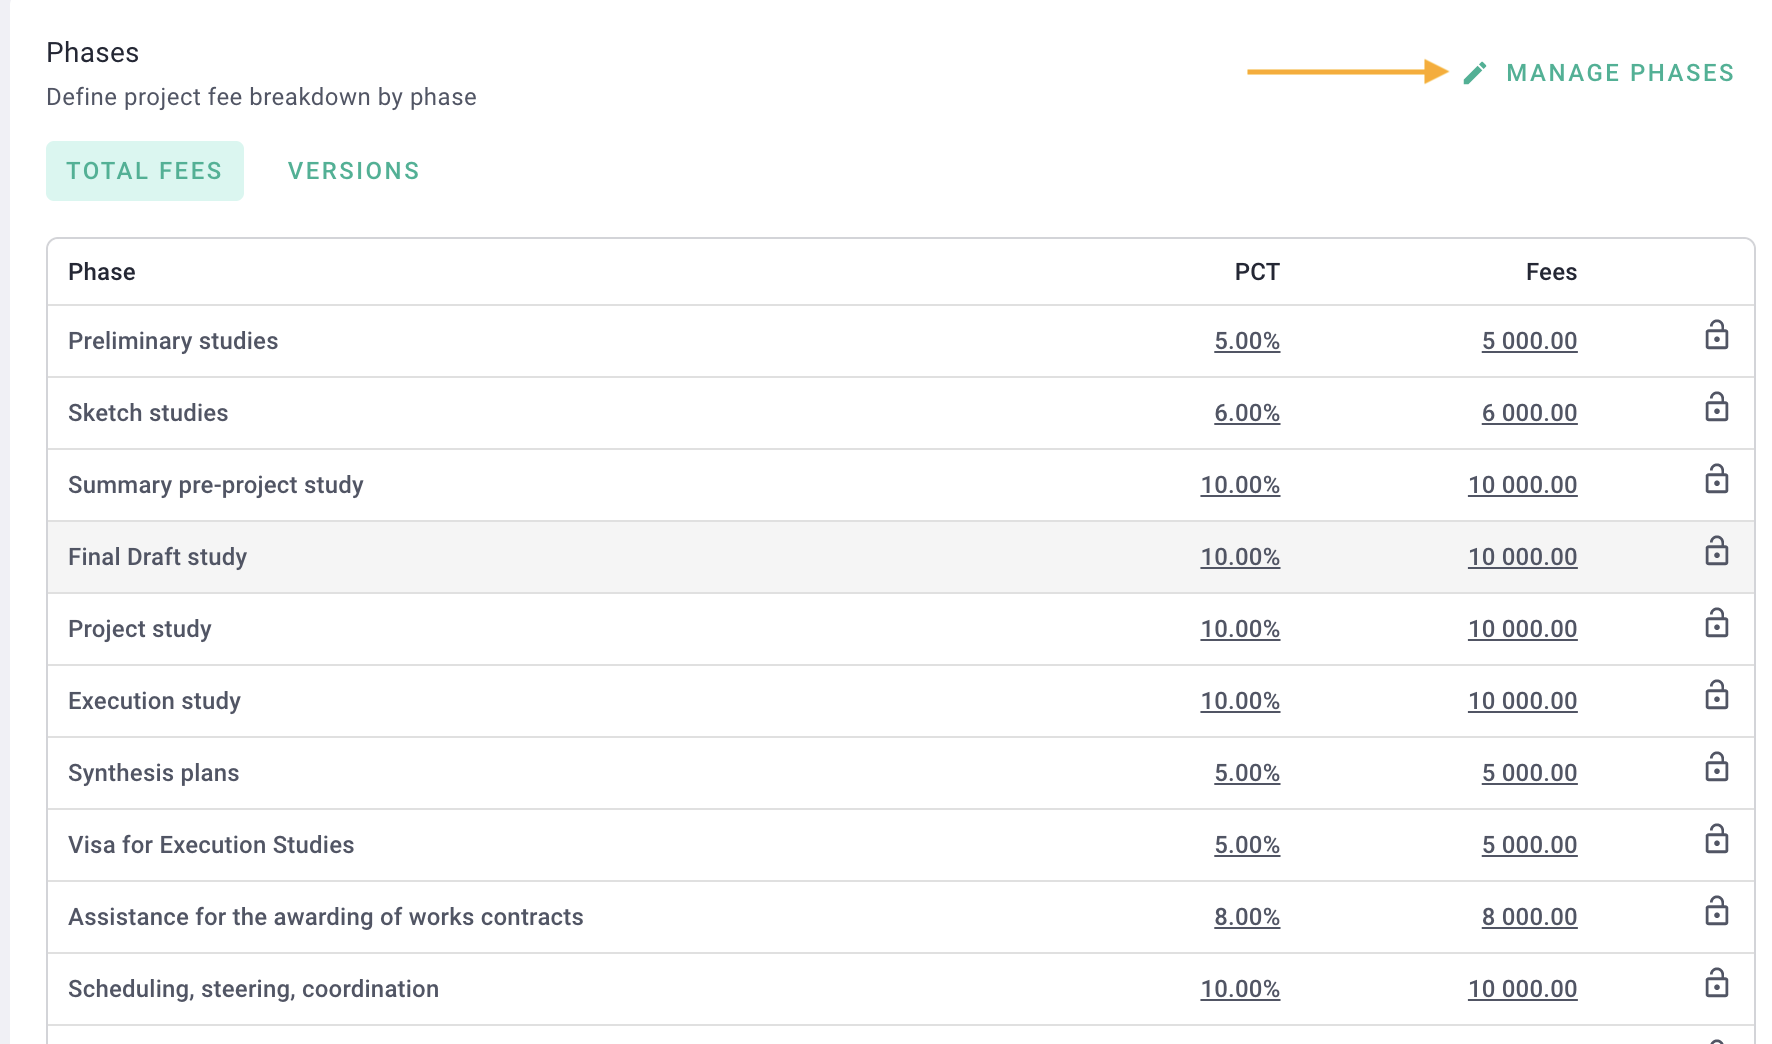
Add a phase by clicking on the button "Add a phase," modify the name, or click on the options.
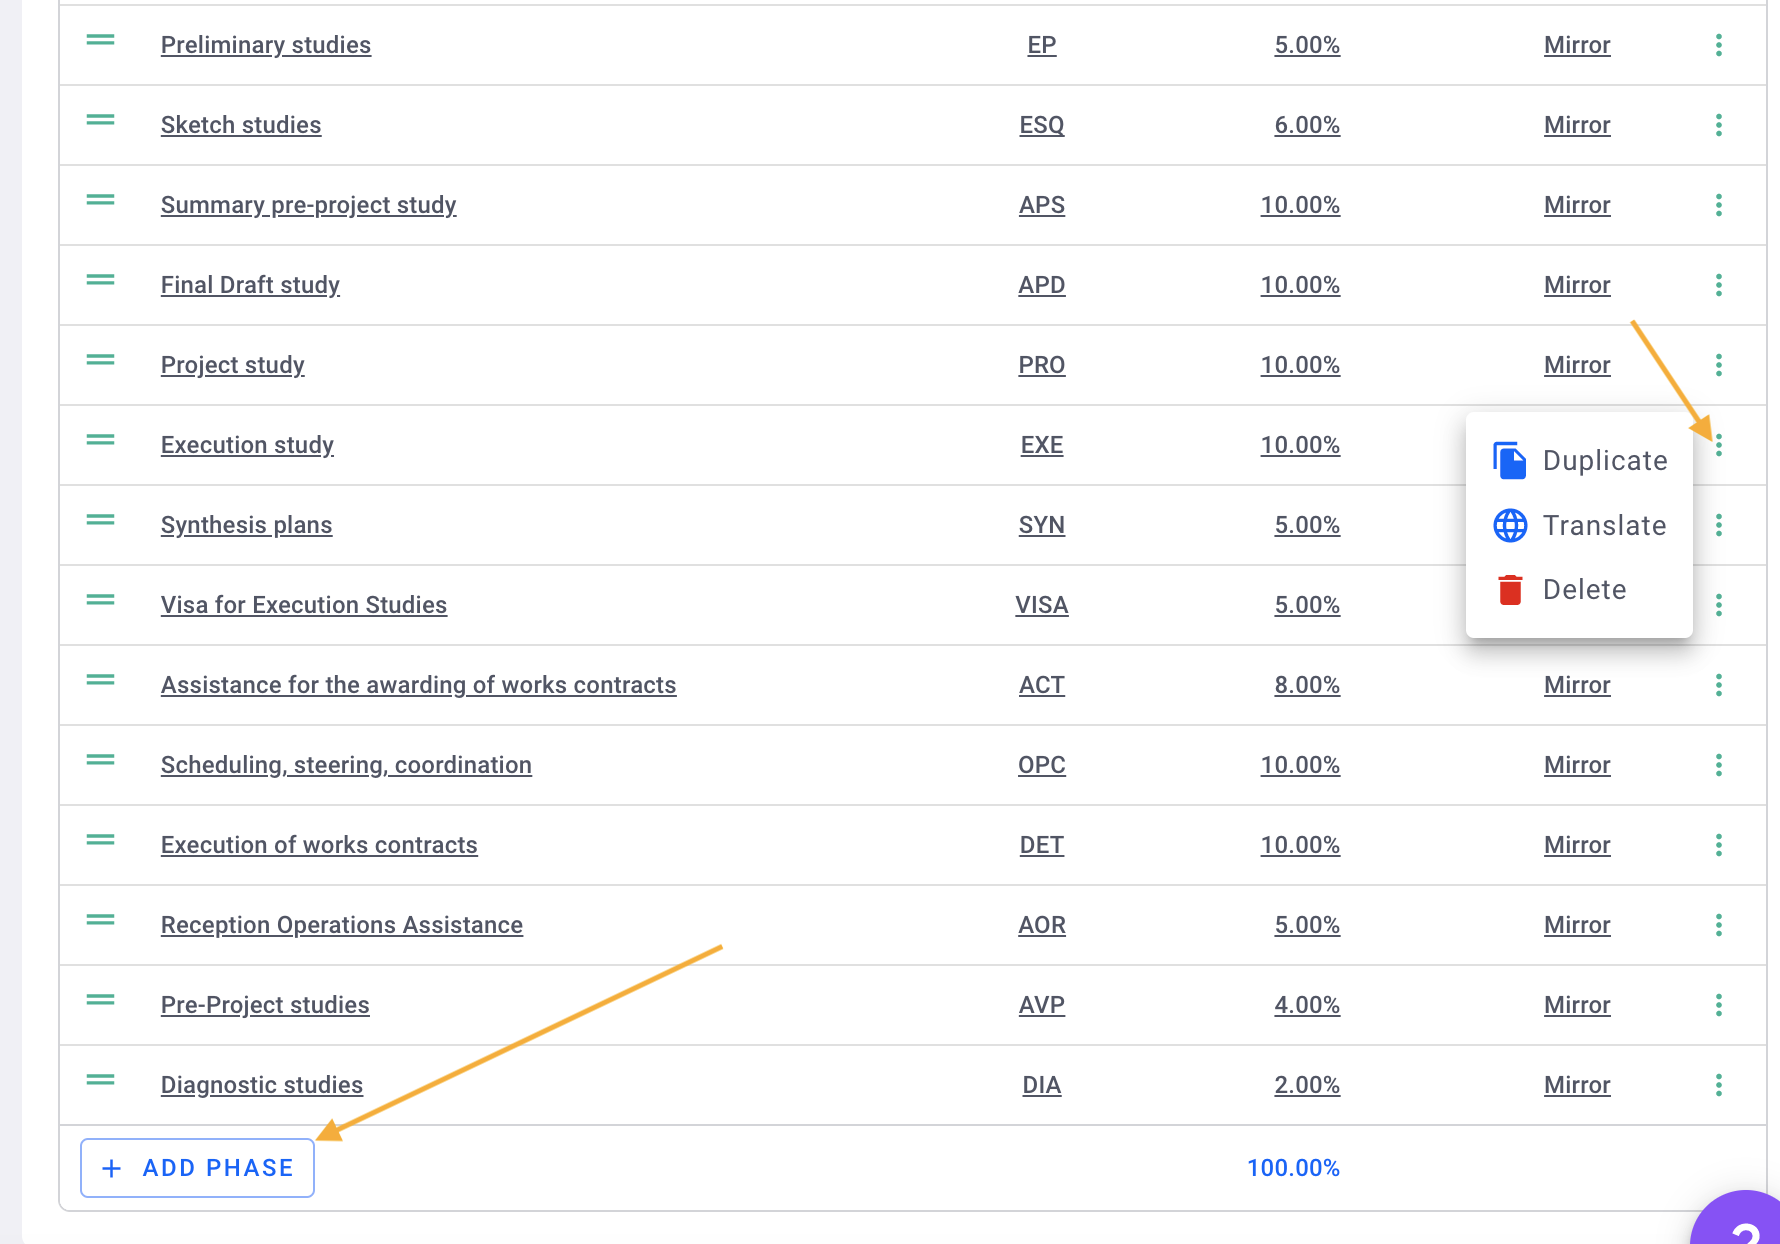
Well done ! 🎉
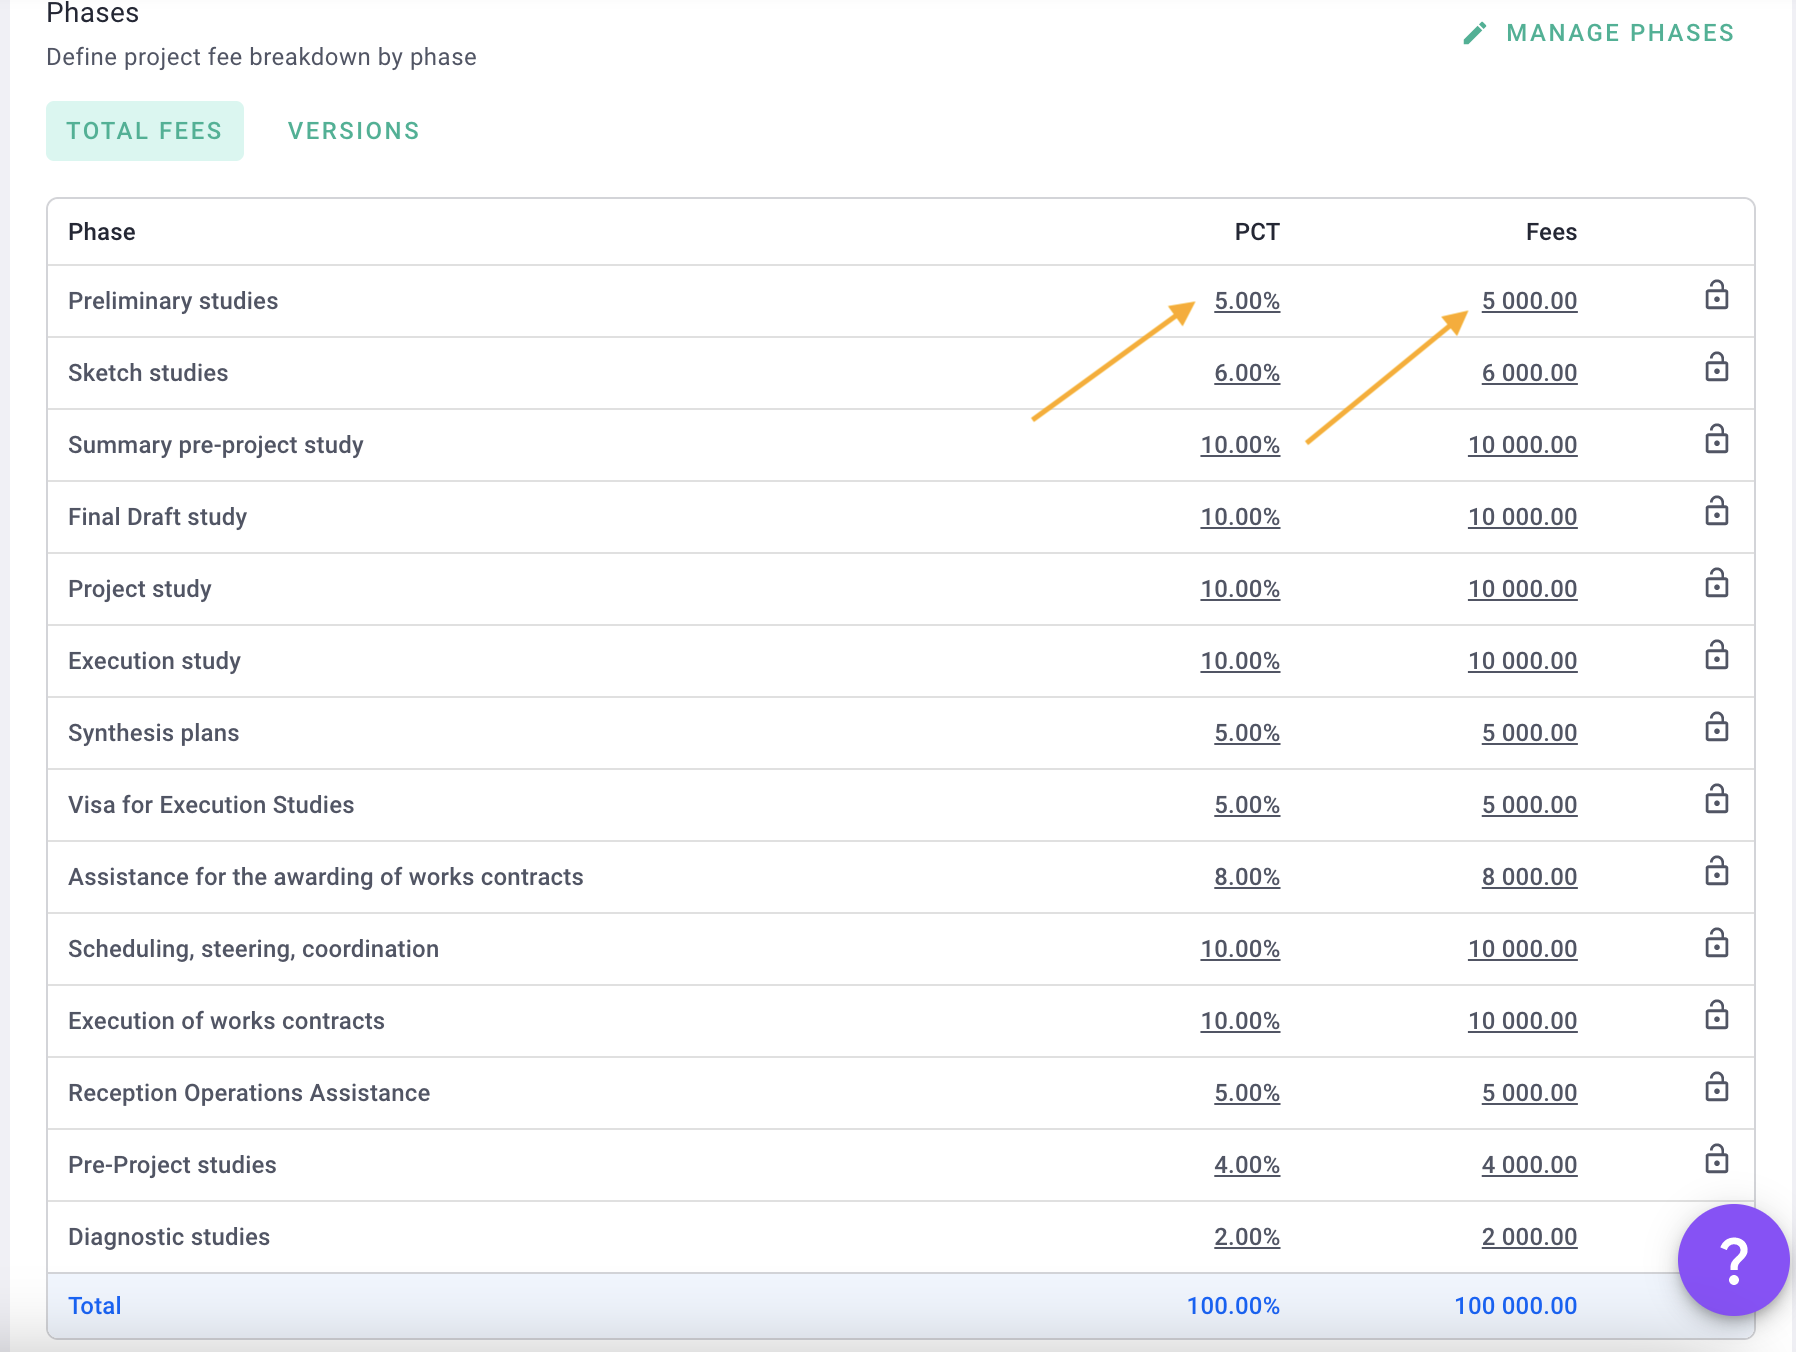
Make sure the total of the phases is 100% of the fees entered in the fee solver.
3) Fee status: Validated and Signed
Your mission is in draft, which means it is under review. You can modify fees, phases, etc.
To validate your project, click on the orange button and change the status to Valid.
⚠️ You cannot invoice phases if the mission is under review.
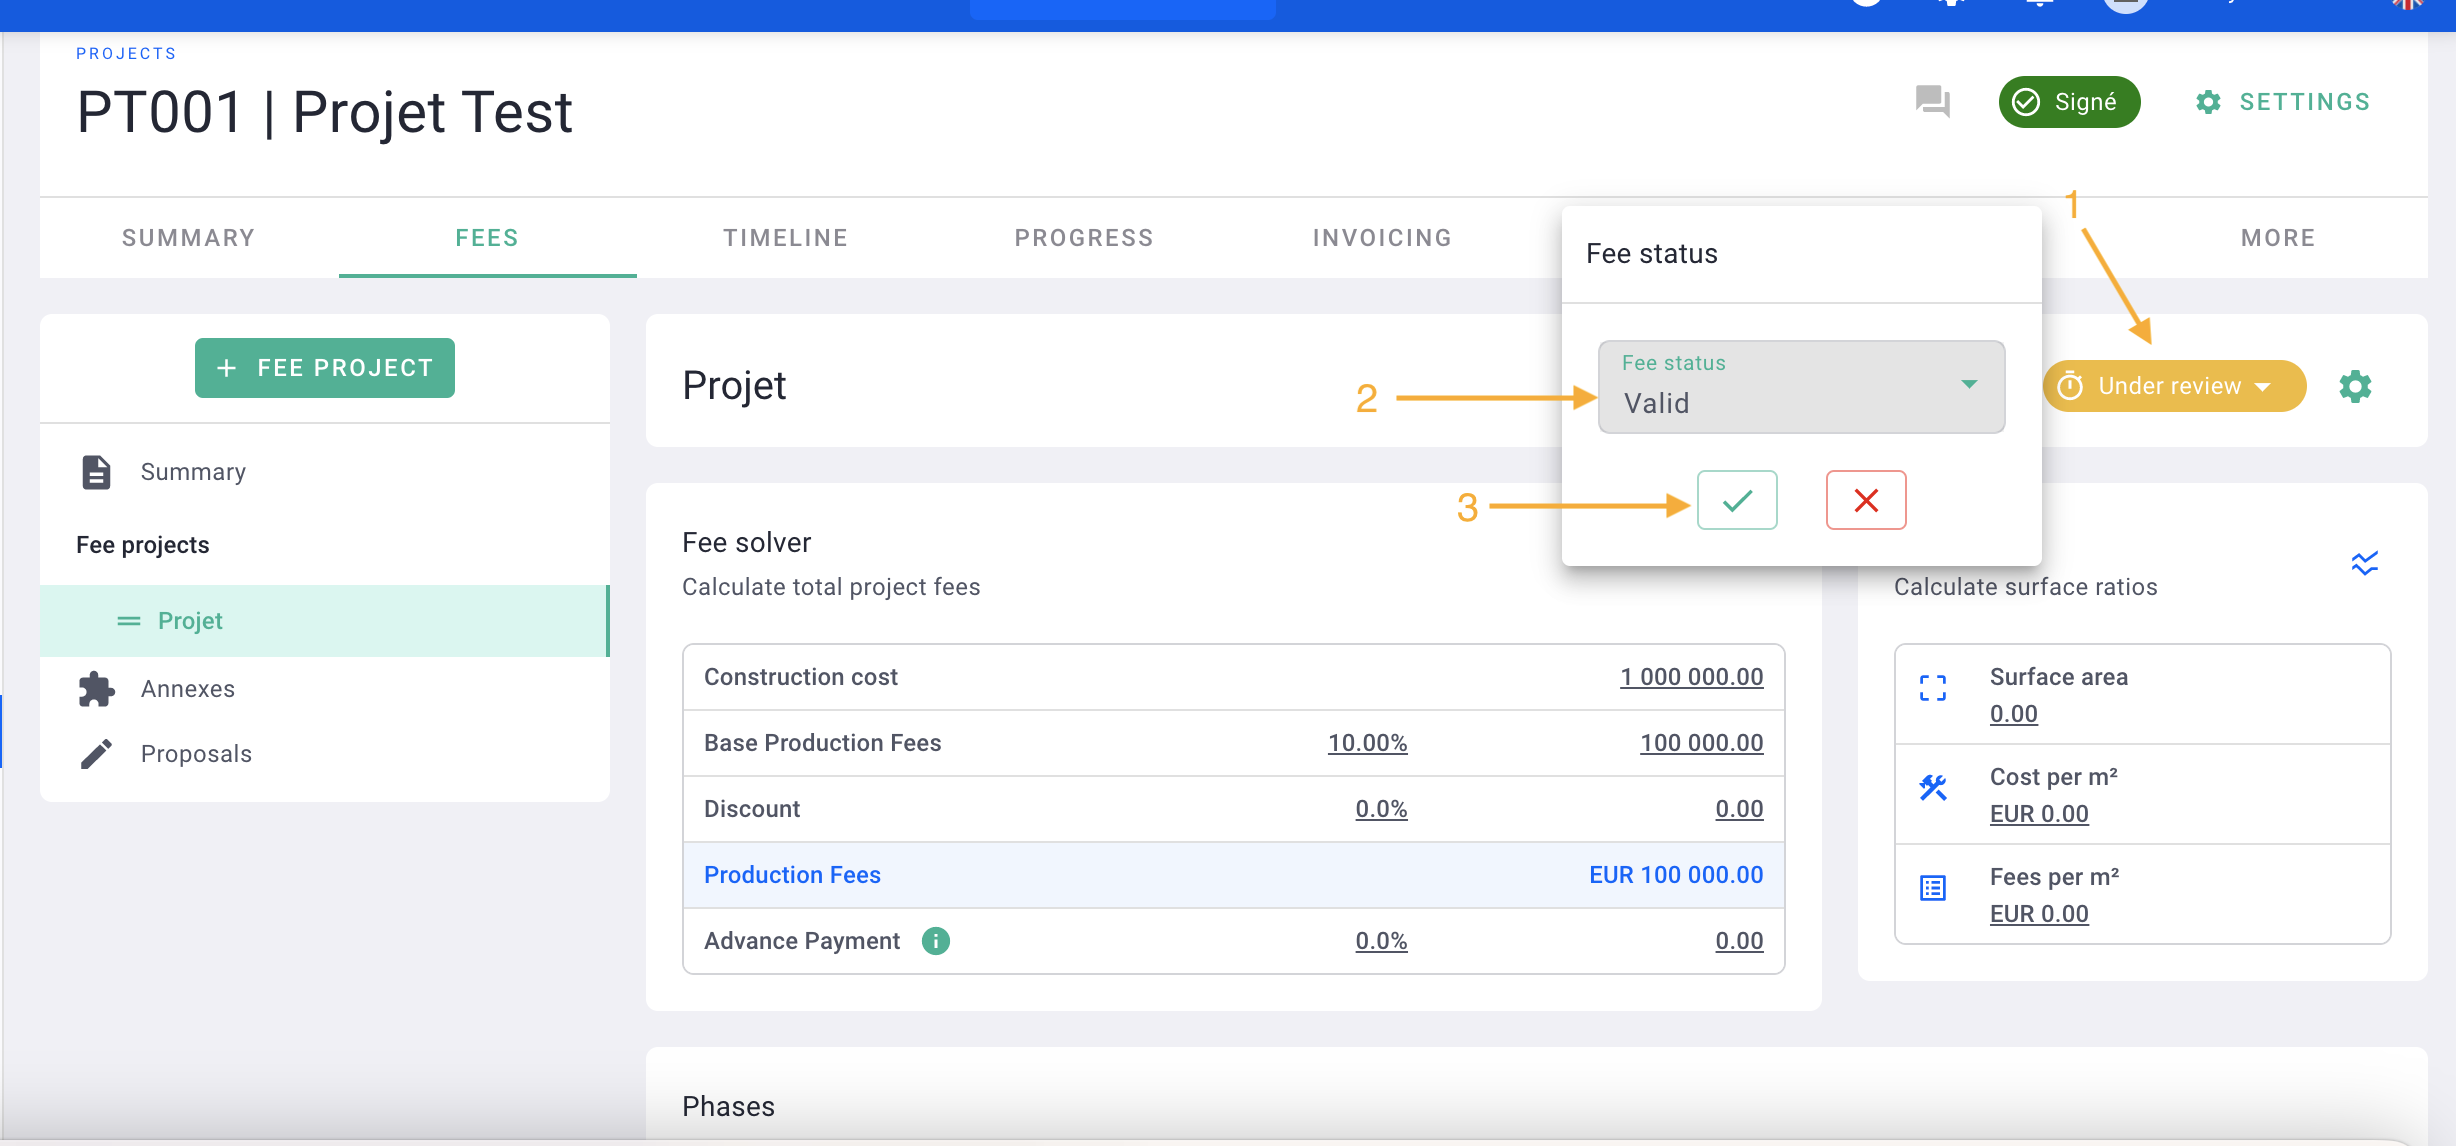
Your mission is validated, and you can revert to the "under review" status at any time by simply clicking the same button.
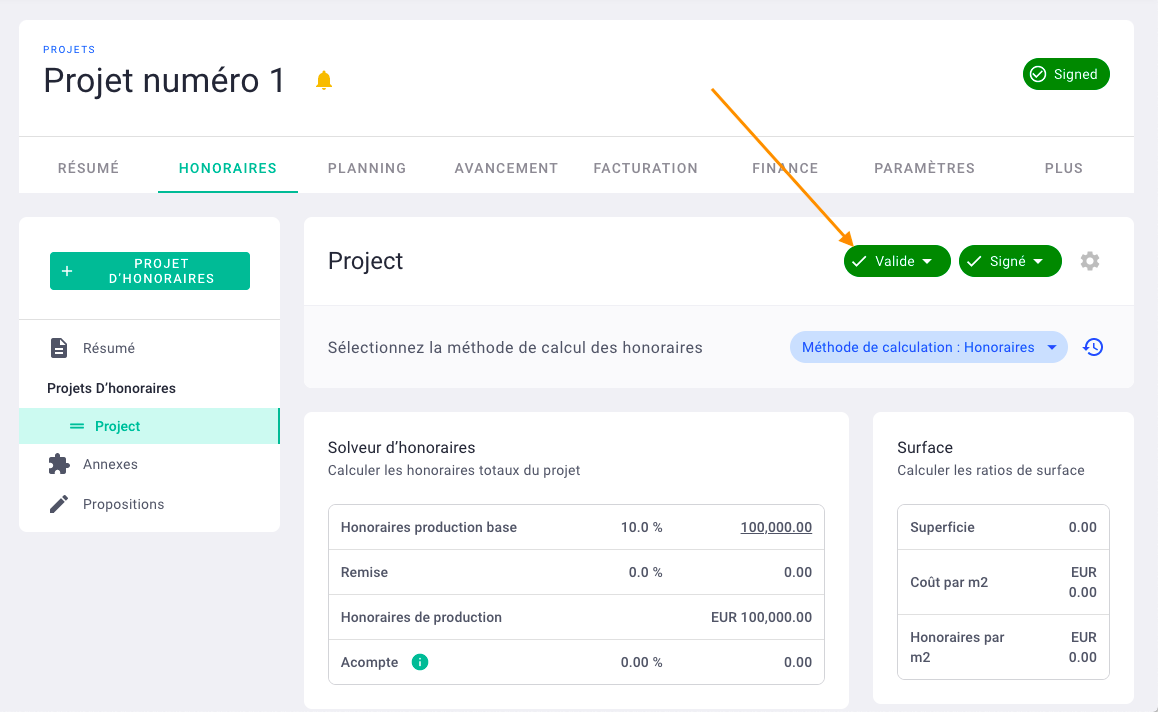
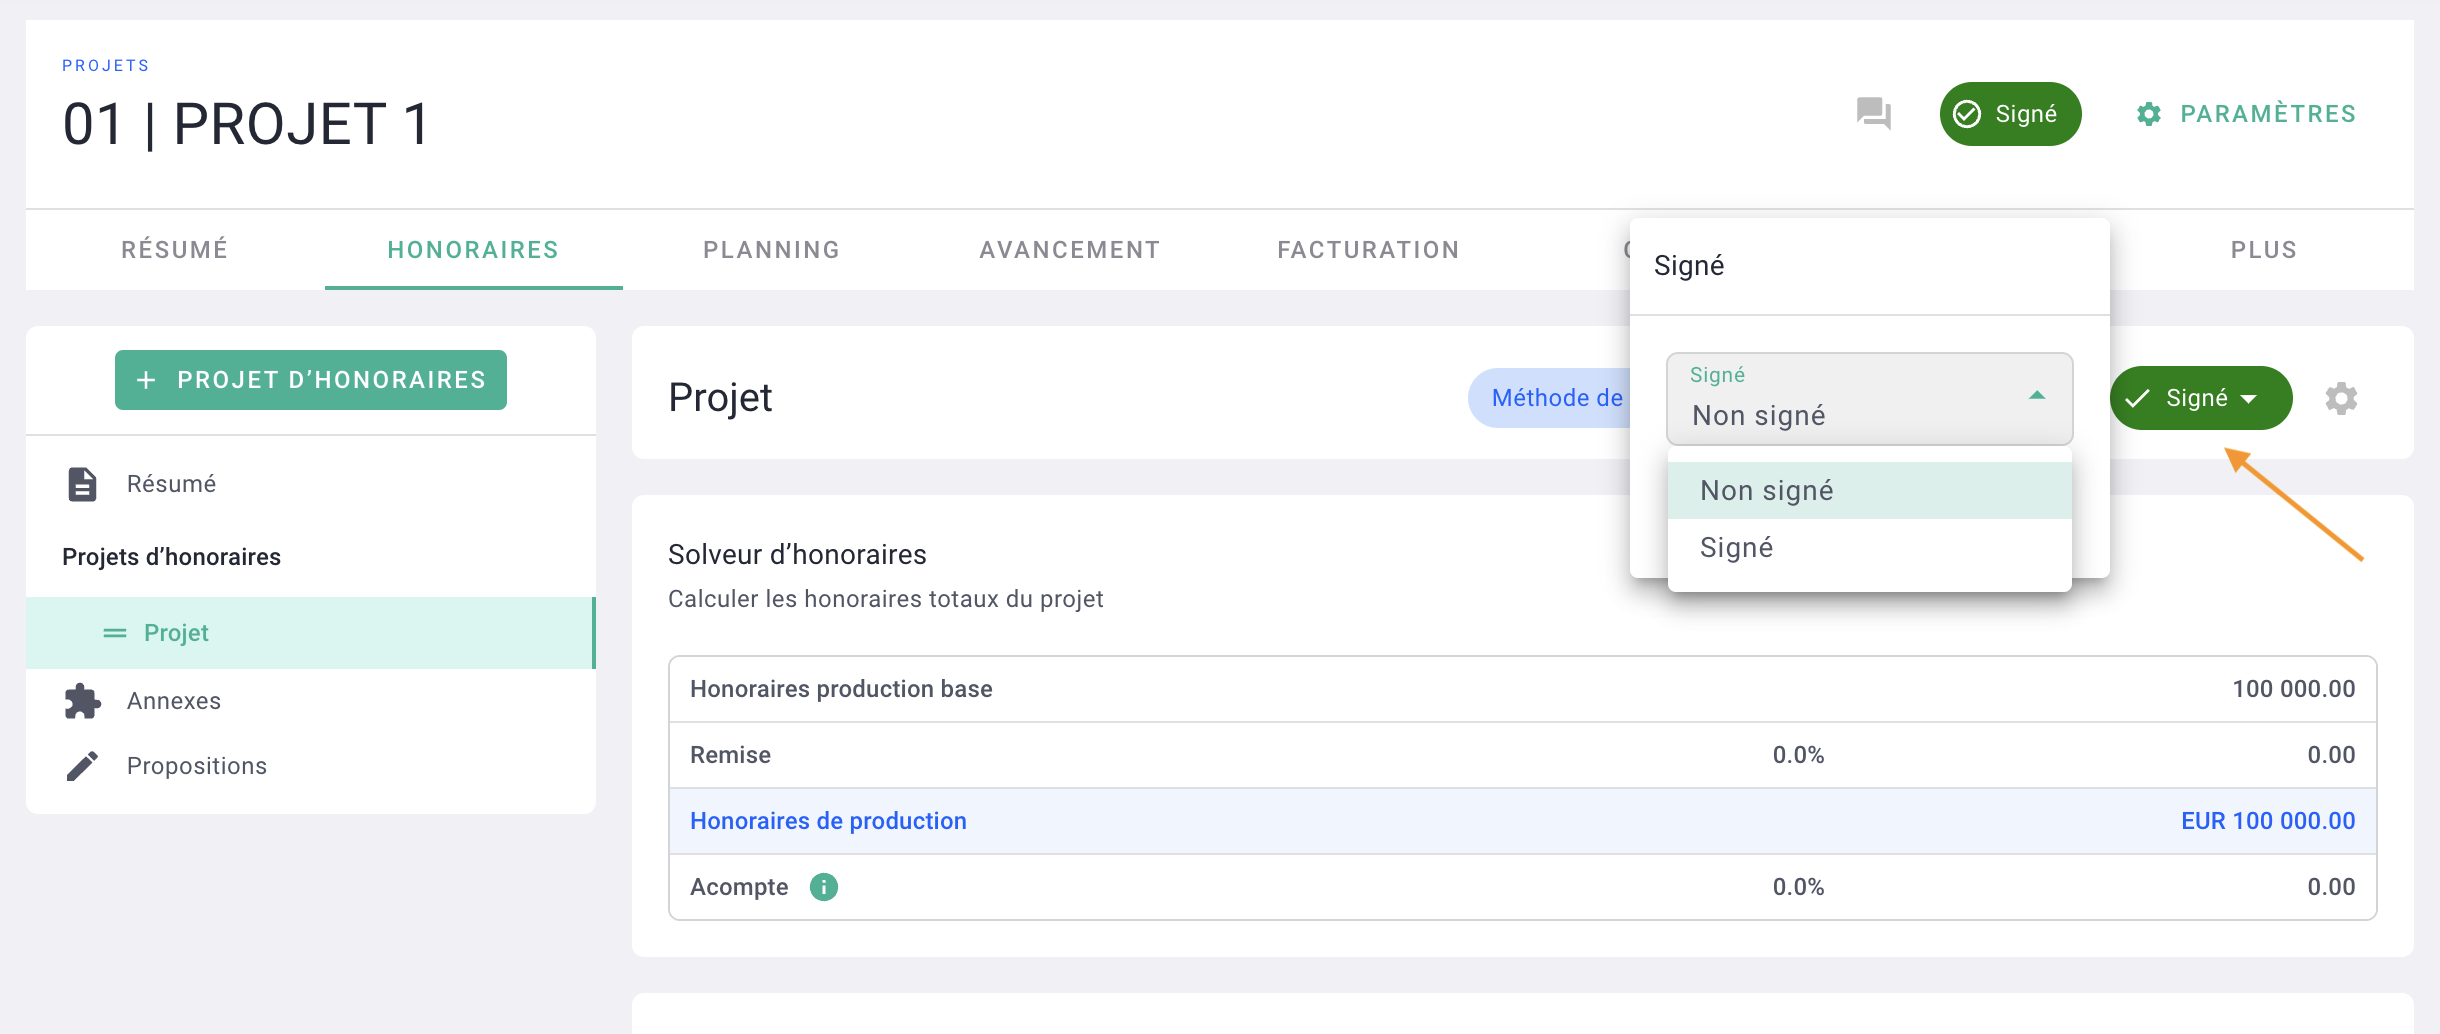
The "signed" status means that the mission's fees are included in the forecasted turnover.
If you do not want to include the fees in the forecasted turnover, set the status to "unsigned."
4) Adding a complementary mission or project amendment
Amendment, additional mission, optional phase... Your project may have more than one base mission. Instead of creating a new project, you can add the additional mission(s).
The supplementary mission is an integral part of the project, with its own phases and fees.
In the project invoices, you have the flexibility to invoice the phases from all missions together or separately. It remains highly adaptable 🤸♀️
Click the Fee Project button.
Name your mission then save.
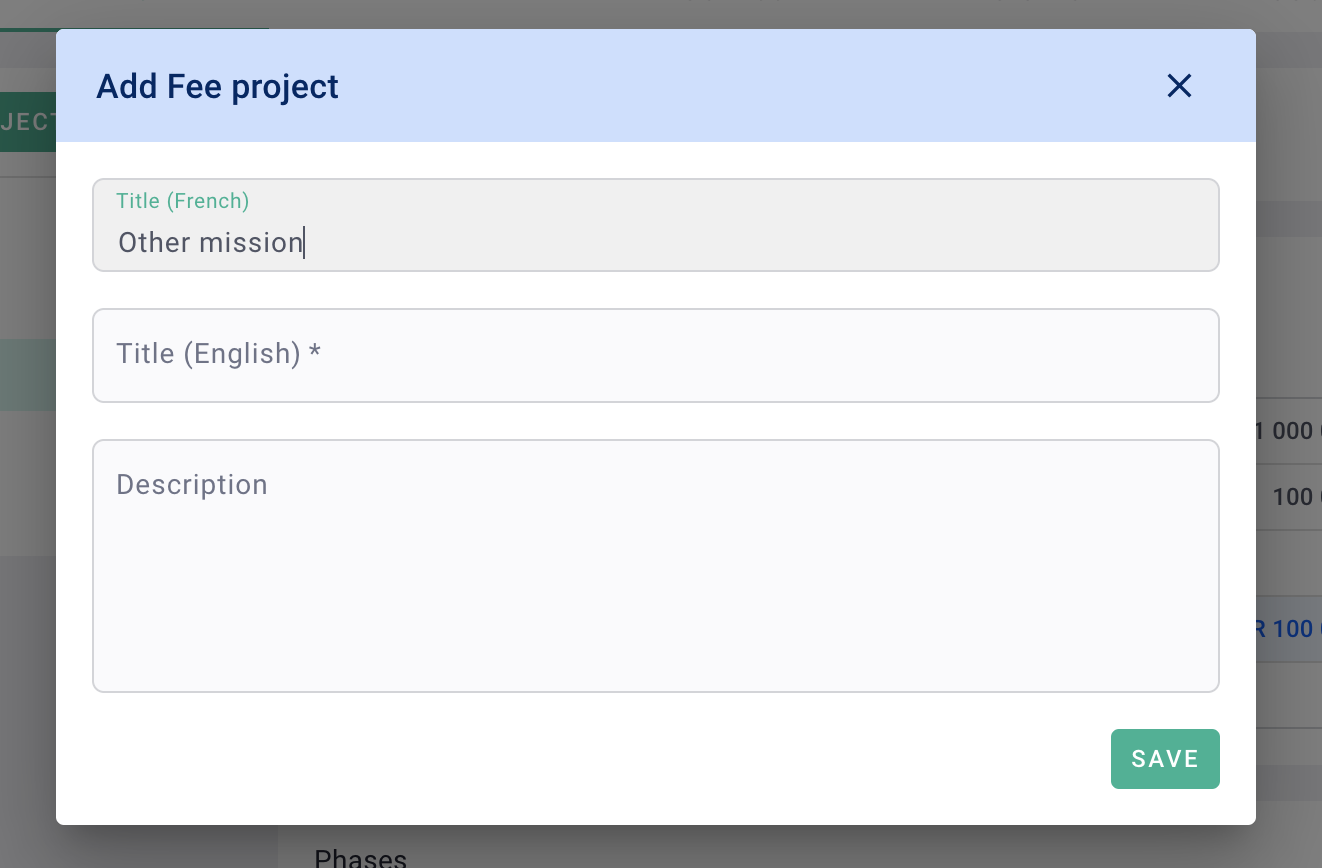
⚠️ The description is a field specific to your mission. The text added in this field will be displayed in the invoice when you bill this mission.
You have added a new mission 🎉
Add the fees then the phases, like what you did for your 1st mission of the project.
Change the status back to validated if necessary and signed if necessary.
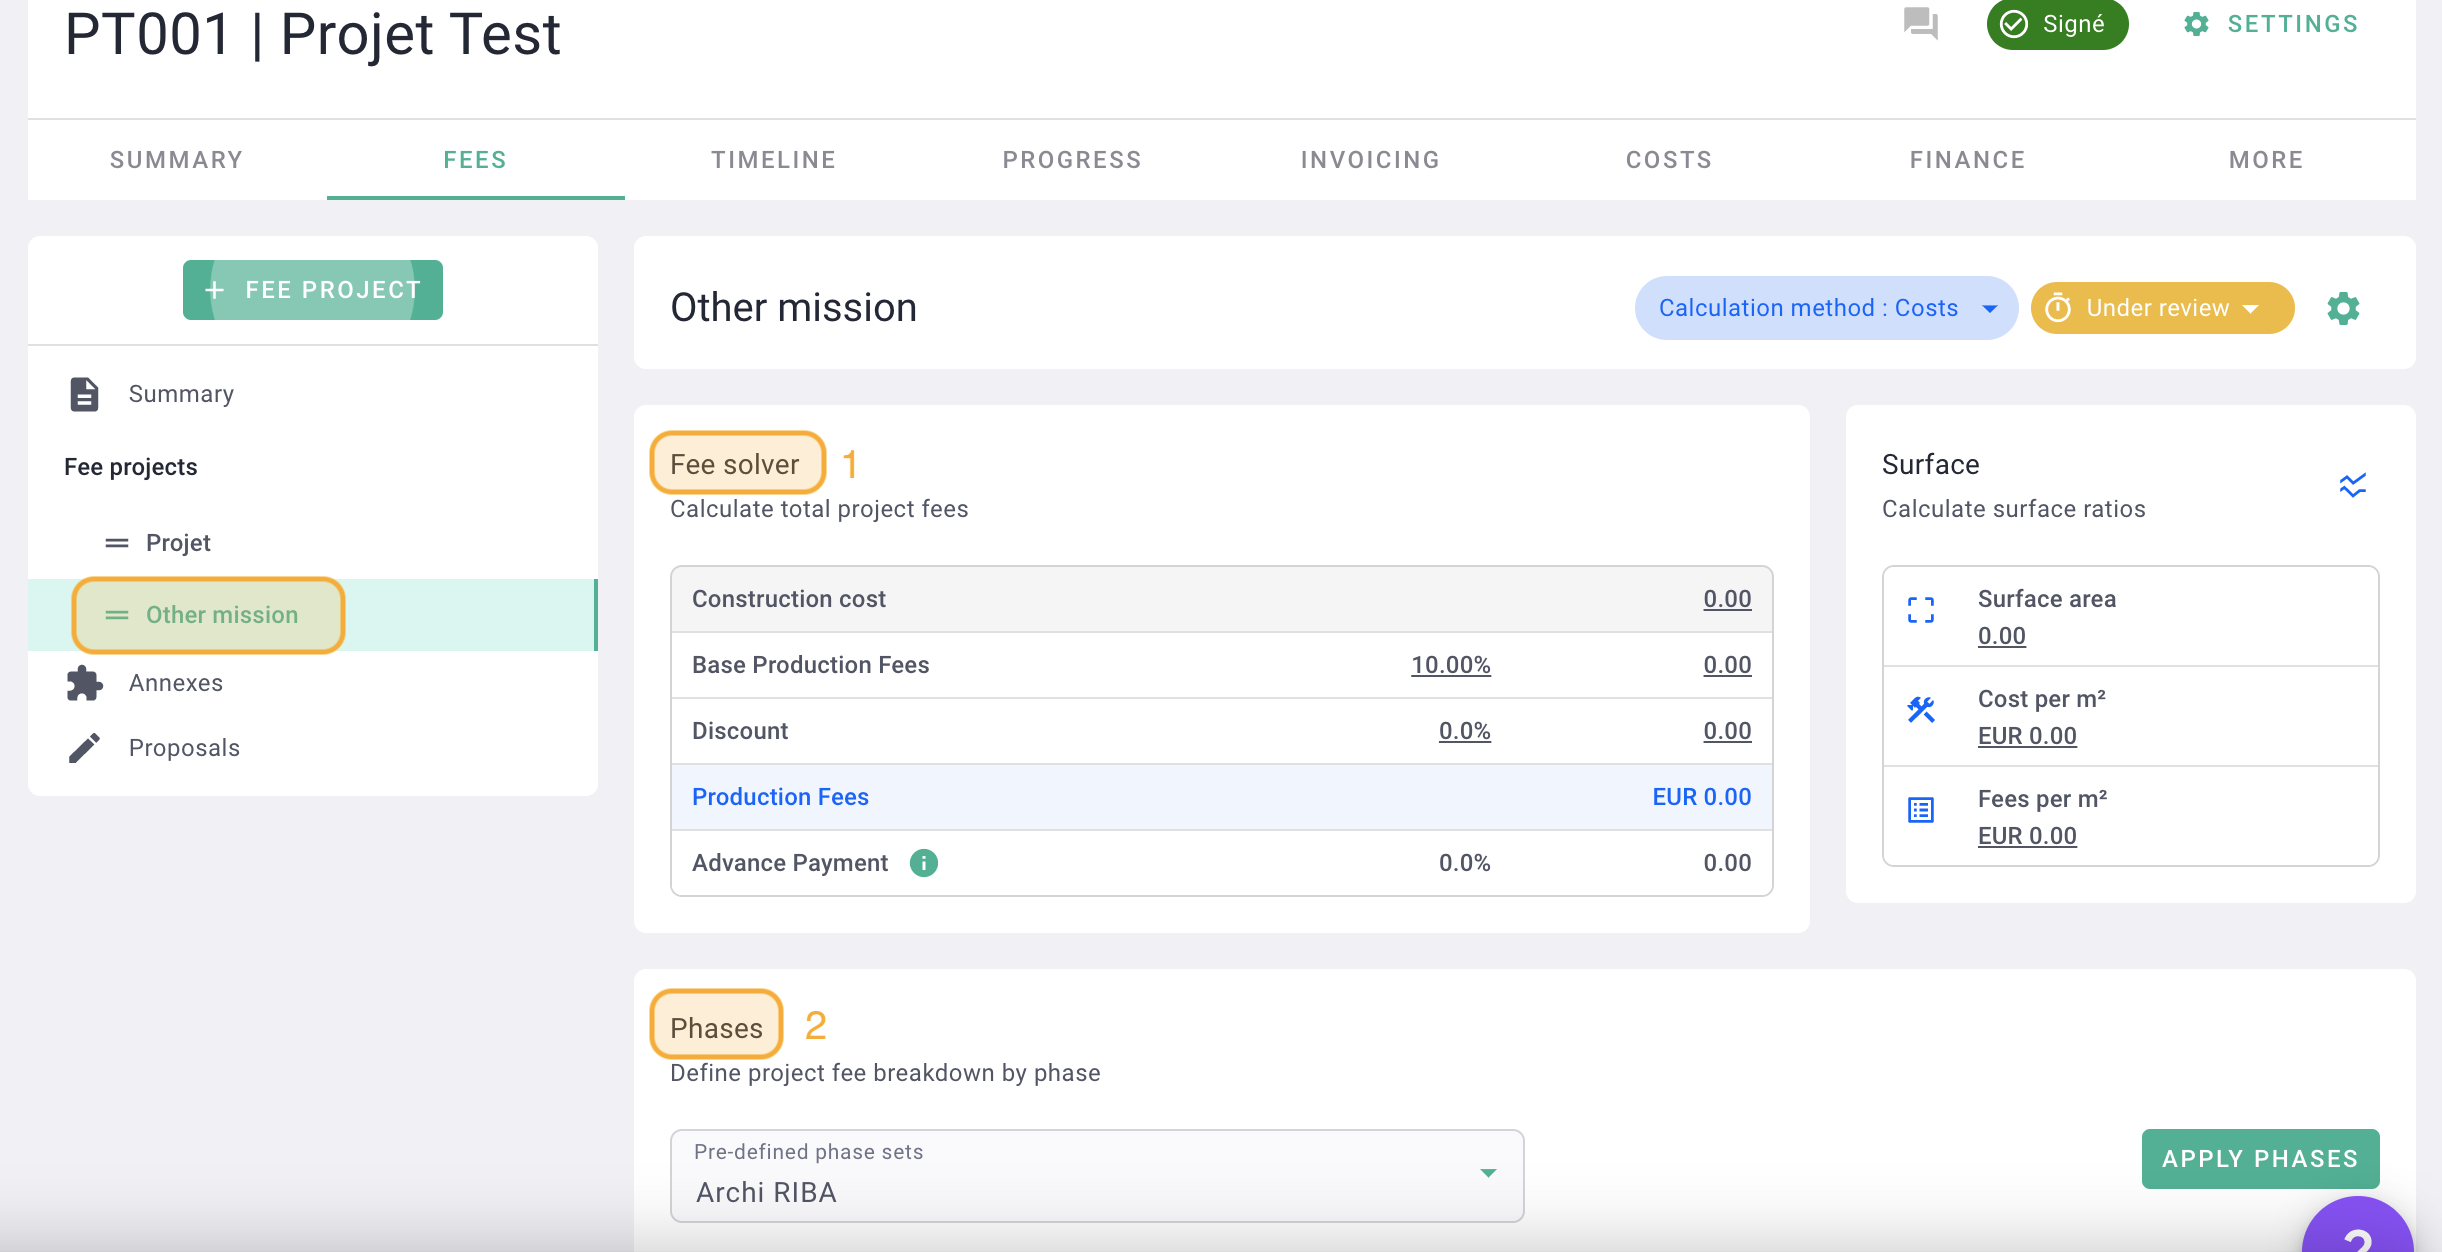
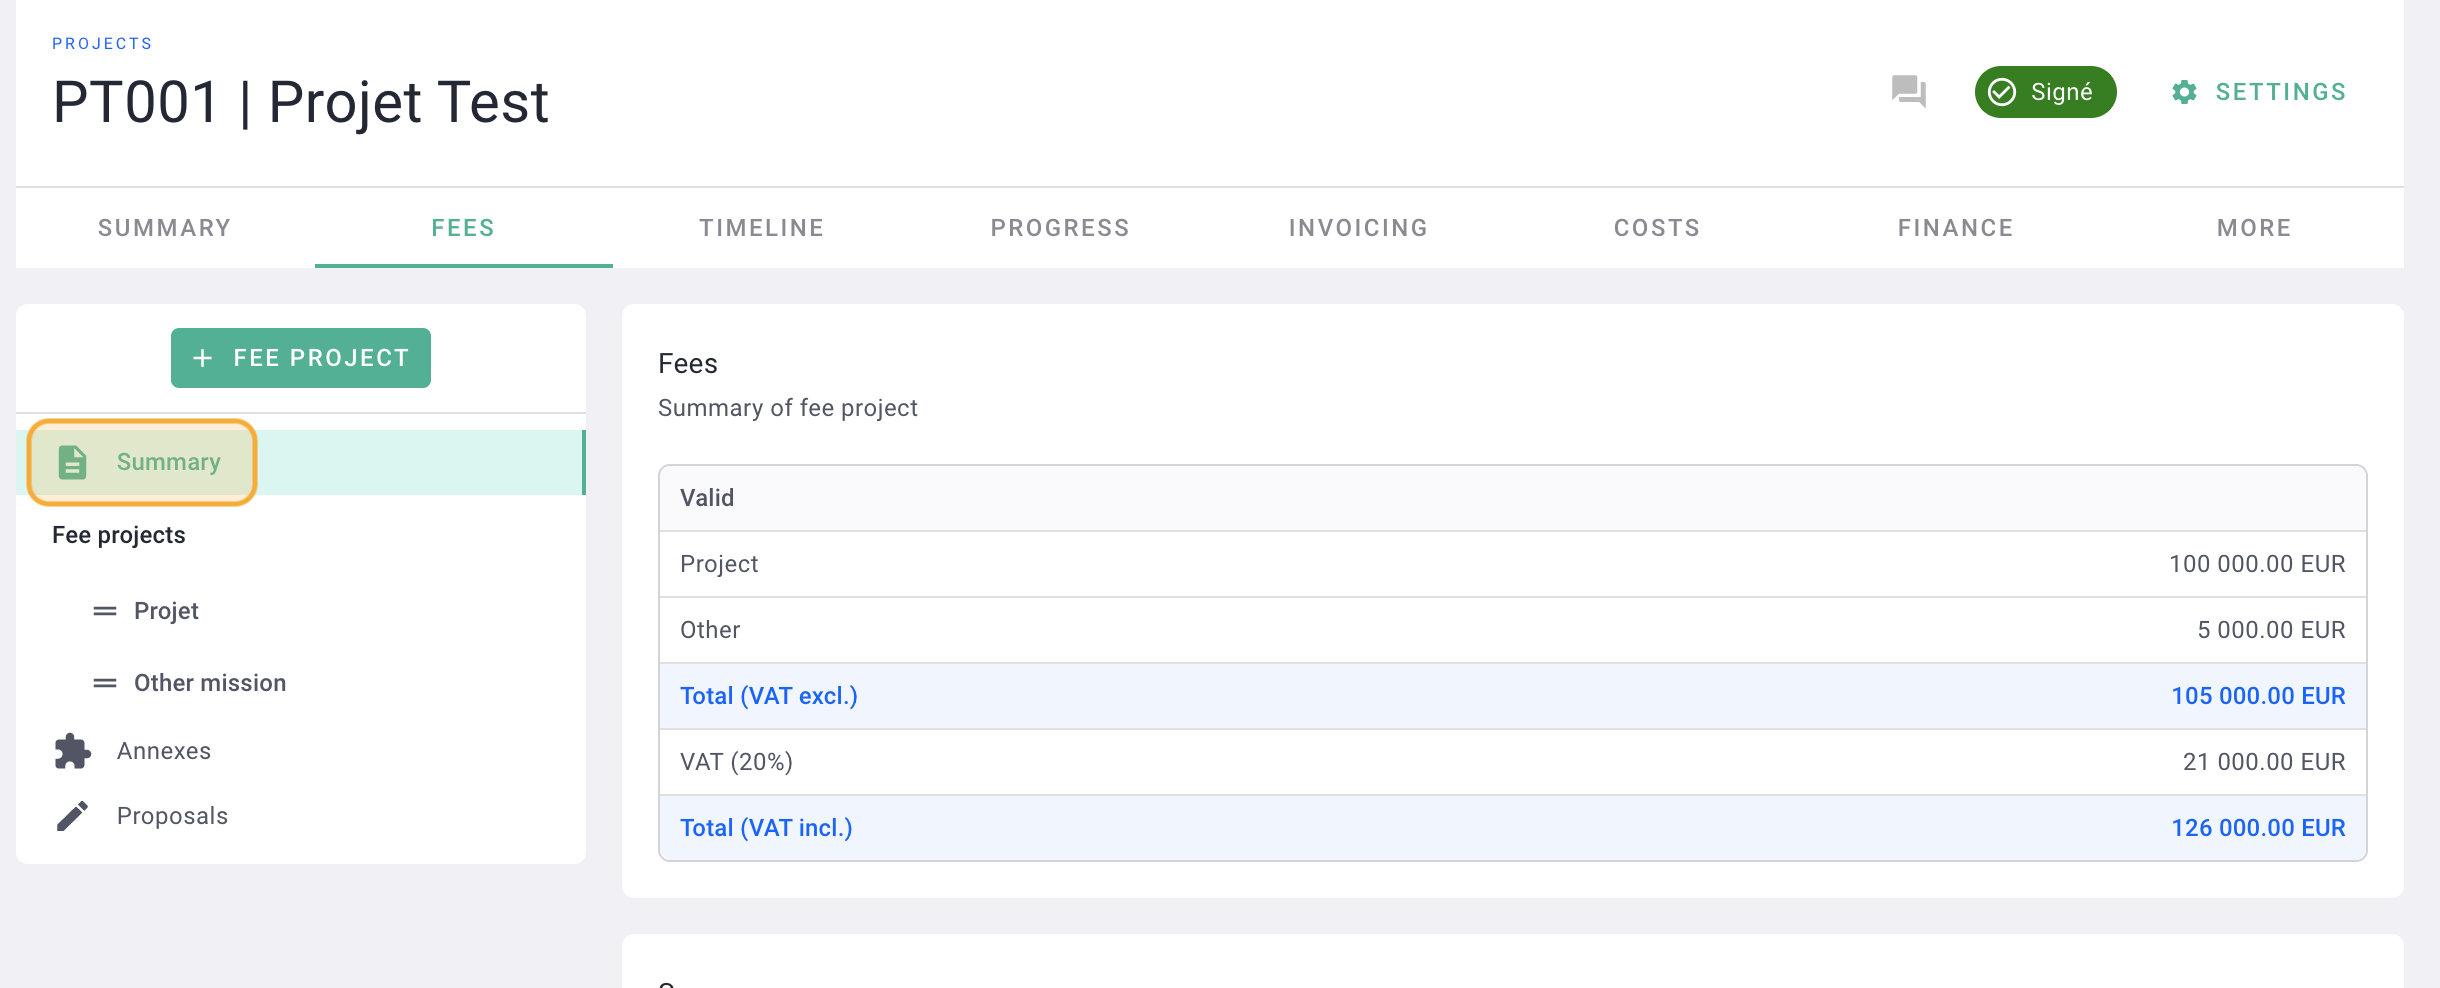
You will see the consolidated of all the missions of the project in the summary of the fees.
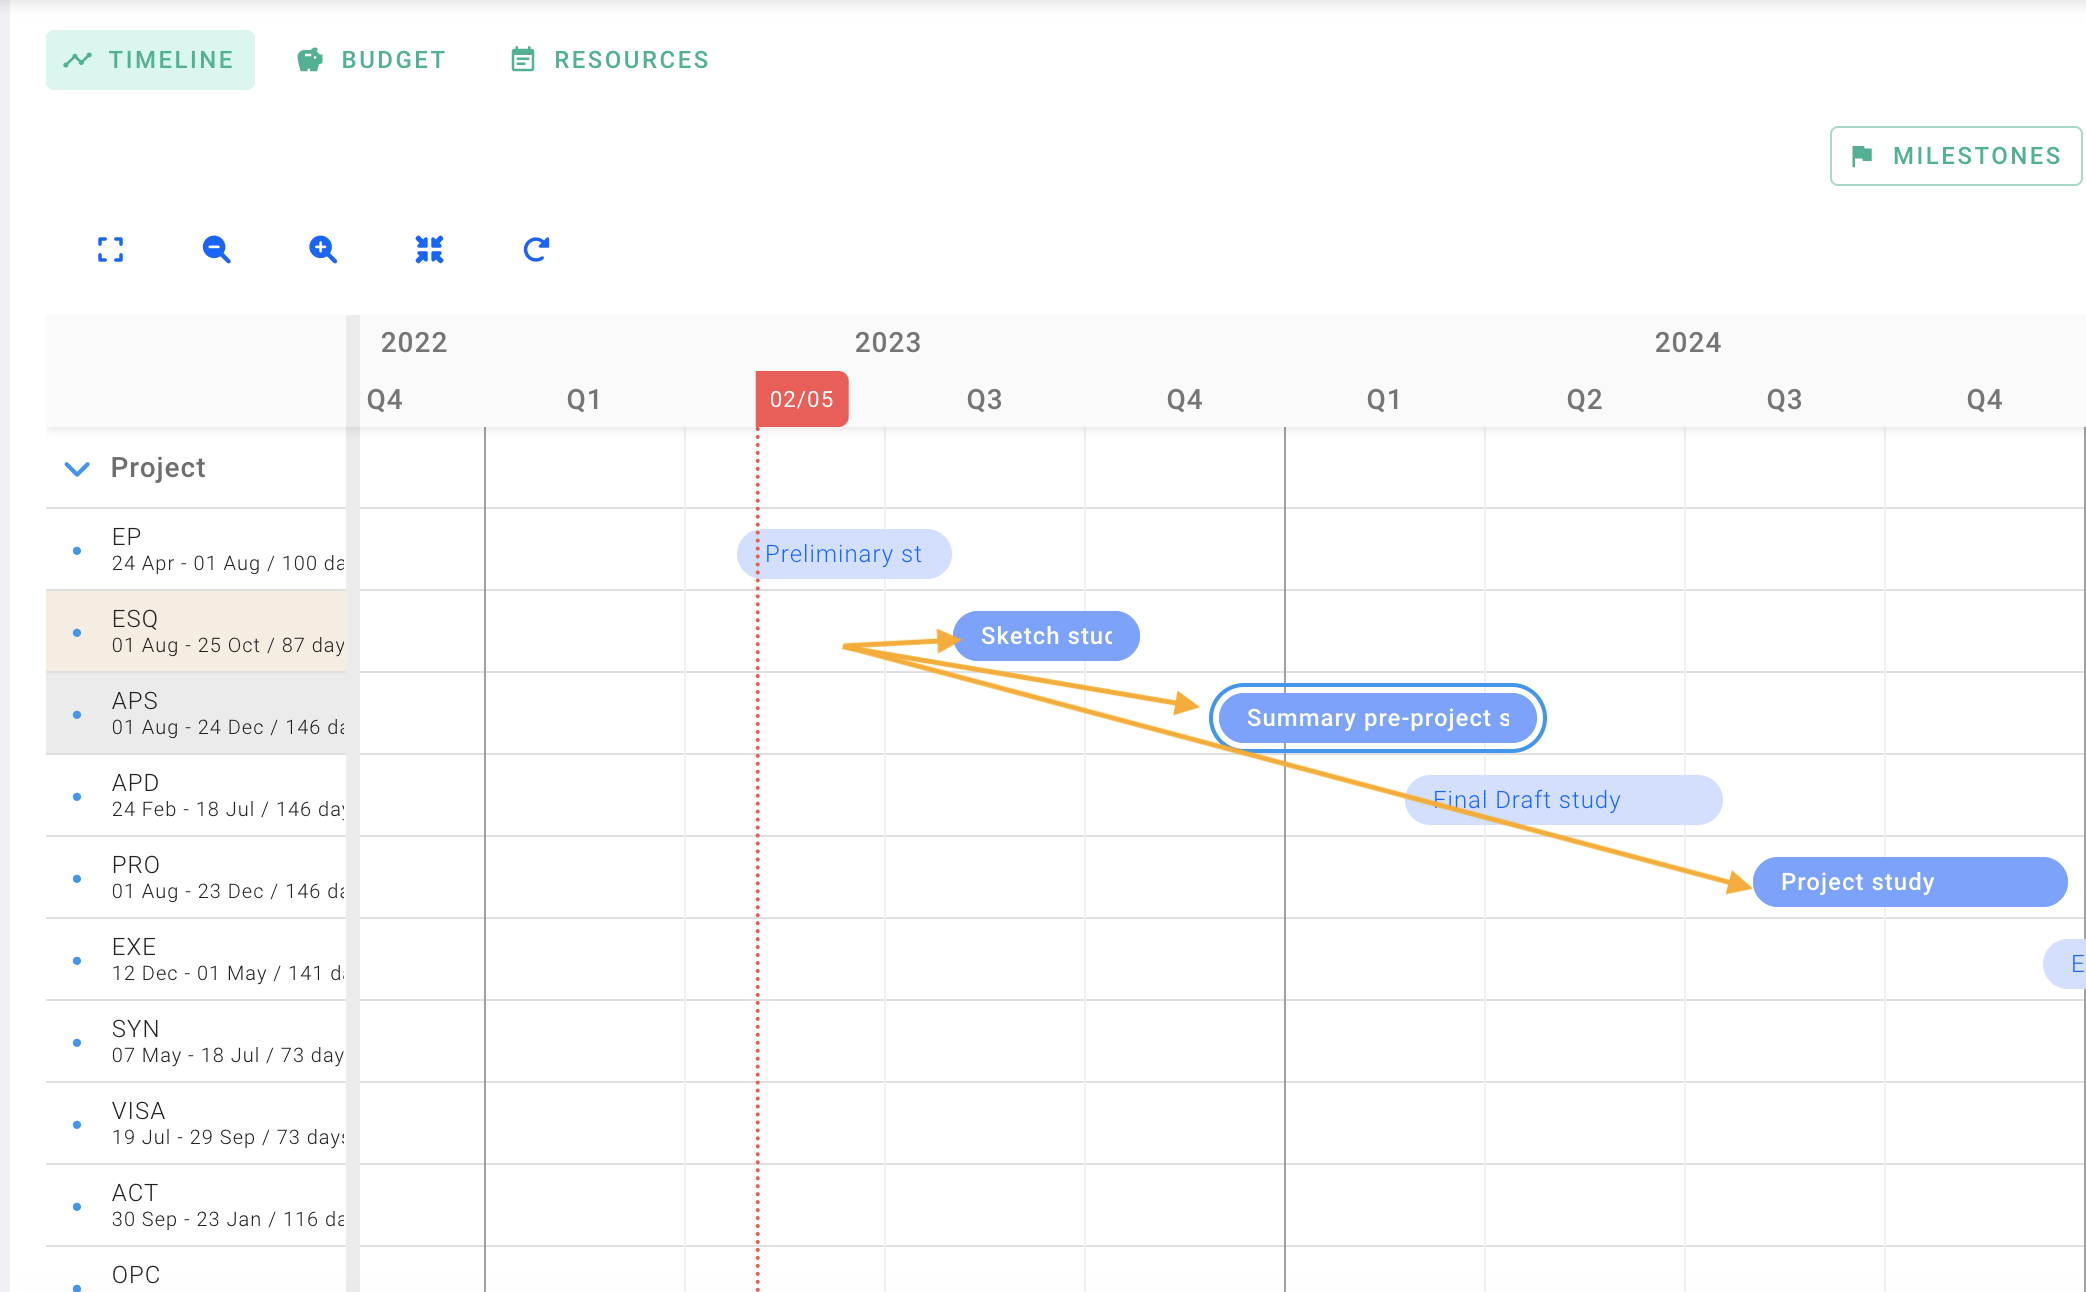
III/ Production schedule
Go to the Planning > Project planning tab.
If you added the start and end dates when creating the project, the schedule will already be generated.
Otherwise, put a start date (start of construction, signature... it's up to you to define this) and an end date, of expected delivery. Don't know the end date? Put an expected delivery date for the project, the schedule will change anyway 😌
Your schedule is generated according to the phases resulting from the fees. The bars in blue then represent the period for each phase with a start and end date.
Click on the end of each phase to lengthen/decrease the period of each phase.
Move your phase by clicking directly on it and shift it to the correct period.
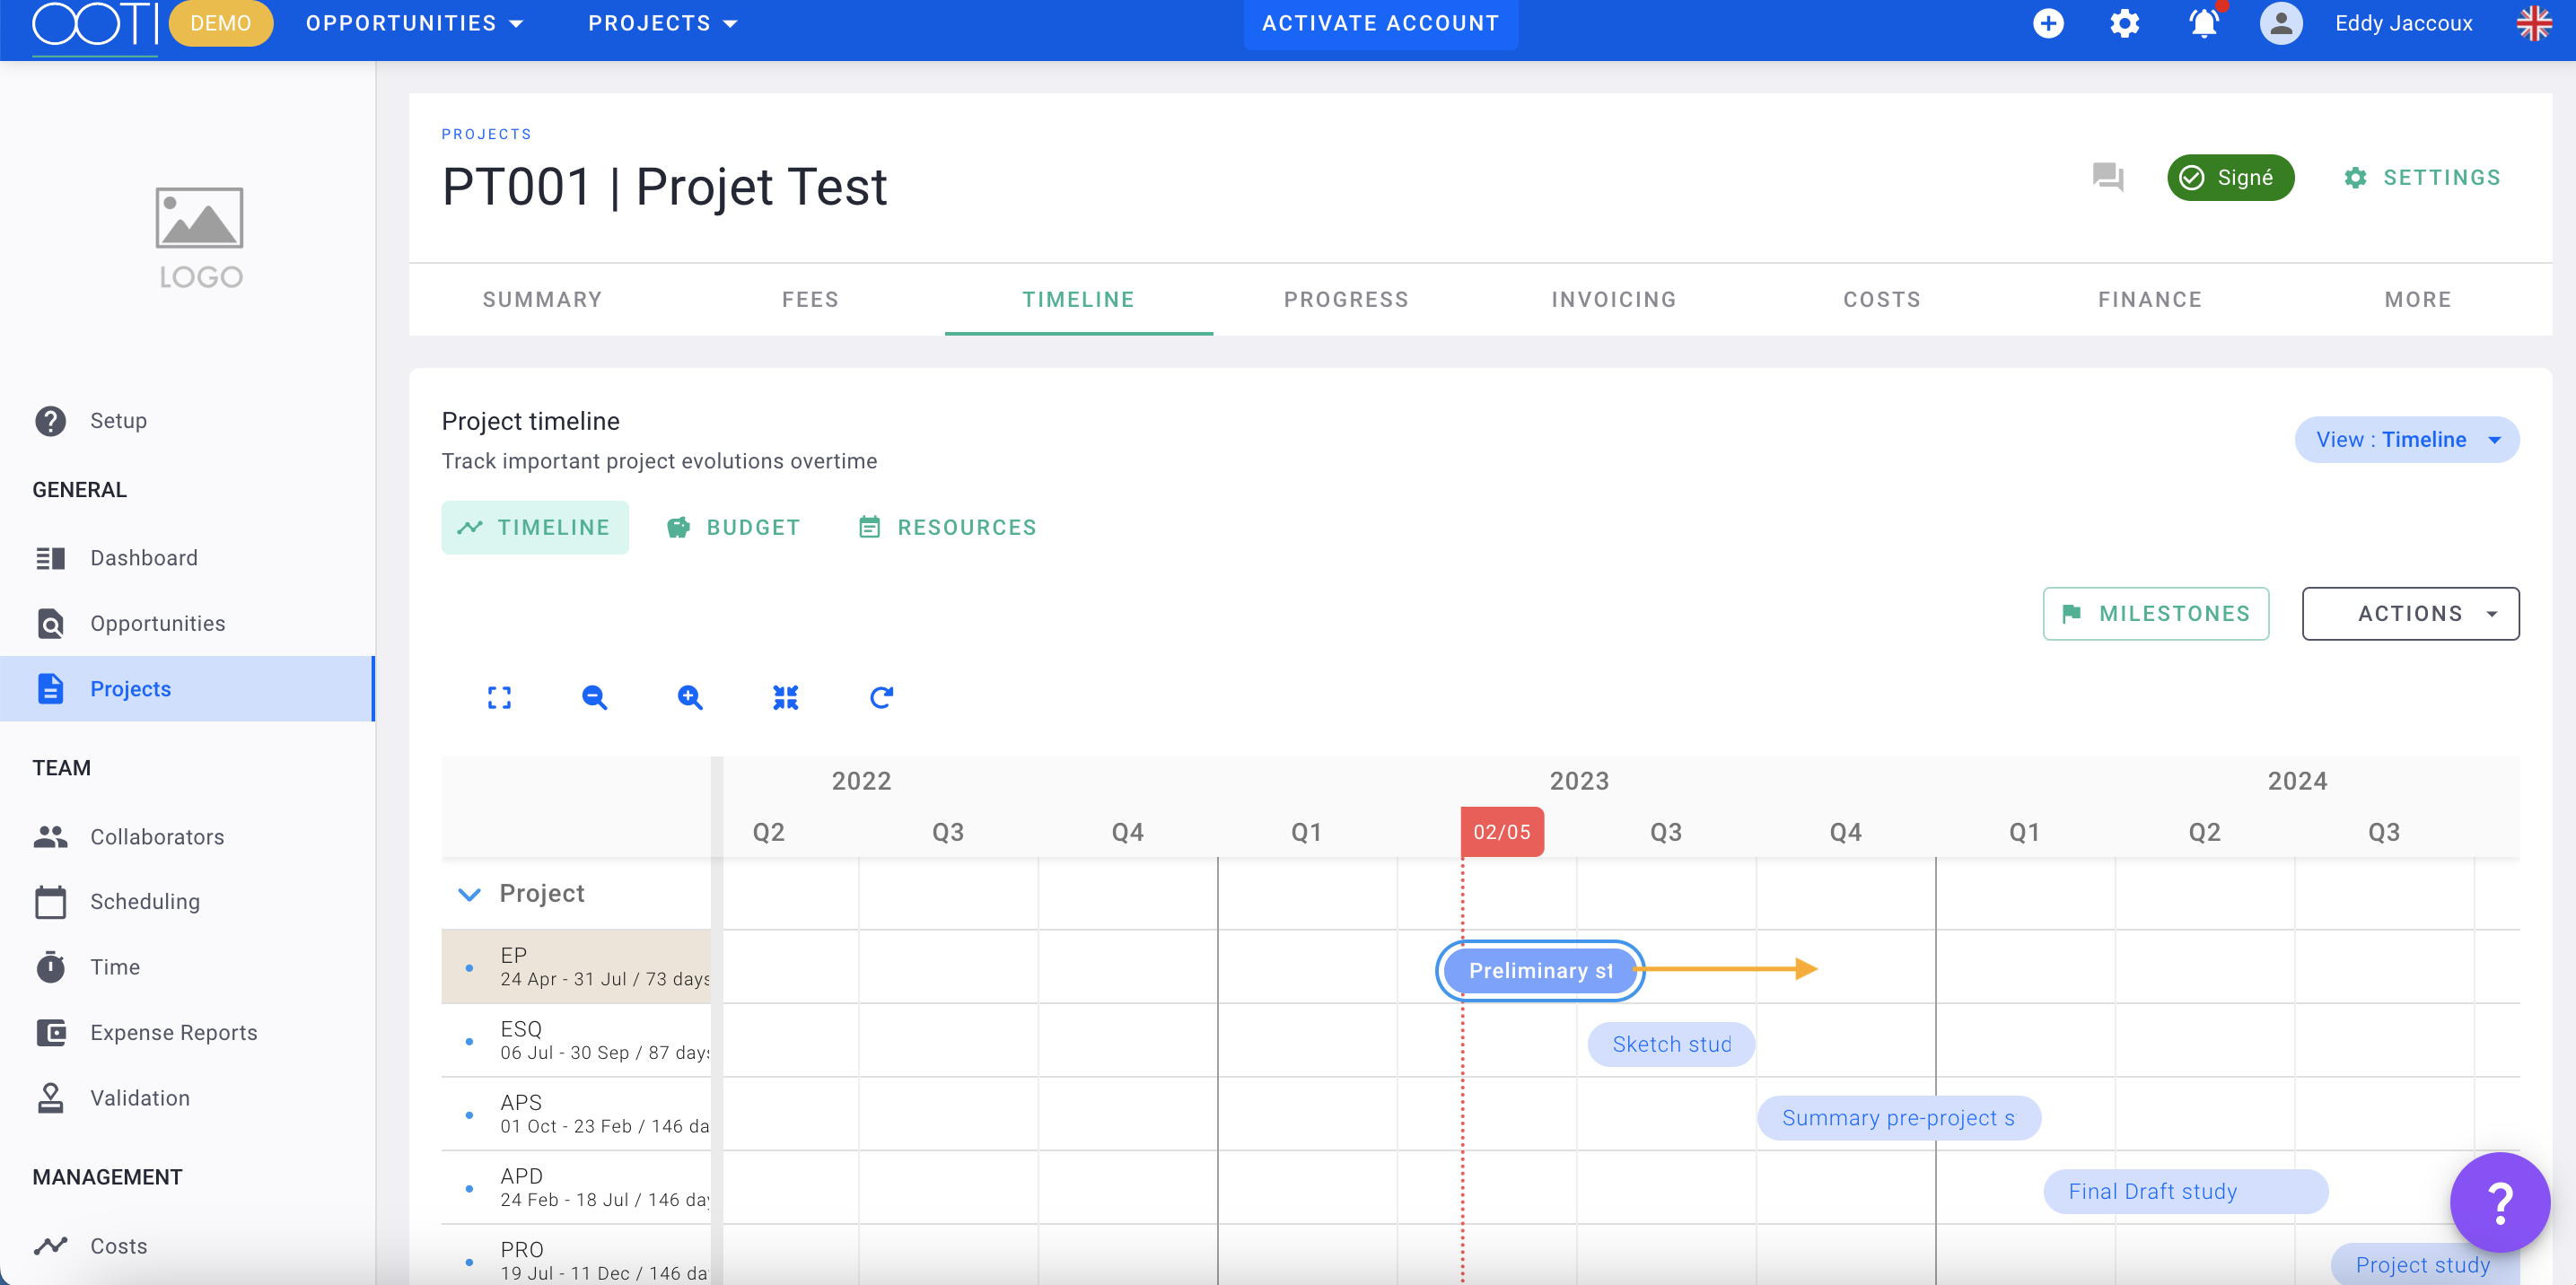
Tip: Each phase is independent; there are no dependencies (yet).
To move multiple phases together, press "cmd + click on the phases" (Mac) or "ctrl + click on the phases" to select them and move them together.
To learn more about the production schedule, click here.
IV/ Progress
Progress tracking is the monitoring of project production. It answers the question, "where are we in the delivery of the phases?"
It also enables the generation of a billable amount, meaning the amount that can potentially be invoiced.
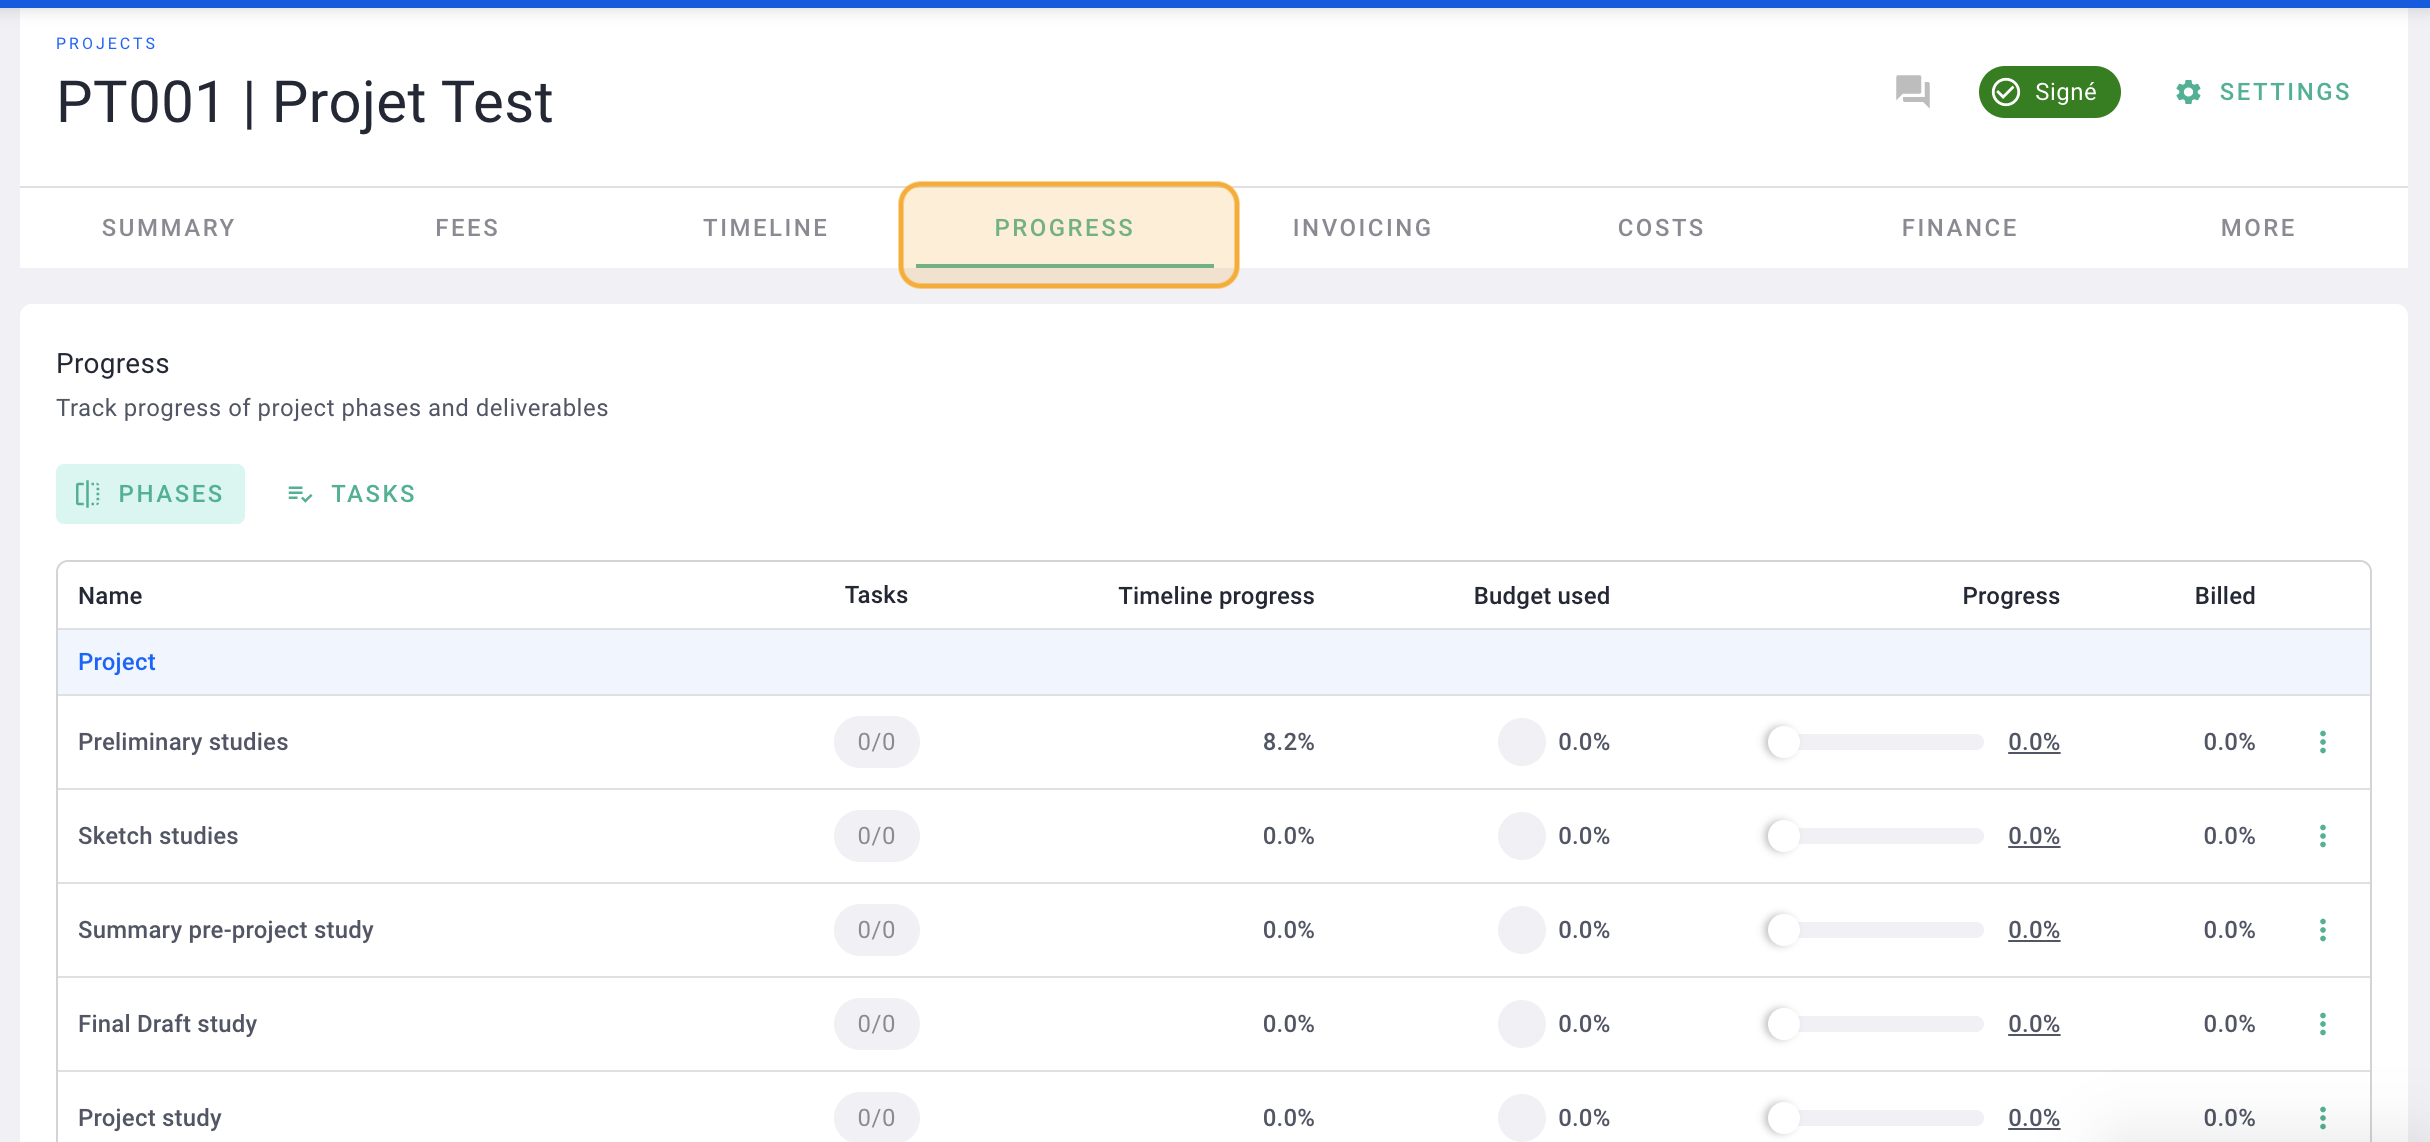
Here, you can indicate the progress of each phase by moving the cursor from 0% to 100%, or you can directly click on the percentage and modify the advancement.
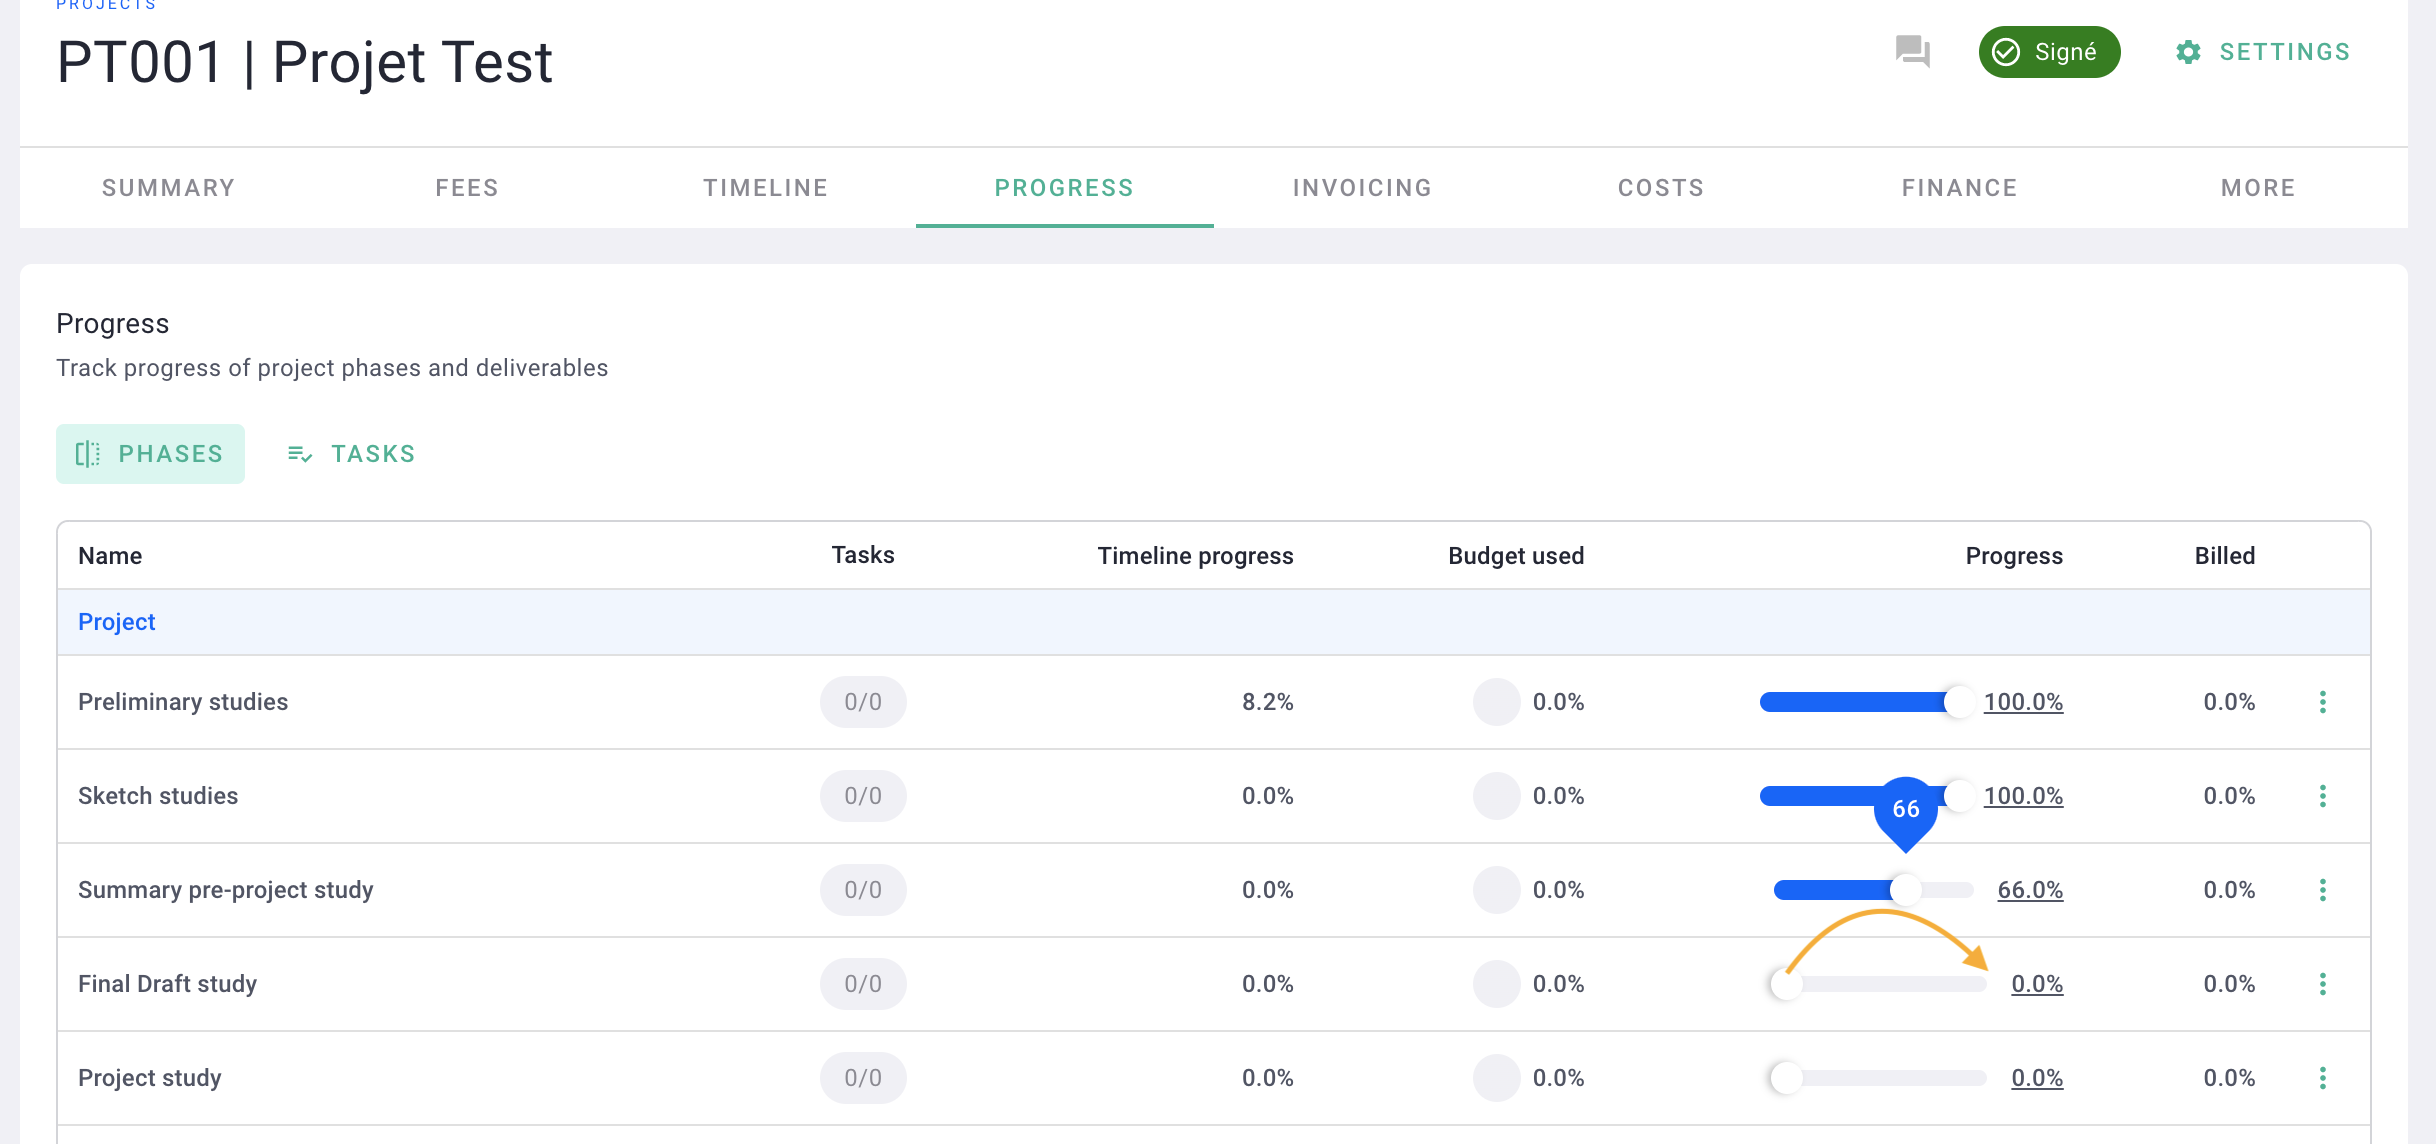
To enter the %, click on the 3 dots to the right of each phase > Production
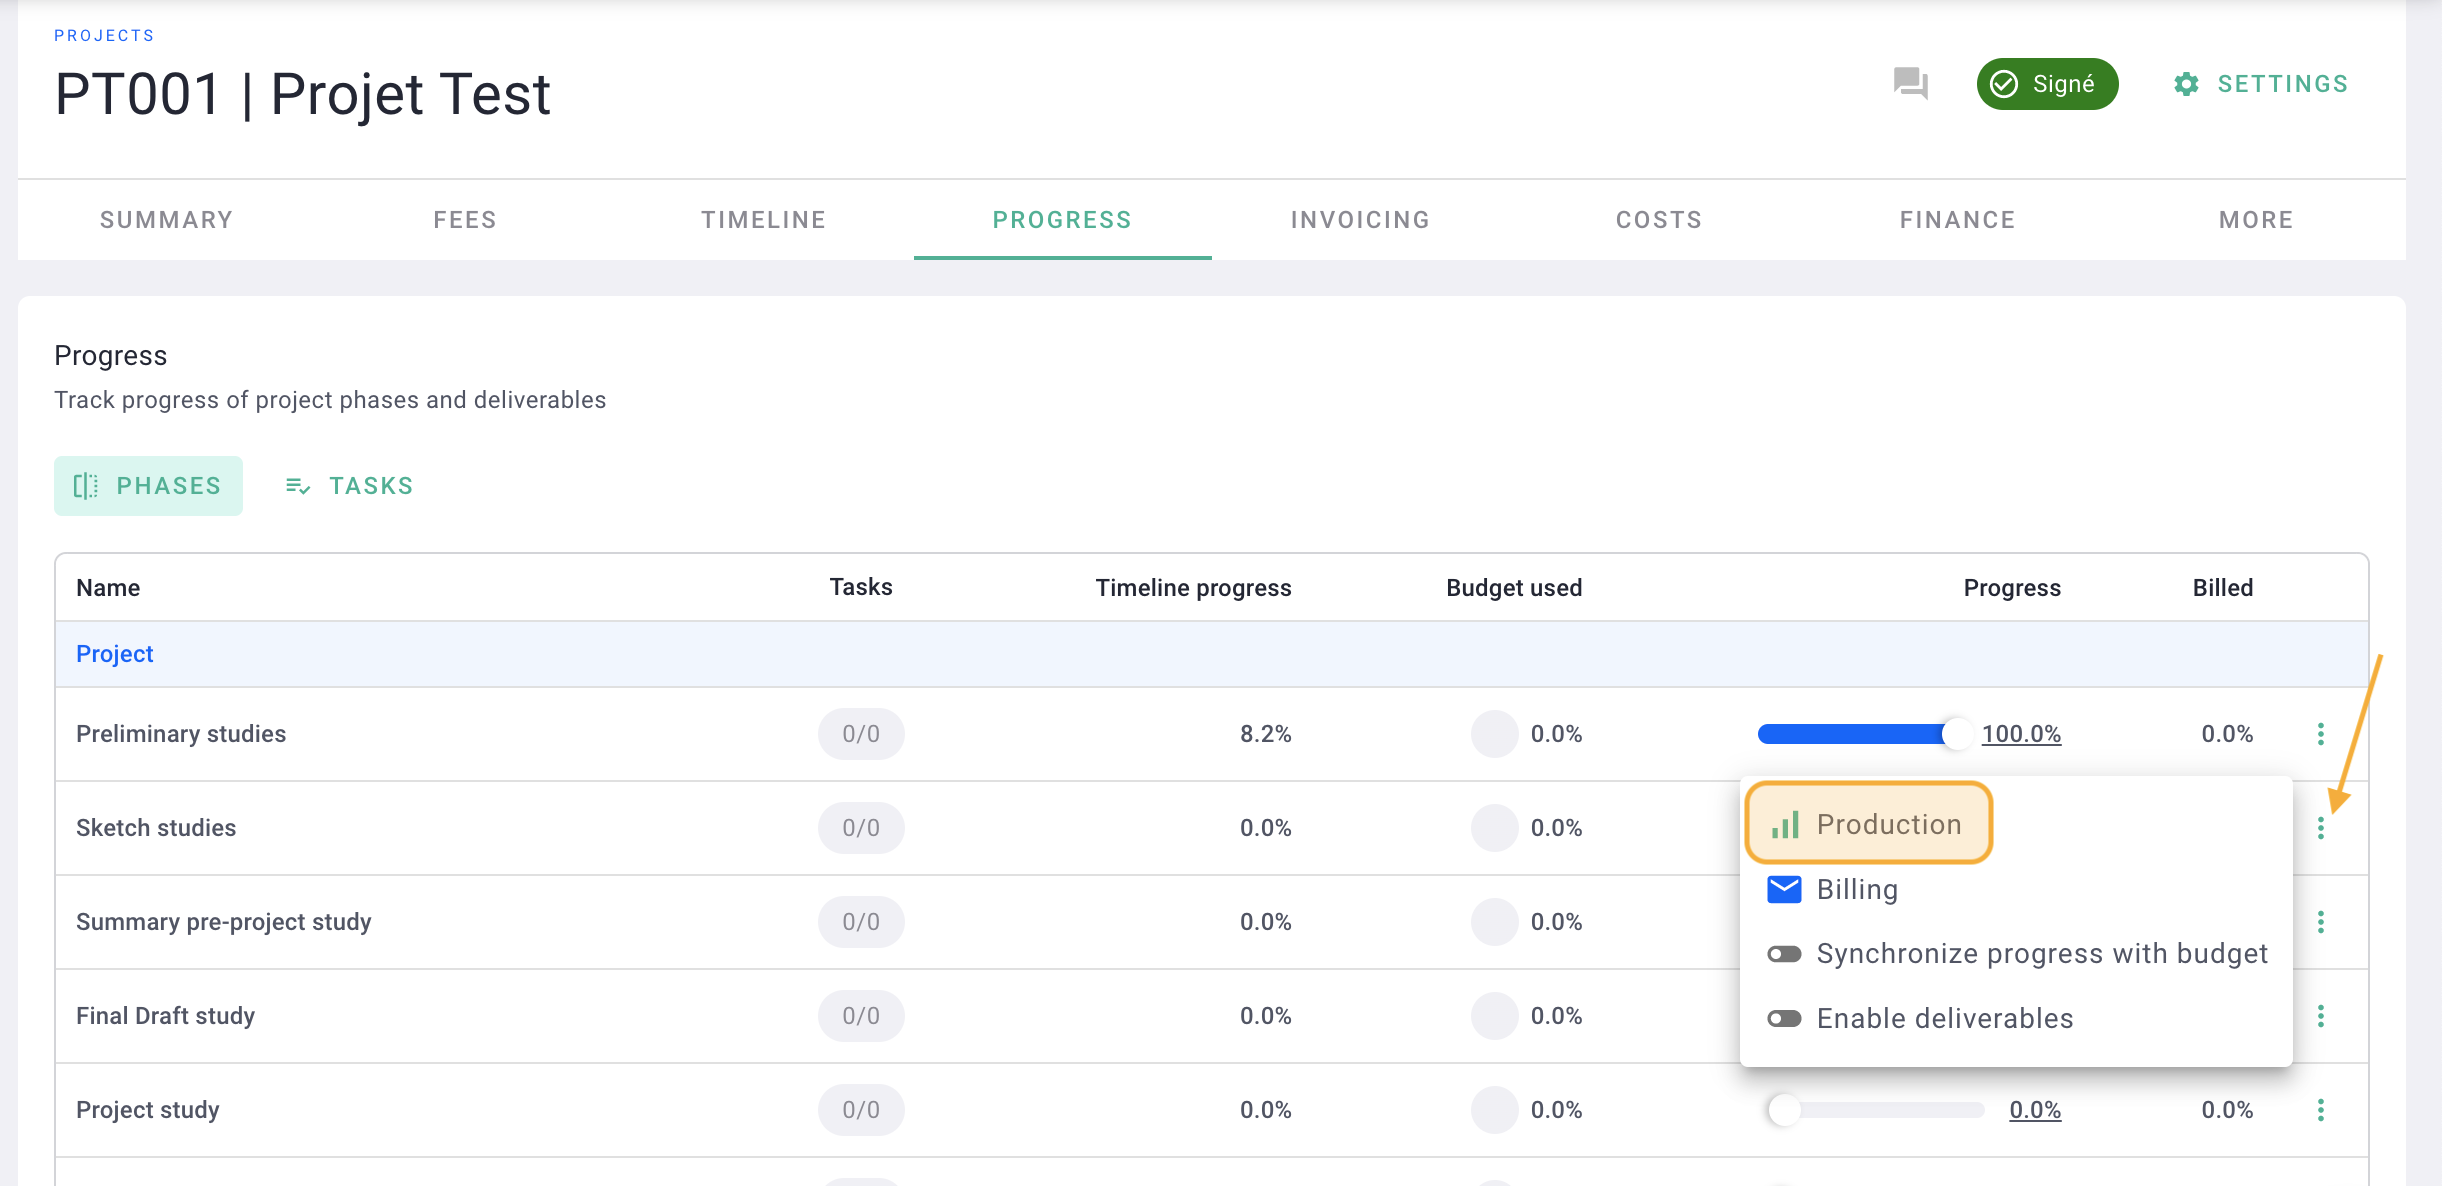
Enter the % progress and put a date if necessary. For example, 66% progress on this phase on 02/05/2023
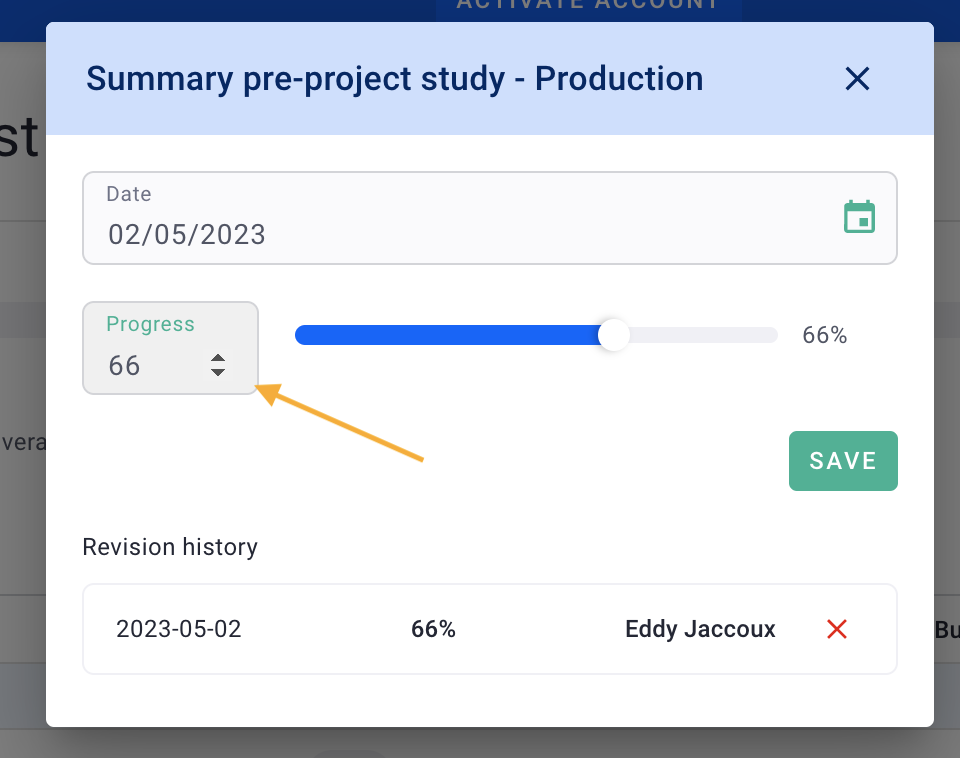
It's done, you have updated the project progress 🎉
In the "Summary" tab of the project, you will see a billable amount based on the fees of the phases and their progress.

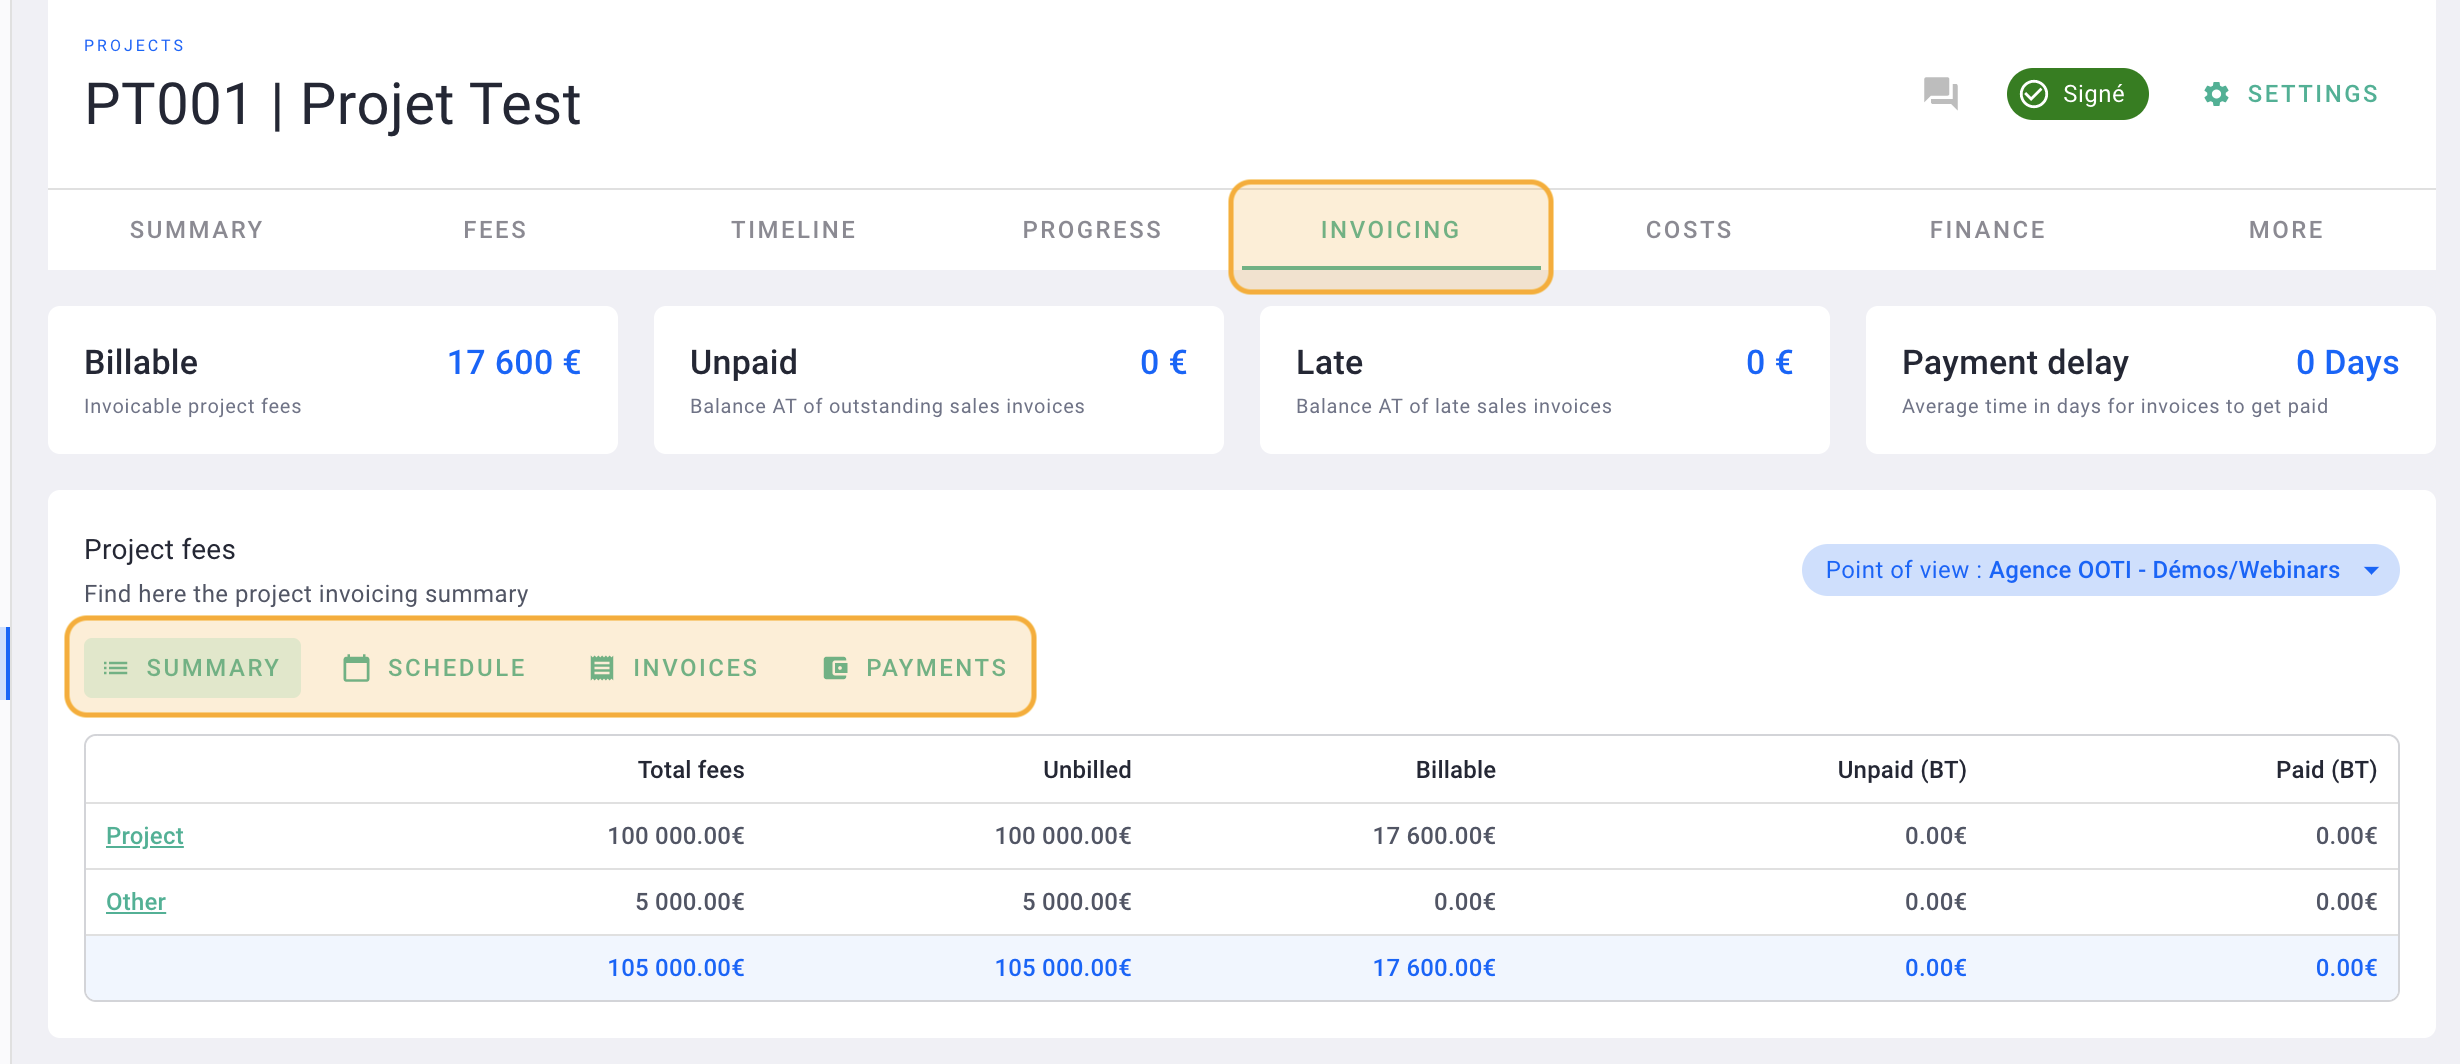
V/ Invoicing
You will find the project's billing summary along with all associated invoices.
For:
- Invoice creation: click here
- Billing schedule and forecast: click here
- Everything you need to know about invoicing: click here
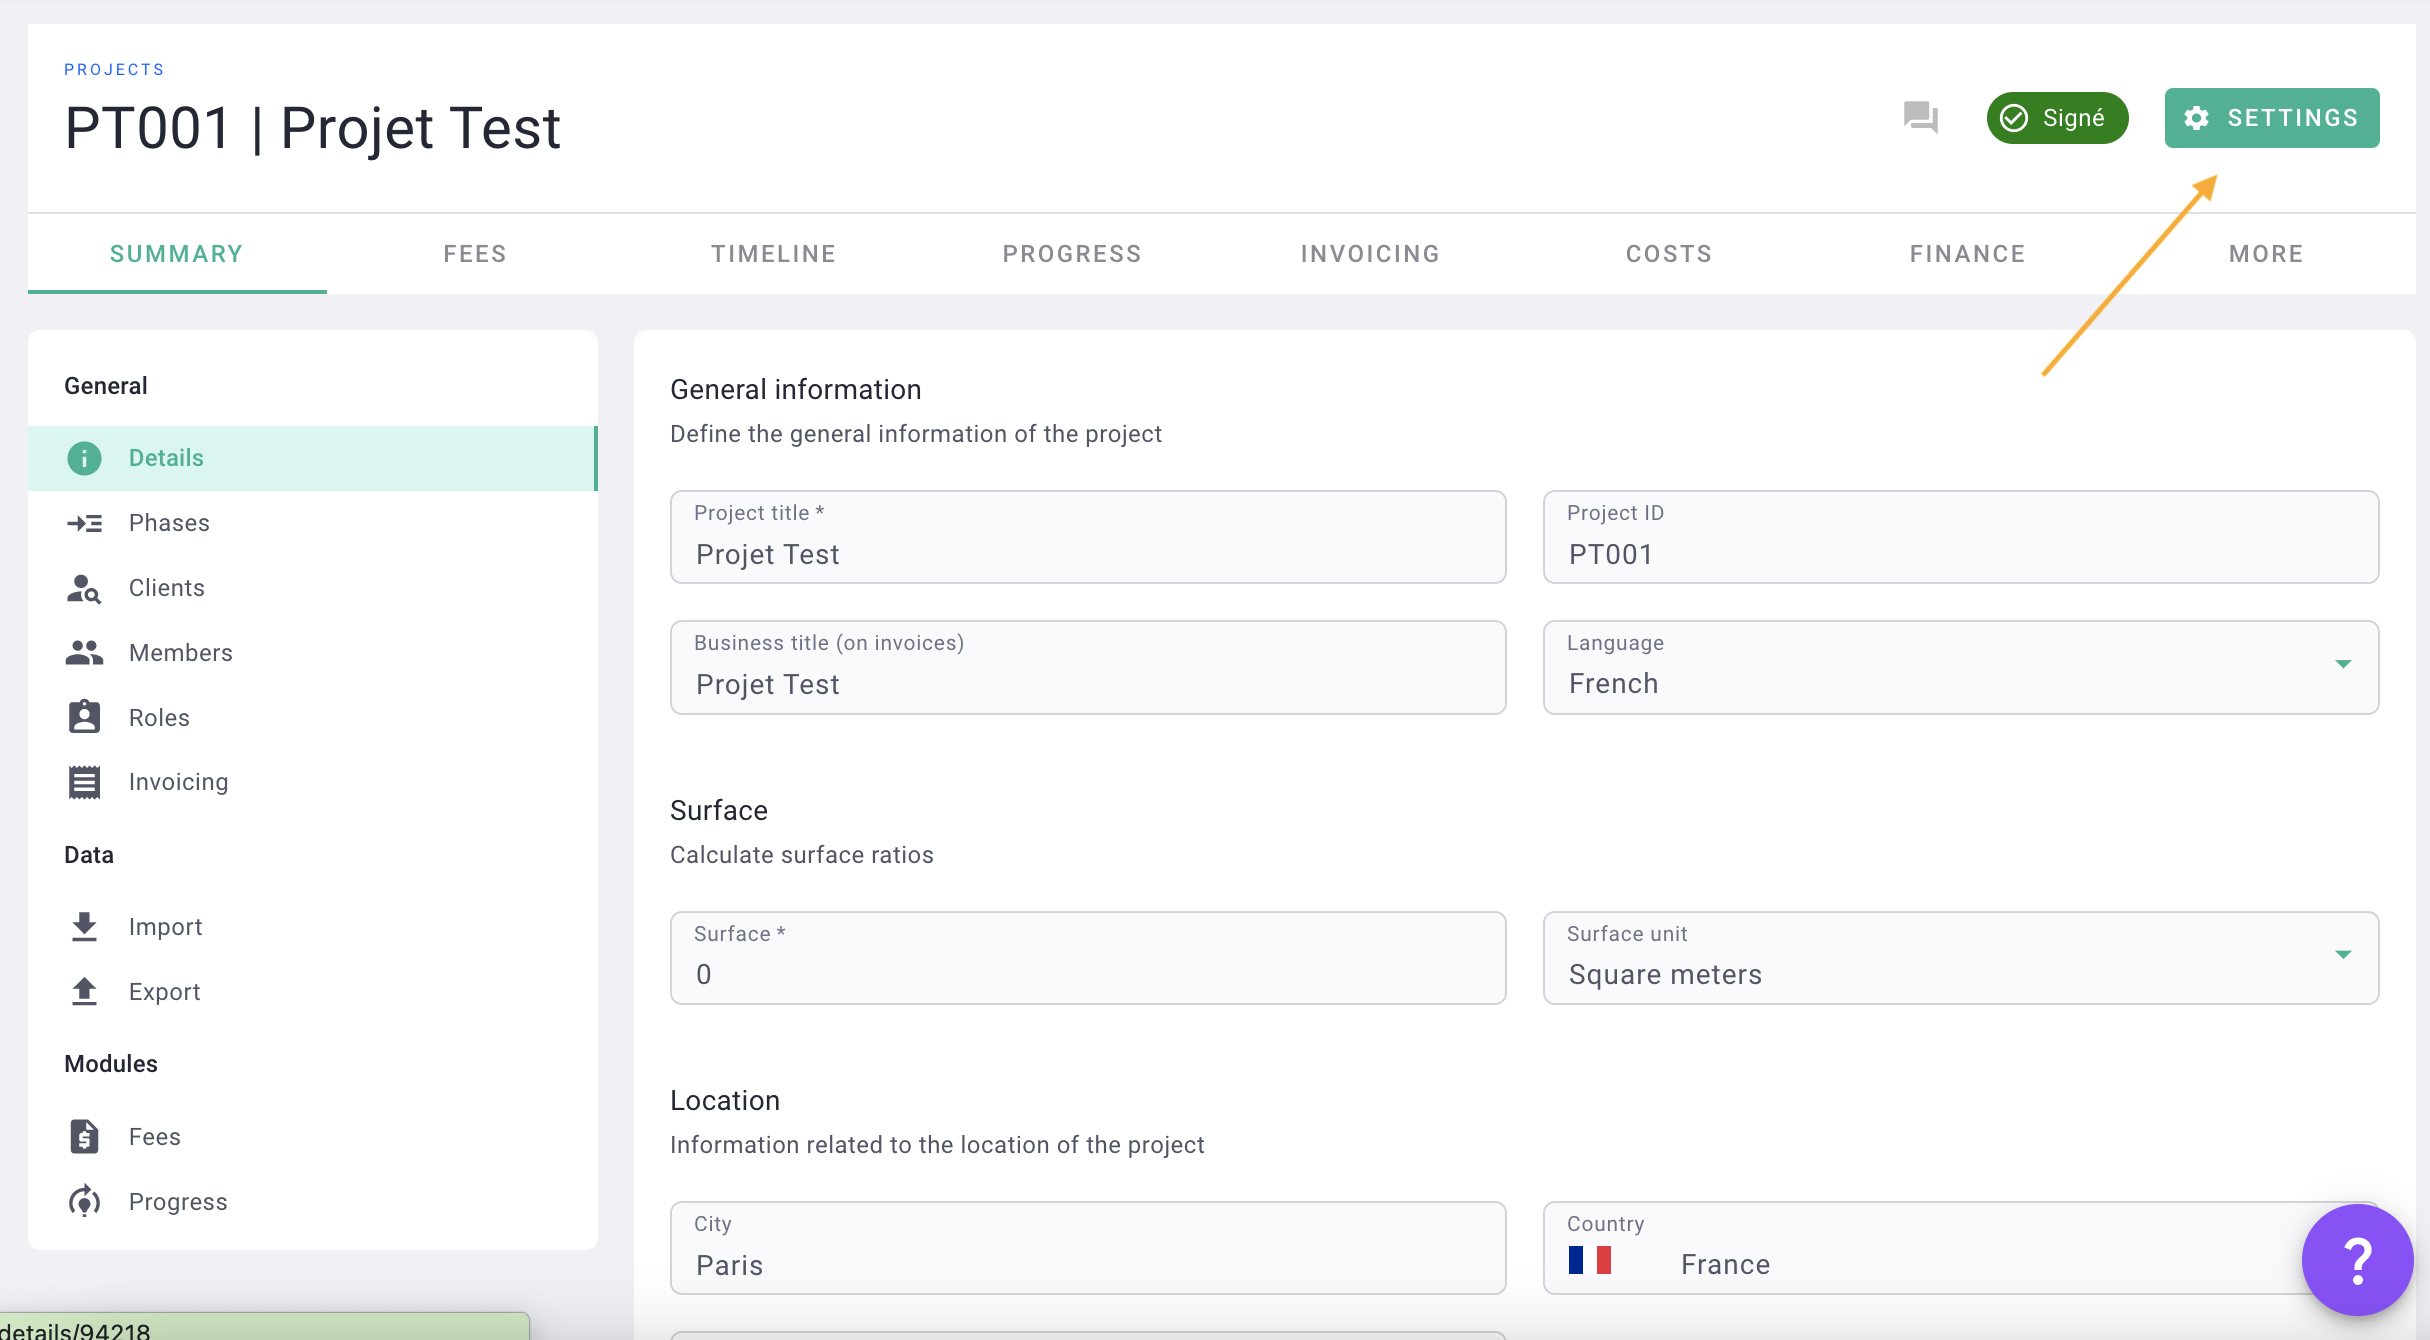
VI/ Project settings
Go to the "Settings" tab to access the project's configuration elements. From here, you can modify project information, client details, add team members to the project, and more.